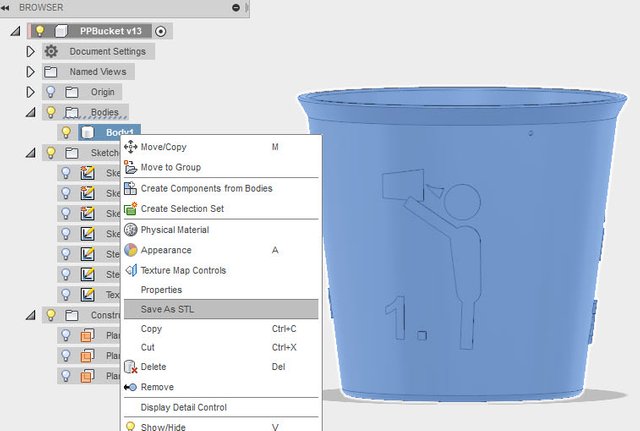
Philipps Party Bucket - 3d printed party gift
I think we all know friends, colleagues, and relatives that like to party a lot and got famous for crossing the line at least once. As a "worried" friend, I created "Philipps Party Bucket." It is for such a friend to help him to keep the memory alive and provide assistance if it happens again :-) . The Bucket contains simple icons that should assist on how to use it also for later periods of a party when textual instructions are difficult to decode.

In this post, I describe the design steps I did take with Fusion 360. You can also learn how to adjust the Bucket design to add a name of your beloved friend or colleague to whom you want to hand this over as a present.
You can download the STL files for 3d printing and original fusion360 file to exchange the name.:
MyMinifactory: https://www.myminifactory.com/object/3d-print-philipps-party-bucket-60001
Thingiverse: https://www.thingiverse.com/thing:2830415
Feel free to change and modify the files. Its all released under creative commons licance.
Create Design with Fusion 360
It is just a bucket, so it's not rocket since. This is a perfect example to start learning to work with a 3d design software.
I first created two sketches with a circle that represents the outer limits of the bucket. As usual, I use variables for those dimensions.
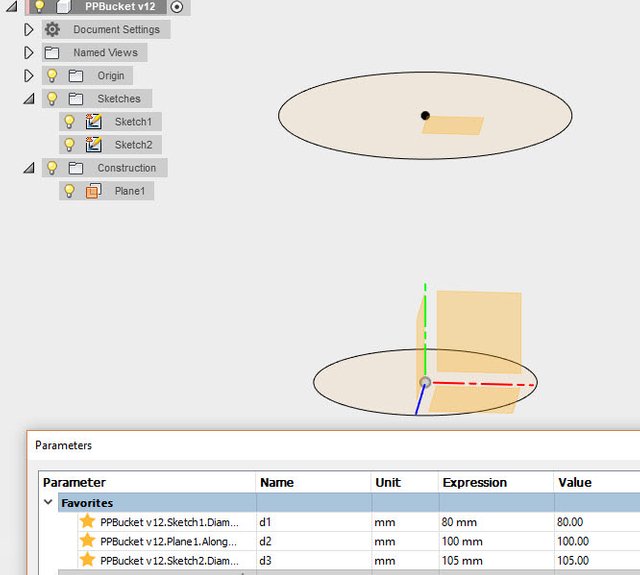
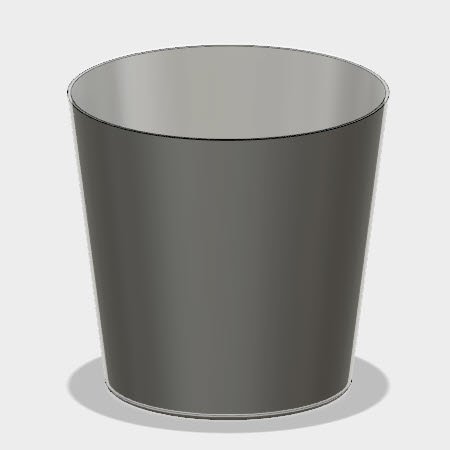
With the loft command, you can create the base shape of the bucket in seconds. The shell command can then be used to hollow out the body.
| Base | Hollow |
|---|---|
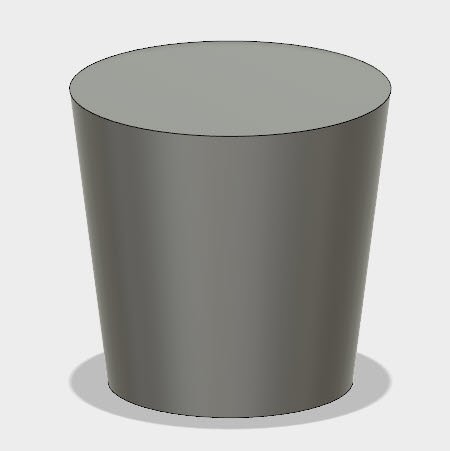 |  |
To make it look a little bit more like a bucket use a fillet at the bottom and add a bigger edge at the top of the bucket.
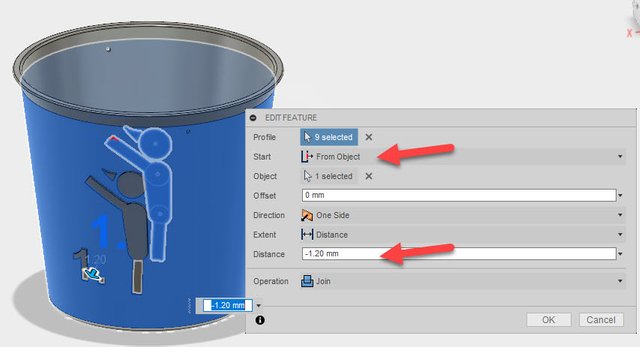
To create the imprint of the symbols and the text, we have to first create three planes for the sketches. On the planes we then create a sketch, 1 for the text and 2 for the icons. I orientated the plans the way they get exactly distributed on the space of the surface.
For drawing the icons, I just used the regular sketch tools like circles and lines that are available.
| Step 1 | Step 2 |
|---|---|
 |  |
For the text, there is a text tool available.
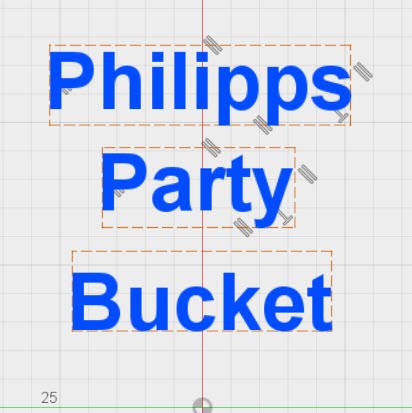
To change this text sketch, you can download my premade Fusion360 file and adjust this sketch with whatever text you like and then export the new bucket as STL file again. If you don't have it installed yet, you can download it for noncommercial use [here] ().
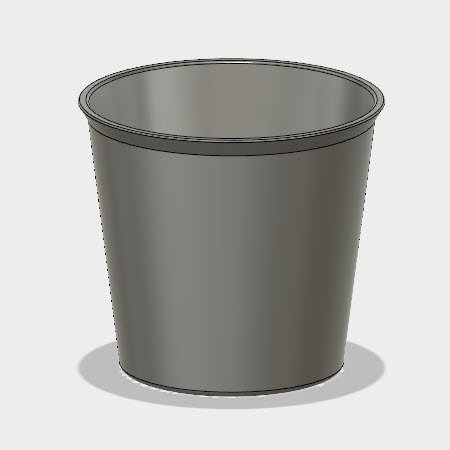
Now, the last step is to imprint the sketches into the curved surface of the bucket. Therefore, we use the normal extrude command with slightly different settings. It is essential to use as Starting Point "From Object" and then select the bucket surface as the starting point. For the extraction distance, I chose between 0.8-1.2mm. That proved to be easy for my printer to be printed without any support.
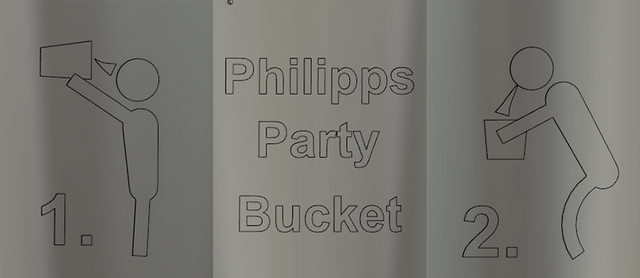
The final Imprint for all three planes.
That's it. The design is ready to be printed.
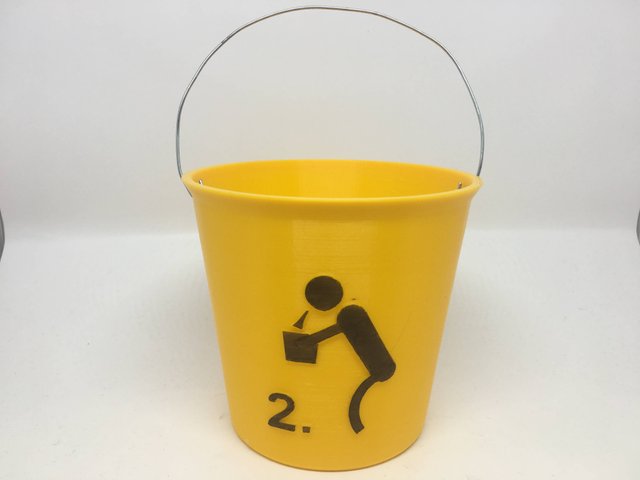
For the handle, I used a 1.5mm bare wire and to improve the contrast for the imprint I painted it with a black pen.
The final Bucket:
Print Details
Download STL: MyMiniFactory, Thingiverse
Printer: Ultimaker2+
Print Material: Innofil PLA Yellow
Infill: 30%
Layer height: 0.1mm
Prime time: 9-10 hours
very good your post in the way that explains and what we can do as you explain us in the design and capase we can do very dynamic
sharing this with my son, he is so interested in this, they have one such printer in their college
Yea it’s a very easy design and print when he wants to get started with this.
Congratulations! This post has been upvoted by SteemMakers. We are a community based project that aims to support makers and DIYers on the blockchain in every way possible. Find out more about us on our website: www.steemmakers.com.
If you like our work, please consider upvoting this comment to support the growth of our community. Thank you.
This design is very creative, I find it funny,
I have a Prusa I3 but when I print the piece, it's not as perfect as that. do you use a 0.1 nozzle?
No 0.4 nozzle but 0.1 layer-height. Can you post a picture would like to see the difference.
That is very cool. Tell Phillip to not drink from the bucket after option 2. :)
Haha, I not sure if i will :) probably that’s another lesson he need to learn by himself :-D
Congratulations! This post has been upvoted from the communal account, @minnowsupport, by Dr.Make from the Minnow Support Project. It's a witness project run by aggroed, ausbitbank, teamsteem, theprophet0, someguy123, neoxian, followbtcnews, and netuoso. The goal is to help Steemit grow by supporting Minnows. Please find us at the Peace, Abundance, and Liberty Network (PALnet) Discord Channel. It's a completely public and open space to all members of the Steemit community who voluntarily choose to be there.
If you would like to delegate to the Minnow Support Project you can do so by clicking on the following links: 50SP, 100SP, 250SP, 500SP, 1000SP, 5000SP.
Be sure to leave at least 50SP undelegated on your account.
Awesomenstuff. Thanks for sharing.