The Steemian's Guide To Digital Alchemy - Part 1
Develop your own personalized system for organizing your wild mind and turning your dreams into reality.
In this post, I will provide an in-depth overview of my unified system for note-taking, brain-wrangling, action-planning, blog-writing, and thought-organization.
Table of contents:
- Markdown Wizardry
- Your Brain, Your App
- Clean Up Your Act (ft. Tags)
- Where The Magic Happens
- Becoming SuperSteemian
Markdown: The first key to blog writing wizardry
Markdown is a simple code language that is optimized to help you write and format with speed and efficiency.The reason it’s so effective is because once you get a grip on it, you can format your posts to a state of beauty without taking your hands off the keyboard. No pointing and clicking required. For the most part.
Steemit uses markdown in the post editor (click the “markdown editor” button) which gives you far greater control and consistency in your blog post formatting.
Here’s a quick overview of the most common markdown commands:
# Heading 1
## Heading 2
### Heading 3
Paragraphs are separated by an extra space.
Here's how you can do *italics* and **bold**.
_Italics_ and __bold__ will do the same thing.
You can also combine them so its _**italic and bold**_.
> This will create a quote.
You can create a [link](http://website.com) with this bit of code.
And the markdown below will generate an image:

Though note that in the Steemit markdown editor, you can simply drag and drop an image in the window and it will automatically upload it to the blockchain and generate the markdown code for you :)
Here’s the same code, but what it actually looks like:
Heading 1
Heading 2
Heading 3
Paragraphs are separated by an extra space.
Here's how you can do italics and bold.
Italics and bold will do the same thing.
You can also combine them so its italic and bold.
This will create a quote.
You can create a link with this bit of code.
And the markdown below will generate an image:

Note: In the Steemit markdown editor, you can simply drag and drop an image in the window and it will automatically upload it to the blockchain and generate the markdown code for you :)
The key thing to realize about markdown, is that once you get over the initial learning curve (which is very easy to do), you will be writing, editing and formatting like a true supersteemian ninja. ⚔
When you are in the steemit editor, you can click the Markdown Styling Guide link at any time to access the full markdown guide.
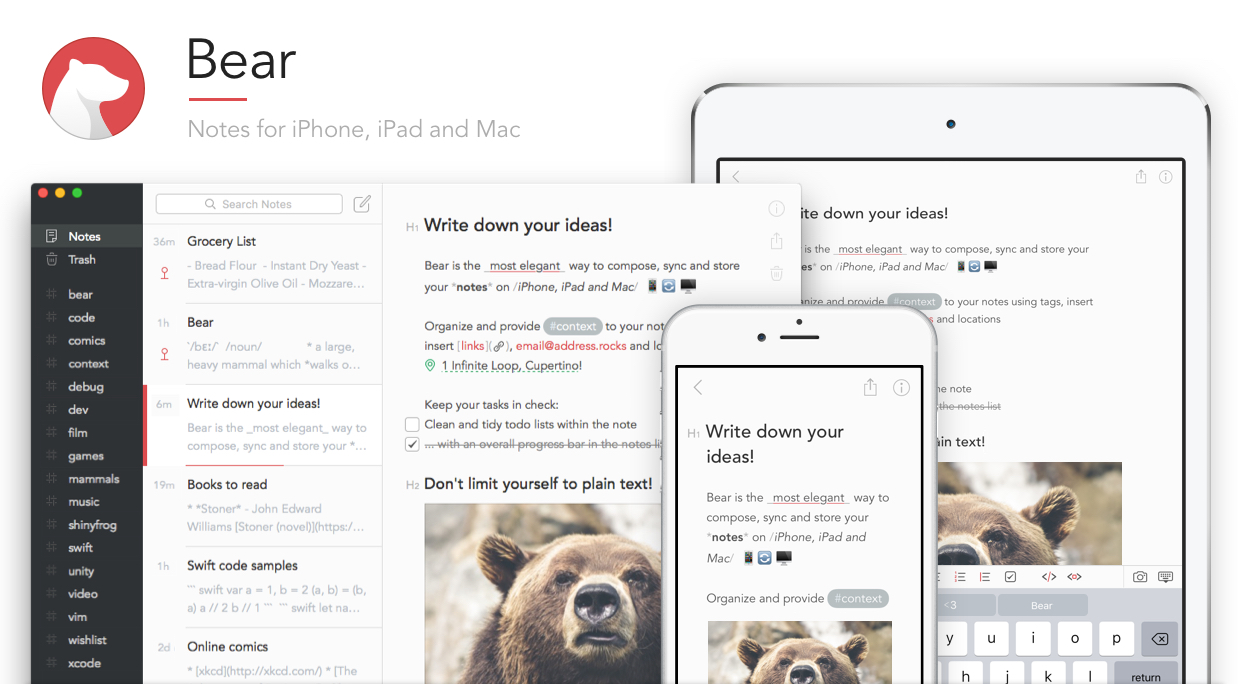
The awesomeness called ‘Bear’
Bear is a beautifully designed note taking app for Mac. This is by far one of the best apps I’ve ever used. The attention to detail is just amazing.
Important: Bear defaults to using its own special flavor of markdown, so the first thing we’ll want to do is turn on “markdown compatibility mode”.
This will allow you to write and format your Steemit-friendly posts inside of Bear. Then you can simply copy->paste into Steemit when you’re done writing. Booyah! 🙌
In my opinion, Bear is the perfect writing and organization app for steemians such as myself.
Are you a Windows user?
You're in luck!
Simplenote is a cross-platform notes app that is essentially a slightly stripped down version of Bear. The overall function is the same, it's just that Bear has a far superior user experience and aesthetic.
- You can write in markdown
- you can tag your posts
- it's a clean and focused UI.
It's basically Bear Lite.
A grand tour of the bear cave
Bear is elegant in it’s simplicity and power. At face value, it’s just a beautifully designed note-taking app. Under the surface it is a tool to enable great minds to organize their crazy and make their dreams a reality.
The main window is the writing area (obviously). It is a genius hybrid of markdown and formatted text. This way you can write super efficiently with markdown and see what it’s going to look like if you publish it on Steemit.
The middle window is the notes list.
The left side window is the tags list.
Whatever tag you select will filter the notes list.
Simple.
There’s also some fancy things you can do, such as…
- Change the theme (my fav is Dracula - great for night writing)
- Sync between all Mac devices
- View stats about your current note (word count, paragraphs, reading time)
- Export in tons of formats (.md, .pdf, .html, .jpg, etc)
- Create to-do lists and checkboxes
- Embed files & images
- Interlink notes
- Create a global hotkey for creating new notes when in other apps.
- Enter focus mode for distraction-free blissful writing
Make sense of your crazy with the awesomeness of tags
Here’s where the true power of Bear lies…

And tags within tags.
And tags within tags within tags.
Note for Simplenote users: You can't do nested tags, so it's best to keep your tagging system _very_simple to keep it organized.
One note can have many tags, and tags can be added anywhere inside of the text by just typing a tag such as #productivity. If the tag doesn’t exist in the system yet, then bear will automatically add it to the tags list. Awesome.
You can create multi-word tags by wrapping the tag with hashes like this: #stuff and things#.
To create nested tags, just use slashes like this: #steem/steemit
If you ever need to merge tags, you can do that too. Just find the tag you want to merge on the left side tag list, right click -> rename, then rename it to the tag you want to merge it with.
With a properly planned and well conceived tagging system, you can finally wrangle all your world-changing ideas into something cohesive, logical and more importantly, actionable.
I like to think of Bear as an all-in-one notepad, authoring tool, to-do list, idea box, organizer and digital brain.
You can also link between notes, effectively creating your own personal wiki.
It’s freakin' amazing.
A method to the madness 🙃
Tags aren’t going to solve all our problems. But we can use tags to solve all our problems. 😎
We can also use tags to ruin ourselves. A disorganized tagging system is an absolute nightmare.
It’s best to start off on the right foot, and set up a basic tagging system before you start tagging.
A side effect of developing good tagging habits is that you get better at tagging in general. Which means you’ll get better at tagging your Steemit posts.
Tags are how Steemit, DSound, and DTube are organized, and as the platform scales its going to become increasingly more important that we all develop wise and organized tagging habits.
The future of easily finding relevant content on Steem depends on it ;)
Tagging with Bear
To create a new tag, you simply add a tag to a note. You can add it at the top, bottom or anywhere in between.
Since I am writing a Steemit post right now, I’ll add the #steem/steemit tag.
Now this note will show up in the notes list when I click the #steem/steemit tag on the left side navigation.
Awesome.
Develop your personal tagging directory
The first thing I did was create a note called “Directory”. I pinned this note so that it shows up at the top of the notes list for easy access.
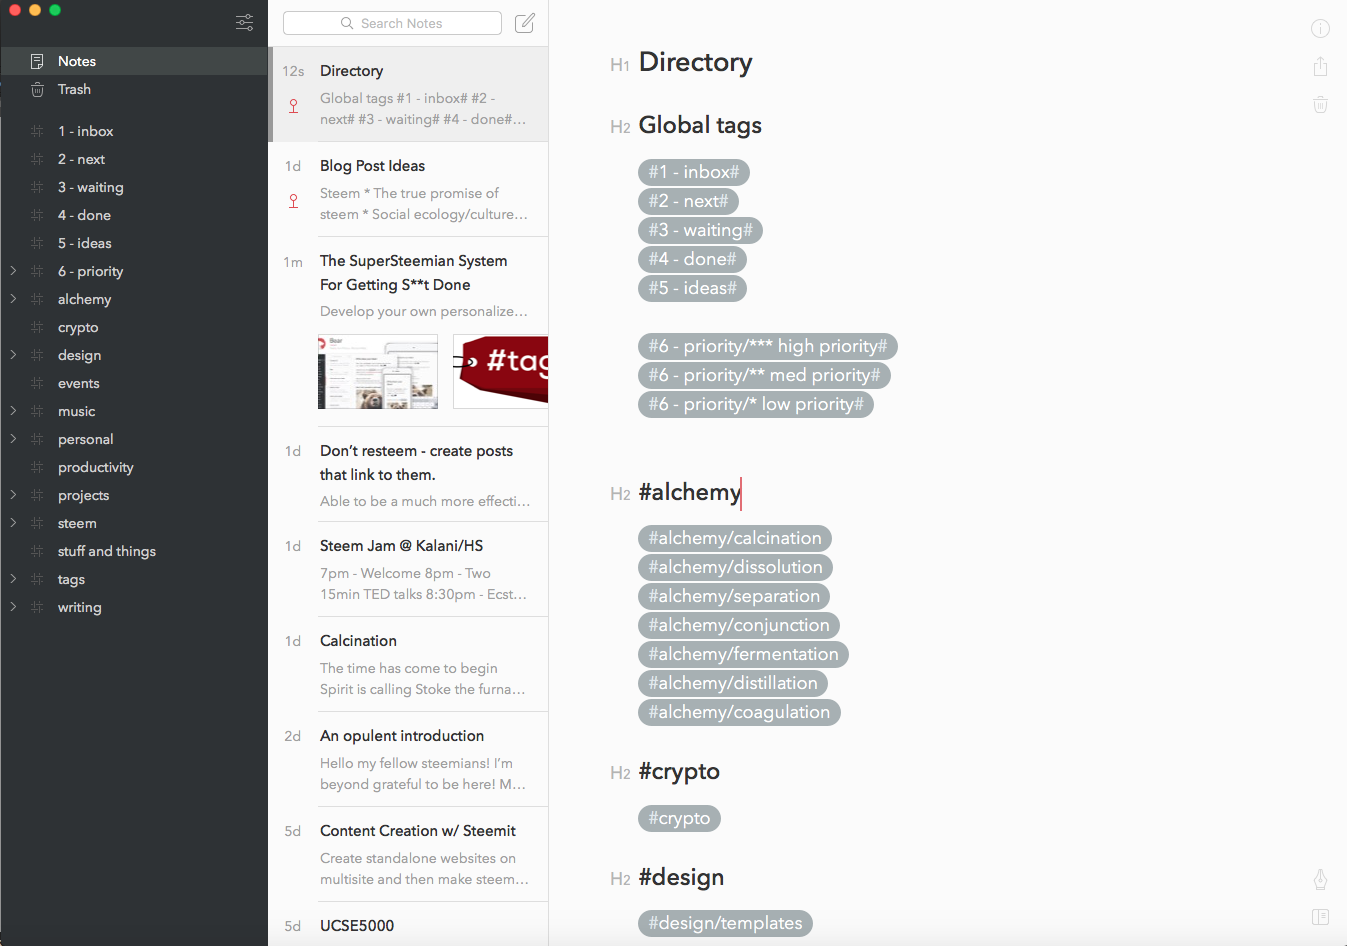
On this note, I started writing all the tags that I felt I would find useful.
I started with the big picture categories of my life such as #alchemy, #design, #projects, #music, #writing, #productivity, #personal, and of course #steem.
Then for each of these categories, I started jotting down sub-tags that I knew I would be using.
I organized them like this:
#steem
#steem/steemit
#steem/dtube
#steem/dsound
#steem/dlive
#writing
#writing/blogs
#writing/daily jam# (remember to add a closing # any time you use multi-word tags)
#writing/poetics
Important: ONLY create a tag if you know you will use it frequently. If you only use a tag once or twice, theres no point in using it at all and it would be contributing to unnecessary complexity.
Processing perfection
Having a solid tagging system is one thing.
Having an effective way to process everything and know what to work on and when is another thing entirely.
I decided to use the GTD method (Getting Things Done) that was invented by David Allen.
The workflow involves a 5-step process that enables you to capture all of your brilliant ideas AND get them done.
The five steps are:
- Capture
- Clarify
- Organize
- Reflect
- Engage
Lucky for you, we can implement this system into our bear workflow to achieve ultimate productivity bliss (though “euphoria” may be more appropriate) :)
Let’s get into it.
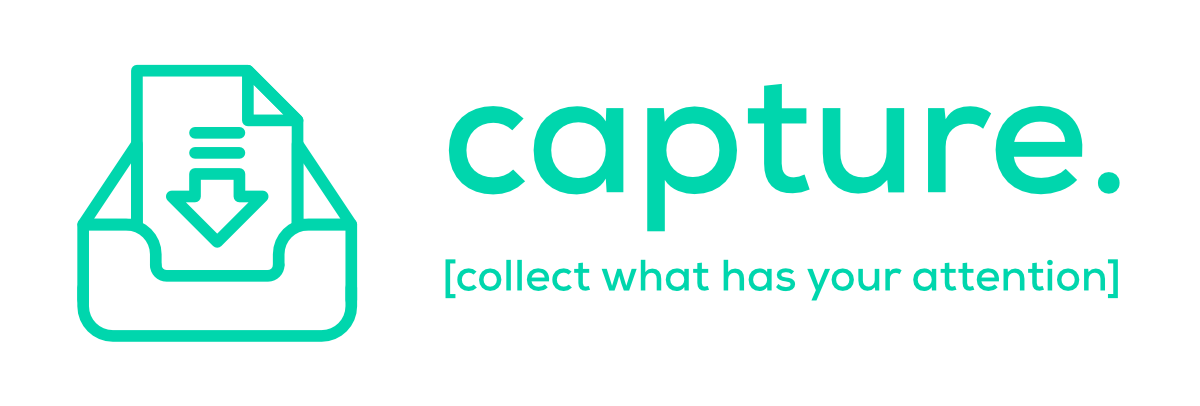
1. Capture
Capture everything.
How many times have you had a brilliant idea, and then lost it to the winds of aether?
I know, I know… It’s painful to think about.
We’re gonna solve that problem right meow. 😼
The key is to convert your thoughts into data.
Capture everything including notes, ideas, to-do’s… everything!
Anytime you have an idea or come across something that you’ll need to remember, make a Bear note and tag it with the #1 - inbox# tag.
The idea is to capture everything that comes to your attention, and then to process it all with the following steps.

2. Clarify
Once we’ve got items in our inbox, we need to clarify what they mean.
When we’re on the go, or in the middle of something, and just need to get an idea down and out of our head, then we’ll want to get it out with the least words possible. Paraphrasing is great for this.
But we need to make sure to revisit it and clarify what we meant by it so that the note still makes sense next week.
If the note doesn’t make clear sense to someone who isn’t you, then its not clear enough. At this stage, be sure you’re 100% clear on the message and that it will still make sense if you forget all about it later.
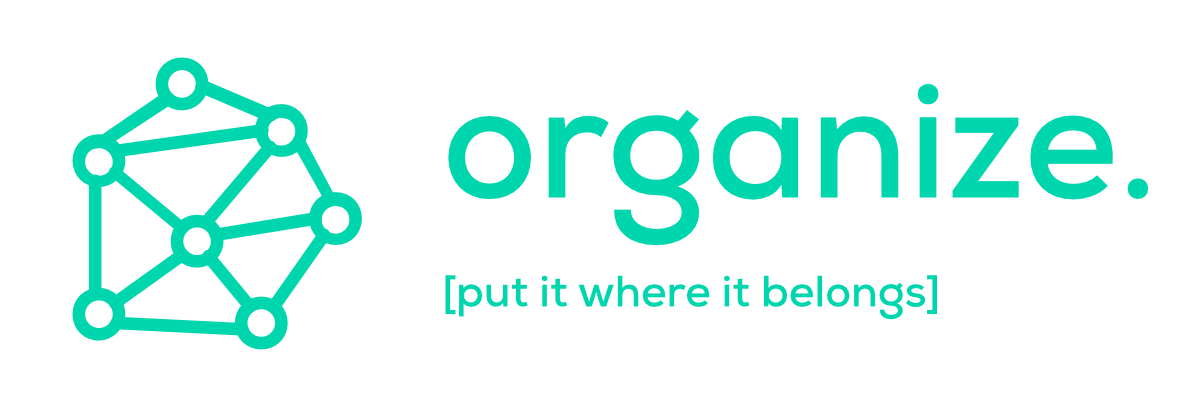
3. Organize
Notes should only stay in the inbox for a day or two max. It’s a good practice to get into a habit of going to your inbox once a day to clarify and organize your notes. Notes are to be organized with the following tags.
Status
#2 - next# is for action items that need to happen now or soon.
#3 - waiting# is for things that are in process but can't be moved forward until something happens that's usually outside of your control.
#4 - done# is to signify that any required actions pertaining to the note are complete.
#5 - ideas# are for ideas you have that you haven't decided to take action on but may result in future action.
Priority
There are 3 levels of priority.
#6 - priority/* low priority#
#6 - priority/** med priority#
#6 - priority/*** high priority#
By getting into the habit of rating action items and notes based on priority, it will help you quickly figure out what needs your immediate attention and what to focus on next.
Tags
This is where your handy dandy personal directory comes into play. For each note, apply the appropriate tags so that it will show up where it needs to. The more you do this, the better it will all get, and you’ll be able to access the depths of your mind and subconscious with ninja-like precision.
So if I get the idea to write a Steemit blog post about using Bear as the ultimate productivity system, and I want to publish it ASAP, then I’d create a note about my idea and tag it with:
#2 - next#
#6 - priority/*** high priority#
#productivity
#steem/steemit
#writing/blogs
Now I can find that note in any one of those places.
And I can simply start writing the blog post right on the note, just like I’m doing right here right now. 😎
Note: Bear just added a new feature that is going to save you tons of time - tag autocomplete. Once you type “#” followed by a letter, number or symbol, it will show you relevant tags. Super duper handy!

4. Reflect
This stage is crucial as it allows you to stay on top of your workflow and refine the process over time.
A weekly reflection session will work wonders and ensure that you remain in control of your workflow. It will also keep you from letting action items slip by unnoticed.
Further, by reflecting on your organizational system and workflow at a meta-level, it will naturally increase its effectiveness and your ability to stay “in flow” will improve over time.
It’s a win-win deal.

5. Engage
This is where you get shit done.
While this system isn’t going to take care of any motivational problems you may have, it will definitely make it easy to know what to work on and when.
That said, I find that having a simple yet capable system like this in place actually provides me with a good dose of motivation, but it’s certainly not gonna do the work for me.
The brilliance of a system like this is that it allows us to develop a personalized system to make quick intuitive judgements on how to best utilize our time.
How often have you had a big pile of to-do’s, you can’t decide where to start and then you just say “F**K IT!” and commence a nice relaxing session of Netflix & Chill?
If we have a system set in place that allows us to know with certainty what the right thing to work on at any given time is, then its a helluva lot easier to get on with it.
When faced with the question “what should I do now?”, it is highly effective to develop a habit of weighing our “what should I do now?” candidates in the #2 - next# tag based on the following four criteria.
I know all this may seem a bit complicated now, but once this is chiseled into your subconscious, you’ll be getting shit done like its nobody’s business but yours.
Context
Consider the current circumstances and environment. The context of where you are and what you have available to utilize will determine what you are able to accomplish, and at what level of efficiency you can accomplish it. Don’t start writing an epic Steemit post while you’re standing in line on your phone at the post office. That context is better suited for smaller tasks that are phone friendly.
Time
This is similar to the context category above, but brings the time dimension into the equation. So let’s say you’re on your phone at the post office and you will be in line for maybe 10 minutes. Scan your #2 - next# tag for things that you could complete in that 10 minutes. It's more effective and productive to complete something rather than start something that you'll have to revisit later. Remember, the goal here is getting shit done, not getting shit started ;)
Energy
Be honest and aware of your energy level when making decisions about what to work on. Don’t start writing an essay when you’re stuffed and spent at 7:30pm. In contrast, don’t do brainless tasks when you’re up bright and early, recharged, just had a nice big cup of coffee and ready to kick some serious ass. Save that brainless stuff for your downtime so you can sit back, relax and go on autopilot ;)
Priority
This is where the priority tags come in.
#6 - priority/*** high priority# stuff comes first.
#6 - priority/* low priority# priority stuff comes last.
#6 - priority/** med priority# comes somewhere in the middle.
I put them as sub-tags to clean up my Bear sidebar a bit. All I need to do to write out one of these tags in Bear is type:
#*
…and then the tag autocomplete will pop up show me the 3 priority levels to choose from ;)
Putting it all together
Using the above criteria (context, time, energy, priority) all together when deciding what to work on may feel a bit tedious at first. In fact, all of this will likely feel a bit tedious at first ;)
Once it starts to settle into your intuition, that will change and you’ll find yourself becoming more ninja-like every single day.
If you can learn how steem works, you can rock the shizzle out of this system and level up your creativity game.

Becoming SuperSteemian
I strongly believe that this system alone, when properly utilized, has the power to turn any smart human into a SuperSteemian.
Q: What’s a SuperSteemian?
A: Someone who has mastered the ability to turn their ideas into extremely valuable, well-organized media art that adds immense value to the steem network and collective.
Next Steps
- Download Bear to all your devices
- Set up your ultimate (yet simple) tagging system
- Get familiar with the GTD workflow
- Capture
- Clarify
- Organize
- Reflect
- Engage
- Actually use it. Every day.
- Become SuperSteemian
As the steem network grows, competition for the reward pool will increase. This means that the bar of quality will continue to rise and the rewards will be allocated to those who continue to push the quality bar higher and higher.
Those who take the time and care to set themselves up for success will greatly improve their chances of becoming SuperSteemian and be transformed by the wonders of this beautiful blockchain.
This isn’t only a call to raise the quality of your posts, but it’s also a call to raise the quality of your thoughts, life and creativity. The quality of your posts will follow ;)
Go forth, get it together, and become the SuperSteemian you are destined to be.
Cheers,

Crafted with ♥ in Hawaii
Great post my man! I've been using Bear for a while, love the Dracula theme and just the whole feel of the app, really inspires me to write better!
Onwards to Supersteemianism! :)
Thx buddyboi... Setting up this workflow with it really re-sparked my Bear love affair :)
Bro! Truly an epic post! Thank you so much for explaining your system with Bear. Going to start implementing it right now, it's taking a little bit to digest but shouldn't be too long n I'll have it. Cheers Chief! Much love.
Thanks broski :) Yeah Bear is the bomb-diggity. I know this is on the verge of TMI (too much info) but it had to be done;) Keep munching, you'll get it down 🍕
I didn't realize you could put tags in posts that would show up in the search as well. Question though, you mention to only use tags if you intend to use them frequently, why is that? For instance if I go see a band, and take photos and tag them, I wouldn't think to be tagging them at another time. Thanks for the heads up on Bear too!
Ah, so when you add tags inside the body of a post, it doesnt include your post in the tag feeds (though it should show in search just like any text would).. only the 5 tags you choose when you make a post are what get you in the tag feeds..
For clarity, when i mentioned only using common tags, I was referring to your personal Bear-based tagging system. If you only saw a band once and you had some notes about it in Bear, you probably wouldnt want to add a whole new tag inside bear, but instead just add that note to a "band" tag or something..
The key for a personal tagging system is to do more with less. If you have a smaller amount of tags, youll be much more efficient with properly organizing everything so that you can find what you need when you need it.
Perhaps it wasnt totally clear, but the tutorial wasnt on how to tag in steem, but specifically for personal tagging in bear - tho i did mention that developing that habit would have a positive effect on your steemit tagging skills ;)
@opulence, what a great post! I am one of those non Mac users, and would very much like to find something like 🐻 to help me streamline/organize my thoughts so I can stay motivated and on task when it comes to posting here on Steemit.
I have yet to make any posts beyond my initial introduction for many reasons. A big one is I just don't know ow where to start! For me, I have so many varied interests and my mind doesn't stay on one subject long enough to be able to come up with a quality sharing about it before I am engrossed in something else. For example, I may have come up with a great essential oil blend for my mom in the morning that I thought might be interesting to share, but 2 hours later I am engrossed in learning about how a Sun-Pluto-Mars in the 7th harmonic effects the lives of several different people in my life....
Anyway, I will strive to improve my focus and dedication to harness my passions and creativity, and thanks for sharing your tools!
Yo @sharonleopardi! Good news: there's a Bear-like app called Simplenote that does everything you need. It's kinda like Bear Lite :) I updated the post to mention that as well.
As for where to start... I know that feeling all too well. The best place to start is to just start without needing to figure it out. Usually the simple act of writing will produce results - and then it will just flow into something cohesive. You don't really need to pick a topic. I just start writing about what i happen to find interesting in that moment, and then it evolves into something worth sharing.
There's value in just being interesting and sharing your process ;)
Evernote is another good option for Windows users, and it has many nice features like posting directly to facebook, attach files, saving screenshots (with a browser pluggin called Evernote Web Clipper), creating checklists, and more..
Great post dude! Thanks for the tip on Bear, gonna check it out!!
Thanks @alfavedic! Stoked to share it with the steem team :) Its a brilliant app and writing in it is a joy ;)
love this post!
never even heard of Bear.. been using a combo of Asana and Notes,,, but been wanting something different and non-internet related.....
stoked to read this and see you are making way on Steemit!
Yeah man, Bear is such a great app. You can make it work however you want pretty much.
The thing I'm most excited about is that I can literally write my blog posts inside of it as a way of creating my own personal knowledgebase, and then share those things with the steem tribe.
So all my blog posts will be also inside my bear, and all interlinked w/ tags.
If i make it valuable for myself, then there will be value in it for others.
This post is a perfect example.
I decided to create this system for myself, so I created a manual as a note inside of Bear.
Now it's a blog post on Steemit too :)
Definitely!
Thought occurred to me as I was setting it up as well :-)
And a great way of pooling information as well, to be drawn on while writing and formulating ideas ...
Thanks so much for sharing!
Another thing I like about where my thoughts are going is "removing deadlines" and, instead, working through "priorities" at a speedy rate.
I understand how deadlines can help people get things done, but I feel like they often limit my rate of production. Since we are working for ourselves here, sure we can set deadlines for ourselves, but why not make them Now or Soon(becoming now as now items finish) and Waiting. And then just do them All!?
I love the idea of expanding time and utilizing different perspectives on what time actually is.
For me, I like to live in the moment. . continually consecutive moments as they come.
With your system (and GTD and Bear, and others added in there) I can help make sure that all of the moments that happen are curated to the direction of where I want to see my Self in the future.
Like a manifestation conduit, set apart from ordinary time constructs. .
I appreciate your effort to build up our community.
For Windows users, I found out EVERNOTE can do subtags, and it has other nice stuff like posting directly to facebook, attach files, saving screenshots (with a browser pluggin called Evernote Web Clipper), creating checklists, and more.
I will start applying what I just learned from this awesome post, and of course, clip it to Evernote. Thank you very much for the ninja lessons.
You got a 27.44% upvote from @whalebuilder courtesy of @opulence. Let your SP earn for you... Deligate it to @whalebuilder by clicking on one of the ready to delegate links: 50SP | 100SP | 250SP | 500SP | 1000SP | 5000SP | custom amount.
This post has received a 0.87% upvote from thanks to: @opulence.
For more information, click here!!!!
Send minimum 0.100 SBD to bid for votes.
Do you know, you can also earn daily passive income simply by delegating your Steem Power to @minnowhelper by clicking following links: 10SP, 100SP, 500SP, 1000SP or Another amount. (10 SP minimum)
Hi greetings from Spain. I'm with your college Riky Frequency Less ;)