The "Comet Assay" [eng]
This method, less eloquently also called "single cell gel electrophoresis", is used to assess DNA damage in cells.
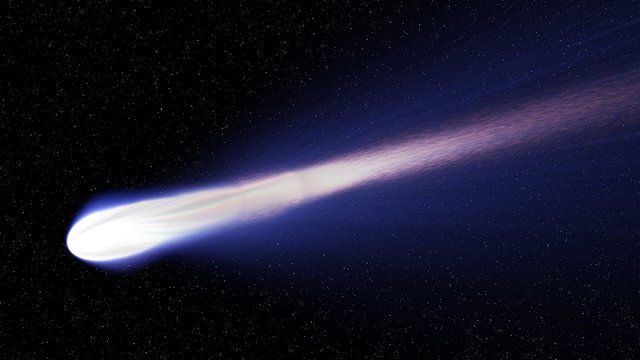
A molecular biological/toxicological method named after a beautiful astronomic object? What the...? CC0, pixabay
Intro
Now it's time. After teaching you the gospel of genotoxicity, I can finally do what I intended to do in the first place - to tell you about the method I've spent the last couple of weeks with. As usual, my German-speaking audience has received first, so this is again an English adaption of a recent German post.
Even though the Comet Assay is quite labor-intensive and sometimes a bit tricky to handle, it is much more reliable than the ICE assay, which I have written about before. It provides reliable, valuable (and arguably pretty^^) data, and has therefore become a well-established standard method in toxicology.
What's it all about and how does it work, you ask? Well...

Aim and selection of the experiment
We want to measure any influence (harmful or protective) of a substance or lifestyle on the DNA. How do we proceed?
First decision: the method.
Depending on the equipment at our disposal, the methods established in our lab, the size of our budget, what we want to investigate and what type of samples we have, we will choose different methods. Choosing the right method for your ends is one of the most important decisions in science.
Wrong method --> shitty results --> no publication.
No publication --> no money, no honey, death and despair.
No, I'm not exaggerating!
The Comet Assay is our method-of-choice when:
- a fluorescence microscope and the right software is available in the lab
- the equipment for electrophoresis is available in the lab (which should be relatively natural, unless you're stuck in a godless area of Europe...) twinkletwinkle towards @scienceangel...I'm talking about this...
- we **want to measure DNA strand breaks in cells directly, and not by assessing any downstream biomarkers
Also, the Comet works well for cell culture and blood. For soft tissues (e.g. liver) it's still ok-ish, but in tissue samples with a high proportion of connective tissue (intestine etc.) the method is shitty as shit.
The method
Step 1: The sample.
We chose the Comet. Yay!
You poor fool don't know you'll be in the darkroom for days yet. ;-P But Yay!
Before we can measure, we need something to measure. See how incredibly logical science is?
Many studies are focusing on effects in vitro. In this case, cells are cultured in bottles or petri dishes and then "incubated" with the substance of interest. After the desired incubation period (usually 1-24h for the comet), the living cells that can be harvested and "singularized" so that they are available in suspension.
If you already have sufficient data from cell culture, you can try your hypothesis on animals or even humans. Then, for example, blood samples can be used for the Comet without further processing, since the leukocytes float freely in the blood.
Tissue samples are more difficult and only feasible to a limited extent, as there is always the risk of premature cell death when well adhering cells are separated. If you want to look at tissues, chances are that another assay, such as the micronuclei test, is more suitable.
Anyway, I'll introduce you to the method based on my current work, and for this we use blood samples - more precisely rat blood from an animal experiment ( I'm not allowed to talk about the exact experimental setting yet).
Step 2: Embedding.
Here's what we do with the blood:
We use a sugar called agarose to "embed" the blood cells on a microscope slide.
Agarose is a substance that only dissolves when boiled in water. When the solution cools down, a gallate-like, porous gel is formed. The pore size can be controlled via the agarose concentration - the smaller the proportion of agarose, the larger the pores.
With a special low-melting agarose, which is still liquid at 37 °C, we can embed the cells on a slide without damaging them. They are then trapped in the gel, while small molecules such as various reagents can enter the gel through the pores at any time and move freely (="migrate").
Step 3: Lysis
Now it's time to kill the cells - but leave the DNA intact. We use a lysis buffer with strong detergents - in principle nothing else than a concentrated, abnormally strong dishwashing liquid to dissolve the membranes of the cells - including the nuclear membrane (which is called "lysis"). Membranes mainly consist of fat, and thus are not water-soluble, but our laboratory rinsing agent does a great job in taking care of them. Muahaha, cell killer!
The result: now not the intact cell, but the free DNA in the form of chromosomes, is trapped in the gel. Of note, those are also too large to migrate through its pores.
From step 3 we work ice-cooled to avoid thermal damage to the DNA. Dead cells don't give a damn.
Optional step 3a: FPG
Spoiler Alert: As you will see, we detect strand breaks with the Comet. In my last post, I explained different types of DNA damage. As you may (hopefully) remember, strand breaks are only one kind of DNA damage. The second major possibility is damage to the DNA bases, which we are unable to detect using a standard comet assay.
However, this can be remedied by treating the slides with a special enzyme called formamidopyrimidine glycosylase (short FPG) after lysis. This is actually part of the NER DNA repair and cuts a piece out of the DNA where it recognizes damaged bases.
To be clear: FPG "translates" damaged bases into DNA strand breaks, which can then be detected by our method. By comparing non-FPG and FPG treated slides from the same sample, we are even able to distinguish between direct strand breakage and base damage in addition to detecting the total damage.
Yeah, I know... G E N I U S!
Treatment with FPG must be carried out in the dark or under red light to avoid the risk of additional damage to the very sensitive DNA, which is no longer protected by cell walls due to UV radiation:
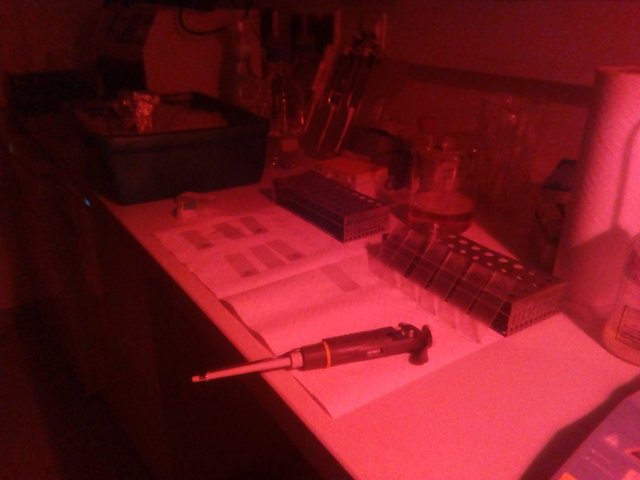
microscope slides, pipettes and other stuff during FPG treatment
Step 4: Electrophoresis
Now to the core of the method.
As I describedlast time, DNA has a phosphate chain that serves as its "backbone". Flashback into school chemistry: Phosphates are anions, meaning negatively charged particles. Thus, the DNA is also negatively charged. This fact can be used in gel electrophoresis.
In classical gel electrophoresis, a mixture of DNA with different chain lengths is put into an agarose gel and then electric voltage is applied. The negatively charged DNA is pulled in direction of the positively charged pole (the anode - which is called "andode" because it attracts anions - #mnemonictricksforstupidchemists). Depending on how large the DNA pieces are, they will be able to migrate through the porous gel more quickly or more slowly - therefore they separate by size in the electric field.
The Comet Assay - the single cell gel electrophoresis - is similar. We pack our slides with the embedded single cells into an electrophoresis chamber, pour a buffer solution over them and switch on the current.
Intact DNA is too bulky to pass through the pores of the gel and therefore stays where it is. Damaged DNA, however, has strand breaks, i.e. it contains smaller DNA fragments that can indeed migrate in the gel, and which are doing exactly that in the electric field. This is how we separate damaged from undamaged DNA!
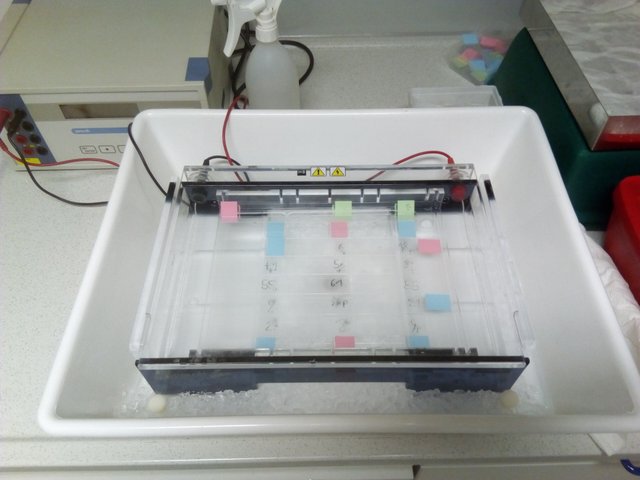
electrophoresis chamber filled with slides, ready to go
We even have two options: We can perform the electrophoresis at a neutral pH, where the DNA double helix is intact. Then we only detect double-strand breaks (DSB), because in the case of a single strand break (SSB) the complementary strand is still intact and holds the DNA together, so that no fragments are formed that can migrate in the gel.
Or we perform the whole thing under strong alkaline conditions (= in concentrated caustic soda), in which double strands separate ("denature") and we can therefore also "see" SSBs. This so-called "alkaline comet assay" is the more common method, as it gives us a more comprehensive picture.
Step 5: Neutralize and stain
After electrophoresis, intact and damaged DNA are spatially separated from each other on the slide. But we still have to detect them.
For this purpose, we use a fluorescent dye that binds to the DNA and "stains" it. A very common dye is ethidium bromide (EtBr), which intercalates into the double helix. In order for EtBr to do this, however, double-stranded DNA must be present again. Therefore, we have to neutralize the slides first, i.e. put them into a buffer solution with neutral pH for a few minutes, which reverses the splitting of the DNA into individual strands.
EtBr has the unpleasant property of being carcinogenic and mutagenic itself. We must therefore follow a few additional safety regulations when working:
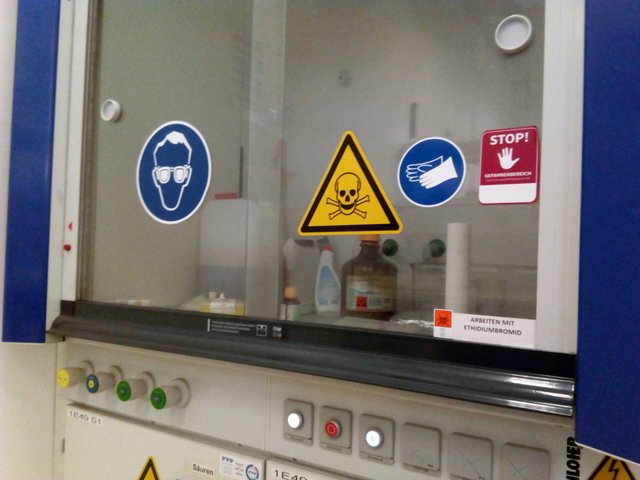
Rule of thumb: When chemists hang more than one warning sign, there's fire on the roof.
In the specific case this means: protective gloves on, lab coats and glasses on, work only in the marked area, dispose all materials in the hazardous waste and make sure not to touch anything else with already contaminated gloves.
Step 6: Microscopy
Last but not least, we detect. Under the microscope, the stained DNA is shot with a laser that stimulates EtBr to fluoresce, which therefore begins to glow and shows us where the DNA is located.
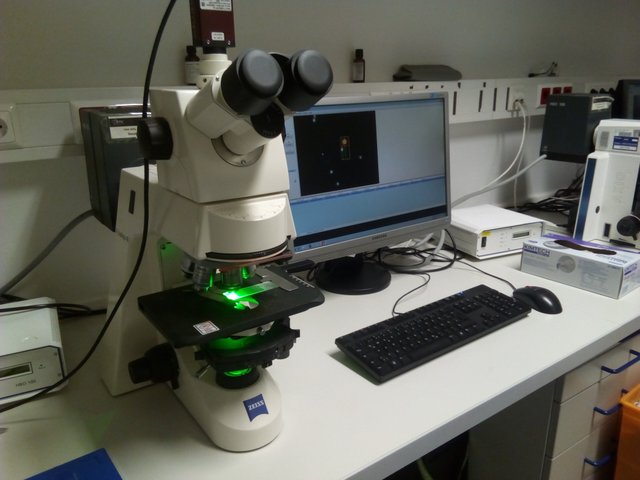
Our fluorescence microscope... I turned up the light to take pictures. Poor eyes.
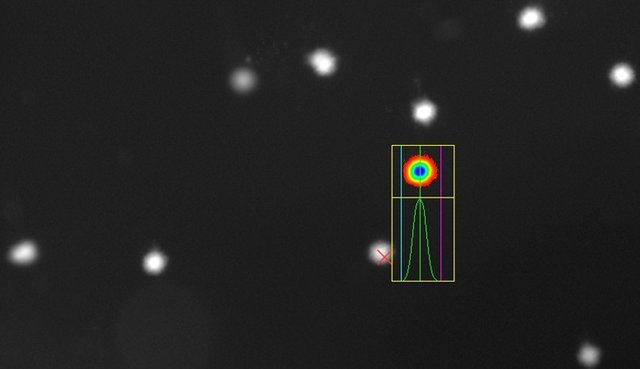
If the DNA has not been damaged, it has not migrated during electrophoresis and the intact DNA in the cell nuclei are visible in a circular and luminous form:
If the DNA has been damaged, the nucleus is still recognizable, but it now is accompanied like a comet by a "tail" of fragmented DNA that has migrated in the electric field:
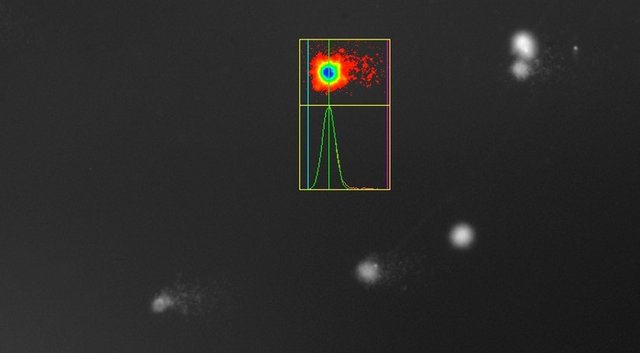
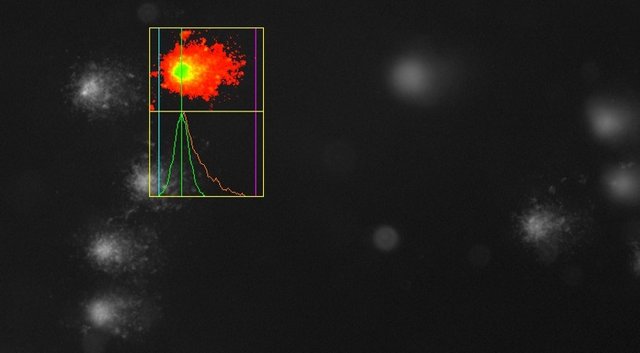
Weak DNA damage in a sample above, severe damage in the UV-irradiated positive control below. Now you know why the experiment is called Comet Assay!
The microscope image is captured by a camera and sent to the PC, where a special software enables us to "score" the cells. The intensity of the entire cell nucleus, the "head" and the "tail" are integrated. The so-called tail intensity, i.e. the ratio of the intensity of the tail to the total intensity of a comet, serves as a measure of DNA damage.
For each slide, 200 comets are scored to provide a mean value. It is important to work blinded:
Since the operator (i.e. me) could theoretically influence the result by selecting comets and setting the *scoring parameters (consciously or unconsciously), he must not know to which sample the microscope slides belong. These therefore only bear numbers, and only after all attempts have been completed will my colleague who has done the embedding give me a list with the assignment of the numbers to the actual samples.
You see, in science you don't even trust yourself!
Conclusion
I get 13 slides a day and have to lyse (overnight), treat with FPG, perform electrophoresis, stain (part 1) and then scan (part 2) them. Part 1 (for an experienced lab rat like me) takes the morning, part 2 means staring at a screen in the darkroom all afternoon. Maybe that explains why I hardly blog at the moment. ;-P
But by the end of the week it will be over. Then I will be unblinded and can finally evaluate! I hope there's some nice DNA damage!
Oh yes, we toxicologists are happy to see toxic effects. Those we can then publish. Poor rats, happy toxicologists. That's how it is.
I hope I could offer you here a small insight into the scientific practice and toxicological methodology, until soon, cya!
Sources and pictures:
Except for the first one, all pictures were taken in the lab by myself. The Comet Assay was invented in 1984 byÖstling and Johannson, the method carried out in our laboratory and presented here is strongly oriented to the modifications and suggestions ofTice et al. from the year 2000.
Run to red!
that is a good one, I'll tell that to my next student!
Wow, comet assay was the last thing I ever expected to see on steemit. Never thought someone could take a boring lab assay and make it into such an interesting post. Awesome!
Ty a lot for this compliment. Are you working with it aswell?
Nope, don't really need it for my project. But it keeps popping here and there in talks and poster. I just liked the way you explained it. I wonder if these kind or articles could be made available to more undergrad students, they will have a much clear understanding of what goes on behind the scenes.
on the long run, it would be amazing if steemstem (with the planned own interface to interact with the blockchain) could evolve to a platform that is broadly known to students around the globe.
On the short run, feel free to use and share my or similar posts, but I can't see much more possibilities.
You see in science you don't even trust yourself👌👌👌👌👌
This post has been voted on by the steemstem curation team and voting trail.
There is more to SteemSTEM than just writing posts, check here for some more tips on being a community member. You can also join our discord here to get to know the rest of the community!
Hi @sco!
Your post was upvoted by utopian.io in cooperation with steemstem - supporting knowledge, innovation and technological advancement on the Steem Blockchain.
Contribute to Open Source with utopian.io
Learn how to contribute on our website and join the new open source economy.
Want to chat? Join the Utopian Community on Discord https://discord.gg/h52nFrV
valuable able post i appreciate your effort to make this blog i'm i like also to make blog on science . check out my blog on black hole .
https://steemit.com/science/@kapilchakrani/do-you-know-what-happen-if-you-fell-in-to-black-hole
pls stop comment spamming, if you want people to read your blog then work hard to produce quality content.