4 Simple DIY recipes for your facial cleansing routine
It's me dear friends!
I'm gonna post about skincare today. It is probably my favorite thing to talk about. I have spent the better part of a decade learning and researching what is good, and of course what is bad. I have developed a routine for my own skin that I find works wonderfully. I have normal to oily skin. This is more geared towards that type of skin, however, I do know what is the best for all skin types. Let's get started!
The first thing you should know and have a complete understanding of is what kinds of things make your skin react badly? These are obviously products you want to stay away from. A LOT of store brands have ingredients in them that are just fillers and do not put any real value into the product. Most lotions and moisturizers are packed with thickeners that could potentially harm your skin. Those same brands promise youthful looking skin, don't they? I don't know about you but I don't want to spend $20 a jar on a product that isn't going to do what it claims when I can make those products much more effective in my own kitchen.
The second thing you should remember is the order in which your skincare routine should be based. I like to use the acronym ECTM. Exfoliate, cleanse, tone, moisturize. I'll discuss them one by one and of course share some recipes you can try if you would like. These are the same recipes I use in my skincare line for my side business called "Scrubs and Rubs". Jumping right into it....
Exfoliate: You don't want to over exfoliate. I need to make that clear. Exfoliation is sloughing off all the dead skin cells to make room for new fresh clean ones. You can do this step in the shower, or you can take a hot wash cloth(not to hot) and hold it on your face for 15 second at time. This is very important because it also opens up your pores to make way for your cleanser, the next step in the process.
Cleanser: Your cleanser is probably the most important part of the process. This is where, as you could probably guess, you cleanse your face. Be-riding your beautiful skin of all the crap that's hiding in your pores. By now, your pores should be open and ready for the cleanser to get deep down in there. They make exfoliating facial cleansers, but again, those are not always good. Most of them have benzoyl peroxide, which is much harsher than salicylic acid and can cause redness and irritation. I prefer salicylic acid because it similar to Hyaluronic acid. Hyaluronic acid helps with collegen production and wrinkle reduction. We all want some of that, don't we? Try to find yourself a natural product. Making cleanser yourself if always beneficial. You will notice a huge difference in your home made cleanser and a store bought cleanser. As you should. The home made cleanser doesn't have a bunch of crap and chemicals in it. So this step is most important. The next step is toning.
Toner: You've heard of toner. Most facial cleansing systems like Pro Active come with a toner. All a toner does is shrink the pores. That is a good thing. You just cleaned them out, now it is time to squeeze them shut. Trying to keep out all the gunk, if you will. Like tiny doors on your face. This is a simple step that is often looked over and forgotten. If you do remember to do this step, good for you! The last step is moisturizing.
Moisturizer: This step is a pretty big deal as well. Since most toners are alcohol based, your skin is now super dry and you need to replace all of the natural oils back on your face. This step is scary to those of us with naturally oily skin. You would think that since oil causes break outs, you would want to avoid oil. This is not true. Your face needs those natural oils. Too much moisturizer can be bad. Too much will clog your pores and gunk them all up after all the hard work you just did clearing them out. This is why the recommended amount by most dermatologists is a pea size. That's relatively standard. The reason for this is so the moisturizer can absorb into your skin. Making your own moisturizer is tricky. If you make it too thick your skin won't be able to breath. Finding that sweet spot so you don't make it too heavy is tricky but don't worry, I have a recipe that you can try that does not have that issue. A LOT of trial and error went into this moisturizer. I finally found the perfect mixture. Give it a try and let me know how it worked for you!
Now that we have the four steps out of the way, let's talk about the ingredients you will need in order to have amazing homemade products that you won't pay a bunch of money for. Plus, there is a sense of pride when you make something yourself that helps you feel healthier and beautiful. Nothing wrong with that, right?
Ok, so...first off natural butters. These, of course, are the moisturizing part of your product. You'll find a lot of cocoa butter or shea butter. Those are just fine and dandy. I have found that shea butter works better than cocoa butter, but both are good options. Another option for you girls (or guys) with extra dry skin is mango butter. That stuff is very fine and very...um I wouldn't say greasy that's not the right word, but it is definitely a good choice for dry skin. It is also super emollient, meaning it will absorb into your skin quickly. This is good if you're a morning facial cleanser routiner. Most of us put on make up in the morning. So a quick absorption is handy.
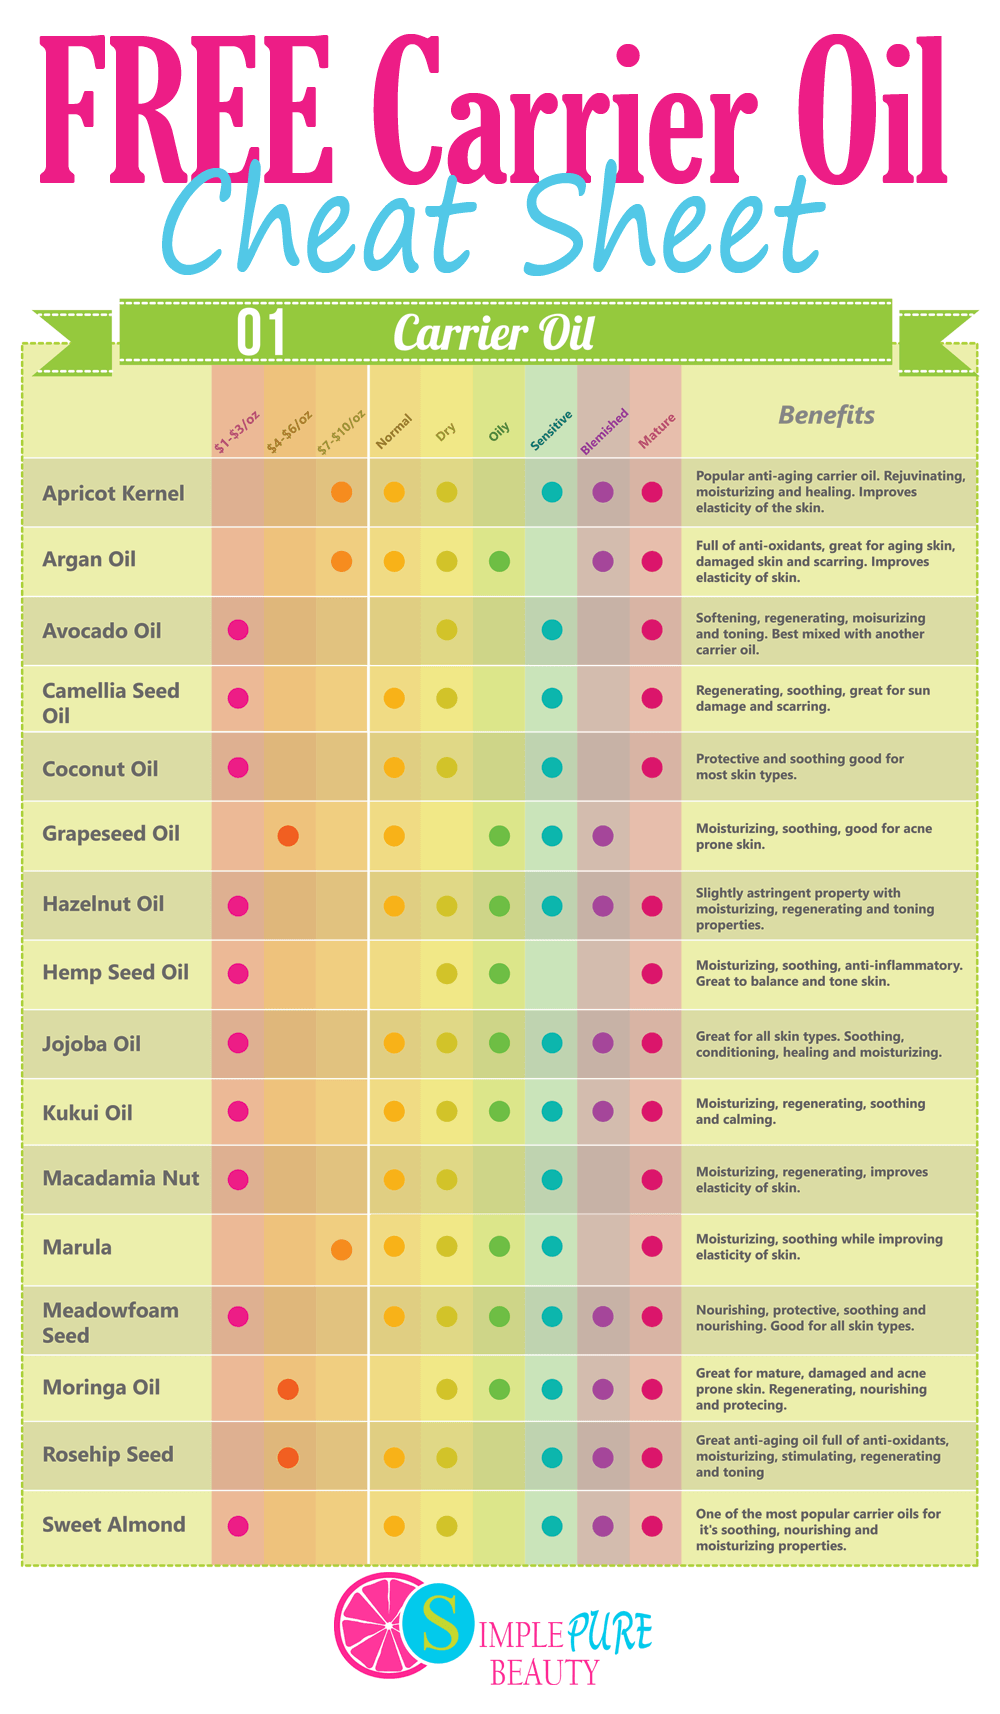
Carrier oils is next on the list. You want to choose the carrier oil that is good for your type of skin. Most people use coconut oil because it is relatively great for all skin types. A universal oil, if you will. Coconut oil is often used in hair products as well. Which is a bonus. Sweet almond oil is another great choice for dry skin because it relieves itching, inflammation, eczema, burns, dandruff, and split ends(when put in hair products). Apricot kernel oil is used for dry skin as well and can be used on sensitive skin too. It relieves inflammation and it also is reduces age spots. You know those pesky, brown spots on your face? It's full of antioxidants. Avocado oil is another favorite for some. It can be used for dry and sensitive skin. It can be used to treat eczema and also fights age spots. It increases elasticity in the skin which is good since we don't want wrinkles. It also increases collagen production and removes impurities from the skin. Next on my list, is Grapeseed oil. This is my personal favorite oil. I use this oil daily. It is best used for oily and sensitive skin. It decreases skin aging, it is emollient and non greasy. It is a powerful antioxidant and also anti fungal/bacterial. You know what that means? It fights acne! Most girls with oily skin will love this. They are the ones more prone to acne.
There are also folks who like to use Jojoba oil as their carrier. This one is pretty awesome for oily skin as well. It is emollient, it decreases inflammation and redness, fights dermatitis, eczema, psoriasis, cradle cap(for moms out there looking for a treatment for their babies, this is common with infants), and it also reduces stretch marks. I used this while I was pregnant with my kids and mixed it with vitamin e oil. No stretchmarks here.
Of course there are many other oils you can choose from. I selected these as these are the most common ones. Also the ones I use on a regular basis for my shop.
Exfoliant recipe-I prefer sugar scrub but you can always use epsom salt.
1c. sugar....you may always add more if you prefer a granier scrub
2 tbsp bentonite clay-cheap option. You can get this on amazon, walmart, target you name it.
2 tbsp carrier oil of your choice- add 1 at a time and mix before adding the second.
1 tbsp castor oil
1/8 c brown sugar
1 tbsp honey-
1 tsp nutmeg
1 tsp cinnamon
1 tbsp lemon juice
1 tbsp baking soda
2-3 drops of essential oil of your choice
Mix it all together and put it in a jar. Keep it in a dry place.
If your scrub is too....scrubby, add one more tbsp at a time of carrier oil. You want the consistency of the scrub to spread nicely but not fall all over the place. You can use a butter of your choice in place of one of the tbsp of carrier if you wish. I have done it both ways and found that there isn't much of a difference. DO NOT PUT WATER IN YOUR SCRUB! The oil will separate from the water and then you will have a mushy gross scrub.
Cleanser recipe
2/3 c. castile soap- you can get this at GNC or online
1/3 c. water
2-3 drops lavender essential oil
2-3 drops teatree essential oil
2-3 drops eucalyptus essential oil
Mix it all together and you're done. If you have allergies to the essential oils, here are oils that are equally as great for your skin. Patchouli, Geranium, Grapefruit, Lemongrass, Myrhh, Helichrysum, Jasmine, Douglas fir, Juniper, Sandlewood, Frankincense, Bergamot, Birch, Cedarwood, Cilantro, Clove, Cypress, Rose, and Ylang Ylang.
Toner:
2 tbsp Rosewater-if you don't have rose water, you can use dry rose petals and just make a tea out of it. Use distilled water if you do that.
2 tbsp Witch Hazel
1 tsp Vegetable Glycerin
1/2 tsp of Aloe vera gel
1/2 tsp Rose Hip Seed oil
a few drops of essential oil of your choice. I have found that Lavender is very popular. Jasmine is great too and smells so nice.
Put all the ingredients in a bottle, mix it up, and you are done. This recipe doesn't make a lot but if you prefer, you can double or triple it.
Moisturizer-
1/2 c. coconut oil, or oil of your choice
1/2 c. shea, cocoa, or mango butter. If you wanna get fancy just split that in thirds and use all 3.
1/4 c. of carrier oil of your choice.
2-3 of essential oil of your choice.
2-3 drops Hyaluronic acid-optional
2-3 drops Vit c-optional
2-3 drops retinol(vitamin a)-optional
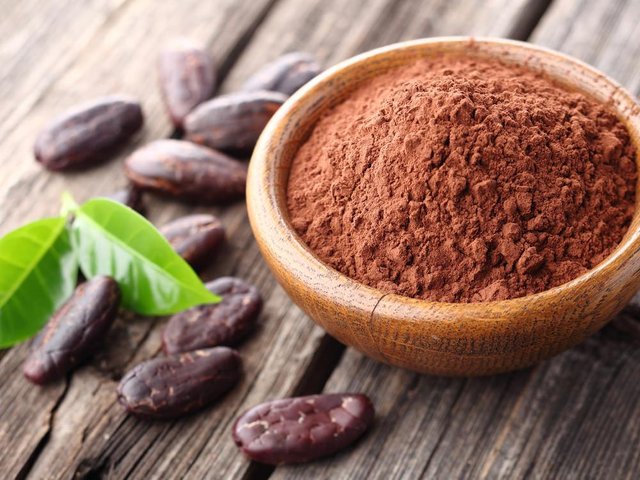
Use a double boiler to melt the butter and then add the oils. Let it sit in the fridge for about 15 minutes. Then take it out and whip it. Use a hand mixer for this. Put it back in the fridge and repeat every 15 minutes until it starts to thicken up. You will notice it doing that once it has cooled. Once it is thick but not solid, whip it one more time, then let it sit in the fridge over night. If you don't have that kind of time, a couple hours will do the trick. I find that if you give it the entire night it will be more solid. If you add water when making this, you will need about 24g of an emulsifier. Beeswax or silky emulsifying wax are both good options. You will also need a tbsp of a thickener like arrowroot powder(baking powder is the same consistency) if you go this route. That's why this is so simple. You don't need to do all that unless you're shooting for long term. Another thing you can do is add cocoa powder. This will turn your moisturizer into a tinted moisturizer. Add 1 tsp at a time depending on your skin tone. You can also add half an oz. of Zinc oxide. This is will give you about 15 SPF. Good for those of us that don't wear make up but still want protection from the sun.
Alright so! You've got some fun tidbits, you've got a few recipes. Please try them and let me know how they worked for you! Just remember it may take practice, but you will get it.
That's all for that.
Ta Ta for now...
-Mel
p.s If you would like to check out my Scrubs and Rubs business, please find and like my page on Facebook.