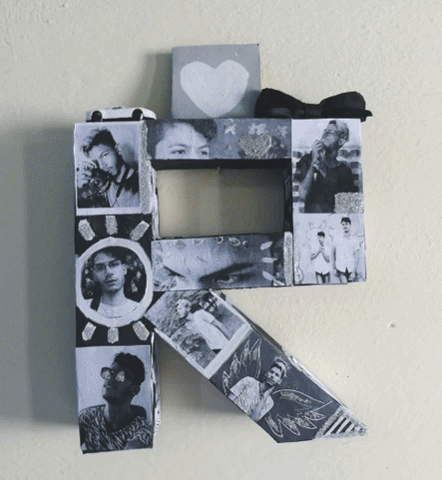
I DECORATED MY ROOM WITH THE INITIAL OF MY NAME (R)! 😎 | (Do it yourself!) 💌
IDEA: Decorative object with the initial of my name (R).
MATERIALS: cardboard, paste, silicone, white and black paint, silver frost, photos printed on paper and creativity
DURATION: 3 hours 🕖.

💬 IMAGINATION AND CREATIVITY: 💬
Before starting with the post, I want to talk a little about these two topics. Since childhood they have been very attached to my personality, maybe that's why I feel I have Artist's Soul. My concern for thinking and doing things were and is level Need/Gain/Anxiety.
And well, I would like to make clear to you these two terms, although they are connected, they are not synonymous.
| IMAGINATION | CREATIVITY |
|---|---|
| During the day we devised many things that may not have to do with what we experienced at the time. The human in itself is imaginative, needs it to solve things in daily life and not to stick to the theoretical. Imagination is the mere thought. | At this point, the imagination is materialized. Creativity is everything we do with our hands: a painting, a novel, a sculpture. It is the ability to create things. |
IF SOMETHING YOU WANT TO BEGIN, BY THE BEGINNING YOU MUST BEGIN 💫.
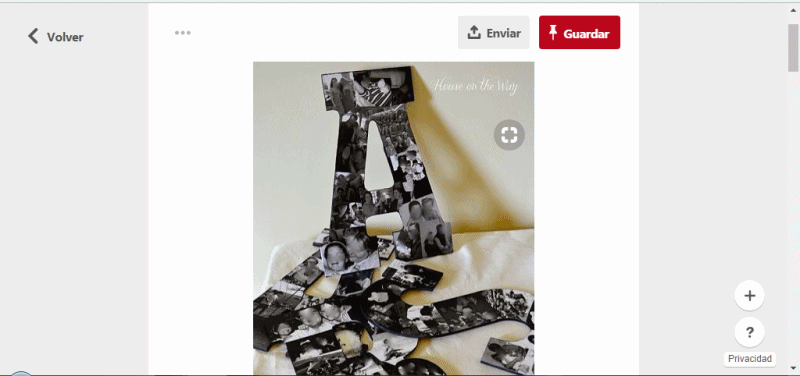
I saw these two images in Pinterest and decided to save them on my Crafts board , I am a lover of creations with recycled materials, in addition to conveying the beautiful concept: that things do not stop living until their first use, you can always Renew/Recycle.
PART ONE: PREPARATION 💗
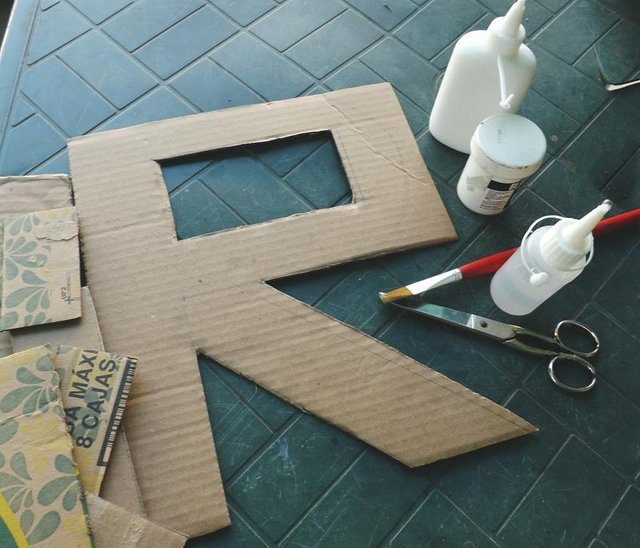
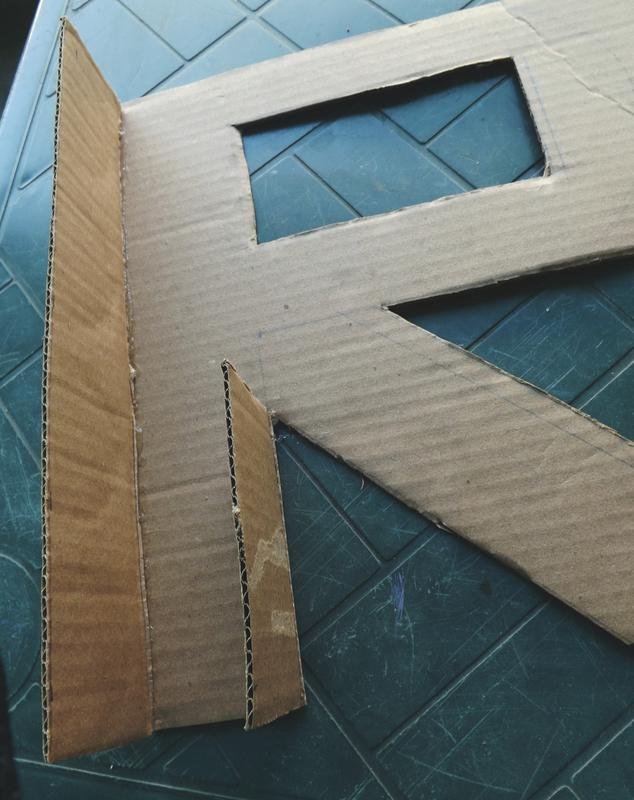
Cut a piece of cardboard (one of the sides of any box) and draw with a ruler the corresponding letter. In this case I put the initial of my name R. (Roger Durán).
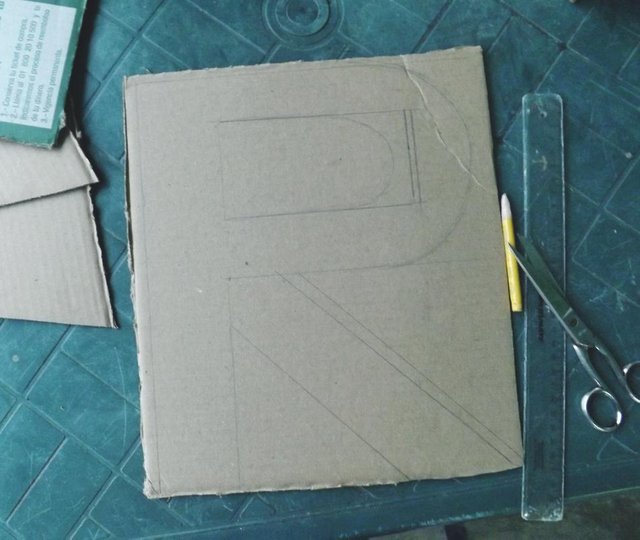
As you can see, I still did not have the design of the R very clear, so I tried several ways to see which one I liked ... There you can see the different directions of the R in search of the most indicated.
It also influenced the fact that the photos are square or rectangular (either vertical or horizontal) ...
So I opted to do them in the classic way ...🌟
Once the design is done ...
 | ... I proceeded to paste the parts that would hold the other side of the "R" . I used the silicone to apply it to the base and the cardboard that would stick. This with the reason that is more fixed and we do not have failures later. |
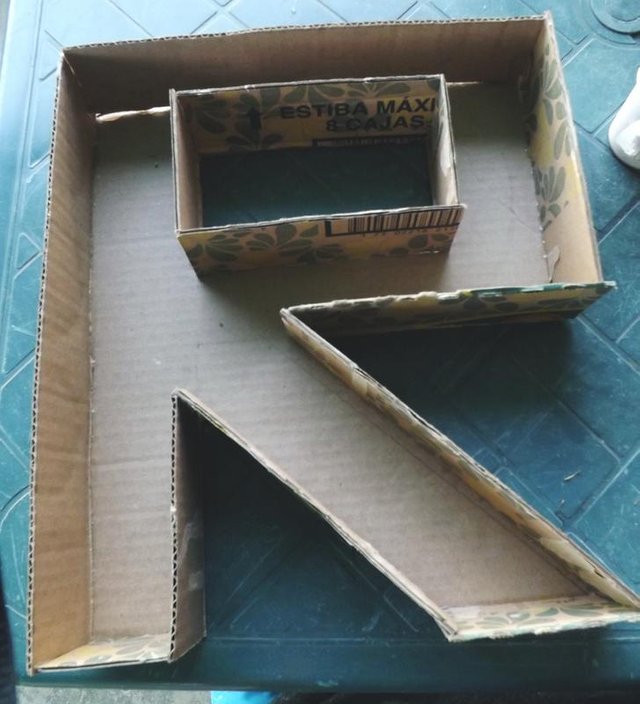 | Here were all the sides stuck with silicone, both to the base, and to each other. |
 | Then I pasted the part that would be the other side of the R, using another loose cardboard from the original box. |
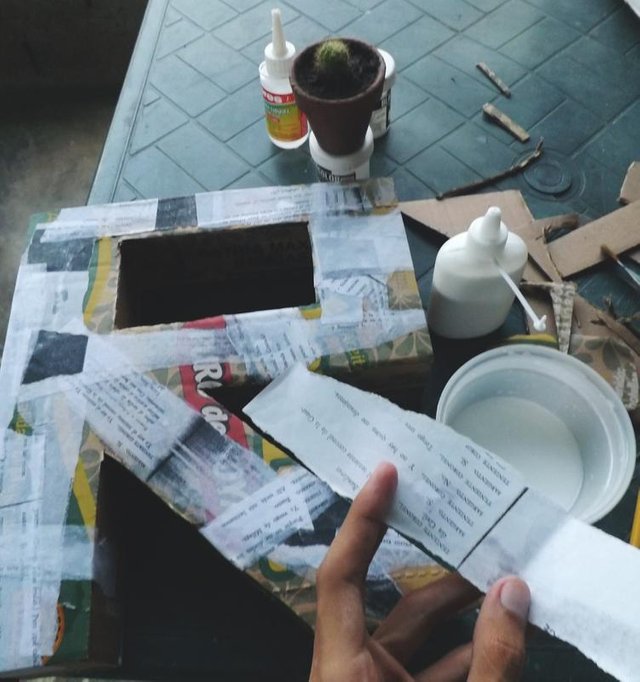 | And finally I started with the process of pasting newspaper or white recycling sheets , this in order to give more hardness to the box, at the same time leaving a smoother finish on the base, so that the time to paste the photographs, do not disfigure. |
In total, there were 3 layers of newspaper and recycled paper sheets that I applied on cardboard.
SECOND PART: THE DESIGN 💗
As the base (the R) was ready, only the design process remained. For this I made a couple of things:
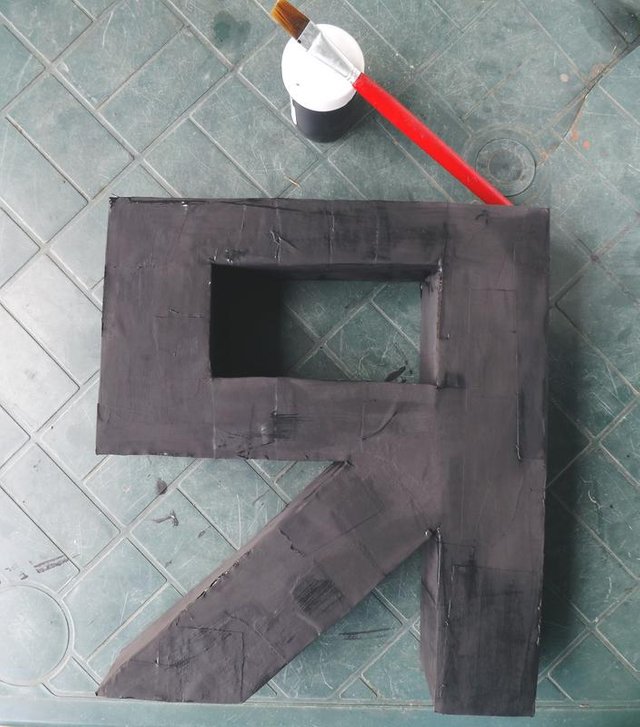
I painted the black box, since that would be my base: white and black.
I did not want to make it colorful because it did not convince me, I liked it more as I raised it before.
I had to throw 2 layers, so that the color was fixed better and the design of the cardboard that was underneath was not noticeable. Although I painted with more layers on the back (the one shown in the image) because it would be the base for stenciling or placing it anywhere, and therefore, would not look .
Then, in Word I placed the majorities of my photographs or the ones I liked the most, to print them and later, paste them ❣.
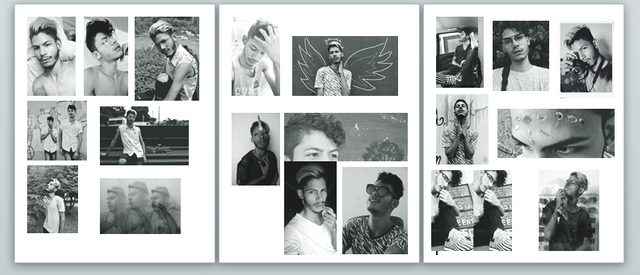
I thought there would be more photos, but it was not like that: they were accurate .
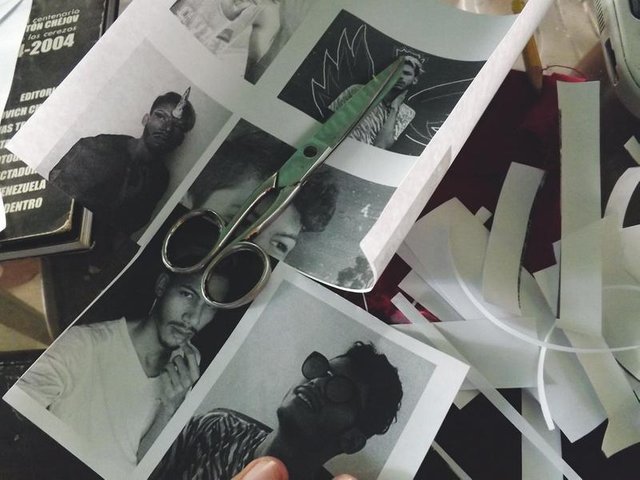
ONCE PRINTED , what came was to cut each of the photos.
No more, no less, flush.
Then, if the photographs are too big for the place of the box, I would cut them in little bit until they were exact.
And so they were stuck ...
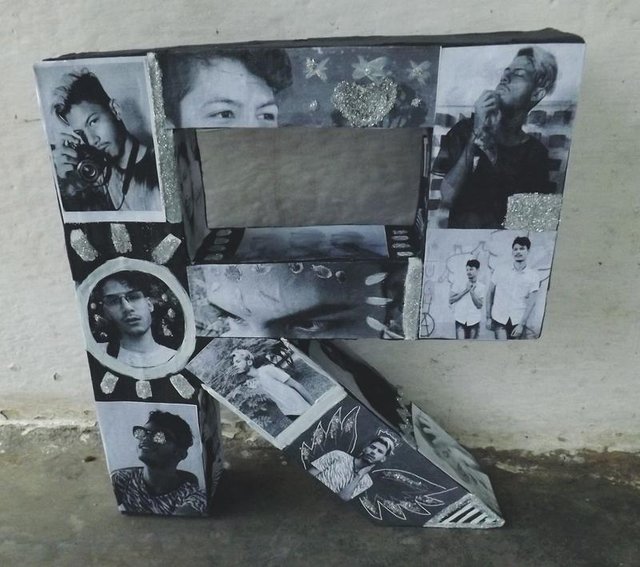 |  |
|---|---|
| I tried to distribute them in the best way possible, so that they had harmony with each other. I even dared to make white strokes with the brush, to give it a touch more like a Collage , and to apply it with silver glitter at certain points. | Once I had hatched it in the place that wanted it, I knew that something was missing ... and in the top part, so I looked for some items that I had in a box and intervened to match the aesthetics of the craft. What do you think? |
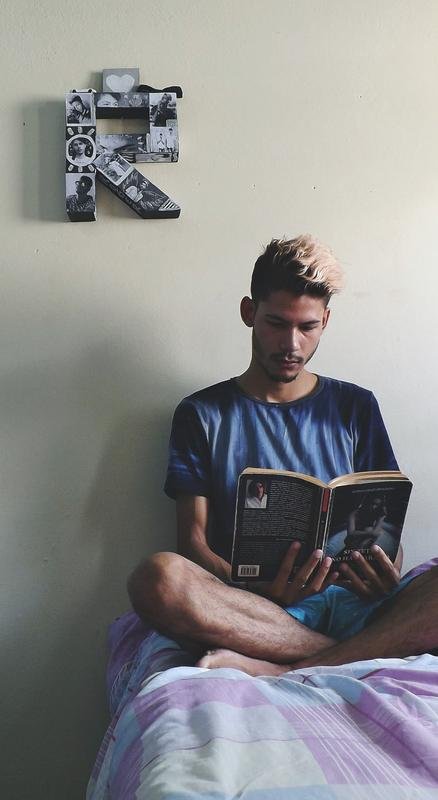
I think it's a very nice decorative object. From the moment I saw it, I knew I wanted to do it as it was.
I had not seen the step by step how to do it, nor did I bother looking for it. I knew that with my imagination and creativity I could solve it, and so it was. From time to time it is good to feel proud of little things.
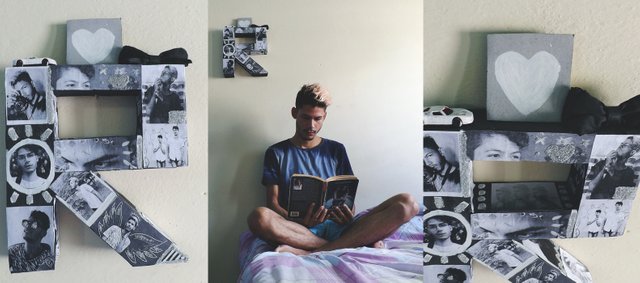
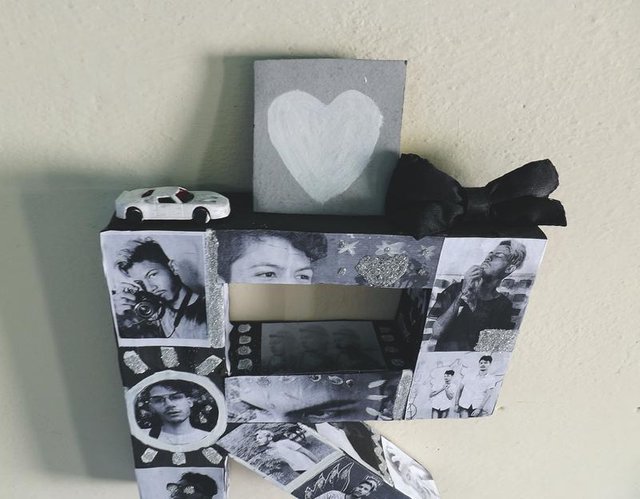
I think, as well as beautiful, a very good decorative proposal for the room. For some time I wanted to do something to cherry on the wall.
To enter, to wake up or to have someone see it is very rewarding, because I have personal things there like my photos, which show who I am and what I want to be.
The good thing about this whole process, apart from entertaining my mind and my restless hands, was to enjoy creating and converting my ideas into something material...
... they are sensations that are never forgotten 💞
And here a sample of all the angles:
Very creative, right? 😁.
How did you think? Would you dare to make one? Which part did you like the most?
I invite you to do this kind of thing, really it is very relaxing and you are very satisfied to see the results. If you are one of the people that is bad with your hands , encouragement! with the practice you become the teacher.
REMEMBER: nobody is born learned ...I want to thank the community of @slothicorn that supports with great fervor the steemit artists!

Greetings to all! Have a nice day/afternoon/night 💝
Excellent artistic work. I really liked your explanation.
Thanks 😎