Steem Cartoon : Process of Animation Background
The duty to complete a background animation is not an easy task especially to have a complete set of detailed painting in 2D animation. Every flow from scene to scene requires a good understanding of the colours. This posting I would like to share with you one of my favourite scene that I have painted in the 2D animation of Awang Khenit.
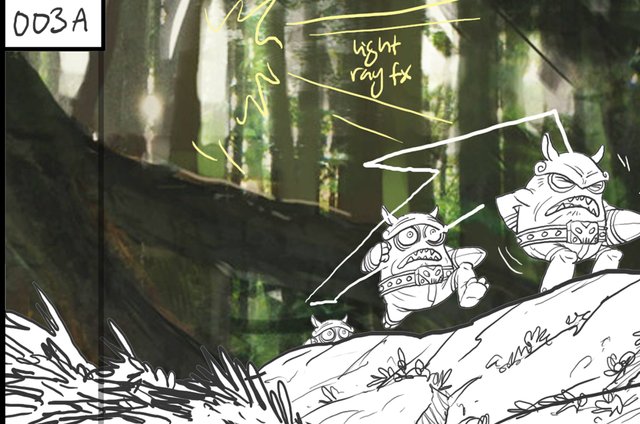
I start by scrutinising the story board and I move according to the note that is written by the animation director. This scene requires a ray of light from between the trees and the movement of the character (monster) that will be running fro the right side. I have to ensure that the key light comes from between the trees and the fill light will come from the opposite direction to ensure that the excited face of the monster can be recorded.
Now we start with a distant object first. I will start with the colour of the trees that is far and I will use low colour contrast.
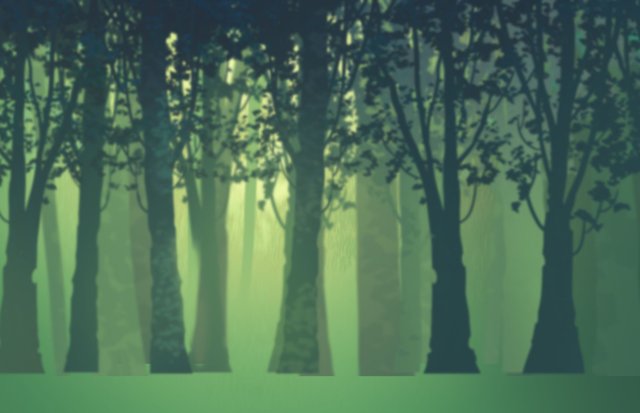
This process I will start by using two trees. From this trees we can cut and paste randomly to give it more numbers.
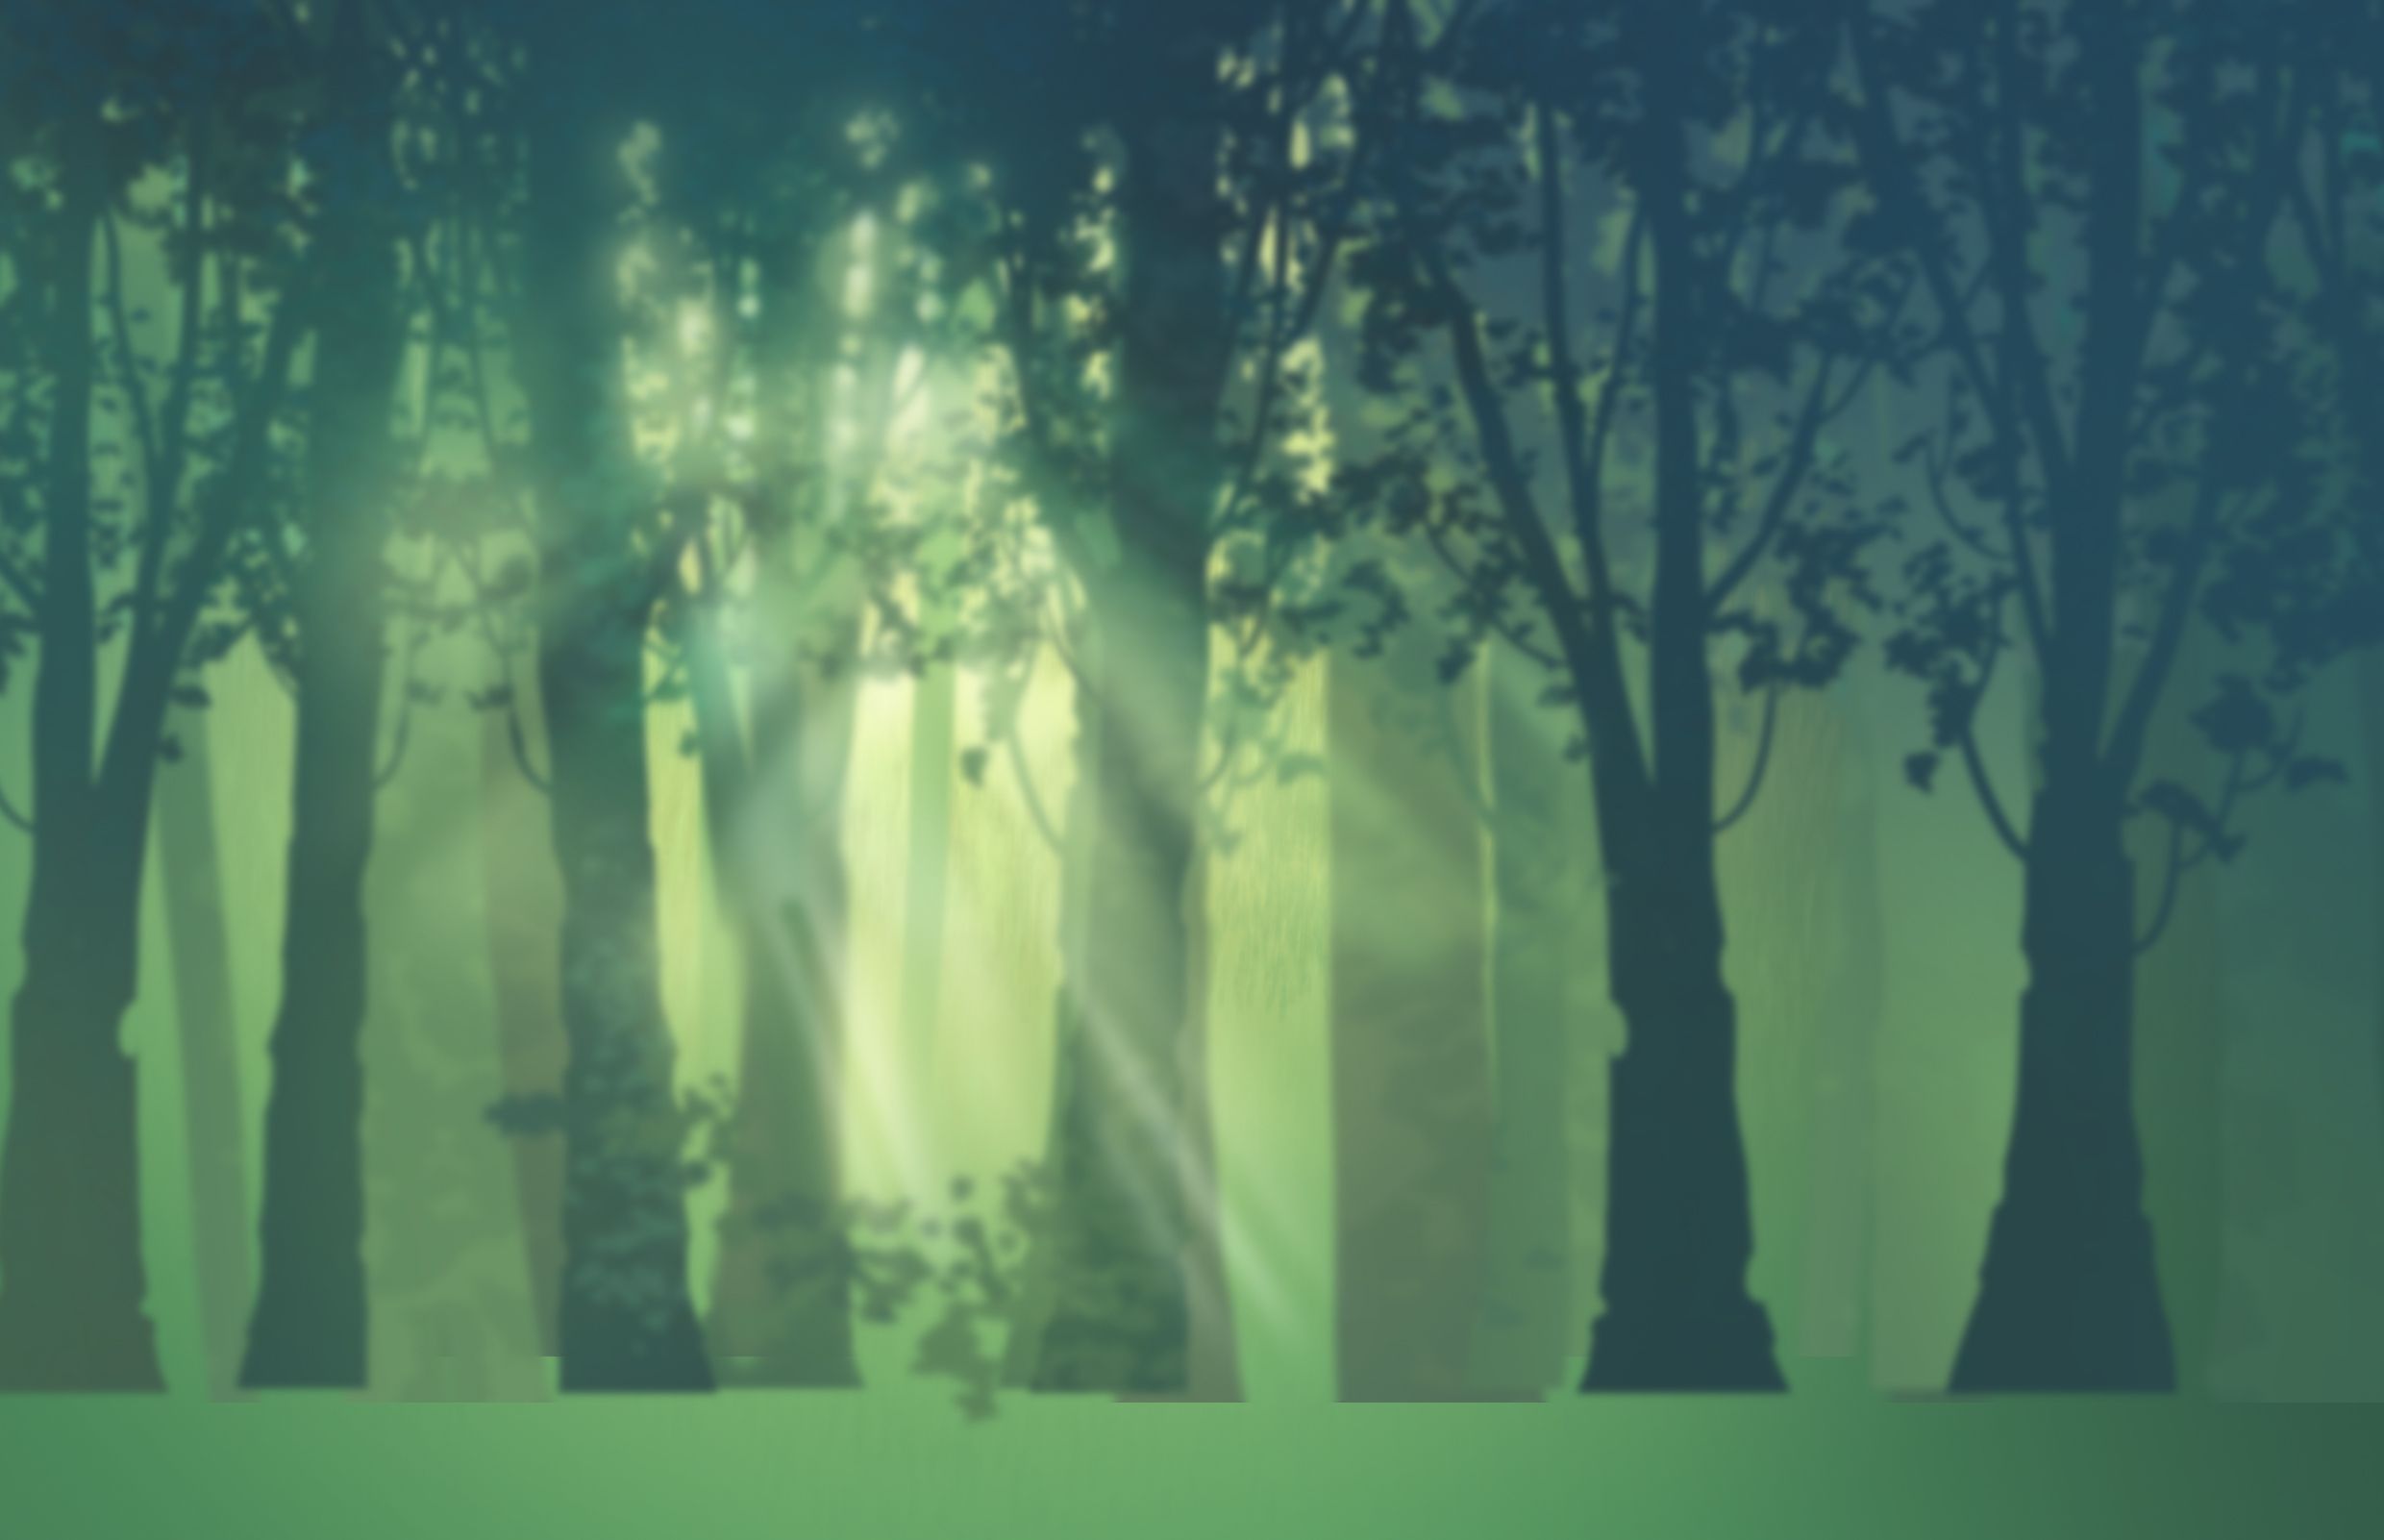
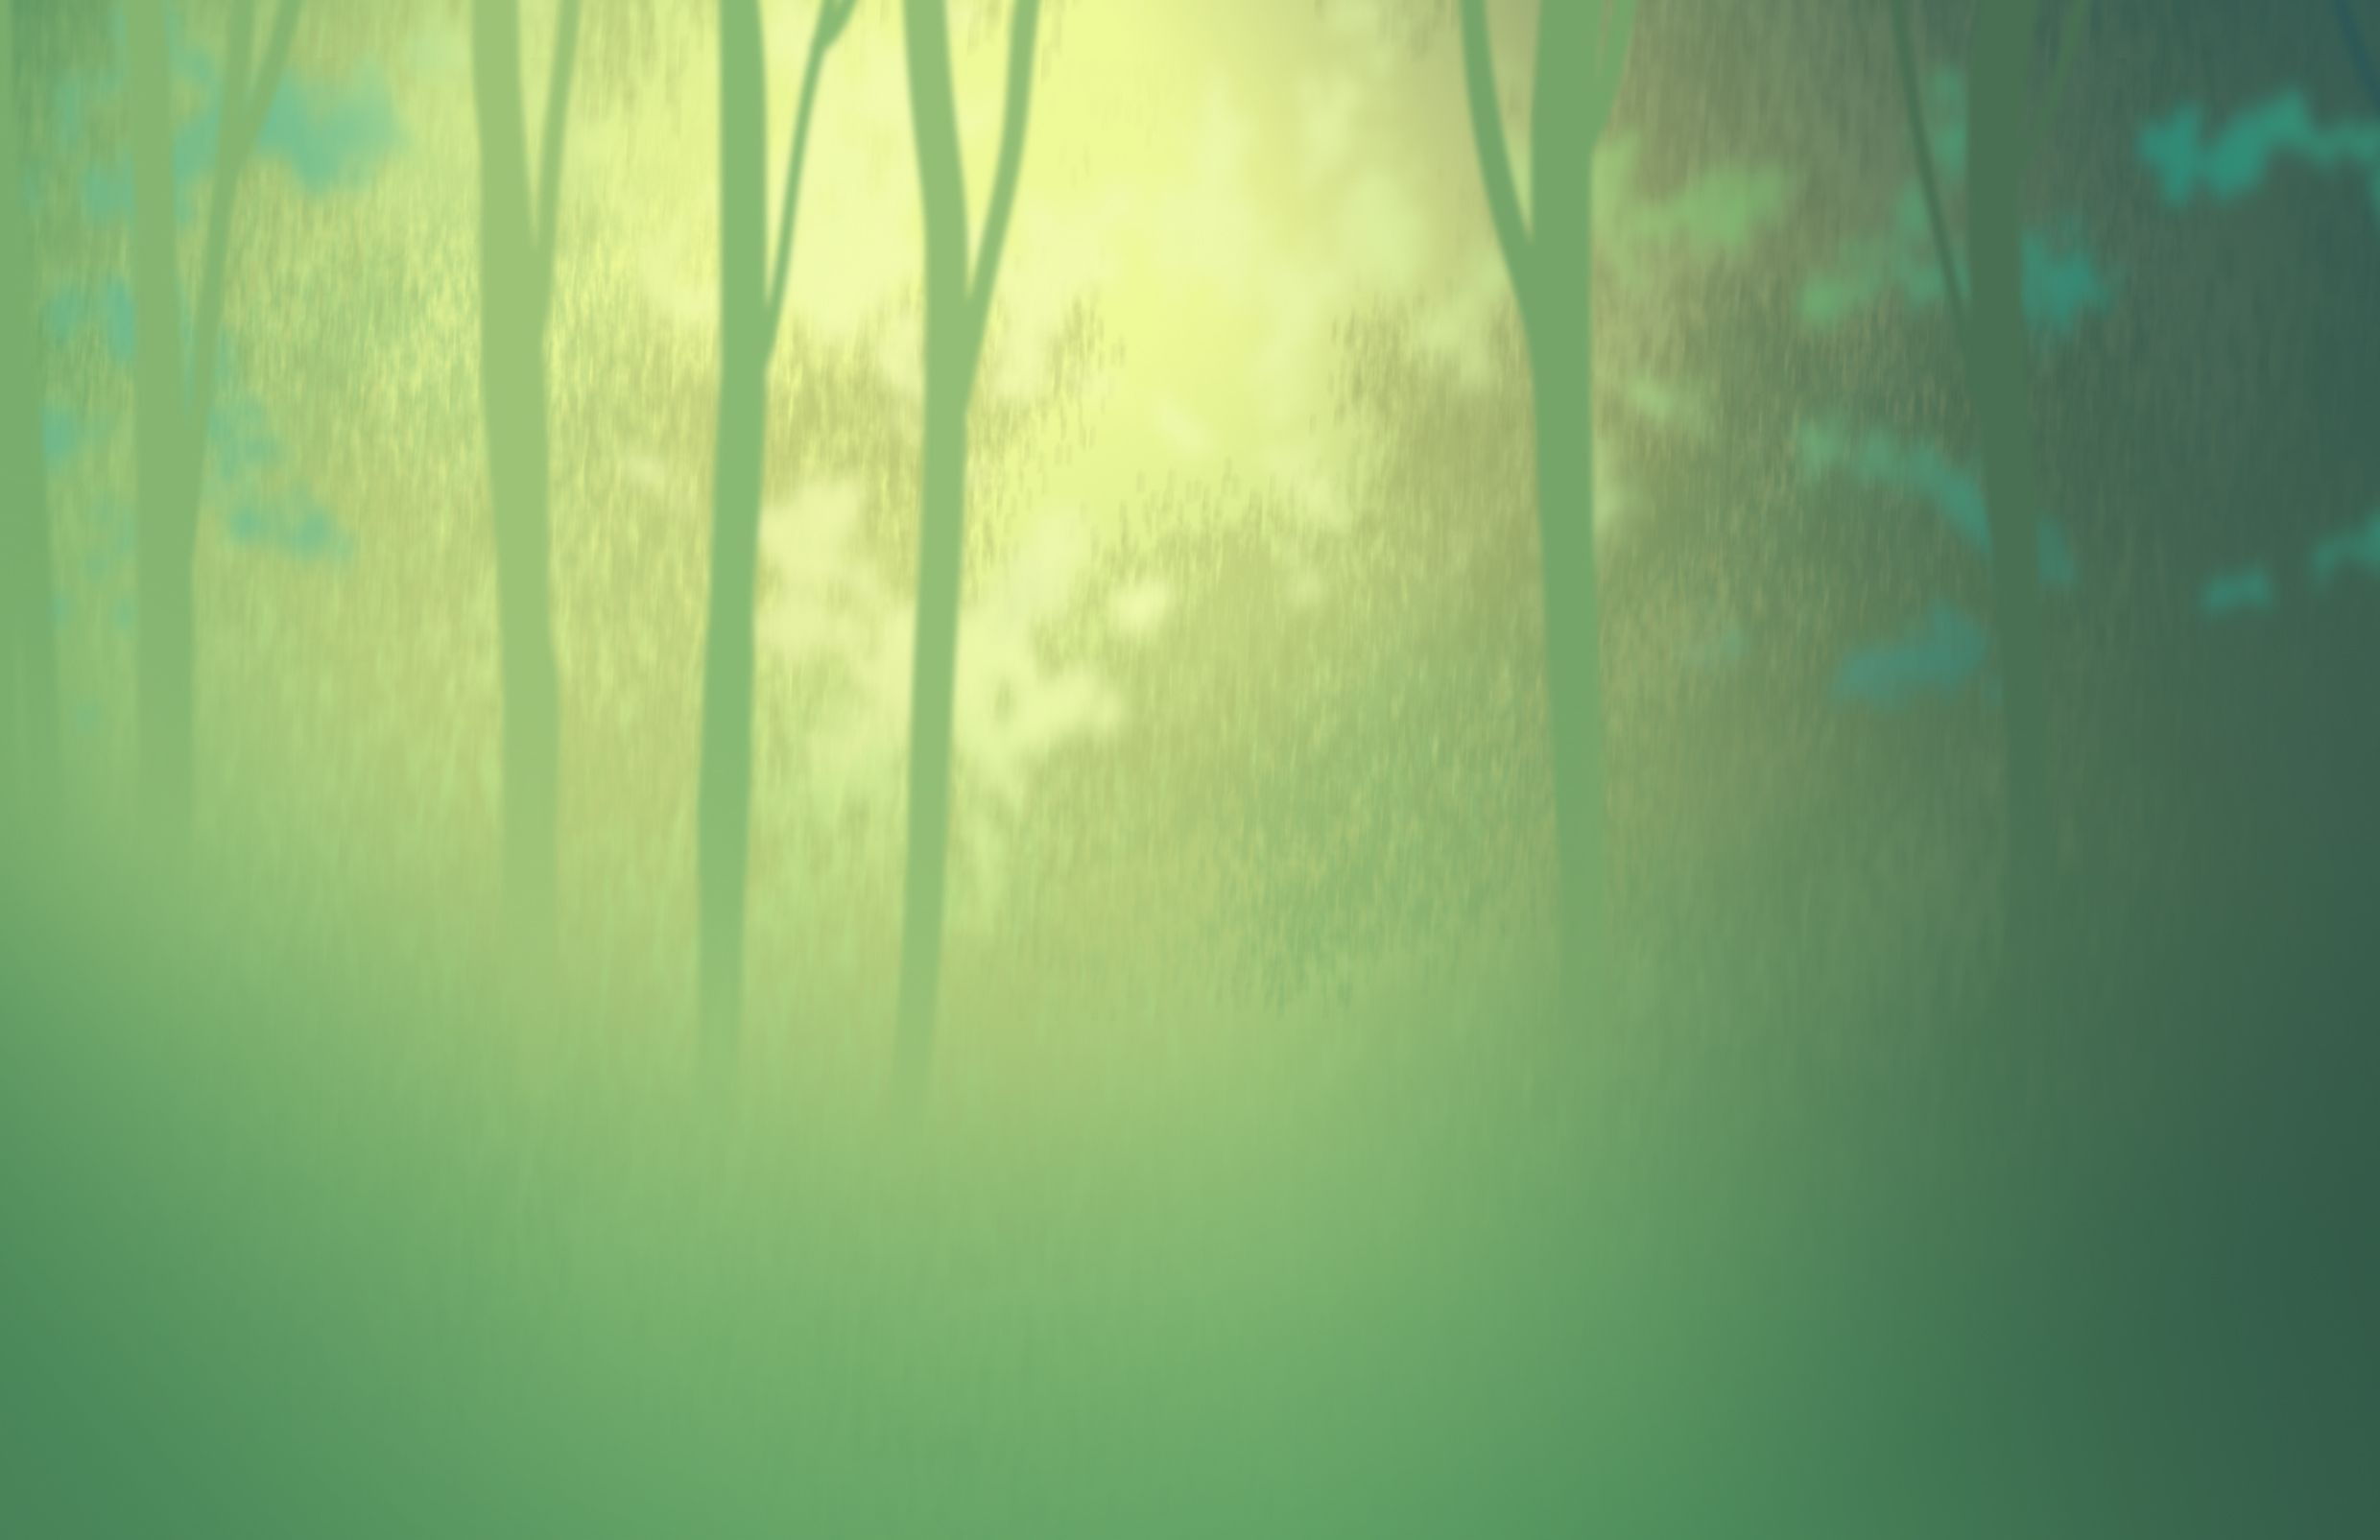
Once the trees are resolved, we can test with a bit of ray of light to see the suitability to the background. For the ray of light I like to use light yellow.
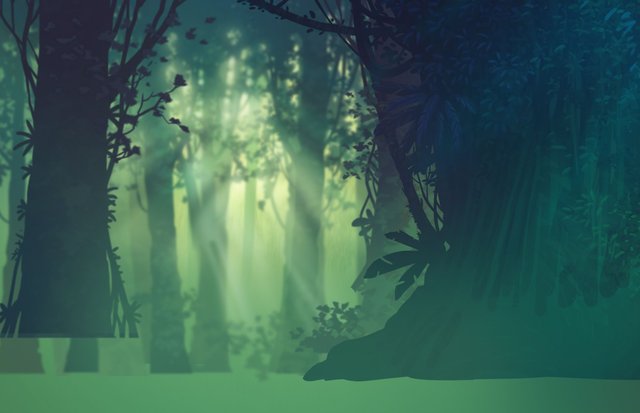
The addition of the front tree will give the distance between near and far. This process I use the colour blue to cool down the temperature colour for the scene.
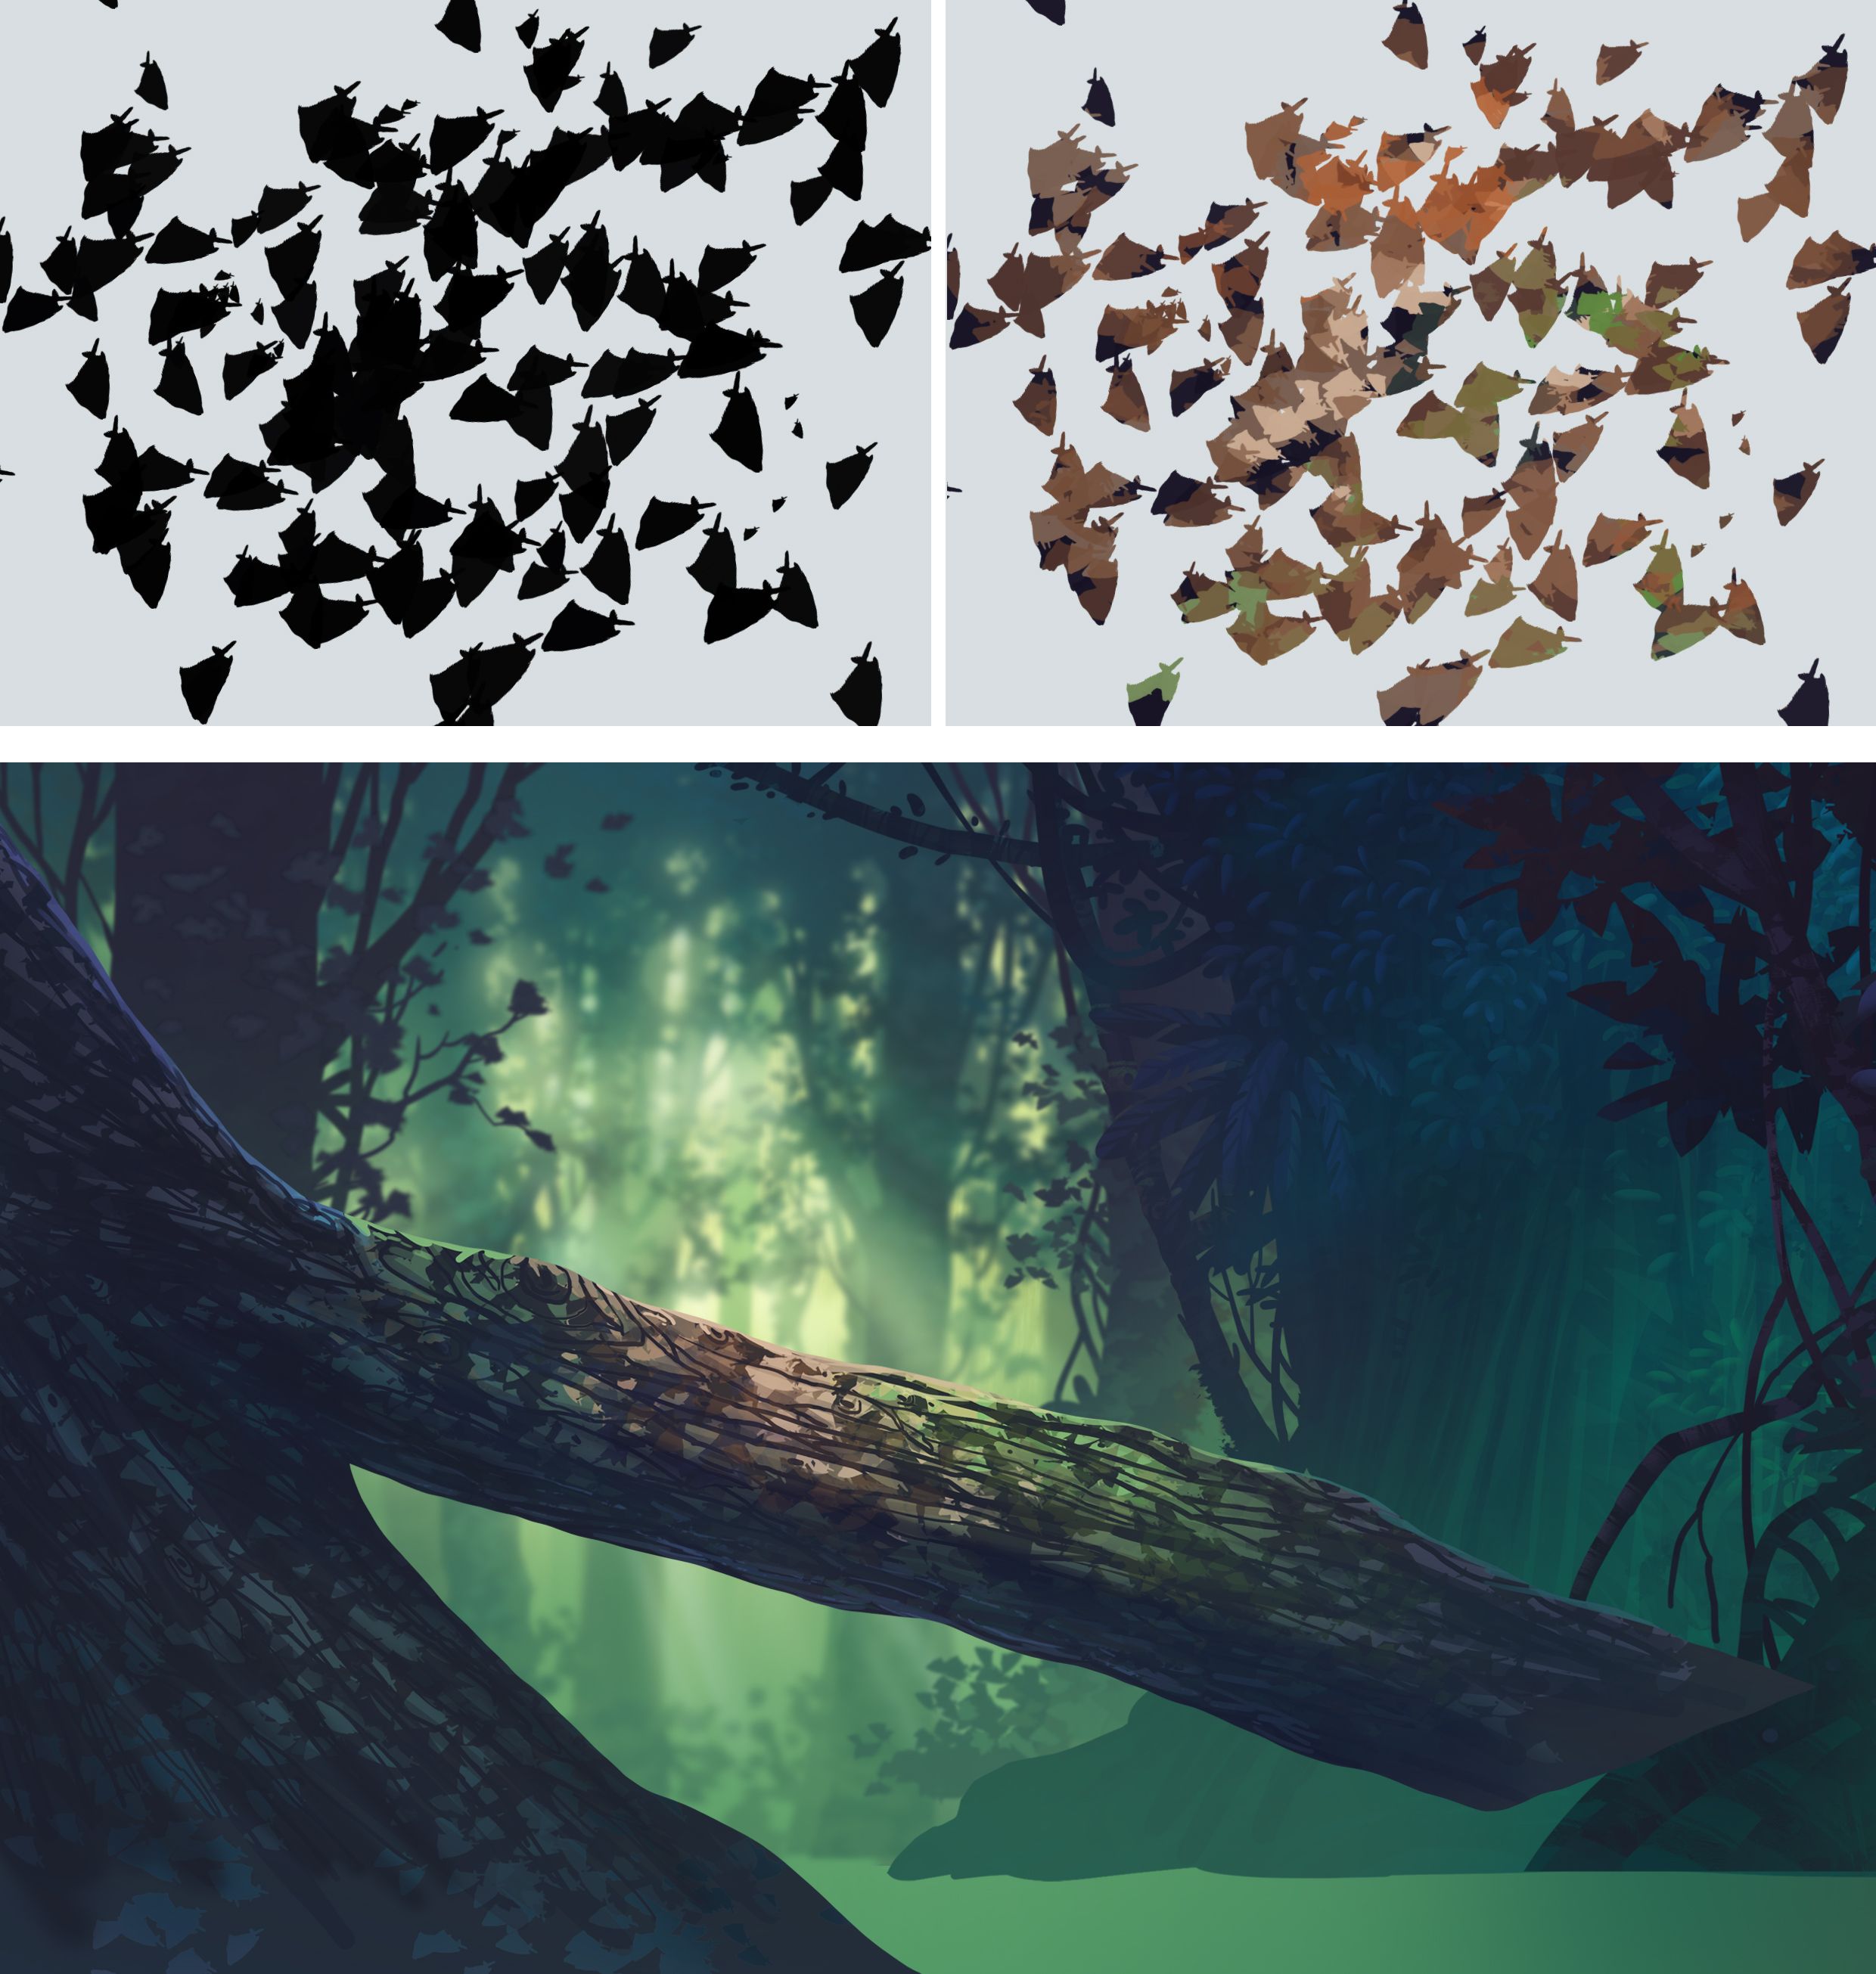
On the middleground, the fallen tree I will detail by using rendering. On the part of the texture of the tree I will use the fish brush that I have posted the last week. By using this brush the rendering process can be speed up.
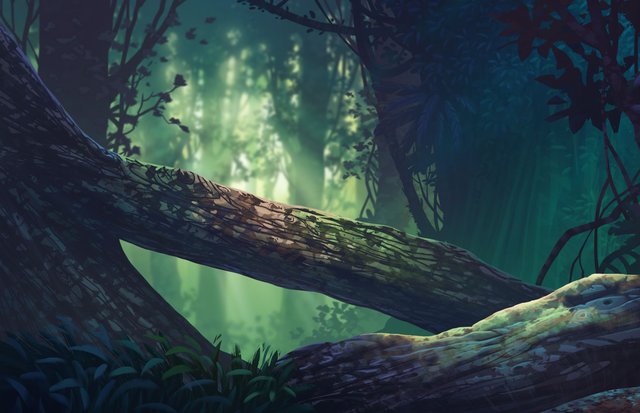
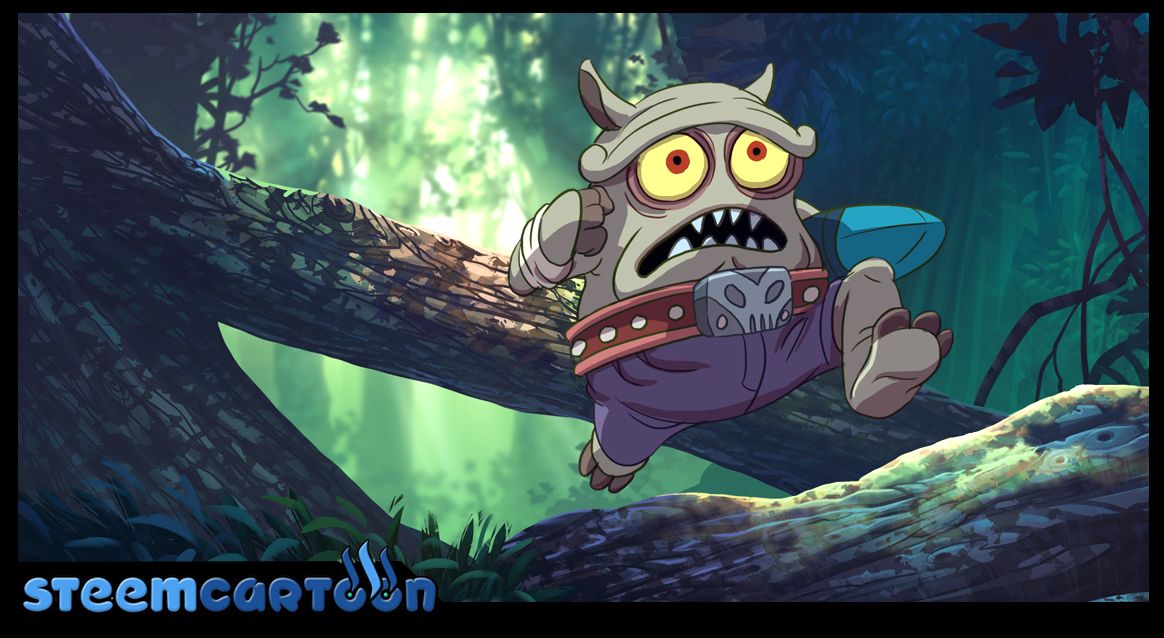
Now we are in the final step of the background process by adding the foreground. This part is the colour contrast that has to be added the details from the previous steps. I will include hard lighting on the stones on the part where the monster will to get the focus lighting on the monster then. Now the background is complete.
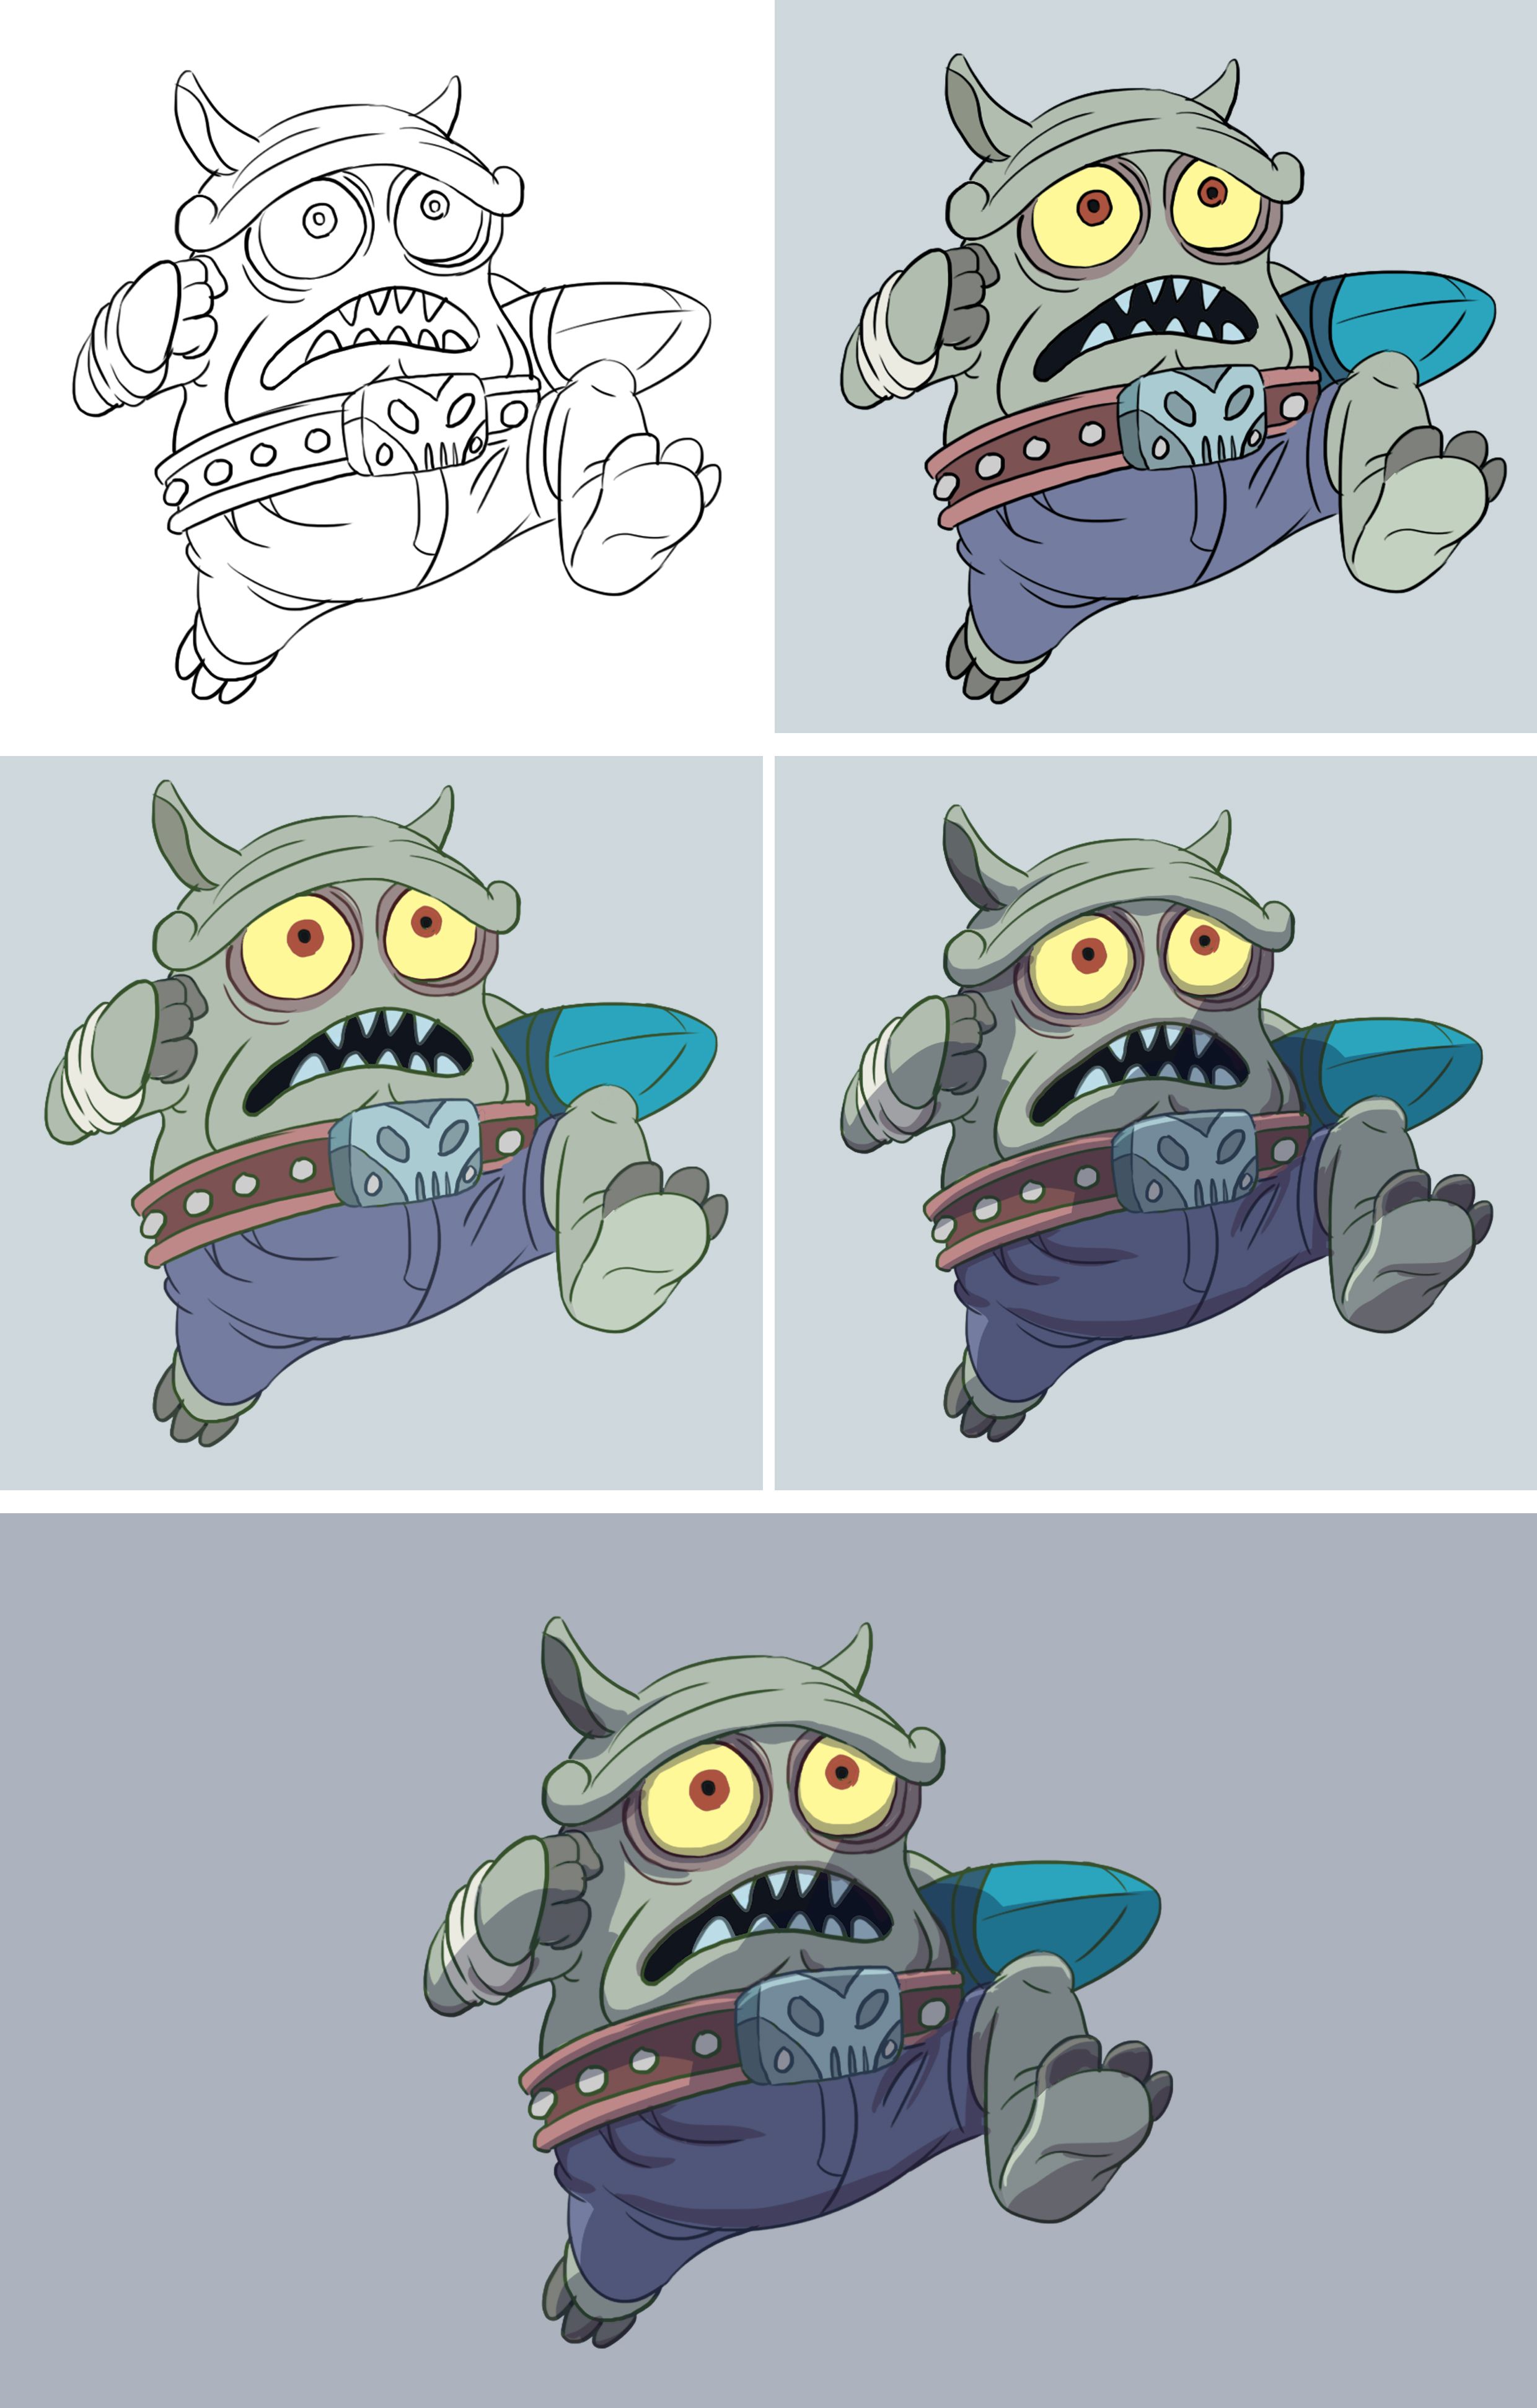
Once the background is complete we can include the small monster character.
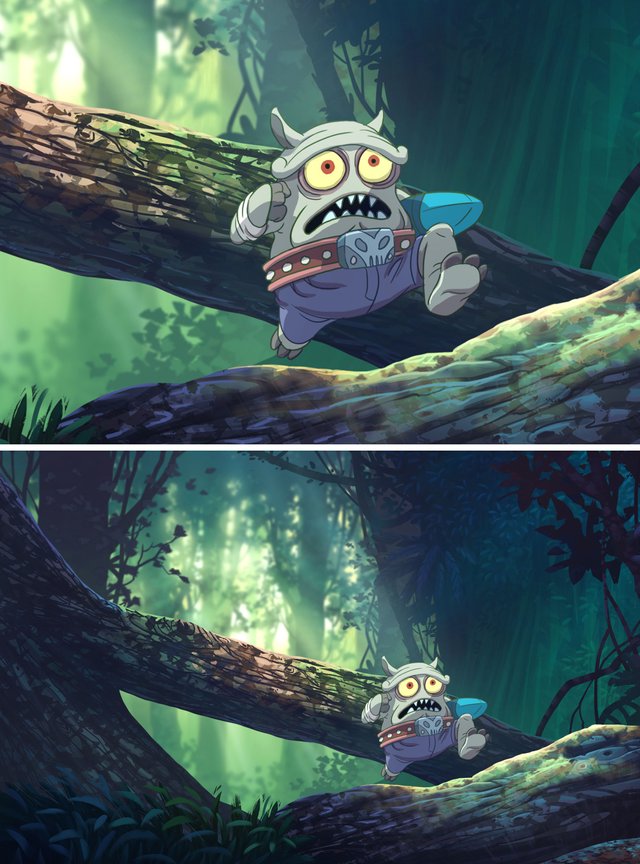
We can also match the character with the background. The colour of the character can be set for clean up and be a guide colour for this scene. That is all folks.

![]()
credit to @zomagic

good post men i like this
Thank you @haroldmateria
Awesome! So what's the little guy carrying?
Thank you @cobmaximus that one is magic gem.he stealing from the castle.
This is really amazing! I really enjoyed seeing this process.
Thank you... appreciate the appreciation...
Semua step buat sorang ke?
yep bro semua background paint ni saya buat sorang kecuali part storyboard ..thanks bro sudi melawat blog saya :)
This is awesome! Described fully process.
Thank you @archual hopefully useful.
Beautiful work
Thank you @erdavid glad you like it and thanks for visiting my blog
Pekerjaan yang sangat bagus. Anda sangat berbakat sekali dalam merancang sketsa kartun .. dan Anda memberi kesan berbeda di setiap posting Anda
Terima kasih @mutiarahmi dengan kata kata semangat anda. saya cuba yang terbaik semoga ilmu ini dapat di manfaatkan :).
I like the final result. Makes me want to know more of this little guy and the world he lives in. Good work!
Thank you @javicuesta .
ranum melihat kaler ini..terbaik boh..
Thank you boh ..hari hari hadam kaler terkadang naik muntah hijau bro haha
5 kali seminggu ye boh..mmg berpinau juga..tapi tetap maintain posting..two thumbs up! :)
So that's how that's done! I'll go check out more of your work.