STEEMCHURCH FARMS: The cultivation of tomatoes (Solanum lycopersicum)
With this new publication I would like to reiterate my support for the project STEEMCHURCH FARMS (@Farms) of @abiye, my regards to Mr. @Sirknight, for making this important humanitarian project a reality. With my publications, I want to contribute with this important cause. I hope that this new issue on agriculture can help many parishioners of the church, who today plan to develop their agricultural projects.
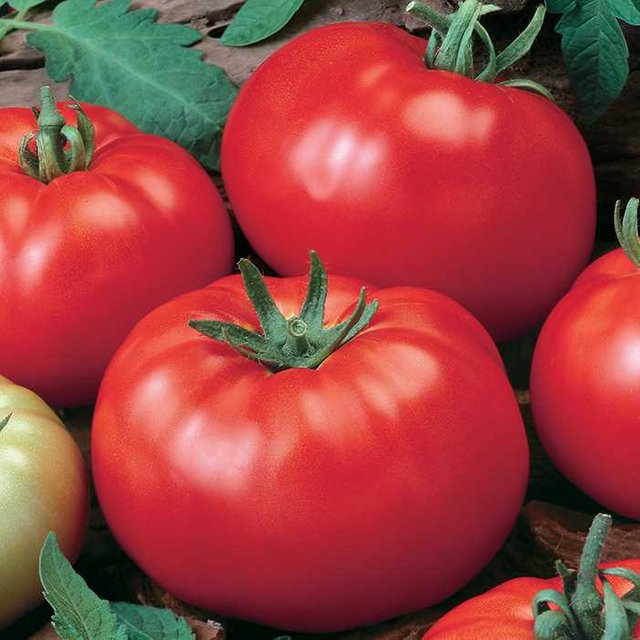
Solanum lycopersicum: Commonly known as tomato.
Source
The tomato is the fruit of the plant known as tomato plant, it is a herbaceous species, and is one of the most popular foods in Europe, due to its versatility and its ability to combine well with a wide variety of foods and aromatic herbs.
Characteristics of the tomato plant:
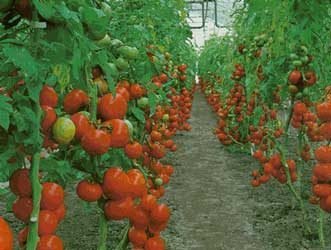
The tomato is a plant with a lot of foliage, and its size varies according to its class.
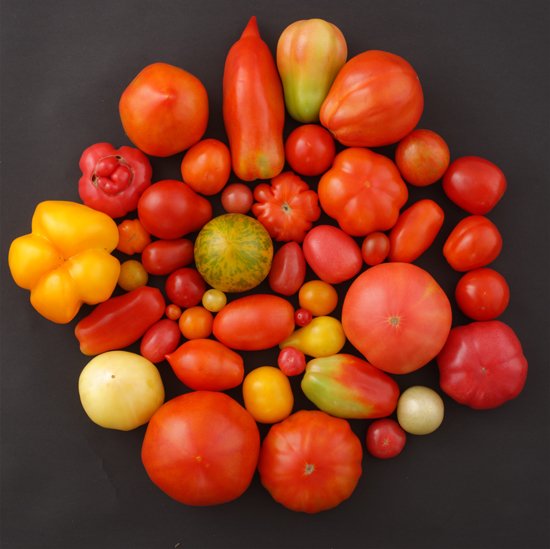
SourceThere are many varieties of tomatoes, with different characteristics regarding their shapes, size, color, weight and flavor.
Source
How to grow tomatoes
The cultivation begins with the development of seedbeds:
But for this we must define the following:
Irrigation system, in this case we will consider the use of irrigation through furrows or gravity.
The number of plants that we are going to plant, because the amount of seeds that we are going to buy depends on this, taking into account that for every gram of seeds there are approximately 750 to 800 seeds. And based on this we will manufacture our seedbeds or trays if it is the case.
We need to know the available area, to calculate the number of plants, and this can be calculated as follows: The tomato plants are planted in rows every 0.50 m between plants and 1.20 m between each row, which they will elaborate in a parallel, so that if we have available a plot of 8 m wide by 50 m long we multiply: in 8 m we would plant 17 plants in rows multiplied by the 50 rows.
Al conocer la cantidad de plantas, ya puedes comprar las semillas, pero les aconseja comprar un 30% más de lo calculado como medidas de precaución.
Now you can start our tomato cultivation
Selection of tomato seeds and their germination
This time I will start teaching you how to get our own tomato seeds, and then develop the seedlings, in case you decide to buy the seeds, this experience can be useful in the future.
Step 1
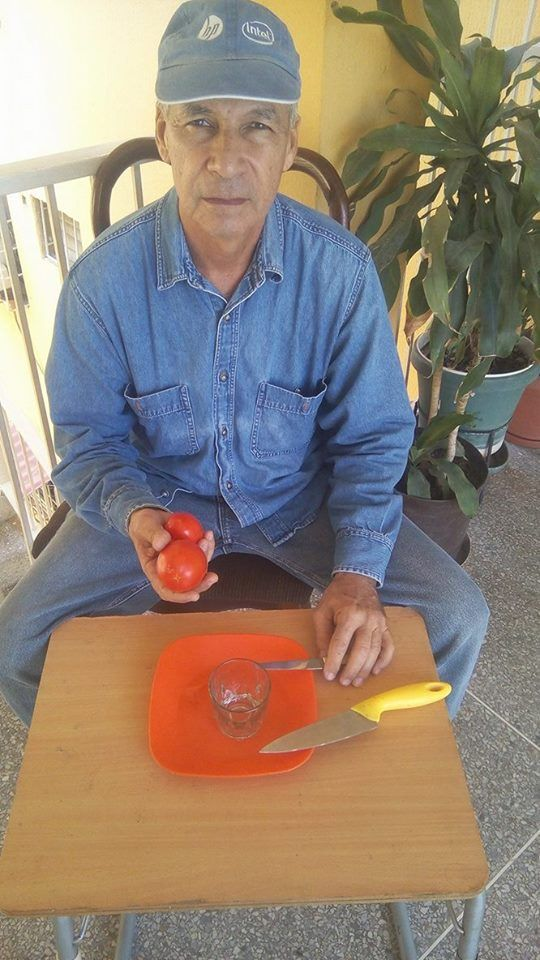
First, we must have fruits of good size and color, and these must be ripe, they can be obtained in the markets.
Step 2
Cut the tomato to extract the seeds, which we will place in a glass.

Step 3
Prepare a juice with the tomato pulp that remains after extracting the seeds, with the use of a juice extractor or blender without water, I recommend you if we use the blender, strain the juice, then add it to the seeds and wait 48 hours to ferment.
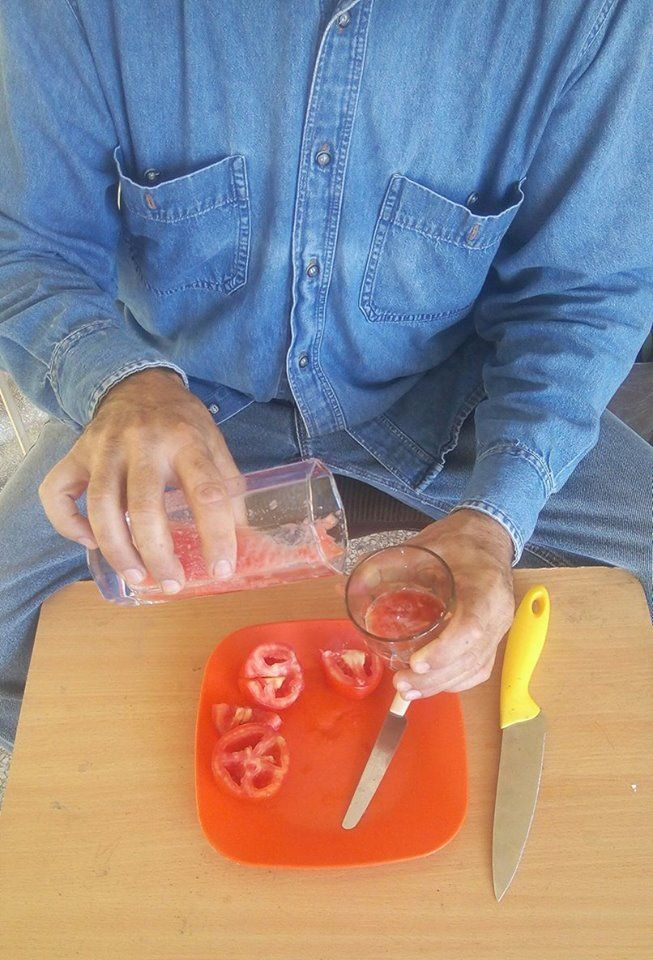
This step is important, because this fermented juice will clean and disinfect the seeds.
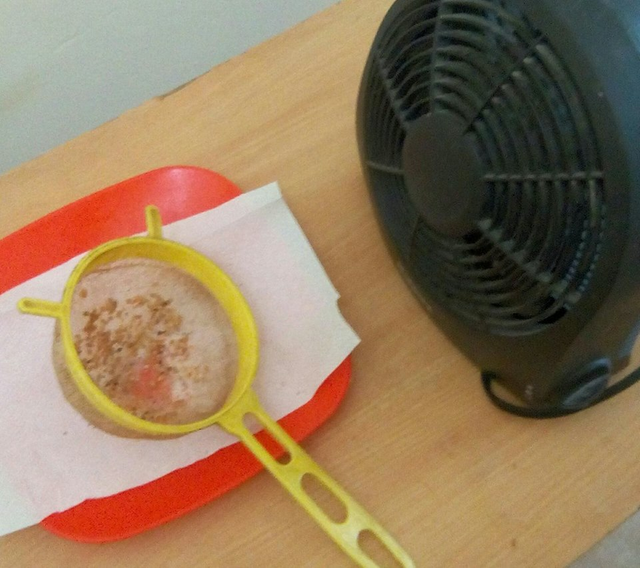
Step 4
Wash the seeds and let them drain in the colander, and proceed to
drying with the use of an electric household fan
so that they lose moisture, then put 30 minutes a day for 3 days outdoors, if we expose it to the sun, we could cover the seeds with some mesh so that the sun's rays do not directly affect them.
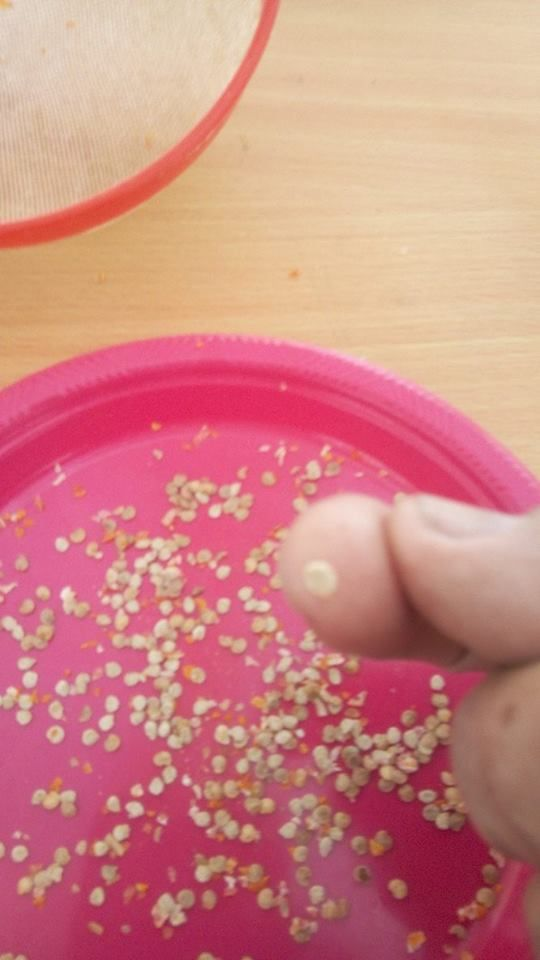
Step 5
Once we have the seeds dry, proceed to separate them by hand and save them in paper envelopes, in the following photo you can see how the seeds have been after this process, they will look clean and ready to save or to prepare the seedlings.
Preparation of the germination trays:
Source
The materials to use:
• Germination trays of 168 to 200 cells, plastic or anime
• Sifted earth mixed with wood sawdust, manure or compost
• A small shower
• A small gardening palin
• One gram of seeds per tray
• Wooden sticks to open the holes in each cell.
Next step:
• Fill the cells with the sand mixture
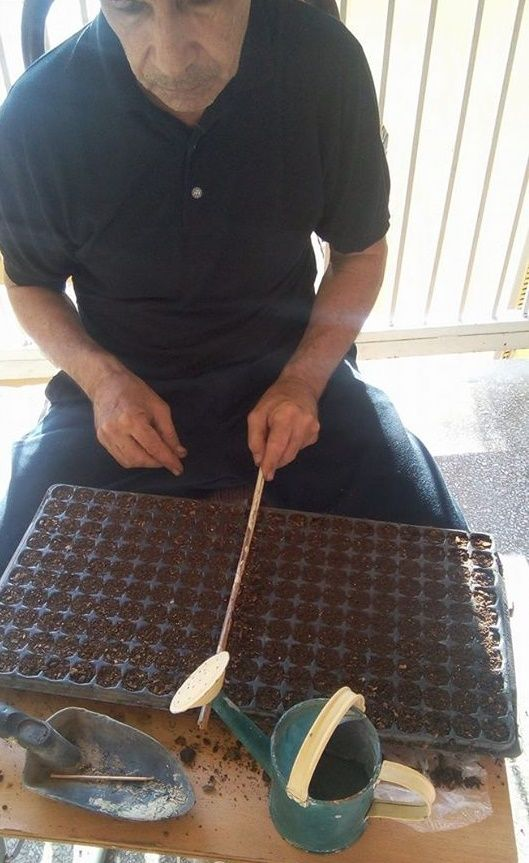
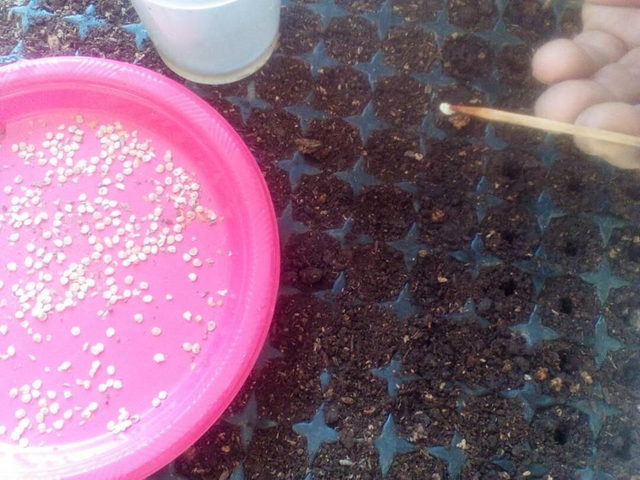
• With a toothpick open the grooves in the earth, in each cell.
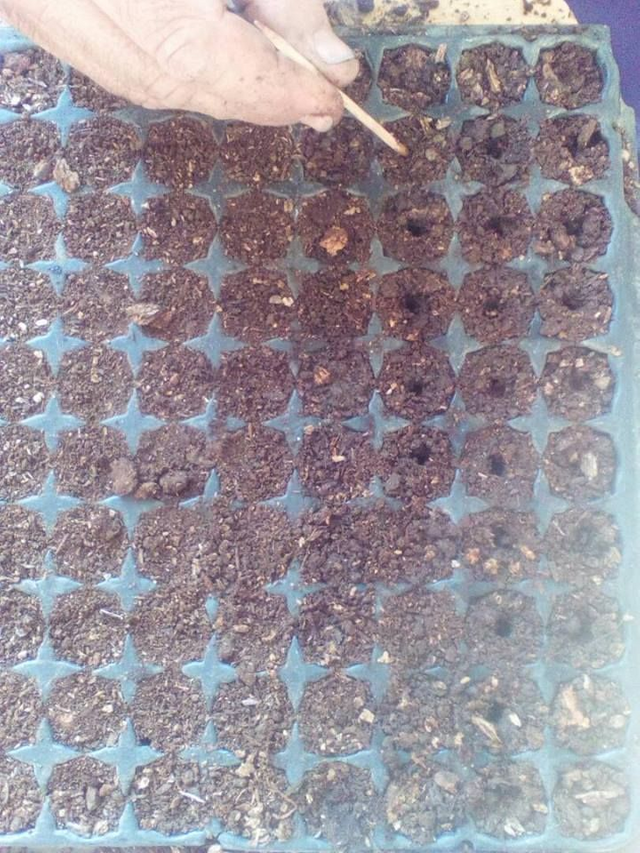
Place the seeds on a piece of paper, in this case I have placed them on a plate, use the wooden rod and the wet tip, touch the seeds, and you can see that they adhere and then place them in the holes to a depth of 4 by 5 millimeters and successively until the tray is full, then covered with the same sand.

Observe how the seed adheres to the wooden stick:
So:
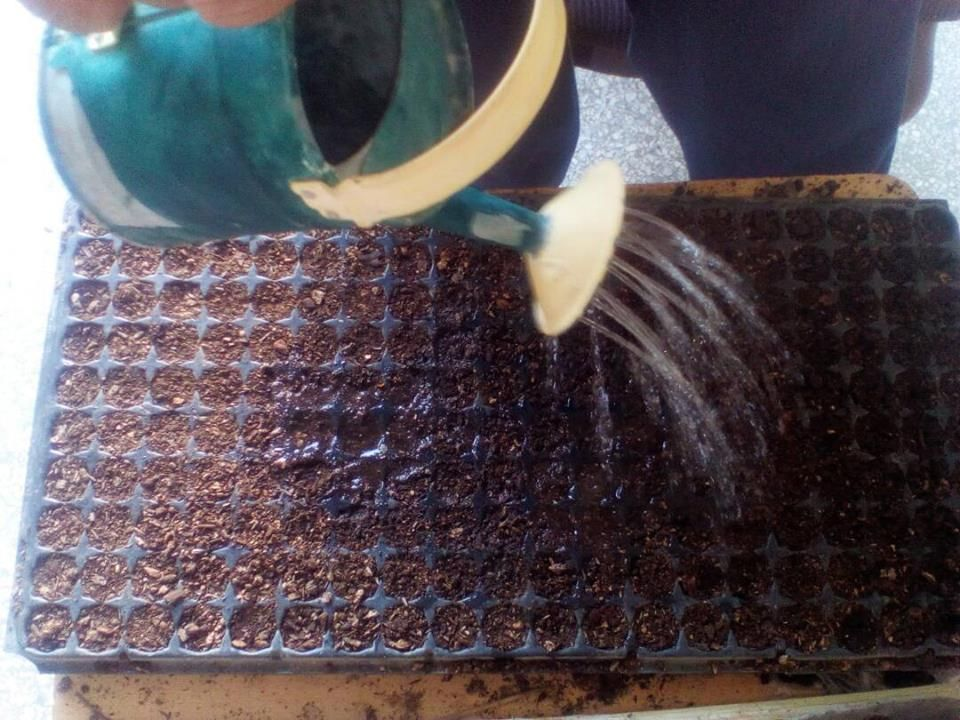
We place the trays in the shade and apply a daily watering with little water, just keep the soil moist until it germinates and then continue with the waterings in the morning and in the afternoon.
If we want to accelerate the germination, we can place the trays inside black bags, we will try that the plastic does not make contact with the tray, which will remain for 3 days in this hermetic environment, which simulates a germination chamber, but should check them continuously, because when germinen will go in search of light and if we neglect, we will find very thin and stretched seedlings and this would be fatal.
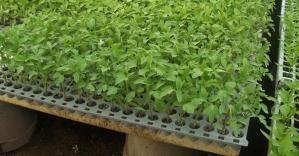
Germination time, fertilization and control of pests and diseases
The seeds germinate between 5 and 8 days, after having passed the 10 days, they will begin with the application of twice a week, in minimum doses, of foliar fertilizer with high content of phosphorus to stimulate the growth of the roots, and To the prevention of fungi, apply once a week a fungicide based on Mancozobet, in minimum doses.
To avoid using insecticides, I prefer to cover the seedlings with meshes to protect them from pests and insects such as mites, whitefly or other butterflies, which can deposit their eggs on the leaves. The seedlings will remain in the trays for 21 to 25 days, until they reach a height of 12 centimeters, considering themselves suitable to be transplanted.
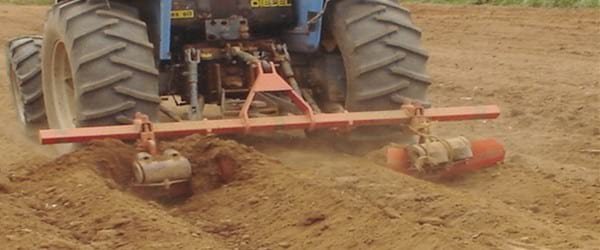
Preparation of the land, preparation of irrigation furrows and transplant
The plow:
Before the transplant, the area to be planted must be ready, for this it is necessary to plow the land well with the use of an agricultural tractor with harrow discs, it is important that the soil is loose and free of clods and weeds. Then proceed to furrow with the mechanical furrower, placing the hooks to a measure of 1.40 meters. so that the separation between line and line is 1.10 meters. The land must be divided into parcels of 10 meters between one and the other.

Source
Source
The transplant:
Once the seedlings have completed the time between 21 and 25 days, and the height of 10 to 12 centimeters, we proceed to take the seedlings to the field for the transplant, this work must be done in the afternoon hours to avoid that the damage the plants. But for this work you must perform the following practices:
- Wet the irrigation furrow well, it is recommended one hour before the transplant.
- With the tip of a wood, open the holes to place the seedlings, to a diameter of 4 centimeters and every 50 cm; Just at the level of the watermark and on only one side of the furrow or irrigation line, we must ensure that the small holes are not very deep, it should only cover the foot of the stem or the ground pylon of the roots.
- The seedlings should not be irrigated in the trays, so that when they are removed from the trays, the substrate is preserved in the roots.
The risks:
Daily irrigations will be carried out in the first 3 days, then inter-day irrigation will continue, and every two days, and then the important thing is to keep the soil moist and avoid puddles.
Tomato tutored:
The tuteado in the tomato, consists in maintaining the erect plant and avoiding that the leaves and especially the fruits touch the ground, improving like this the general aeration of the plant and favoring the use of the radiation and the accomplishment of the cultural works (destallado, collection, etc.). All this will have repercussions on the final production, the quality of the fruit and the control of the disease.
The fastening is usually done with polypropylene thread (raffia) attached at one end to the basal area of the plant (bundled, knotted or tied by rings) and another wire located at a certain height above the plant (1,8 -2.4 m above the ground). As the plant grows, it is tied or tied to the guardian wire by rings, until the plant reaches the wire. As of this moment there are three options:
Lower the plant by picking up the thread, which entails an additional labor cost. This system is beginning to be introduced with the use of a clamping mechanism called "Dutch" or "hangers", which consists of placing the hangers with yarn wrapped around them to be dropped as the plant grows, holding it to the thread through clips In this way, the plant always develops upwards, receiving maximum luminosity, which is why it improves the quality of the fruit and increases production.
Hilling:
This hilling will be done after 15 days, and this consists of bringing soil to the part at the foot of the stem, in this work is used for the first granulated fertilizer of slow action, formula NP-K 12-24-12 at 15 days the second hilling.
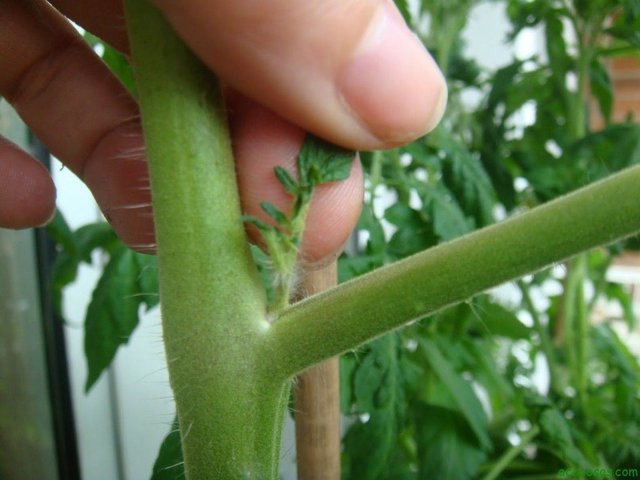
The destallado in Tomato.
Source
This task consists in removing the axillary buds, to the plant, which are called pacifiers, they are little daughters that if we let them grow they become a branch that are born in the bifurcation between the main stem and the branches, these suckers are torn making a Clamp with your fingers and pulling down gently.
Fertilization plan:
- Five days, after the transplant, apply the first fumigation with sprinklers, using foliar fertilizer with high content of phosphorus + fungicides.
- After ten days, apply the second fumigation with foliar fertilizer complete formula + fungicide + insecticide. And continue with the weekly fumigations until the end of the vegetative cycle.
Control of pests and diseases
The main pests are insects such as red spider, whitefly and aphids. They are seen in the leaves with the naked eye; for this I like to water my plants, instead of having some automatic system, those five minutes that lasts the watering of all the macetohuerto, take advantage to see each plant, if you need fertilizer because it has yellow leaves, if it is attacked by spiders and you have to help her defend herself, or remove her pacifiers. These pests are going to be treated mainly with soap and water, we make a solution with biodegradable soap and we spray it on the leaves and stems in abundance, this kills and drives away the insects, it can be applied a couple of times a day in two or three days the problem must be solved, remove also with the hand, the insects and eggs of the leaves gently. Source
Another plague are nematodes in the roots according to my experience are not very common in the cultivation in pots, what I do is always leave old roots of plants already cut in the pots, the nematodes like a dead root more than alive. Source
Approximate yields in the production of tomatoes
In terms of yields, I can tell you, based on my experience, that every thousand tomato plants produce an average of 3,500 to 4,000 kg, and particularly when I have planted tomatoes, my production has always been above 3,500. kg per thousand plants, I think this has been an important data for your projects.
Time for the new chapter
To begin
New people, new places
New love….
An adventure
The possibilities are endless
This is wonderful... SteemChurch farm is really expanding
Yes friend @andymandy01, Steemchurch Farms, it's a great project, we can already see its positive effects, greetings brother.