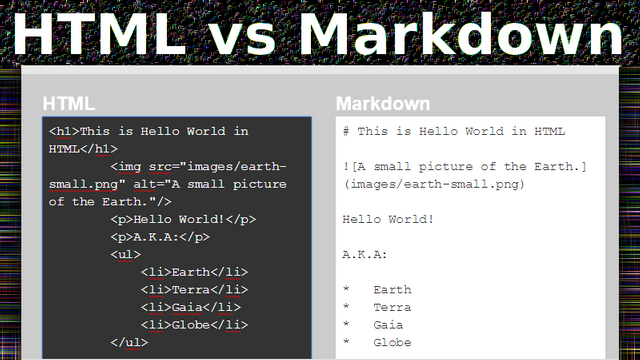
HTML vs MARKDOWN

Do you know HTML?
If you already have time publishing articles in Steemit for sure you had to research what is the "MarkDown" and the "HTML" this because to format your publications to beautify them you need to manage their syntax.
In Steemit to create an article you can use as you well know any of these two languages, you can even combine them, there is the debate of which of the two is easier to use, if you are like me from the old era of "Word Perfect" and of the world before the "WYSIWYG" 😜 then you will not have any problem with HTML, if you do not like writing so much code using tags and you are able to remember symbols like *, # etc, then you should use "MarkDown". this article we will not touch the MarkDown aspect.
My very personal opinion:You must learn "HTML", why?
- It is the original and universal markup language of the Web.
- It is recognized by all browsers without exception.
- Knowing the HTML, starts you in some way in Web design.
- Also because it is easier to remember words than symbols.
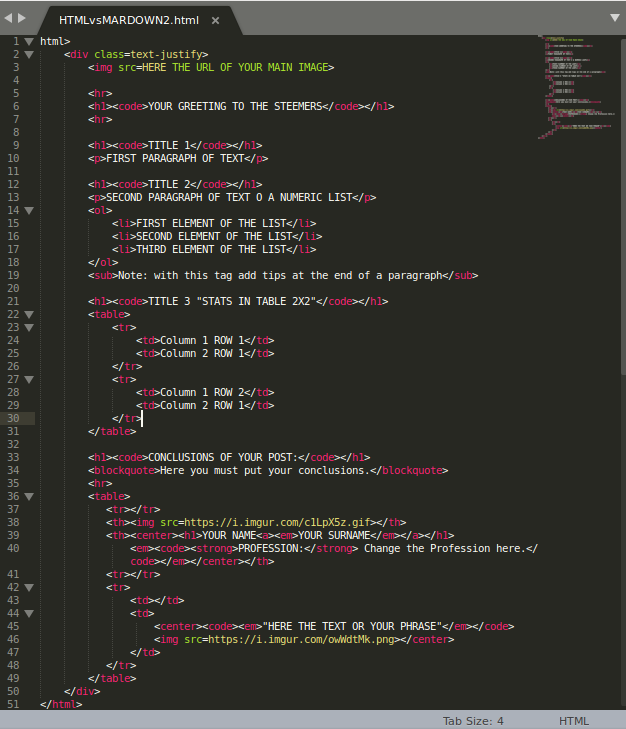
Today I'm going to give you a simple way to learn "HTML" specifically for Steemit, using what I call a standard template like the one you see below.

Basically you must copy the code and insert it in the "Raw Editor" of Steemit and modify where I indicate.
Now I'm going to describe each of the labels used in the template. With these you can do enough to give the desired format to your publication.
Tag: <html> </html>
Although the editor steemit do not need it or not required we recommend you put it, this label is the main that is what defines that we are using this markup language, all code or all the other labels should go inside of them.
Tag: <div class=text-justify> </div>
The enunciation of this tag allows access to a class that allows to justify (text-justify), put to the center (text-center), put to the left (text-left) or right (text-right) all the text that is inside. It is the second tag to use in the case of the template, you can use so many <div> as necessary within an html document. You can also use it anywhere within the same document.
Tag: <h1> </h1>
This tag is the most used, because it allows you to convert your text into a title, that is, with this you can put different sizes to the text to use as titles or sub-titles.
| |
| |
| |
| |
| |
|
Tag: <code> </code>
It allows to insert code of the majority of programming languages, in the case of this publication we use it to shade the titles of headers.
Tag: <p> </p>
It allows us to divide the text into paragraphs, each time this happens a line break occurs. When writing a publication is the best way to work.
Tag: <hr>
Inserts a horizontal line that is generally used to separate section of text within an html document. There is also a similar tag quite useful <br> this makes a line break. It should be mentioned that these tags do not have a closing tag like most html tags.
Tag: <ol> </ol>
Generates a numerical list This also belongs to the set of labels <ul> </ul>
| Type | Code | View |
| Numeric |
<ol> <li>One</li> <li>Two</li> <li>Three</li> </ol> |
|
| Symbols |
<ul> <li>Symbol 1</li> <li>Symbol 2</li> <li>Symbol 3</li> </ul> |
|
Tag: <center> </center>
It allows you to center both a text and an image within a document. It basically has the same centering functionality that the tag <div> has.
This is a text in the center.
Tag: <img src="url.png">
This tag allows us to insert an image, where "img" is the name of the tag, "src" is the abbreviation of "source" and "url.png" represents the address where your image is hosted, it should be noted that the main formats of images that support browsers are .png, .gif, .jpg
Tag: <a href="url"> </a>
Important tag that allows us to link a text or an image, where "a" is the name of the tag, "href" is the abbreviation of "Hypertext reference" that allows us to place the url to link.
| <a href="url-of-the-template">Template</a> | This the view: Template |
Tag: <sub> </sub>
Usually used to add notes at the end of a paragraph or document, defines a piece of text that should be displayed, for typographical reasons, lower, and generally smaller, than the main section of the text, ie, in subscript. Otherwise, the <sup> tag that shows the highest text is superscript
| This is a text in subscript | This is a text in superscript |
Tag: <blockquote> </blockquote>
This tag creates a quote in block, generally used to highlight an appointment by itself or another author, in this case we use the template to highlight the conclusion.
In HTML remember words is less difficult than remembering symbols like in Markdown!
Tag: <strong> </strong>
Tag that allows you to place a text in Bold, you can also use it as <b> </b> has the same effect, "b" is the abbreviation of "bold"
| Using <strong> </strong> | Using <b> </b> |
| This text is in Bold | This text is in Bold |
Tag: <em> </em>
It allows us to make "Emphasis" in the text, that is, it allows to place the text in "Italic", you can also use the tag <i> </i> it has the same effect.
| Using <em> </em> | Using <i> </i> |
| This text is in Italic | This text is in Italic |
 |
ROGER PAEZPROFESSION:Systems Analyst and Programmer |
|---|---|
"User: @ElGuaroDigital"
 |