Hey Steemers ! Create better posts an easier way....

I wondered how to have better versatility and control over content creation in Steem posts and looked for an improved way to manage that process.
The built in editor was difficult for me to manage and after losing hours of work on a post and deleting it by hitting the wrong button while being tired I determined to find a better way. Here is the way I do it at this time. I am going to take you through the process of creating this post. I am using Windows and Markdownpad2 editor and Img Safe web based image hosting. Enjoy!
First download Markdownpad 2 free, install and open it. markdownpad.com/
When you create a post it is wise to name it and save it before you do much work on it.
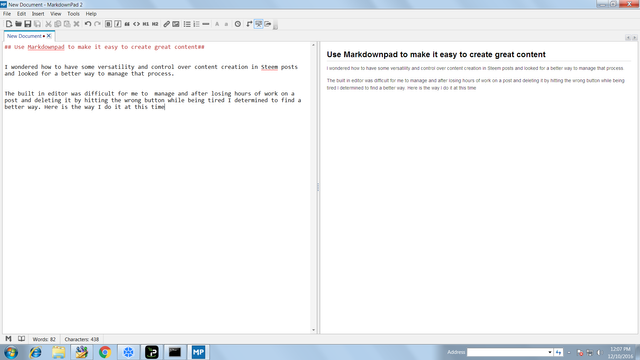
There are two windows, the left is the data entry or editor window and the right side is the preview window.

There is a toolbar at the top and to insert a hyperlink in your blog click the paperclip icon at top and paste the url in the popup. It simplifies adding a link to a site you are referencing. http://markdownpad.com/
Now to add a picture here I take a screenshot of the image say of a webpage and add it to my graphics editor (paint comes with windows) and save it. I can also edit the image at this time. Since Steem needs a url for the image I need to take my image and place it on a webhost like https://imgsafe.org/ or http://dirtyimg.com/ These are just two possibilities. You could also have your own domain on a webhost and point to the images from there.
Here is the process.
- Open the webpage of the webhost in this case ImgSave
- Click +Browse Files (to bold the type highlite it and select the B button)
- Select Image from the folder it is stored in
- Select upload
- Click on Image and it loads in a new tab
- Copy Url and paste into Markdownpad 2
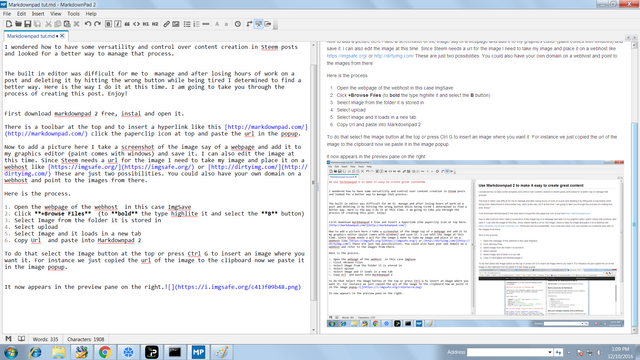
To do that select the Image button at the top next to the paper clip button or press Ctrl G to insert an image where you want it. For instance the just copied url of the image in the clipboard is now pasted into the image popup window.
It now appears in the preview pane on the right.

To make a thumbnail image appear in publishing your blog or post simply add a picture to the top of the page in your post.
Once content is all added I edit it for presentation such as bolding, selecting headers via the H buttons on top, italicize when wanted and check for typos. Add whitespace by hitting the enter key.
The last step after the blog is finished is to upload it to your Steem account.
Before you paste it to the Steem Submit a Story page open that page up and enter the tags or categories you want your post to be in. Now is the time to do this! This saves having to navigate outside of the Submit a story page while you are preparing a post for publication.
In the editor window in Markdownpad 2 select everything with the Ctrl A key combo.
Now paste it into the Steem Submit a story window and do your final editing. Add a Title and you are done.
This method allows me to save posts with all their content on my computer or anywhere I would like to save it allowing for a work in progress to continue under my control whenever I choose to work on it.
I know this is a work in process and I welcome any constructive help others can provide. I am still a newb at this. I havent worked with videos, from what I am aware of you link the url of the video into your markdown editor similar to images.

Nice tool
Congratulations @frankswi! You have completed some achievement on Steemit and have been rewarded with new badge(s) :
Click on any badge to view your own Board of Honor on SteemitBoard.
For more information about SteemitBoard, click here
If you no longer want to receive notifications, reply to this comment with the word
STOP