Making it easy to the eye - how to format your blog posts like a pro!
Unfortunately, the steemit platform is not a great GUI . To non-programming users, there are few tools by default that makes formatting a post easy. But for anyone with HTML or CSS knowledge, some lines of code could make the whole difference on the appearance of a post. Let me show you those few lines of code.
Text Aligments
In word processing, there are basically three types of text alighnment. There are: Left, Center and Right. Left Alignment: By default, steemit aligns text to the left. That is why the left side of your writeup looks neat and straight, but the right side looks unarranged. That is what left alignment does. Check the image below, the paragraph was aligned left:
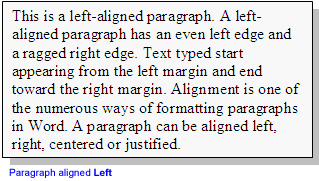
Image source
There is no need to use code to align text to the left because, that is the default setting in steemit.
Right Alignment: In right alignment, the right side of your writeup appears straight and neat while the left side looks unarranged.
Justify Alignment: In this type of alignment, the left and right edges of the text is lined up in a straight line. The computer does this by automatically adding extra spaces to the texts in each line to make them have equal width. This is the type of formating used in magazines and newspapers as it makes the texts appear neat and tidy.
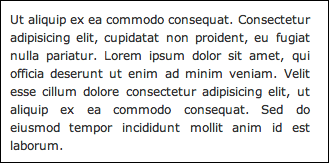
You must have realized that I used this type of alignment for this post and you probably loved it. So let me show you the piece of code that does the magic.
How to set text to Justify Alignment
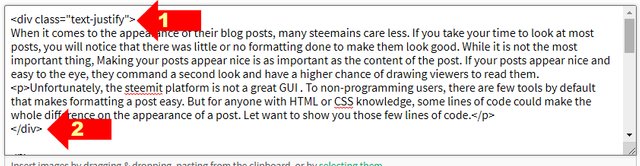
Explaination: The opening of the code is the arrow labelled 1. Type everything as it appears there. The arrow labelled 2 is the closing of the code. Everything written in-between the opening and closing of the code will have "Justify" alignment. Easy. Simple.
How to center texts
You will also notice that my heading texts are aligned center like the one above this line. To center texts and make them bold, see the image below:
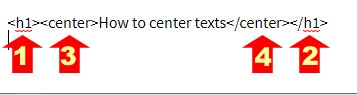
Explanation: In the picture above, using the two codes labelled 3 and 4 will make any texts written in-between to have center alignment. Adding 1 and 2 will make it a heading text with a center alignment. The center tags (labelled 1 and 2 above) can be used for texts, images or videos
Extending it
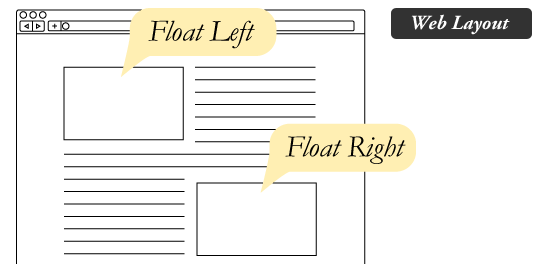
In newspapers and magazines, some pictures are aligned left and text is written on the right side of the same column or vice versa like this illustration below:
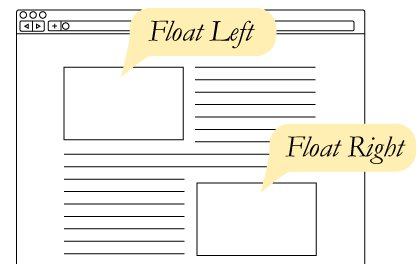
image source

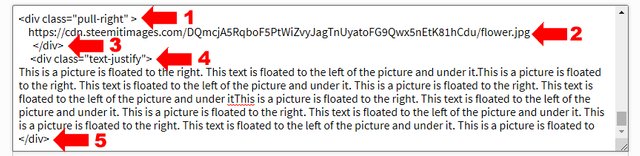
Explanation: Lets explain the function of each line of code labelled 1 - 5 above.
This opens the container for the image and pulls it to the right. It simply means that any image or text inserted into this container will take the right side of the column. Note: If you delete "right" and write "left", the image or text takes the left position.
This is the image that will be pulled to the right.
This is the closing of the image container
This opens another conatiner where the text will be placed. It will place the text to the right or left depending on the position of the image (If the image takes left, the text takes right and vice versa). However, the text alignment is "justify".
This is the closing of the container for the text.
Conclusion
I hope you understood the lesson. And I hope your next post will look neat and tidy. Just take your time to learn it and you will be glad you did.
If you have any questions, drop them as a comment. If this post was useful, resteem it to help others learn.
Sir, l must say that your post is informative and educating one ,l give it to you, but l have a question on the arrow sign and numbers they carry, supposing l am writing a post and l must apply the method you suggested how will and where can see the arrow and no.s they carry.
I didnt get your question. Make it clearer pls.
Congratulations! This post has been upvoted from the communal account, @minnowsupport, by focusnow from the Minnow Support Project. It's a witness project run by aggroed, ausbitbank, teamsteem, someguy123, neoxian, followbtcnews, and netuoso. The goal is to help Steemit grow by supporting Minnows. Please find us at the Peace, Abundance, and Liberty Network (PALnet) Discord Channel. It's a completely public and open space to all members of the Steemit community who voluntarily choose to be there.
If you would like to delegate to the Minnow Support Project you can do so by clicking on the following links: 50SP, 100SP, 250SP, 500SP, 1000SP, 5000SP.
Be sure to leave at least 50SP undelegated on your account.
Hello! I find your post valuable for the wafrica community! Thanks for the great post! We encourage and support quality contents and projects from the West African region.
Do you have a suggestion, concern or want to appear as a guest author on WAfrica, join our discord server and discuss with a member of our curation team.
Don't forget to join us every Sunday by 20:30GMT for our Sunday WAFRO party on our discord channel. Thank you.
Thanks for all the information... I have a question for you @focusnow Just today I posted an article (over today's Google doodle on Don Bradman) in which I wanted to align a picture (of lower dimensions) in the centre but I couldn't... It is lurking on the side nd not looking good... So how could I align pictures of lower dimensions in the centre?
Its very easy, look at the code blow:

Put your picture in-between the opening and closing of the center tag and it will be aligned center.
It worked :D Thanks buddy :D
Am happy to help.
thank you for this post you keep aiding me on steemit,thank you very much @focusnow
This post is so clear and easy to follow! Thank you @focusnow. I have been trying to find this information but your post by far has been the most helpful 🌱
Am glad to help.