How to create a Trading Card Feeder, Scanner, Analyzer and Sorter - Part 1 Card Feeder
How to create a Trading Card Feeder, Scanner, Analyzer and Sorter - Part 1 Card Feeder
Michael Portera's Card Feeder is made out of Lego. It is a top loader
and the bottom card will be transported to the scanner. I'm a big fan of
Lego and like the idea a lot.
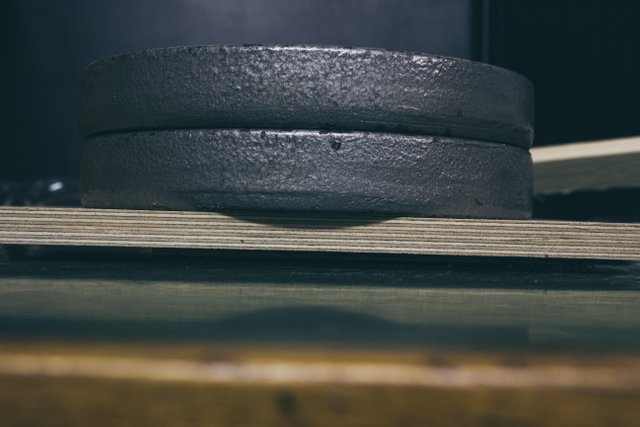
To understand to whole mechanism, I analysed one of the best feeders
that exists; a printer. It does exactly that what I need.
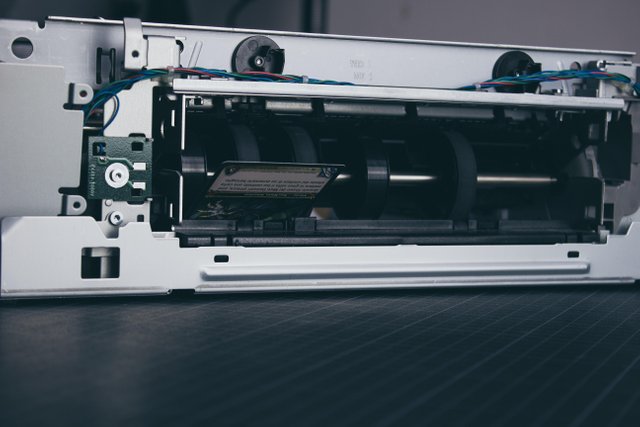

With that said, I bought a cheap 8€ printer on eBay and disassembled
it until I had a full look at the needed mechanism.
I tested a lot:
- turning the printer wheels forward and backward
- tried it with a piece of paper
- tried it with one WoW card
- tried it with many cards
It works perfect. To be honest I don't expect that behaviour, but even
with the trading cards the mechanism was able to pull out only one card
at a time.
First success.

Source
From my point of view the secret of the mechanism is
- an area which press the paper to the major roll
- a second smaller roll which has direct contact to the major roll
- the second and major roll are covered with rubber
Prototype
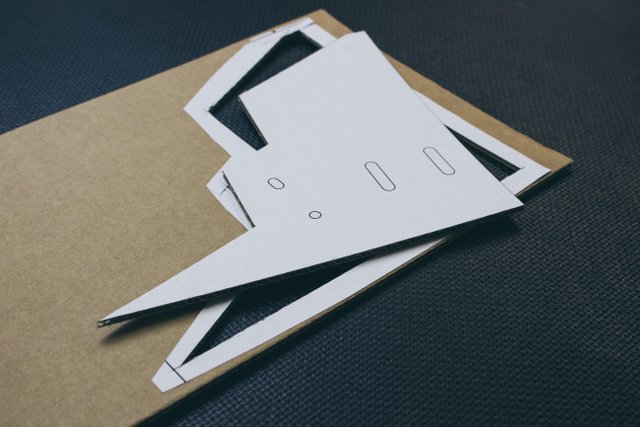
It was time to copy the printer functionality. I made the first tests
with a piece of ikea cardboard to get a feeling for the sizes.
Very simple and reduced to the feeding mechanism.
After that I created the second version with a container
for the cards out of MDF. Very ugly, but it's working.
While testing I realized
- that I need some ramp for the cards which came out of the feeder.
- It's not necessary to have a separate container for the cards.
In version 3 I switched back to cardboard, which I felt in love during
the creation of this prototype. With the right tools and the right
handling the material is sooooo great.
I integrated the thoughts from version 2 and created a solid piece.
I spent some time for a view thoughts about symmetry and equality.
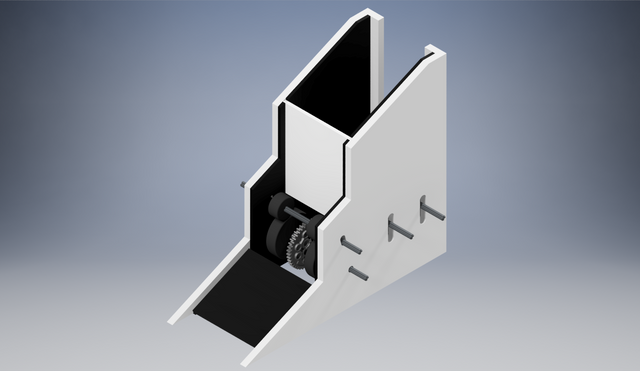
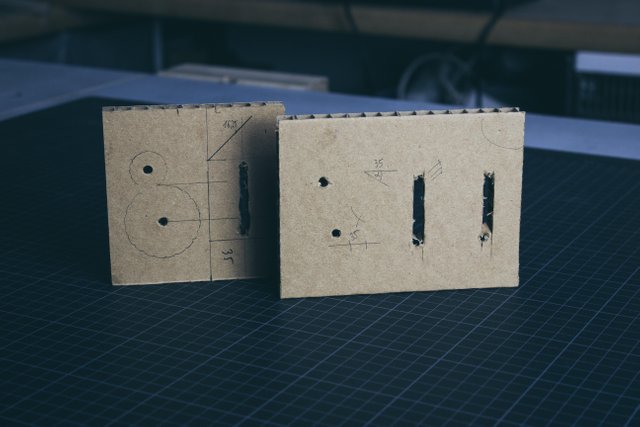
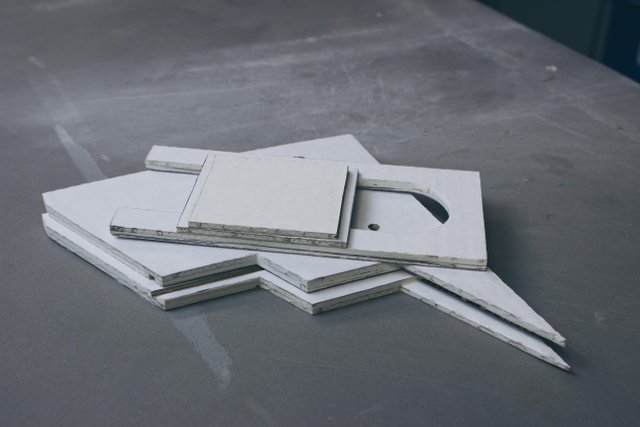
With that in mind I created the final prototype number 4 on the computer.
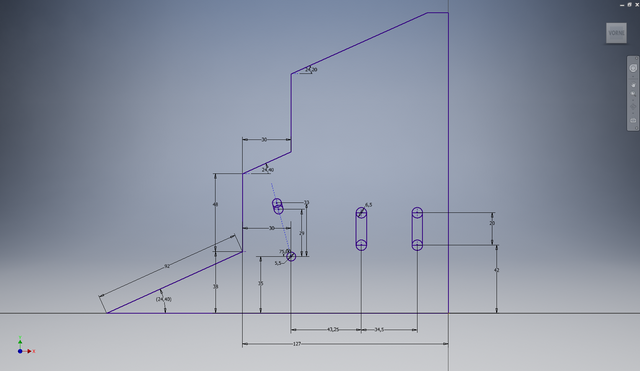
Basic shape
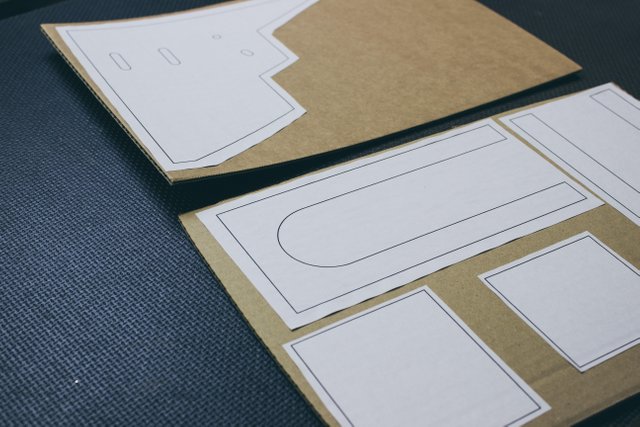
I glued the printouts to a piece of 3mm corrugated cardboard. Very
important (I learned that during this prototyping phase) to apply
glue and some paper on both sides. If not, the cardboard will bend.
To be safe I put some weight on it during the dry time.
I also would say (not sure at the moment) that water-containing
adhesives will cause more bending that solvent-containing adhesives.
***Do you have here some experience? ***
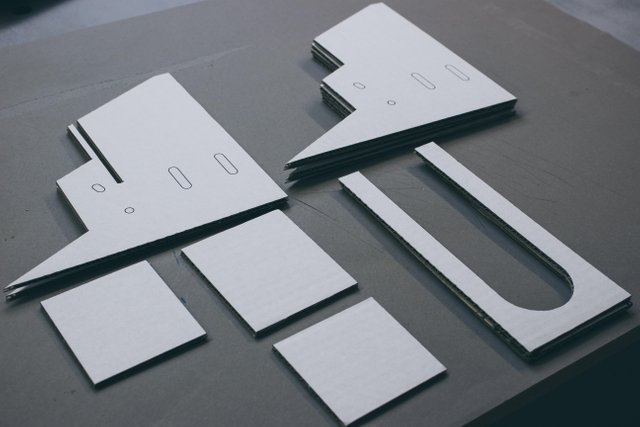
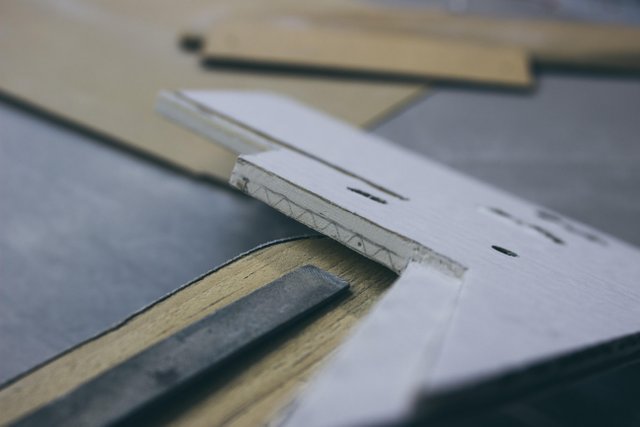
In multiple passes I cut out the shapes from the cardboard. I used a simple
cutter and a ruler.
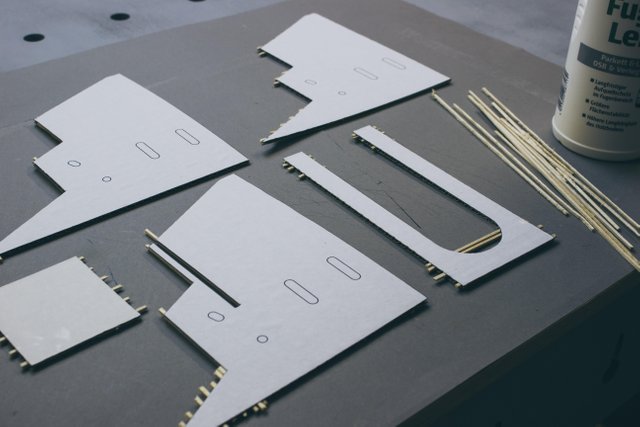
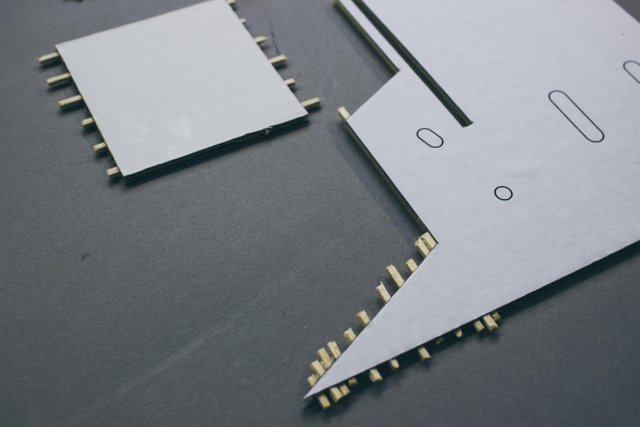
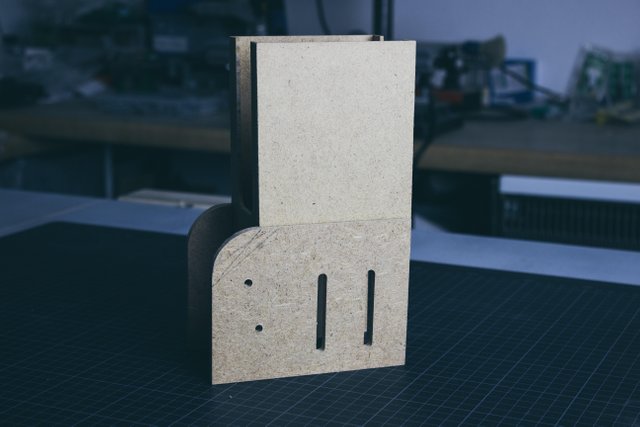
In my casemod project I cut some small strips out of a big piece of wood.
At that time, I needed them to create the cable ducts for the backside. In this
project I used them to stabilize the cardboard. It is also a good way to
protect the corners and edges.
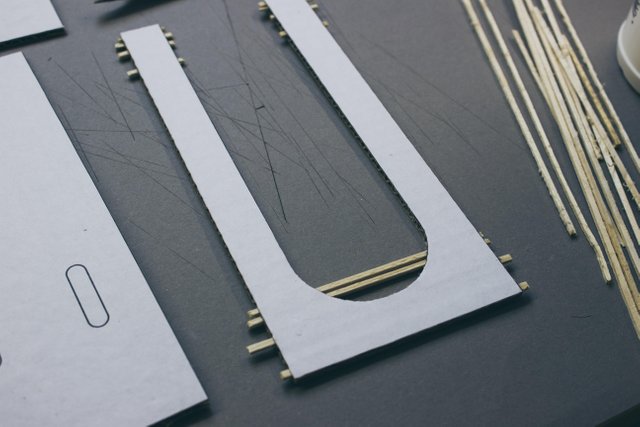
I put them, with some glue, into the cardboard.
After the glue was dry, I cut off the excessive wood so they are flush with
the cardboard shape. I put everything together and hold it with a rubber
band in place.
Great, everything fits perfect.

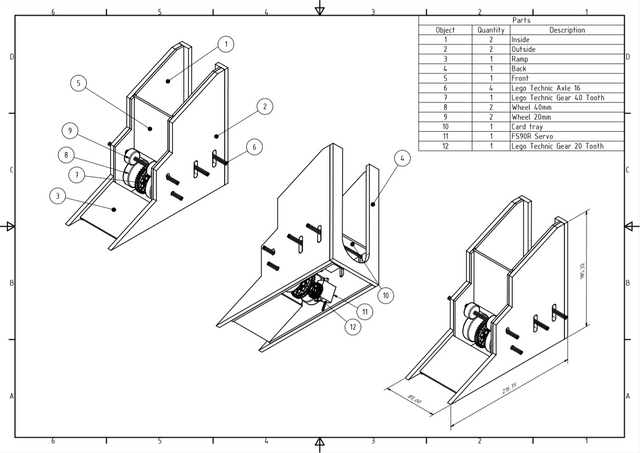
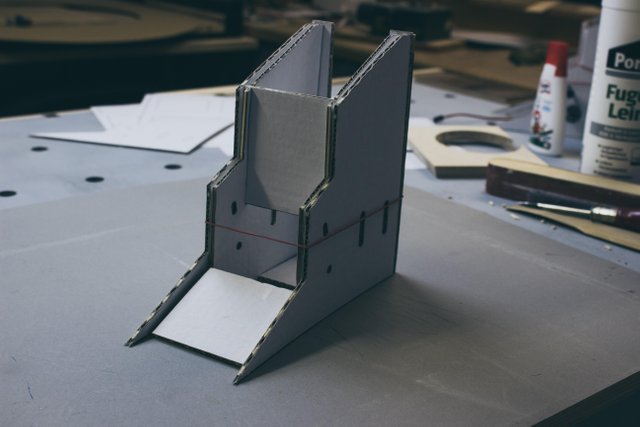
With craft- and hot glue, I put all pieces together.
During the gluing phase I took care of the different orientations of the
cardboard. A horizontal oriented piece will be glue to a vertical oriented,
and so one.
I closed the cardboard holes with some filler and sanded them. I also
applied some black color to create a little bit of contrast.
(can be seen later on a picture)
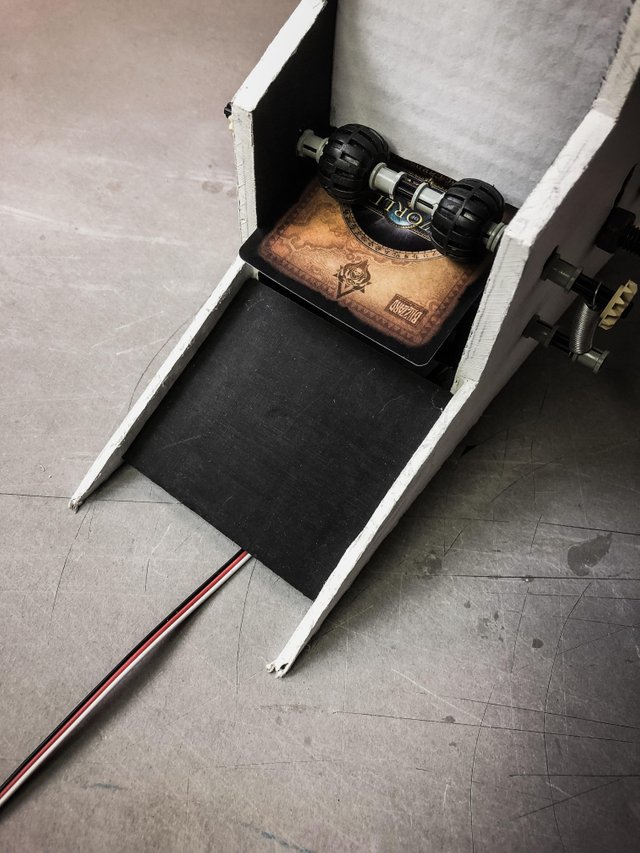
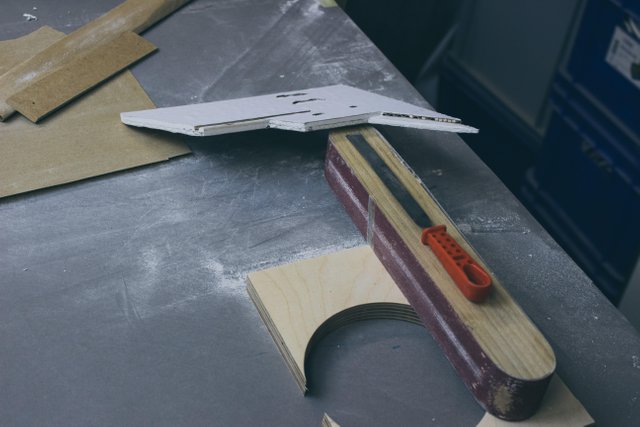
Mechanic
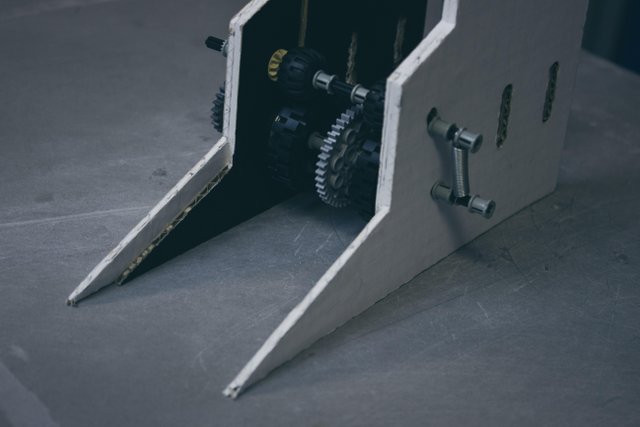
With Lego Technic components I recreated the mechanism from inside the
printer. One major axis with two 40mm wheels and a helper axis with
two 10mm wheels. For the right pressure I applied two springs on the axis.
One secret and some very important parts are the rubber bands on the main
wheels. Without them it will not work very well. Each wheel has three rubber
bands in a 120-degree angle.
In my first idea I made the card area flexible. It can be height adjusted in
relation to the major wheel. Until now, I never used it. Maybe unnecessary
in the final version? We will see.
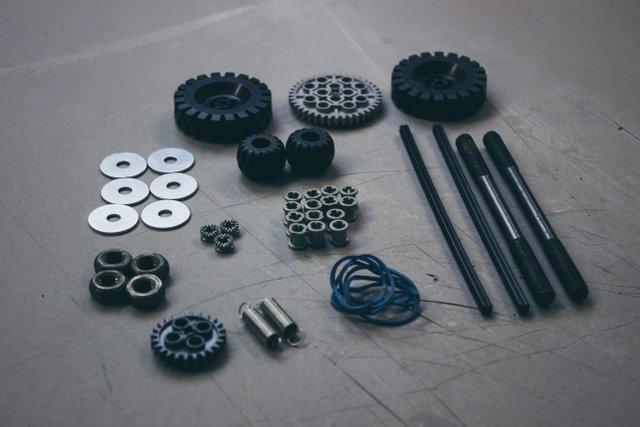
Electronis
I used the following parts:
- Raspberry Pi
- Raspberry Pi Power Supply
- Adafruit Servo Bonnet
- Adafruit Micro Switch
- FEETECH FS90R Micro Continuous Rotation Servo
- Servo Power Supply
It was straight forward to mount the components. The servo bonnet and
the micro switch had to be soldered, but it was not a big deal.
Operating system / Python
I used the Raspbian OS and the Adafruit Python PCA9685 lib to interact
and control the feeder.
My code is based on the Adafruit example
Video
What’s next?
Card Sorter :) :) but now for real
Servus and cu next time!


Your level of research and development is impressive. :O It was a pleasure to read through the detailed post and to accompany you on the way to the finished feeder. I'm looking forward to the next parts. :D
@schabenstolz

Gif's sind so super. :)
Ja, das stimmt. Habe ich allerdings bisher nicht genutzt und musste erstmal schauen wie man so etwas hier einbindet.
Ich finde sie haben deinen Beitrag zusätzlich positiv aufgewertet, werde dies bei Gelegenheit auch mal anwenden. ;P
Thanks for using eSteem!
Your post has been voted as a part of eSteem encouragement program. Keep up the good work! Install Android, iOS Mobile app or Windows, Mac, Linux Surfer app, if you haven't already!
Learn more: https://esteem.app
Join our discord: https://discord.gg/8eHupPq