Java Tutorial - Before Beginning
Hi Steemians !!! Since I am an engineer why not to take the advantage of my knowledge on Steemit? So, I have decided to start Java tutorials from today. I hope you guys enjoy it and respond to it. This is my last hope on Steemit. I have explained this tutorial in easy way. Let's go.
In this tutorial we will see : What is Java? Why do we care about learning Java? and How to install Java in Windows operating system?
What is Java?
-Java is a high level programming language.
-Developed by Sun Microsystems in early 90s.
-As any other high level programming language like C sharp or C++ Java is also a high level programming language but it's little bit different from other languages in a sense that it's a cross platform programming language which you can develop and run on multiple operating system like Windows, Linux and Mac OS or any other operating system.
-It runs its program using a special virtual machine called Java virtual Machine.
-This Java virtual machine is responsible for running Java programs and whenever you install Java on your operating system like Windows or Linux, you also install this Java Virtual Machine.
-This Java Virtual Machine is same for every operating system.
-So, your program runs on Java Virtual Machine and not on operating system.
-That's why it runs on every operating system which Java supports.
-So, if you compile a Java program on Windows you can run it on Linux or Mac OS using this Java Virtual Machine.
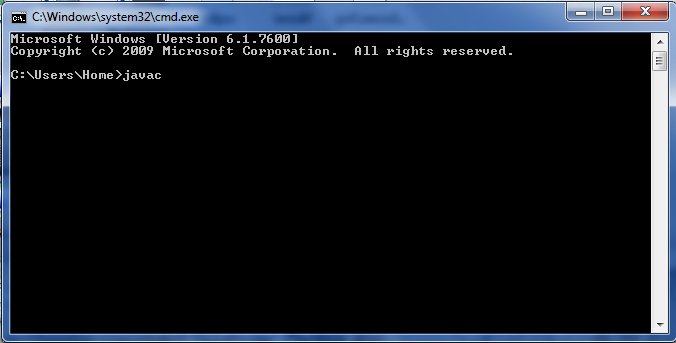
That's why before developing Java we need to install Java JDK and JRE on our operating system. Java is an object oriented programming. We will learn what object oriented programming language is and what are the features of it but first of all we need to install Java on our system. It may be possible that Java is already installed on your system or it may be possible that you have never installed Java on your system. So, how to check whether Java is installed on your system? If you are using Windows, you just need to click on start menu button and open command prompt and just give this command 'javac' and press enter.
Screenshot 1 :
Screenshot 2 :
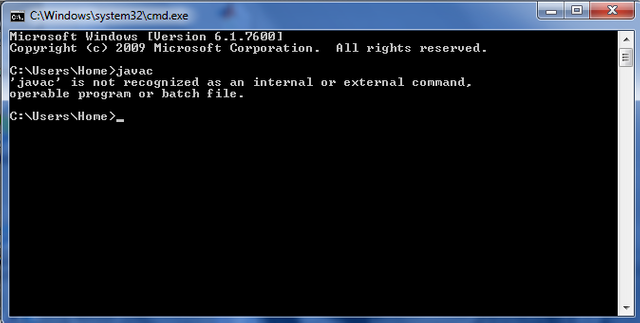
If this command responds that that javac is not recognized as an internal or external command as shown in screenshot 2 then Java is not installed on your system and you need to install Java on your system. To install Java, go to your browser and search for Java jdk and click on the first website oracle.com .
Screenshot 3 :
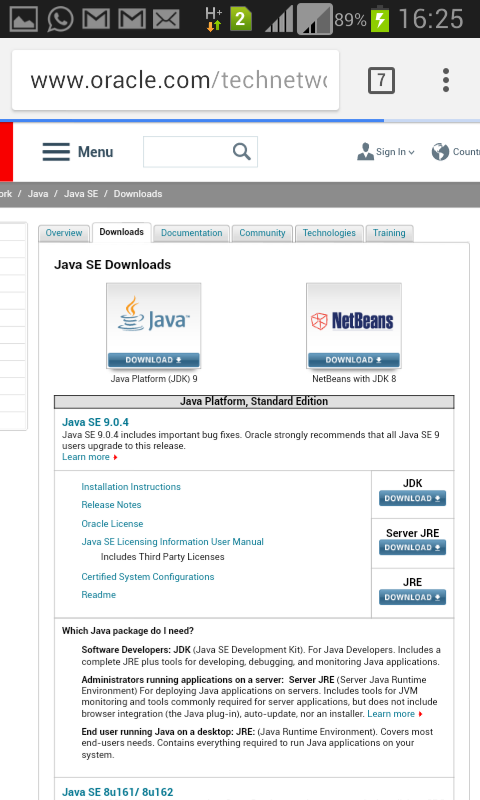
In here, you will be able to see two options. One is Java JDK and the other is NetBeans with JDK. So, the Java is a platform and NetBeans is IDE and you have the option to install Java with this development IDE but I will choose Java option for now. The latest version of Java is 9 but I will install 8.
Screenshot 4 :

So, when you click on Java JDK, you need to accept the license and conditions in order to download this Java. So, just click that small button and choose your operating system. My operating system is Windows 32 bit. So, I will have to select x86 bit and if you have Windows 64 bit operating system then choose x46 bit.
You can check it by going computer > right click > properties. You can see that how many bits your operating system is. So, click on whatever is appropriate for your system. It will take some time to download this Java executable file. Once this will be downloaded we will be ready to execute this executable file and install Java. So, when after our download is complete we will run this executable file.
Screenshot 5 :

The installation is straightforward. You just need to click next and check the status and then it will start installing Java on your system. It's really straightforward so you don't need to worry about anything while you are installing Java.
Screenshot 6 :

And while installing it will ask you the destination folder for wherever you want to install JDK and JRE on your system. JRE stands for Java Runtime Environment and JDK stands for Java Development Kit. These are the two things that will be installed by this installer. So, I will leave them as default and will click next and wait for the installation to complete.
Screenshot 7 :

Now Java is successfully installed in our system. You will be able to see this message and then click on close button.
Once you install Java, you can check it by going to C folder of your computer. Go to C drive > program files > Java.
Screenshot 8 :

And in here, you will be able to see two folders. One is JDK and the other is JRE. So, once you have done that you need to set your environment variables so that whenever you run your Java program it will recognize these JDK and JRE and then you will be able to compile your programs.
How to set your environment variable?
For setting your environment variable what you need to do is just go to your system or go to computer > right click > properties > advanced setting.
Screenshot 9 :

And in here, go to environment variables. In system variables, you will be able to find a variable called path.
Screenshot 10 :
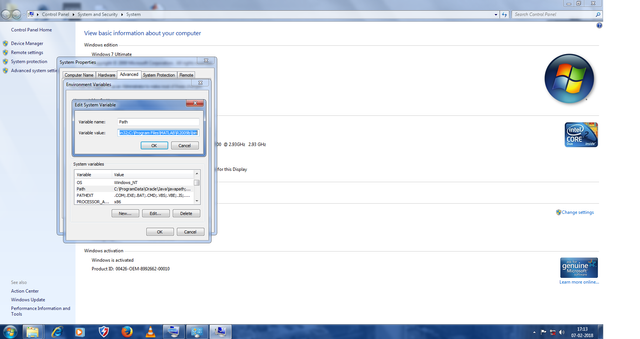
You just need to double click this path. You can see the variable name is path and there will be already some value in variable values and you need to add some more value here which is the JDK. So, once again go to C drive > program files > Java > JDK > bin.
Screenshot 11 :
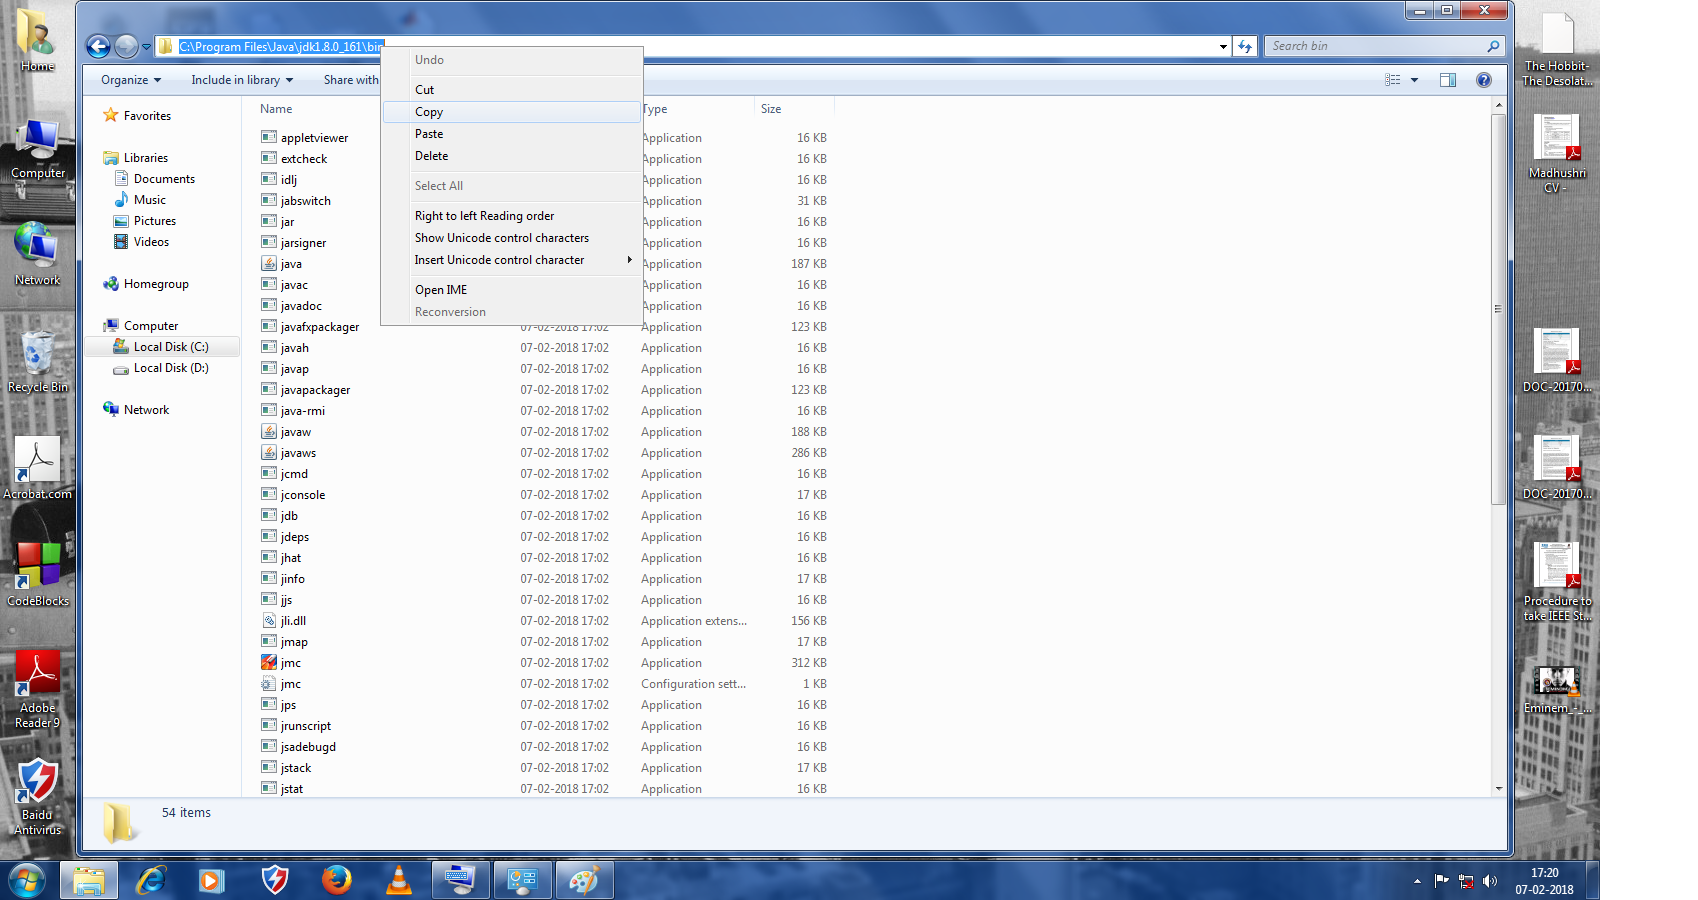
This destination path which is shown in screenshot 11. Copy this path and in variable values, just give a semicolon and paste your path. Once again go to your Java folder and then this time go to JRE folder. There is also a bin folder then copy the path and then give semicolon to your variable value and paste this path.
Why do we set environment variable? Whenever you compile a program and you set the environment variable, compiler will know the path of these binary files which are responsible for compiling your program and it will be straightforward to compile your program. So, once you have set your environment variable we will once again open command prompt and check whether Java is really installed in our system or not. So, once again give 'javac' command and press Enter.
Screenshot 12 :
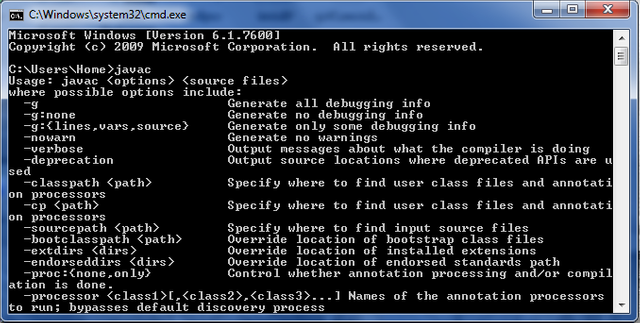
This time you can see a big response to 'javac' command. And you can see, to use 'javac', you need to give some options and source file. So, 'javac' is a command to compile a Java program. So, whenever you give a 'javac' space filename dot java file (example : javac helloworld.java) it will compile Java program and then you can run your Java program.
So, today we learned to install Java in our system. In the next article, I am going to show you how can you install an IDE which is called Eclipse IDE which is widely used to develop Java programs.
If you have any questions please comment below.
Imaportant :
All the images used in this article are the screenshots taken in my phone and my pc and some of them are cropped using Paint.
References :
http://www.oracle.com/technetwork/java/javase/downloads/index.html
Book : The Java programming language by Arnold.
Wow really educating post
Nice post. Thanks for sharing.
Thank you :))
Congratulations! This post has been upvoted from the communal account, @minnowsupport, by pratique007 from the Minnow Support Project. It's a witness project run by aggroed, ausbitbank, teamsteem, theprophet0, someguy123, neoxian, followbtcnews, and netuoso. The goal is to help Steemit grow by supporting Minnows. Please find us at the Peace, Abundance, and Liberty Network (PALnet) Discord Channel. It's a completely public and open space to all members of the Steemit community who voluntarily choose to be there.
If you would like to delegate to the Minnow Support Project you can do so by clicking on the following links: 50SP, 100SP, 250SP, 500SP, 1000SP, 5000SP.
Be sure to leave at least 50SP undelegated on your account.