Astronomical Imaging – Stacking
Astronomical Imaging – Stacking
In this article I am going to introduce image stacking, a very powerful technique for improving image quality of astronomical images (and can also improve daytime images as well). Stacking is particularly useful when the image quality of a single image is poor either due to weak illumination or when large focal lengths are used, and the image is affected by atmospheric turbulence.
In short Stacking is simply a technique where numerous images of the same object are added together to create a single stacked image. When this is done detail is reinforced and noise is suppressed. I will discuss some examples, a little theory and the software you need to do image stacking.
Some Examples
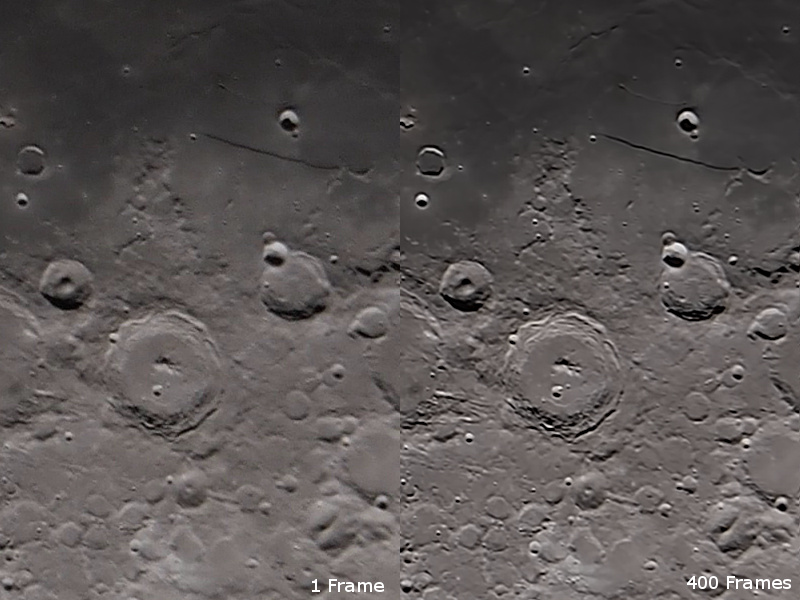
Let start with some examples of how image stacking helps. The following image shows the difference between a single image (left panel) and a stack of 400 images (right panel) from the same video capture using an Olympus OMD camera attached to my Celestron C14 telescope. You should be able to see that the stacked image shows a lot more detail and is considerably sharper.
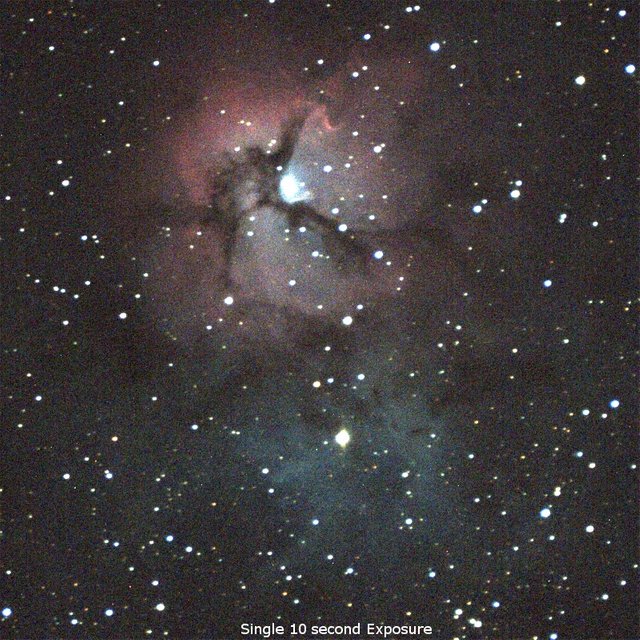
The next example is an emission nebula called M20 (The Trifid Nebula) in the constellation of Sagittarius. The first image below is a single 10 second image I made with the C14 telescope in Hyperstar mode. Although there is quite a bit of detail visible, the image is very grainy and noisy.
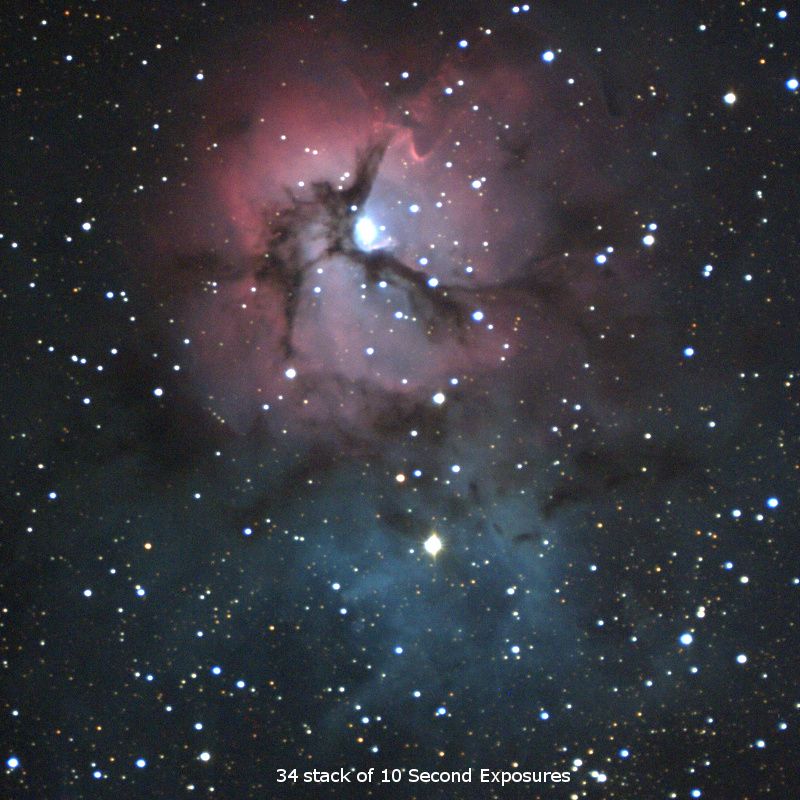
However, when 34 images of M20 are stacked together, the result is shown below. You should immediately notice that the graininess is almost gone, and there is more intricate detail visible in the nebula itself. Additionally, there are more stars visible.
Can this be applied to normal photo’s? Absolutely yes! Although the improvement depends on the subject and conditions. Here is a a Hibiscus flower in my backyard, which I took a video through my Olympus camera. This is one frame from the video.
Now when stacking is employed there is clear improvement in resolution, as can be seen below where a before and after comparison is provided. The left-hand pane shows a single frame, and the right hand pane is the result of stacking 15 images. You can see a noticeable improvement in resolution.
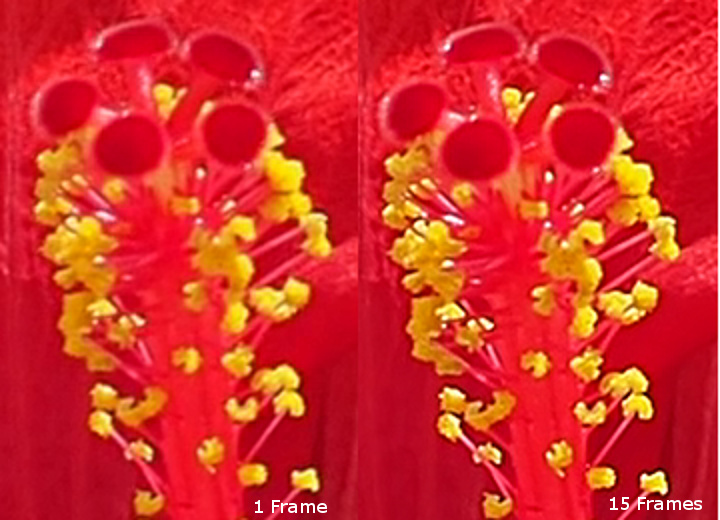
As mentioned earlier, the improvement for normal photography varies, and depends on the subject and conditions, it won’t work well unless the subject is stationary or near so. But it might be a good tip to improve photos.
A little bit of theory
Why does this work? Well Its all about Signal to Noise in an image. Signal is enhanced, and noise is suppressed when adding images together in stacking. The result is an image that has higher signal to noise.
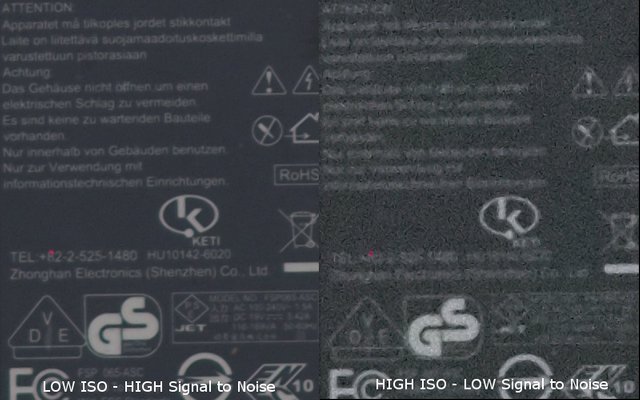
When signal to noise is highest, the image is smoother and able to withstand more sharpening. You can test this easily enough yourself by taking a photo of fine detail using the lowest and then the highest ISO’s on a camera. A low ISO image, properly exposed has much higher signal to noise than one of high ISO. The following image is a comparison of the same subject at low ISO (left) and high ISO (right). In both cases the writing is difficult to distinguish, as both are at the same magnification.
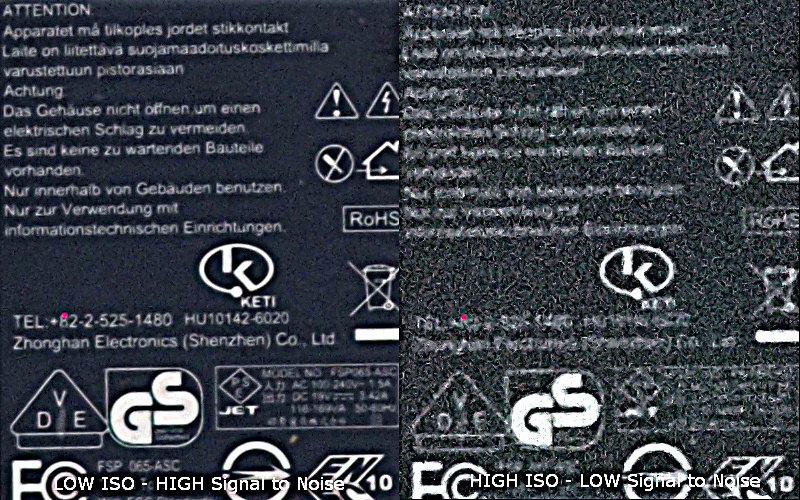
To try make the writing easier to see we can try to boost contrast and sharpness (image below), but predictably it fails to help with the high ISO image on the right as the image is very noisy to start with and sharpening does not help. But the lower ISO image on the left has very little noise (therefor high signal to noise), and responds well to sharpening and you can read the writing easily.
Returning to image stacking, when images are added together, signal to noise improves as the Square root of the total number of exposures in the image Stack. This is shown in the following graph. Referring to the moon sample at the start of this article, where 400 images were stacked, the graph tells us that Signal to Noise has been improved 20x over a single image. Similarly, the 34 image stack of the Trifid nebula should have almost 6 times the signal to noise as the single image.
Software tools to use for stacking
There are some great free tools available for stacking My suggestions are as follows:
• PIPP - Planetary Imaging Pre-processor. This is great for converting video files into individual frames as well as doing some initial sorting, rejecting bad frames, cropping, etc.
• AutoStakkert. Currently the tool of choice for stacking planetary images, not only does it stack images (and does it quickly) it also designed to correct distortions caused by atmospheric turbulence (called “Seeing” in astronomy parlance).
• Registax. The wavelet sharpening tool is one the best and designed for the high bit depth images used in astronomy.
• Maxim DL. I use this for “Deep sky” stacking, however it is a paid software package.
• DeepSkyStacker. A free package for stacking star images.
These are all windows programs, but Linux or Mac users can run these out of Wine.
A Demo
Here is quick demo of how the stacked moon image was obtained at the start of this article. The video version of this demo has been uploaded here:
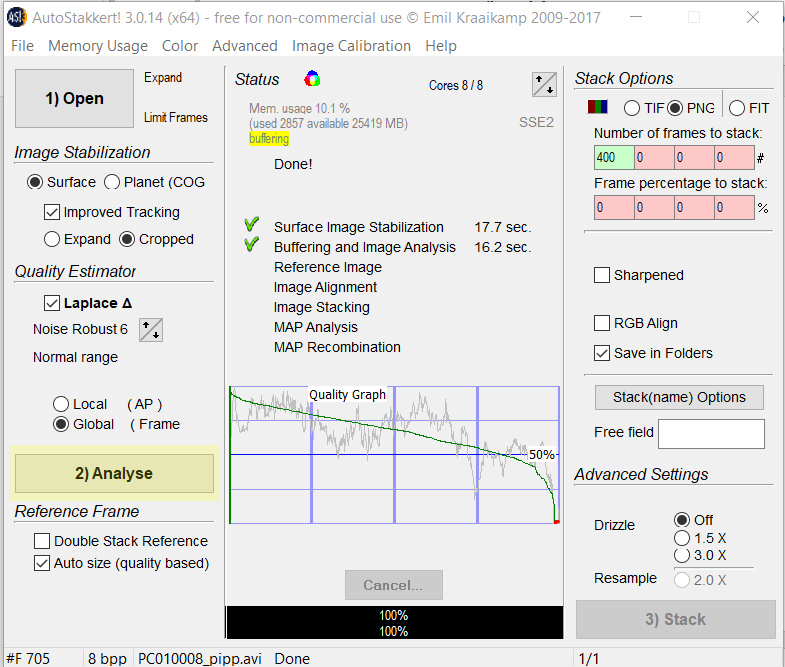
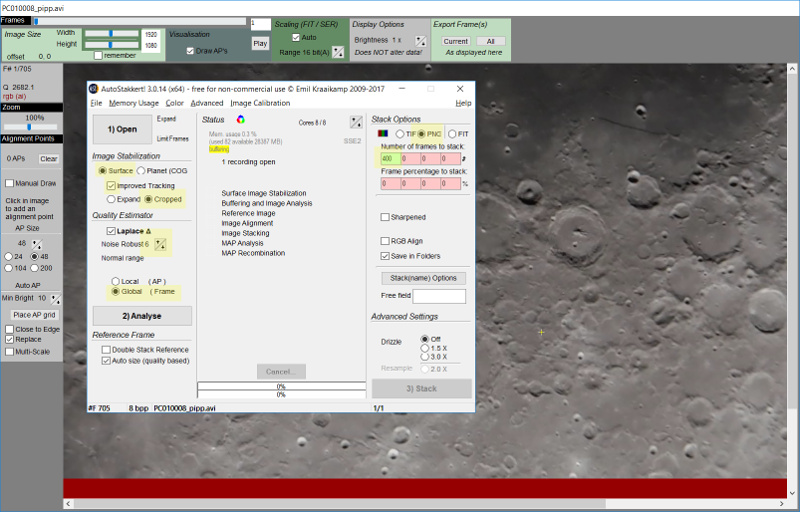
Firstly, I started by converting the native .MOV video format generate by the Olympus camera to .AVI format that Autostakkert can read. I used to PIPP to do this conversion, but there are plenty of other tools that can be used for this purpose. Once the video is AVI format, it is opened in Autostakkert as follows.
Where I’ve highlighted yellow these are parameter’s I chose which I felt would work best with this image. Some experimentation is often needed for optimal results. But for this image the “Surface” checkbox needs to be selected. I chose the png output because this image format seems to work best for the Registax, which we will use to sharpen the image later.
The next step I performed was to click on the image in the background and set an anchor point, as follows. This helps with the overall alignment process and you noticed I picked an isolated crater which will be easy for the program to follow. Selecting a number sets the size of the anchor box.
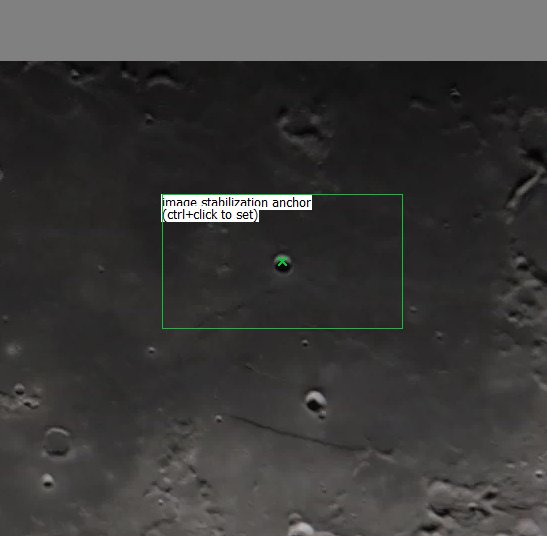
Once the anchor box is selected, I returned to the main window and clicked analyse.
Once Analyse has completed, the play button was clicked to verify the anchor box has worked and the video is locked on to the crater we selected above. Once this was done, alignment points were set, which is how Autostakkert’s can determine how to correct for seeing. After selecting 104 for AP (Alignment point/box) size the Place AP Grid was clicked which automatically placed AP’s across the image. Note for best results manually setting points to features gives the best results, but is time consuming.
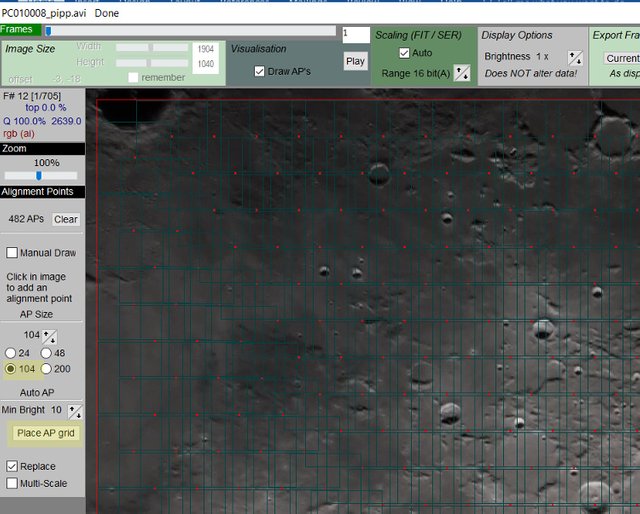
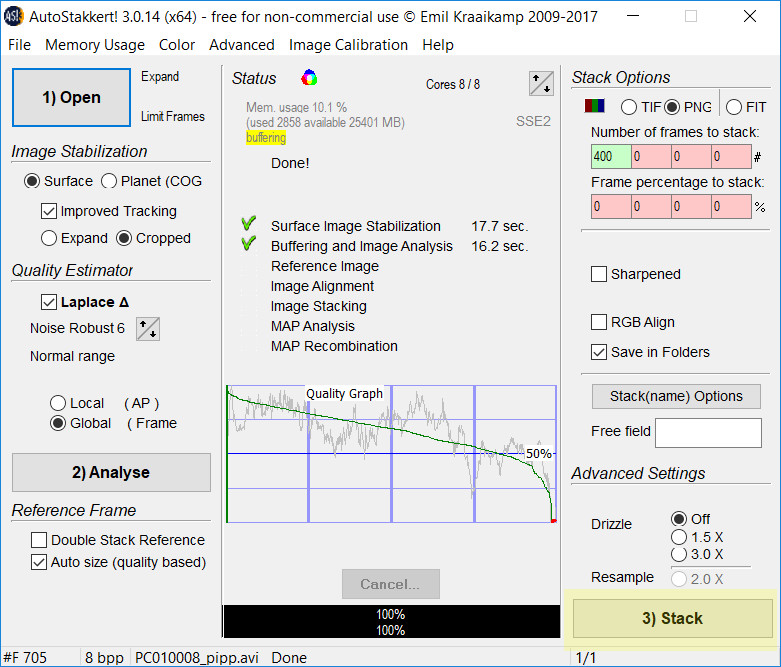
Once the alignment points were set (and you can see them in the image above) it was just a matter to return to the main screen and press the stack button. But before doing that I set the stack size to 400 (there were about 700 frames total) which picked the 400 best quality frames to stack, and rejected the other 300. This process then created a png file that I could then bring into Registax for sharpening.
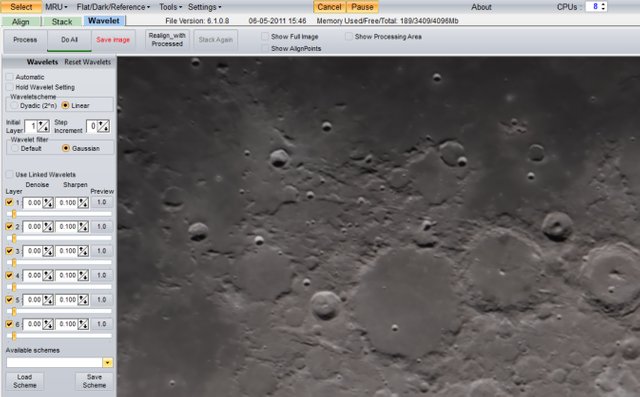
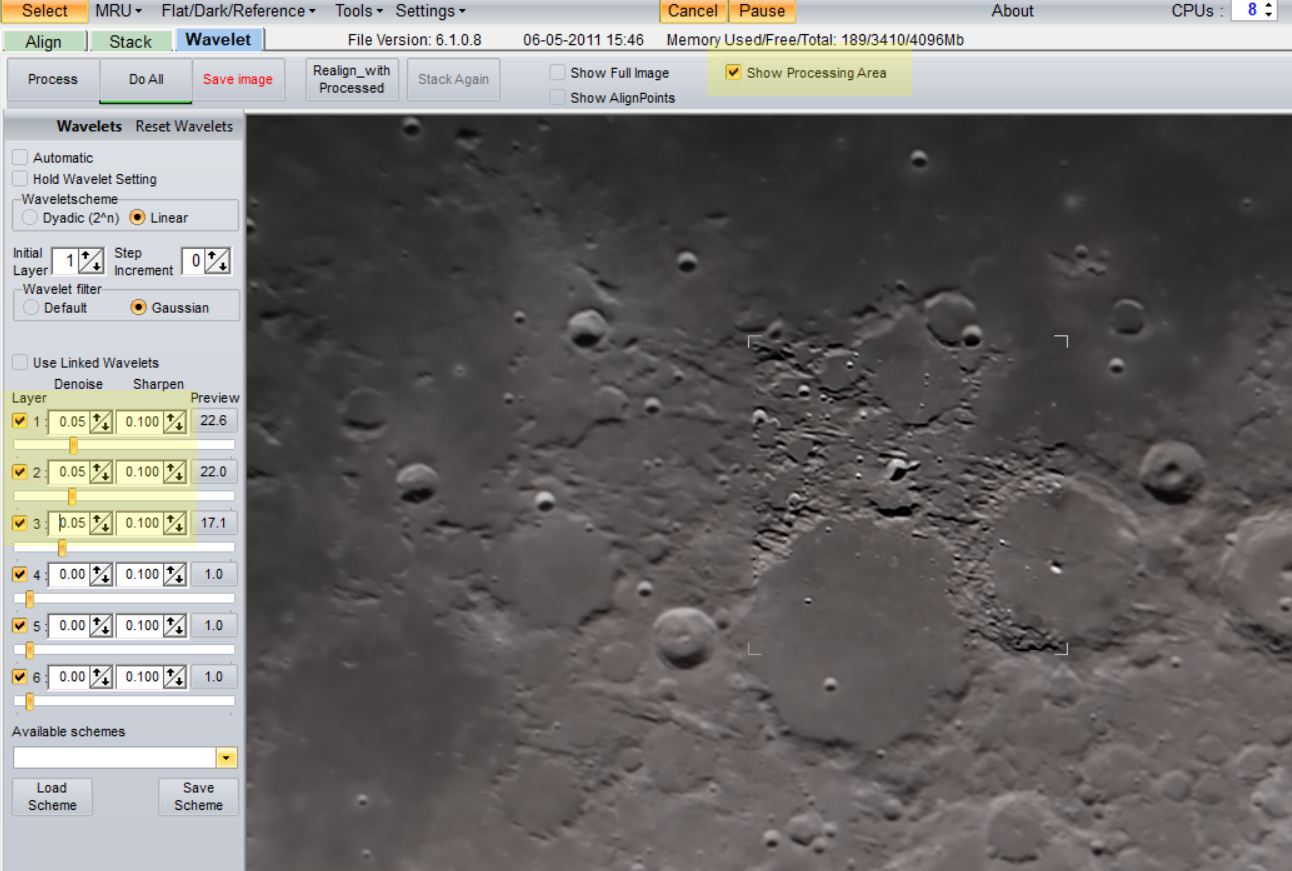
When the png file from before is opened in Registax, the screen opens to the wavelet window as shown below application. Note that registax has a set of sliders on the left and side that can be used to perform wavelet sharpening. Although the image does not look much different to the original it now has much higher Signal to noise and will be able tolerate a great deal of sharpening.
By adjusting the Wavelet sliders shows a preview of the sharpening effect anywhere on the image you click. Trying these settings seemed to give a pleasing effect. If you look closely below, you can see that a portion of the image has had wavelet sharpening applied and the improvement can be clearly seen. At this point, it was just a matter of clicking do all and save image.
Here is the result again.
Conclusion
I hope this article will encourage people to go and try the techniques outline above, it is a lot of fun and very rewarding seeing your images improve with relatively little effort.
References
- PIPP - Planetary Imaging PreProcessor. https://sites.google.com/site/astropipp/downloads
- Autostakkert, http://www.astrokraai.nl/software/latest.php.
- Registax 6. https://www.astronomie.be/registax/
- DeepSky Stacker. http://deepskystacker.free.fr/english/index.html


wow amazing research article. astonishing facts
wow your article is in detail but I,m quite a slow learner so can I find a video tutorial on it and can i use my DSLR camera for this experiment
Hello @samreenfarooq I have updated the article with a link to video tutorial for Autostakkert. I will do another video shortly with registax sharpening. The direct link to my video is here
Hi @samreenfarooq yes you can most definitely use your DSLR for this experiment. There are quite a few vid's around showing you how to use Autostakkert so have a look on youtube. In the future, maybe I can look at an accompanying video with some of these posts.
thanks
Congratulations @terrylovejoy, this post is the tenth most rewarded post (based on pending payouts) in the last 12 hours written by a Dust account holder (accounts that hold between 0 and 0.01 Mega Vests). The total number of posts by Dust account holders during this period was 12064 and the total pending payments to posts in this category was $4947.19. To see the full list of highest paid posts across all accounts categories, click here.
If you do not wish to receive these messages in future, please reply stop to this comment.