A peep into the cold cage; tear-down of a refrigerator
It is always good to learn something new, isn't it?
I got back from school after few months with our refrigerator damaged. Well, I am not someone that does like cold water. because I do not like it, I do love it. lol
Well, this was something I was not enjoying, and I could do nothing because I had little or no experience in refrigeration and air conditioning apart from the books that I read back in school. I knew the deep freezer has compressors and condensers filled with refrigerant, a cooling fan to control the temperature in a certain space.
I complained several times and after few weeks my mom had to listen to my complaint and she brought in a technician to diagnose and repair the deep freezer since it was not cooling anymore.
Let me tell you about my refrigerator

The chest freezer is large: image by me
Well, the image shows the white chest freezer of the maker Haier Thermocool which is said to be assembled in Nigeria. I would try to get the features from the internet to best describe this product.
The model of the refrigerator is HTF-371HH, it’s a chest freezer capable of 379 liters, this chest freezer allows for cooling of both small and huge food items. The freezer operates on 220 volts and a 50Hz frequency. It is capable of 100 hours of freeze even after the power supply which means the insulation is very thick and about 75mm thickness of polyurethane. The dimension is 1240×745×855 millimeters.

The diagnosis
After several hours of putting on the refrigerator, it was noticed that the freezer or the regulated area would not become cold, therefore there was the first diagnosis of a refrigerant leak. So, refrigerant was filled into the compressor and the chest freezer was monitored for days.
I noticed it cooled for some time before it stopped again which means we either have a problem with the compressor or the refrigerant has once again found a way out of the cycle. Opening the valve, we discovered that there was no more refrigerant in it. The one filled in initially had found its way out into the atmosphere.

The problem and the tools used
The problem was a leak in the evaporator and refill of the refrigerant.
The tools used includes
- Oxyacetylene flame
- Copper pipes 13mm
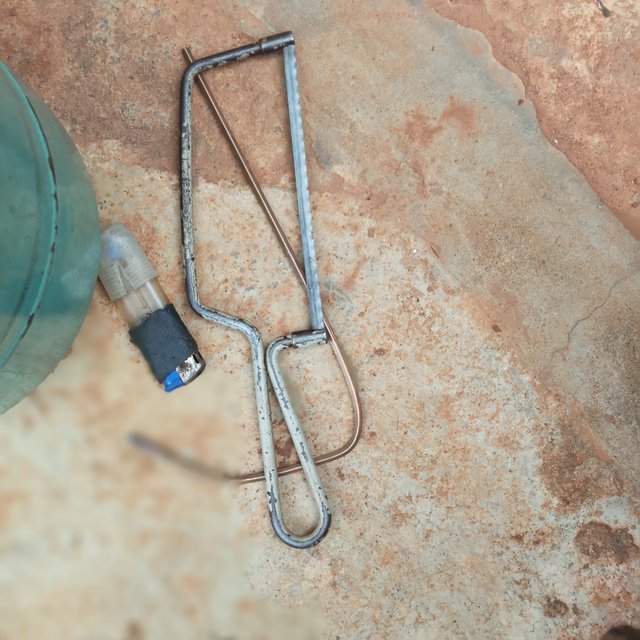
- Hacksaw
- Brazing flux
- Refrigerant
- Screwdriver
- scrapper
- glue
- scrapper
- mallet
The Job
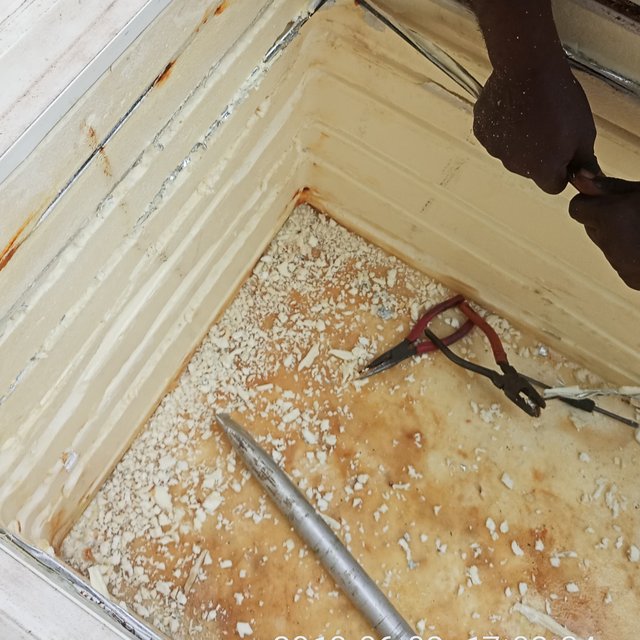
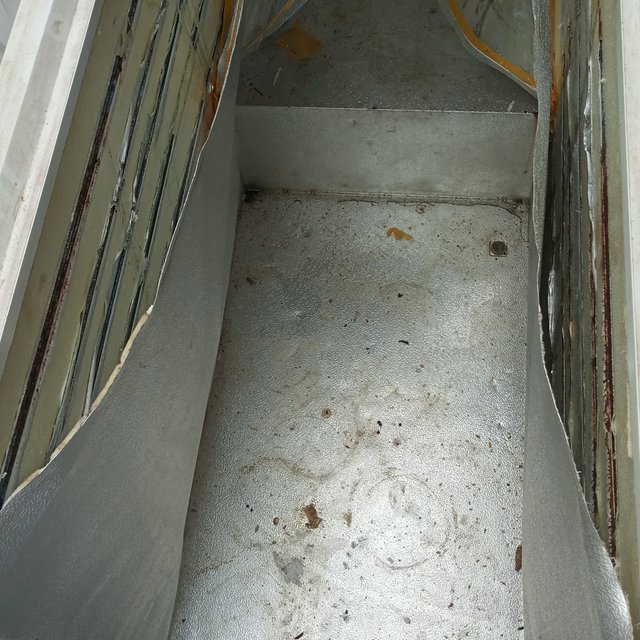
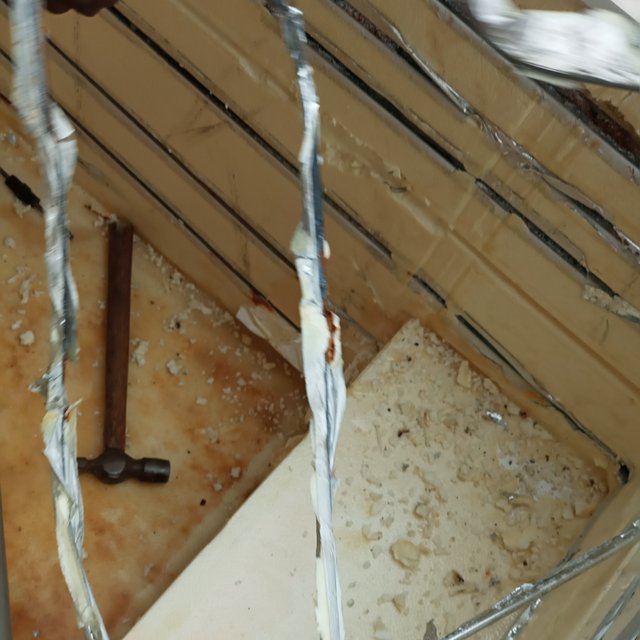
The work started with using the screwdriver to uncap the cover of the chest freezer to have access to the inner part of the freezer it wasn’t so difficult getting it off. Next off was removing the caps to gain access to the evaporator.
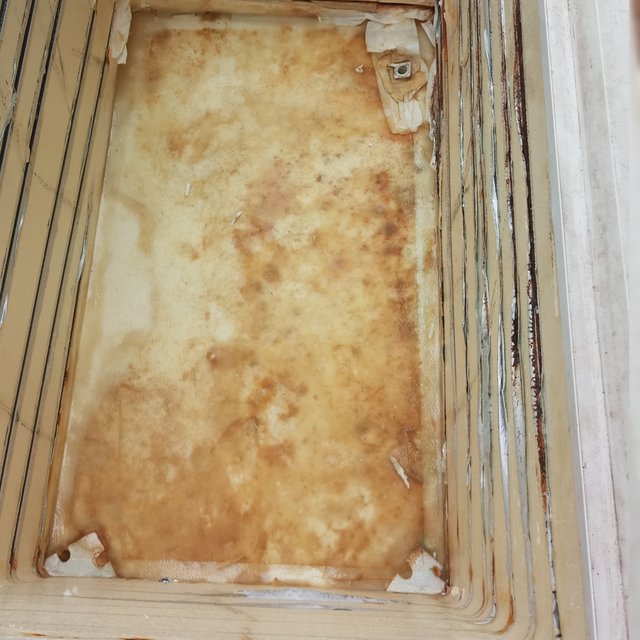
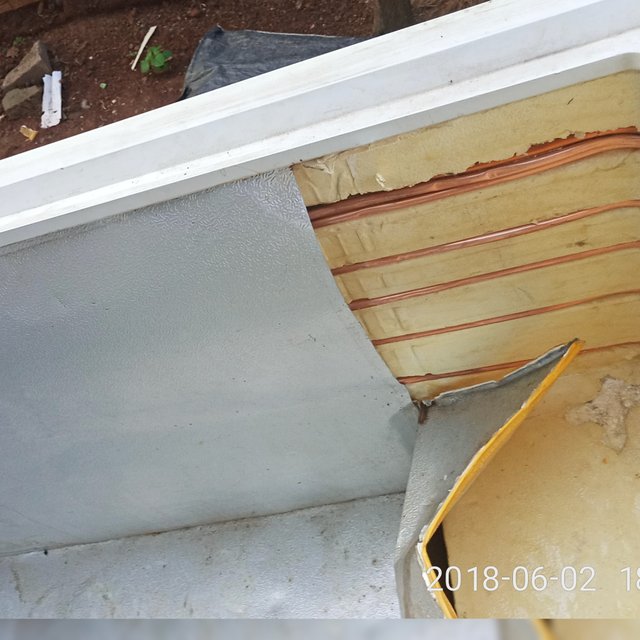
The aluminum foils were the barriers left between the evaporator fins and me. So, I got a scraper to peel off the aluminum files to access the evaporator. After removing the aluminum foil carefully, the polyurethane. The polyurethane is an insulating material used in refrigerators to preserve its temperature or prevent its temperature from rising fast. It is a thick material and white in color. Quite similar to the polystyrene used in packaging of new appliance just like the one in your television. For Nigerians, it is that white stuff you use in making glue. Lol...familiar now?
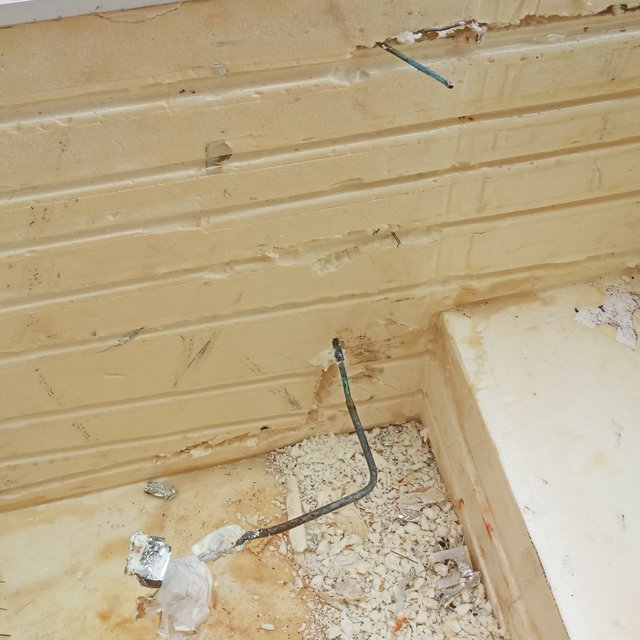
Buried at the surface, this is where the evaporator coils are located. I found out the evaporator coils which were made of iron by the company had completely corroded therefore it is prone to leakage or it is even the cause of the refrigerant leak.
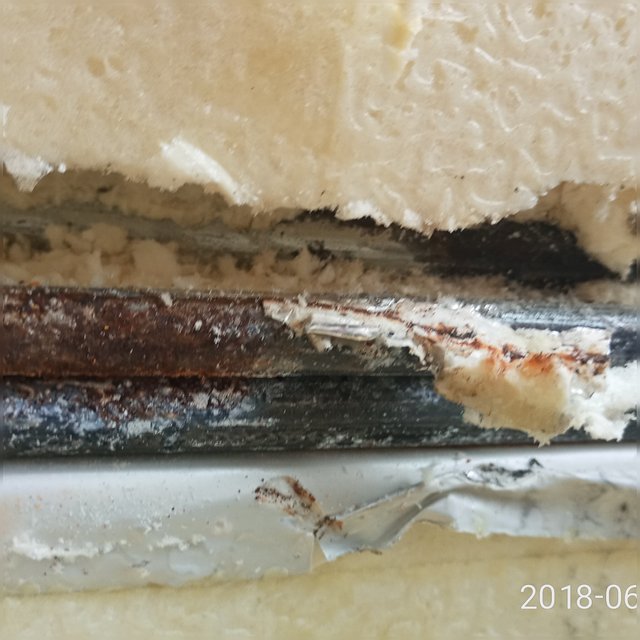
a close look at the first pipe: image taken by me @adetola
This chest freezer was bought five years ago which is a long time and these evaporator fins must be replaced. I bought two coils of evaporator fins which are made of copper due to its resistance to corrosion. You can read more about corrosion from @rharphelle here.

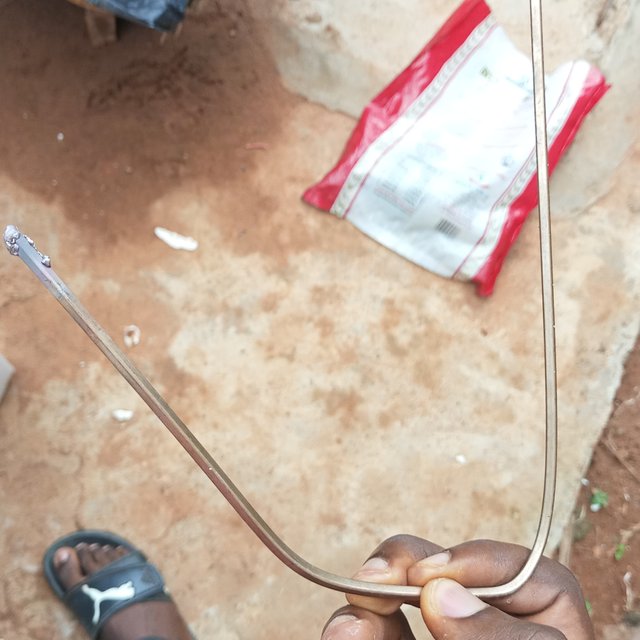
brazing the pipe : image taken by me @adetola
The electrode used in joining both metals was flux. The flux was applied in the middle while the brazing was going on. The copper pipe had to be expanded first before the iron pipe was put inside to a comfortable length before the flame was applied thereafter the flux was used as the electrode flux to seal the weld.
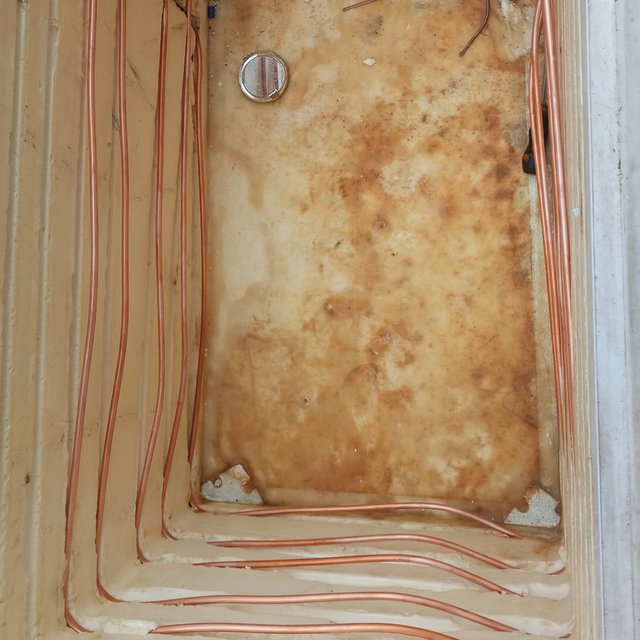
The same way the evaporator coils were coiled all around the insulating wall of the freezer so was the copper coil done and where needed, the brazing process was repeated to ensure continuity of the pipes back to the outlet. Eventually, we did it three times and successfully completed the cycle and tested for a leak.
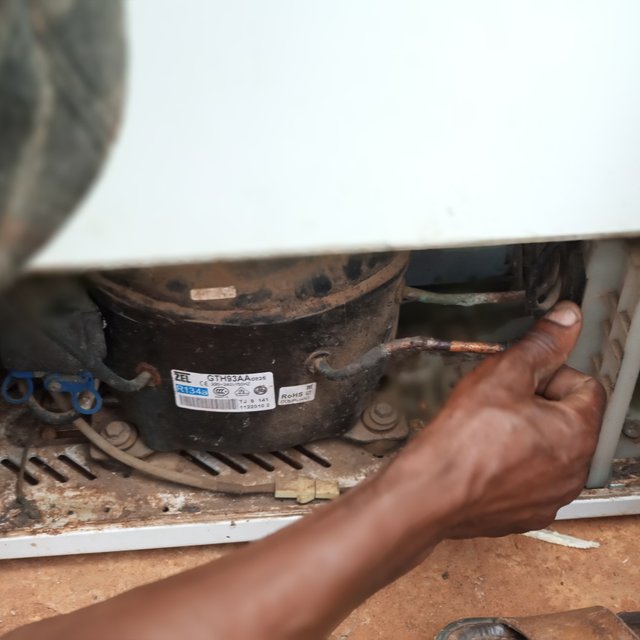
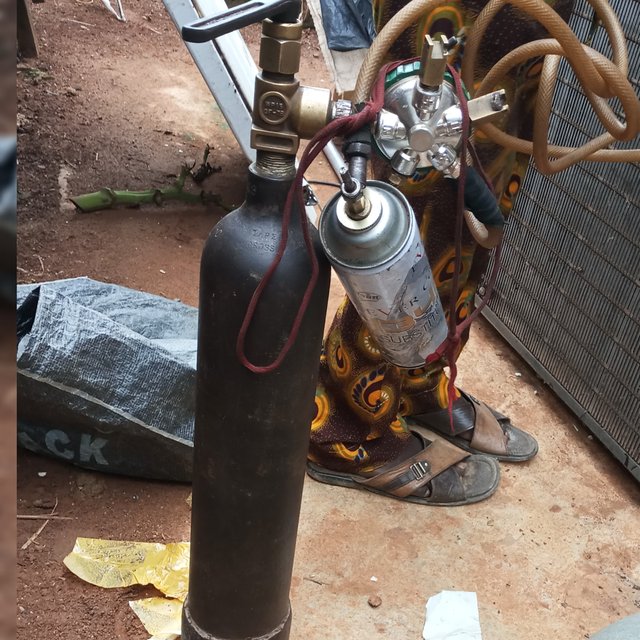
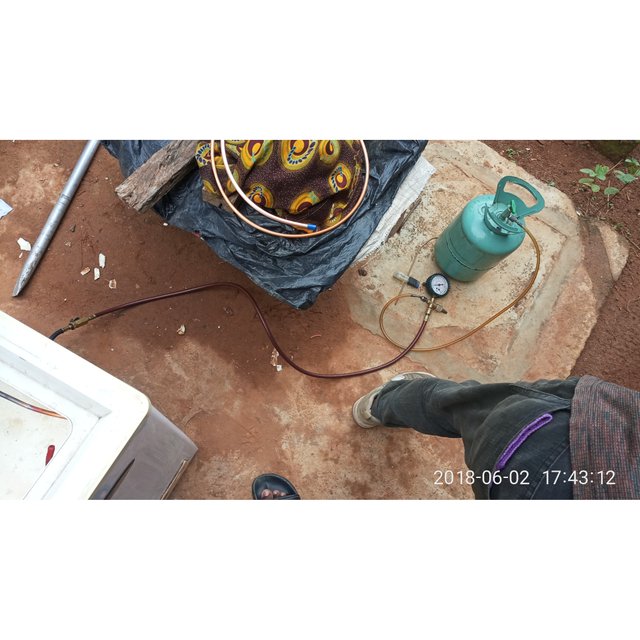
filling the compressor: image taken by me @adetola
This test for the leak was carried out in a similar way to a non-destructive test type called hydrostatic test, a test gas was passed into the compressor and allowed to circulate then foamy liquid was applied on the surface of all three weld joints. What happens if there is a leak would be a bubble on the surface of the leak while the calm fluid dries off when there is no leak.
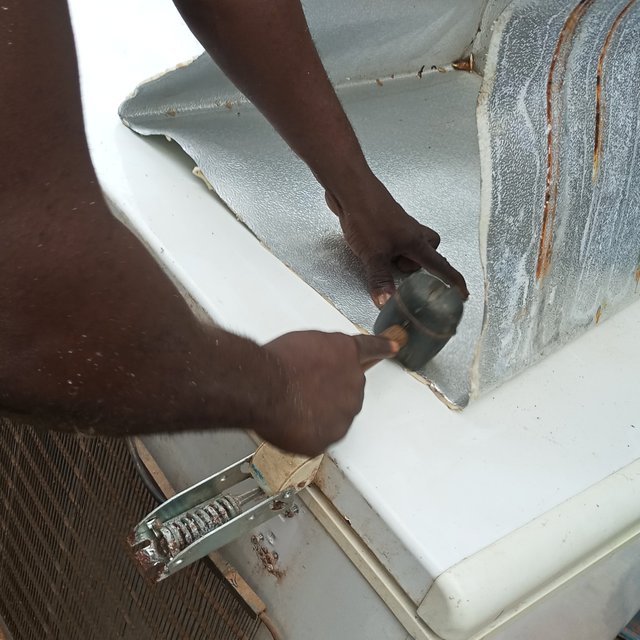
In this case, the liquid dried off while the test gas which was air was removed from the compressor and allowed to flow out. Fitting the coiled compressor tube was a bit of a problem but with the help of a mallet which was carefully applied at special points with enough support it was able to sit inside the space we removed the corroded pipe from.
Replacing the aluminum foil to look like it was before was another task at hand the parts first had to be stretched out on a flat surface using the mallet before the gum is applied on the surface of the insulating material and the aluminum foil to make it stick to the surface carefully.
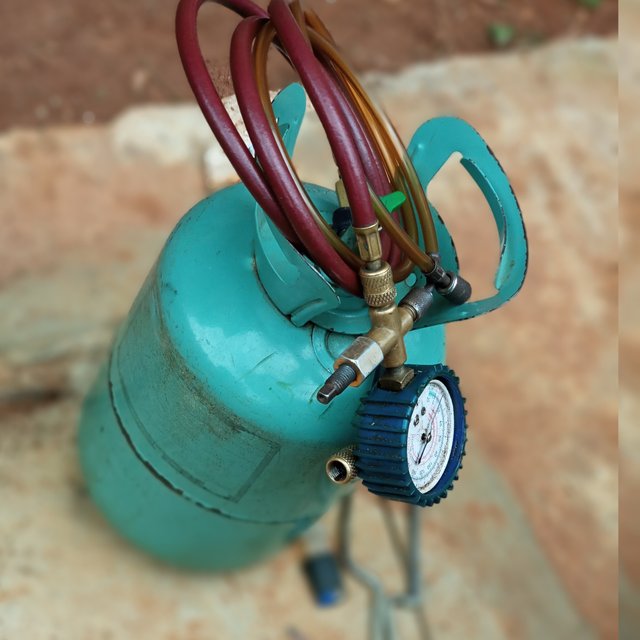
After this is done, the last phase of the teardown is to fill the compressor with the working fluid and this was done by using the inlet of the compressor as it was done before when it was being tested and a certain amount of gas C134 refrigerant was filled into the compressor while the aluminum foil was allowed to dry up. Lastly, the cover of the chest freezer was returned to its place.
Image gallery
You would see some images and a video in my gallery about how these operations are carried out on these materials.


watch this video I made to see several operations being carried out
Conclusion/ testing
The chest freezer after several hours was put to test by connecting to a power source and monitored for several hours. This teardown and repair had brought about a drastic change to the refrigerator as its working fine with the exchange of temperature between both atmospheres happening as to its failure before.
I was happy I finally had knowledge about refrigeration and what I was able to pinpoint is that a refrigerator is just a couple of tubes with a compressor and condenser. The only thing that makes your refrigerator big is the controlled area or space which you call your refrigerator.
This job took almost 6 hours to complete. I hope you enjoyed reading.
References
Knowledge is the beginning of all good things in life, it is a process and it is being improved upon here are the books and links I read.
- refrigerator specs
- Wikipedia brazing
- basic refrigeration cycle
- A Textbook of Refrigeration and Air Conditioning By R.S. Khurmi And J.K Gupta.
If you write STEM (Science, Technology, Engineering, and Mathematics) related posts, consider joining #steemSTEM on steemit chat or discord here. If you are from Nigeria, you may want to include the #stemng tag in your post. You can visit this blog by @stemng for more details.

You can also join us at Promo-Mentors, to improve your blogging skills. Join our discord channel and meet awesome mentors who are willing and ready to shape your writing skills.

I guess there is no machine you cannot tear down, is there?
You have a minor misspelling in the following sentence:
It should be in the long run, instead of in the long term,.Thank you.
This is good.... As much as I know about this stuff I would not try it out
Kudos.... It takes a real man to do hands on practical on technical appliances like this
Haha.. Trust me i had to get an expert beside me too.
Good job well done @adetola
Awesome teardown here...!
Thanks man!
In my engagement as facility manager, when considering fridge not cooling the major problem is gas leakage or storage of gas in the compressor. yYour article breakdown all the steps required to carry out repair and maintenance of fridge or let me say refrigerator.
Well done @adetola
Wow... You have gotten so much experience man.
Thanks for the encouragement
Hi @adetola!
Your post was upvoted by utopian.io in cooperation with steemstem - supporting knowledge, innovation and technological advancement on the Steem Blockchain.
Contribute to Open Source with utopian.io
Learn how to contribute on our website and join the new open source economy.
Want to chat? Join the Utopian Community on Discord https://discord.gg/h52nFrV
Next time, use #steemstem #ocd-resteem #how-to to supplements your tags, I hope curators find this post.
@dante31 @surfyogi
I hope good and great Upvote comes your way.
Thank you for the advice
Thanks for what? Never knew you're whale o, I checked your blog and was amazed, that means you've been here before me.
You have a anyone great blog bro. I envy you.
Congratulations @adetola! You have completed some achievement on Steemit and have been rewarded with new badge(s) :
Click on the badge to view your Board of Honor.
If you no longer want to receive notifications, reply to this comment with the word
STOPTo support your work, I also upvoted your post!
Do not miss the last post from @steemitboard!
Participate in the SteemitBoard World Cup Contest!
Collect World Cup badges and win free SBD
Support the Gold Sponsors of the contest: @good-karma and @lukestokes
This has been made more than explainable. Nice work @adetola.
I expect a truck teardown soon. Hahah
what a tear down here (laughs!). Reading this post alone seems as if i was there with you tearing all of this down. Keep the good works bro. I have learnt a lot here.