How to IoT your ligths....Pt 1
Hello there Steemians!
I am sure a lot of you here are into DIY and technology, (and Arduino)
so I thought I would share my last geekiness...
Is a quite cheap and simple solution -not too simple, but not even cumbersome if done properly- and is super useful if you are forgetful or if you live with many people that often come home drunk ahahahah!
(15 in my case! We are a happy bunch)
The whole tutorial is about making some lights in your house that turn on just at night and only when you pass in front of them (or in front of wherever you put your PIR sensor).
I wanted to do everything in one go but is too much stuff :)
So in this first part I am going to teach you how to set-up a light sensor that sends data to the internet,
and the rest is gonna come in part 2.
I followed A LOT of different courses/sources out there in order to make it work and this here is the condensation of all of them, so fasten your seat belts!
We go!
A) Materials and components:
Components:
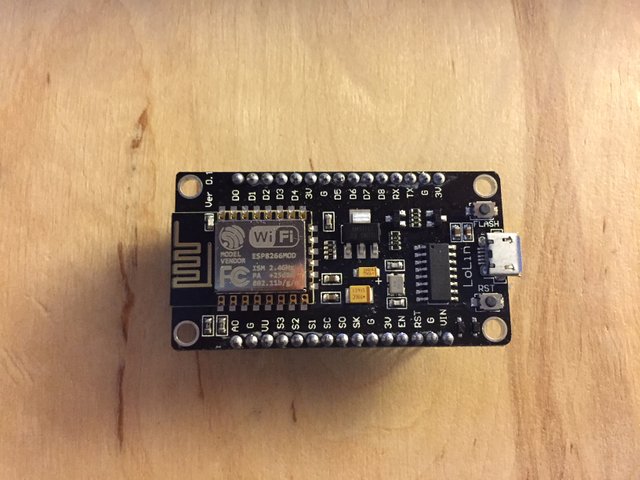
- 1 x ESP8266 Mod NodeMcu V3 (Or similar, AVOID ESP8266-01, too unstable)
- 1 x 10 k resistor
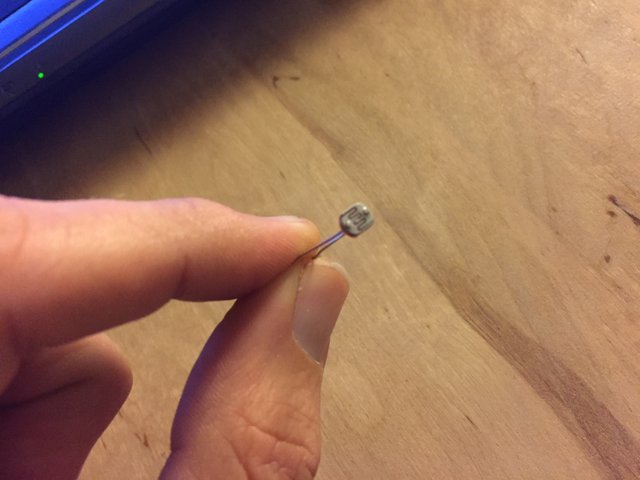
- 1 x LDR photo resistor
Other materials:
- Soldering Iron
- Jumper cables
- Electrical tape
- Scissors and lighter (wire stripper would be better)
Software:
- Arduino IDE
B) Setting up Arduino IDE
Open your IDE, and go into preferences:
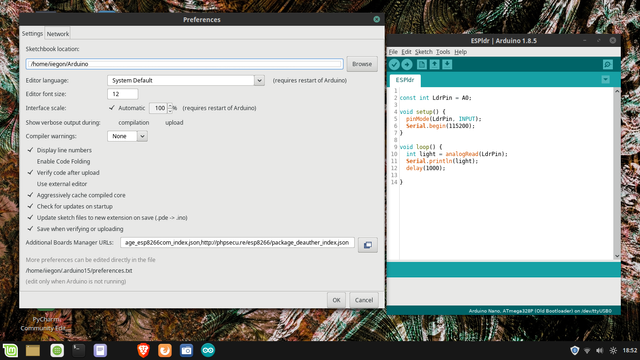
In the entry Additional Boards Manager URLs add this address:
http://arduino.esp8266.com/stable/package_esp8266com_index.json
Cool.
Now open Sketch, Include Libraries, Manage Libraries:
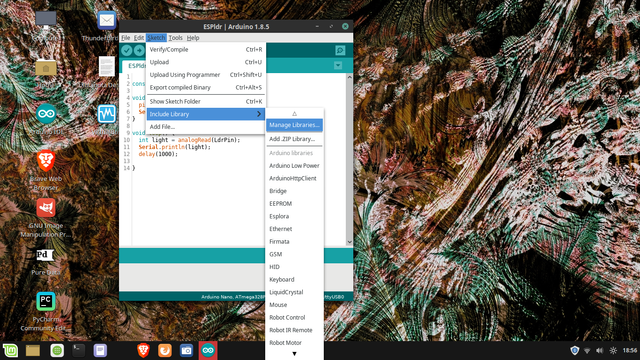
In the library manager search and download the following :
- Adafruit IO Arduino
- Adafruit MQTT Library
- Arduino Http Client
C) Adafruit IO:
Here is where you set an account on Adafruit IO where the ESP8266 is going to send data.
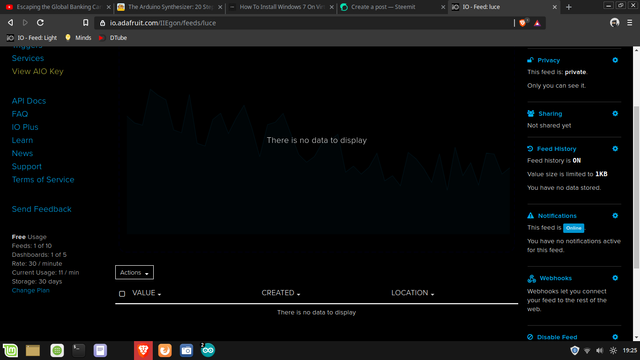
Is pretty simple, just go on https://io.adafruit.com , set up an account and create a Feed. Call it "light" or whatever makes sense to you.
When you are done it should look something like this:
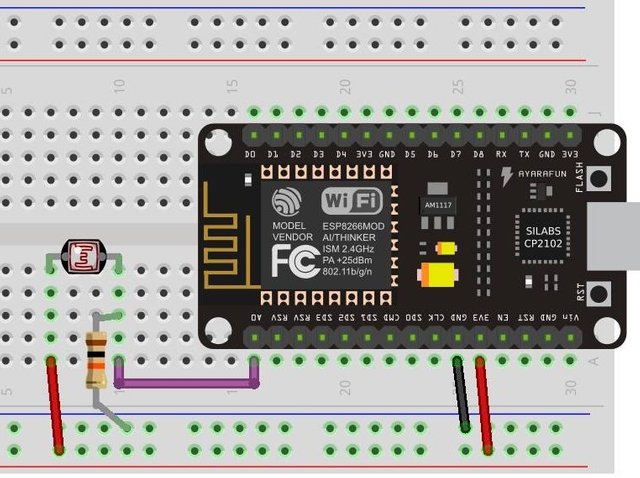
D) Wiring.
Again, pretty simple, just connect one side of the LDR to 3.3V.
The other side connects both to the 10k resistor and to Analog 0 on the ESP8266,
and finally the other end of the resistor to Ground.
Like this:
E) Test the LDR
Yeah we are finally ready to code.
First of all, let's put some code in only to check that the LDR is working properly.
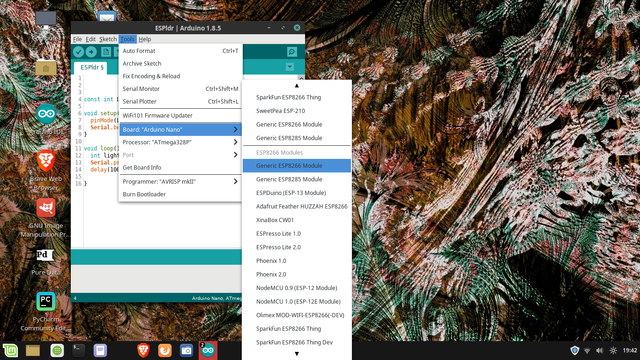
To do this you need to go into Arduino IDE,
then select Tools -> Boards -> Generic ESP8266 Module
Then copy and paste this code:
const int LdrPin = A0;
void setup() {
pinMode(LdrPin, INPUT);
Serial.begin(115200);
}
void loop() {
int light = analogRead(LdrPin);
Serial.println(light);
delay(1000);
}
Connect the ESP8266 to your computer and upload!
Now open the serial monitor (ctrl + shift + M) and change the settings in the lower right to
Both NL & CR and 115200 baud.
If you did everything right you should see something like this:
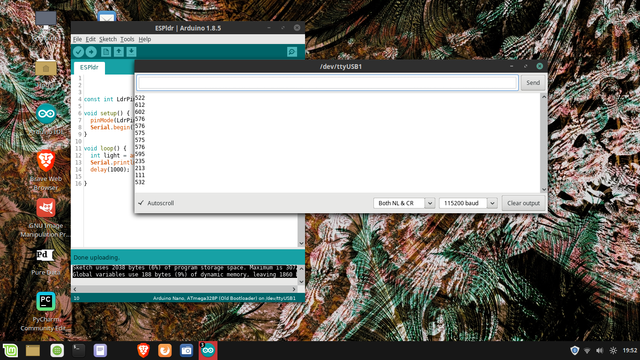
The numbers on the left are the readings of the LDR. If you get the photo resistor closer to a light source the number should go up to a max of 1024, while taking away from the light it goes down o a minimum of 0.
If you are getting wrong values (don't worry, messing up is quite normal) check you connections on the breadboard and the resistor.
Make your tests and if everything works fine you are ready for the last step.
F) Send data to Adafruit IO:
Copy and paste this code:
//include needed libraries to connect to wifi and to AdafruitIO
#include <ESP8266WiFi.h>
#include <AdafruitIO.h>
#include <Adafruit_MQTT.h>
#include <ArduinoHttpClient.h>
//define IO credentials
#define IO_USERNAME "ABCDE" //put your username
#define IO_KEY "hjvhjdbbdbvkvbb" // put your key
//define wifi credentials
#define WIFI_SSID "WIFI NETWORK" //your wifi name
#define WIFI_PASS "passpasspass" //your wifi password
//prepare adafruit wifi connection
#include "AdafruitIO_WiFi.h"
AdafruitIO_WiFi io(IO_USERNAME, IO_KEY, WIFI_SSID, WIFI_PASS);
//define the pin for the ldr
#define LDR_PIN A0
//define the feed we are going to write to
AdafruitIO_Feed *command = io.feed("YOUR FEED"); // check this! Is case sensitive!
void setup() {
pinMode(LDR_PIN, INPUT);
Serial.begin(115200);
// connect to AdafruitIO
Serial.println("Connecting to Adafruit IO");
io.connect();
while(io.status() < AIO_CONNECTED){
Serial.println(".");
delay(500);
}
//print connection status on serial
Serial.println();
Serial.println(io.statusText());
}
void loop() {
//keeping the connection to IO open
io.run();
// reading the ldr values
int Lvl = (analogRead(LDR_PIN));
// sending the values to IO and writing them on serial
Serial.println("Sending light level -> ");
Serial.println(Lvl);
command->save(Lvl);
//waiting tot seconds/minutes
delay(5000);
}
Before you can upload you need to edit the code to insert your:
- Wi Fi credentials (SSID name and your password)
- Adafruit IO credentials (put your Username and you active password, you can find them under the menu View AIO key in your account, on the left under the feeds menu)
- feed name.
Great! We are done!
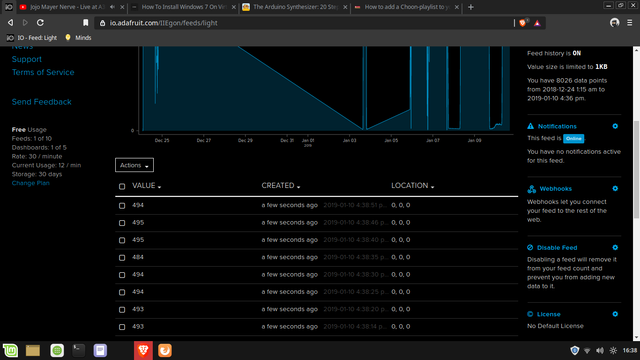
Now you should see your feed on Adafruit IO full of numbers, the ESP8266 reads the LDR and sends data to the IO every 5 seconds, so in a minute or 2 this should be the result!
I hope this tutorial was clear enough, I tried to be as precise as possible because I know how difficult this stuff is when you just start, I am kinda still there too :)
In part 2 I am going to explain how to make a receiver for this data that can also read a movement sensor and activate/deactivate a relay!
See you in a couple days.
Congratulations @iiegon! You have completed the following achievement on the Steem blockchain and have been rewarded with new badge(s) :
Click here to view your Board
If you no longer want to receive notifications, reply to this comment with the word
STOPTo support your work, I also upvoted your post!
Do not miss the last post from @steemitboard: