Pc Upgrade 🖥 | How To Change CPU, Motherboard And RAM Step By Step Guide 💾
So i started editing a lot more 4k content and figured out i would save quite som time on upgrading my CPU. After some research i ended up with the Intel Core i7-8700K processor and my main reasons for that was a clock speed of 3.7-4.7 with good overclock capabilities and 6 cores. Last time i upgraded my CPU was back in 2014 so it was truly time for something new and fast. My motherboard and RAM then also needed to be upgraded to be compatible with the new CPU.
I then thought some one in the steemit community might have some interests in learning how to upgrade their system, i then started documenting my build.
| Old parts: | New parts: | |
|---|---|---|
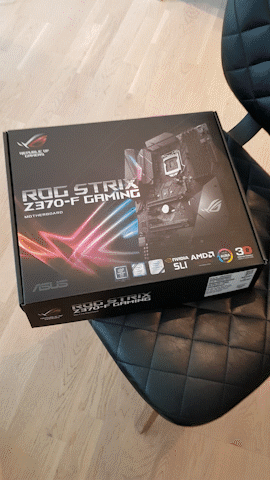
| MSI Z87-G45 Gaming, Socket-1150 | ASUS ROG STRIX Z370-F Gaming, S1151 | |
| Intel Core i5-4670K | Intel Core i7-8700K | |
| Kingston DDR3 HyperX Beast 2400MHz 16GB | HyperX Fury DDR4 2666MHz 16GB |

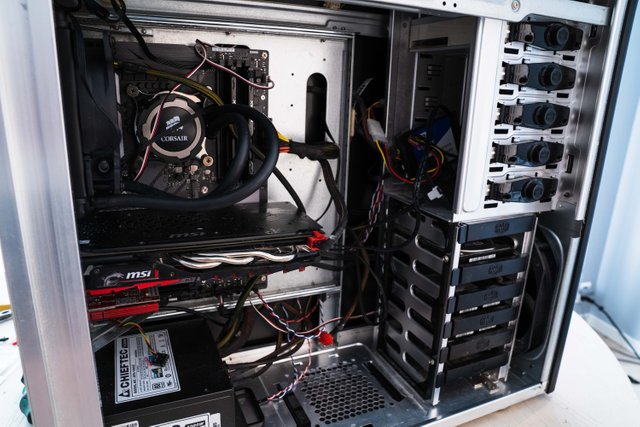
- First off all i start off with removing the old cooling unit from my motherboard since i am going to use it on my new build.
- I then proceed with unplugging and removing the GPU (Graphic card) and wireless network card.
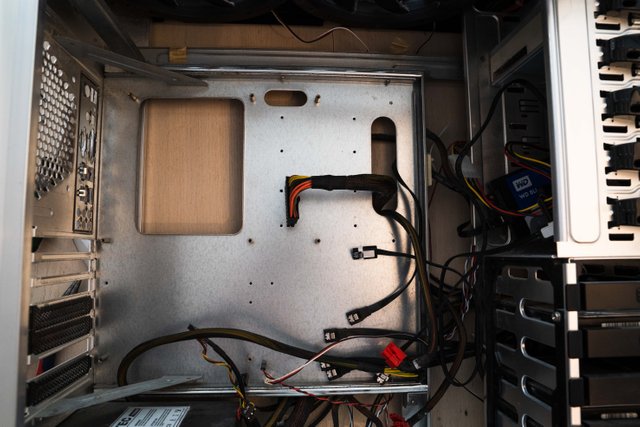
- Now unplug all the power, fan, SATA and other connectors on the motherboard so it can be removed safely from the computer case.
- To be able to remove the motherboard you unscrew the mounting screws located on a few different spots on the board.
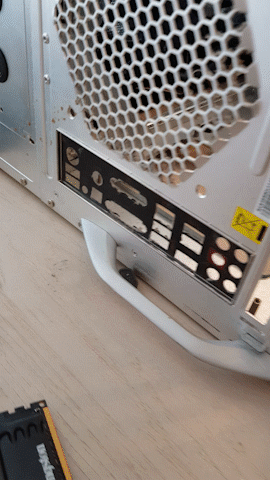
- After the motherboard is removed the IO shield on the back can be removed with a quick flick of a finger literally.
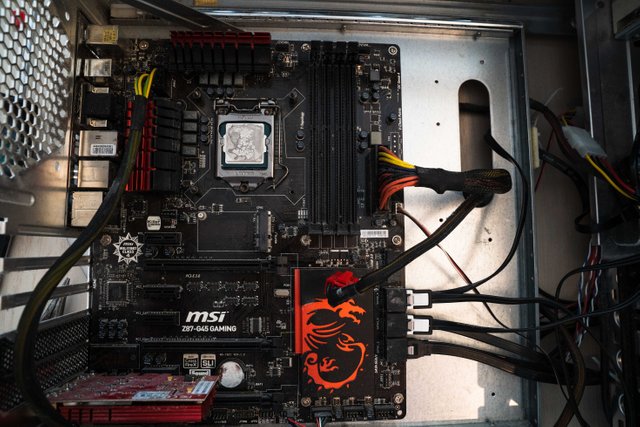
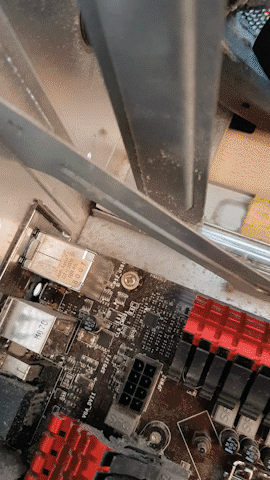
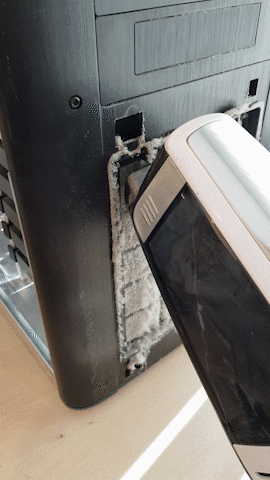
- Now that the motherboard is removed it's a great opportunity to do some spring cleaning. Grab a vacuum cleaner with a nozzle and remove all the dust you can find, your computer will thank you.
- Then it's time to insert the new IO shield in the back f the case.
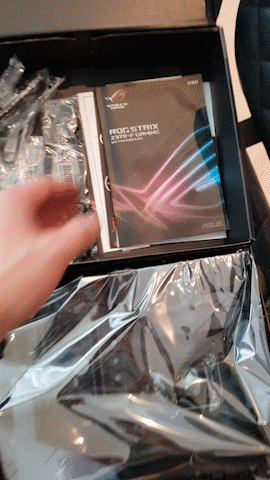
- Unbox the new motherboard and for sure throw away that manual, who needs it?
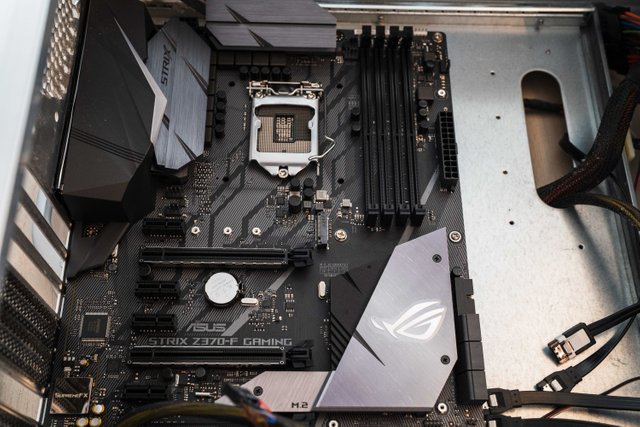
- Now place the motherboard in the same spot as the old and start adding back the mounting screws.

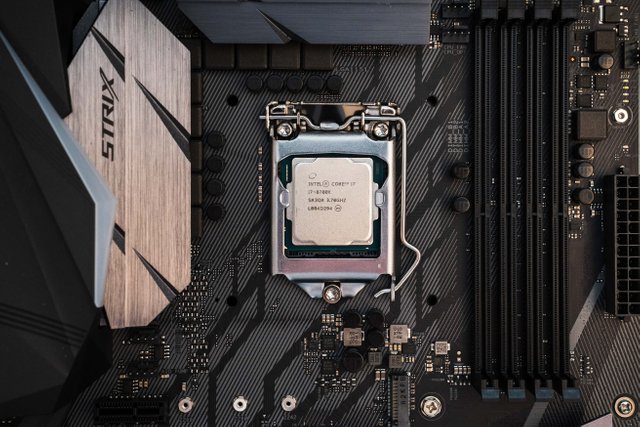
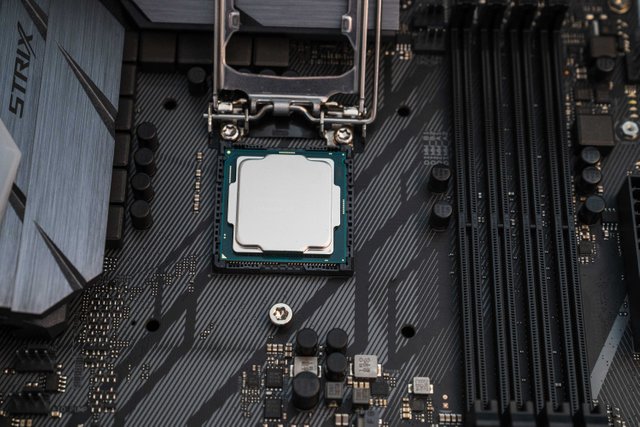
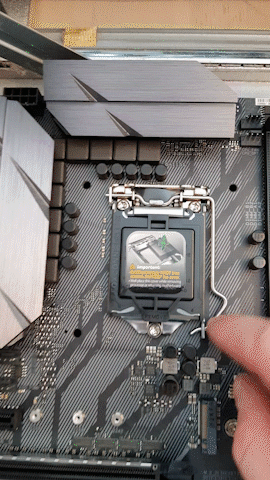
- Okey now we are installing the CPU, it needs to be mounted in the right orientation. This is indicated by a arrow in the left corner of the CPU that will line up with a arrow on the mounting bracket.
- Clamp down the locking mechanism so the CPU is securely fitted.
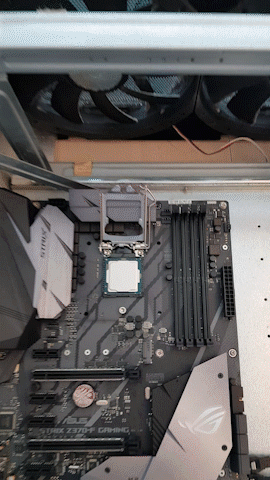
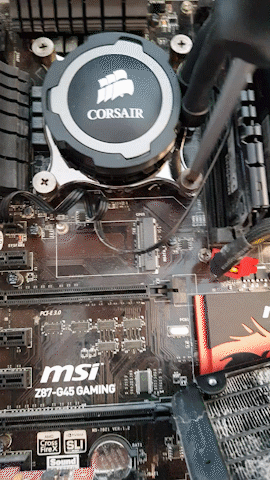
- Before attaching the cooling unit it must be cleaned because of old thermal past residue left on it from the old CPU, i usually us som high percentage rubbing alcohol for this job.
- Add a small dab of new thermal paste to the middle of the CPU.
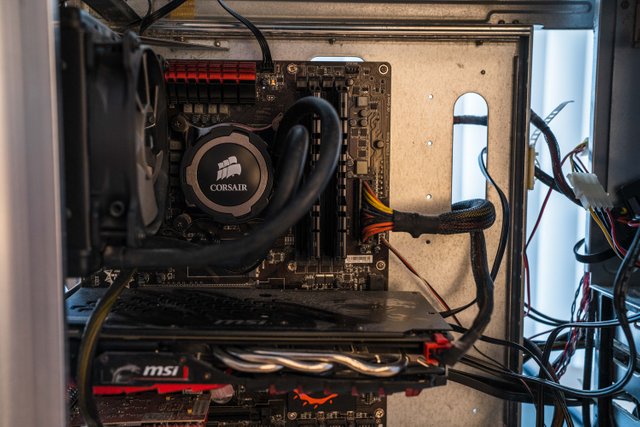
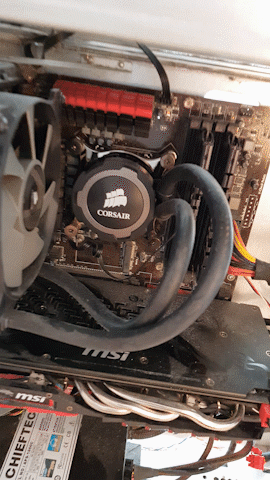
- Place the cooler on top of the CPU and press it down to spread the paste, use screwdriver to secure the cooler to the motherboard.
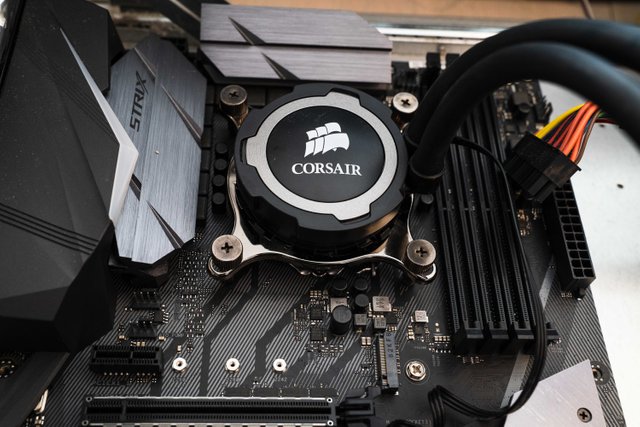
- Start connecting power, fan, SATA and the rest of the wires that was disconnected when removing the old motherboard.
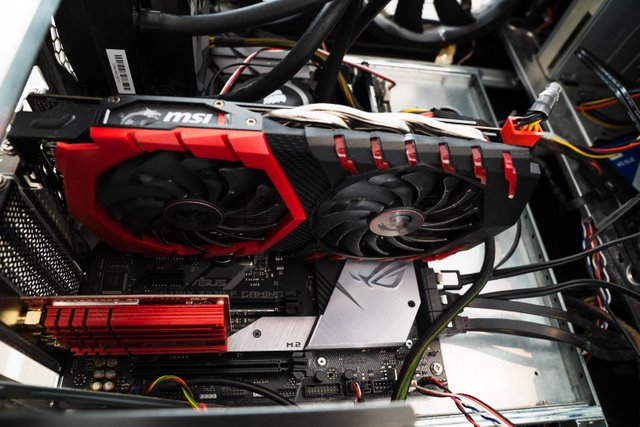
- I then mount the GPU and wireless network card.
- If your case got dust filters then clean them as they are probably filled with dust.
- Now the build is done. Only thing left is hooking it up to the screen to test out if everything works.
- When everything boots up i go and download CoreTemp and 3DMark basic edition. CoreTemp to have an eye on the temperature of each CPU core and 3DMark for stress testing the system, you can then see pretty fast if the CPU cooler is doing it's job or not.

Great skills to help us fix our pcs on our own. There is no better way to cut expenses than fixing stuff on your own.
That is so true 👍
Great post! as a long time computer builder this would have helped me a lot when I was first learning (of course being "geeked at birth" PC building for me started in the mid 90's)
also love that you included the all important cleaning of vents/grills
Thank you! aah you got quite some more years in the "game" then me 😃 Yeah never messing with that overheating👌
Wonderful tutorial! I wish I could have seen this before I knew a bunch about building computers. Keep up the great content.
Thank you, really appreciate the feedback of a fellow computer builder 😃 will do!
very helpful
Happy to hear that 👍
wonderfull presentation
Thank you!
Dope post. Detailed as hell. Helps alot . Good look
Thanks dude, much appreciated 👍
wow i actually find something really helpful now I can fix my own pc very easily thank you for this amazing info bless u.👍
Thank you for the positive feedback! Happy you found it helpful 👍
keep giving great information like that!
Will do! 😃
that will be great :) thank you!
What type of Graphics Card do you have? If its an older model i'm pretty sure an upgrade will help with rendering / content creation, especially in 4k.
Nice guide though!
Thank you! I got the msi 480 8gb, so it's the next one on my upgrade list. I have a freesync monitor so probably gonna go with the vega 56 or 64 if nothing new gets launched from amd.
The rumor is that new nvidia cards are launching within a few months. New AMD cards arent supposed to launch until 2019. Again these are just rumors but if I were you I would wait for Nvidia even though you have a freesync monitor. Freesync is best used for gaming.
Yeah for now my 480 is ok, so i think i'll just wait and see what happens in the GPU market. I do some gaming as well so would like to benefit from the freesync.
Nice upgrade. Time for me soon to do the same
Always sweet with a computer upgrade 👍
Fantastic work with this one, kudos
Thank you sir 👍