Using Aws-Shell To Deploy And Manage Updates For S3 Static Website
Repository
https://github.com/awslabs/aws-shell
What Will I Learn?
You will be learning how to use aws-shell (better version of aws cli) to create an s3 bucket, set it up for static website hosting and finally updating it. All using the aws-shell without performing any action from the aws console.
- How to install the aws-shell
- How to configure aws-shell to perform an action on your aws account
- How to configure access control (acl) and website settings for your s3 bucket directly from the aws-shell
- Update version of your static s3 website from the aws-shell without having to use the aws console
Requirements
For this tutorial, you will be required to have the following.
- A Linux OS
- An active AWS account
pipinstalled on your machine
Difficulty
Basic
What You Will Learn
More often than not, we find the need to briefly put a static site up to run a preregistration, maybe to display some information to our audience and accept some sort of registration through google forms or to run a campaign ad of some sort.
In this short tutorial, i would show you how to use aws-shell to create a new bucket, configure for static website hosting and allow read-only access to the objects of the bucket and do some sort of version control by updating the content right through the aws-shell.
First, you need to have the latest version of pip(package management system used to install and manage software packages written in python) installed. The latest version of pip as at the relea of this tutorial is version 10.0.1 to confirm this simply open your terminal then run pip -V and it should display something like this
pip 10.0.1 from /usr/local/lib/python2.7/dist-packages/pip (python 2.7)
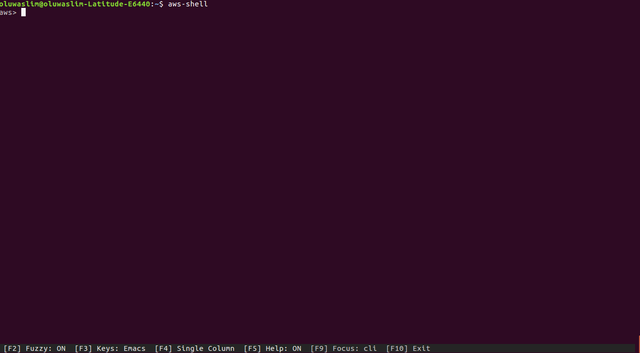
If your version is less than that, simply run sudo pip install --upgrade pip to update to the latest version, then run the previous command to confirm the version again. Now that you have the latest version of pip which is compatible with aws-shell simply run sudo pip install aws-shell, wait for it to install then run command aws-shell from you terminal. You will be presented with a screen like this
The aws-shell is an interactive shell, a close look at the above image you would see some options definition. The shell provides with feature such as autocompletion and tip about a command.
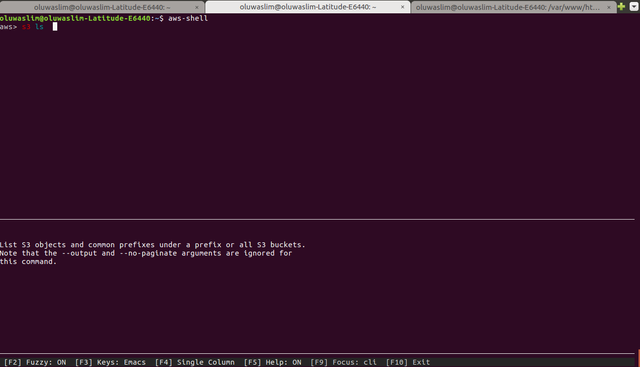
Example image showing S3 ls autosuggetsion and info window
Now proceed to aws console under the IAM service to create a user with only Programmatic access and AmazonS3FullAccess Policy attached to it.
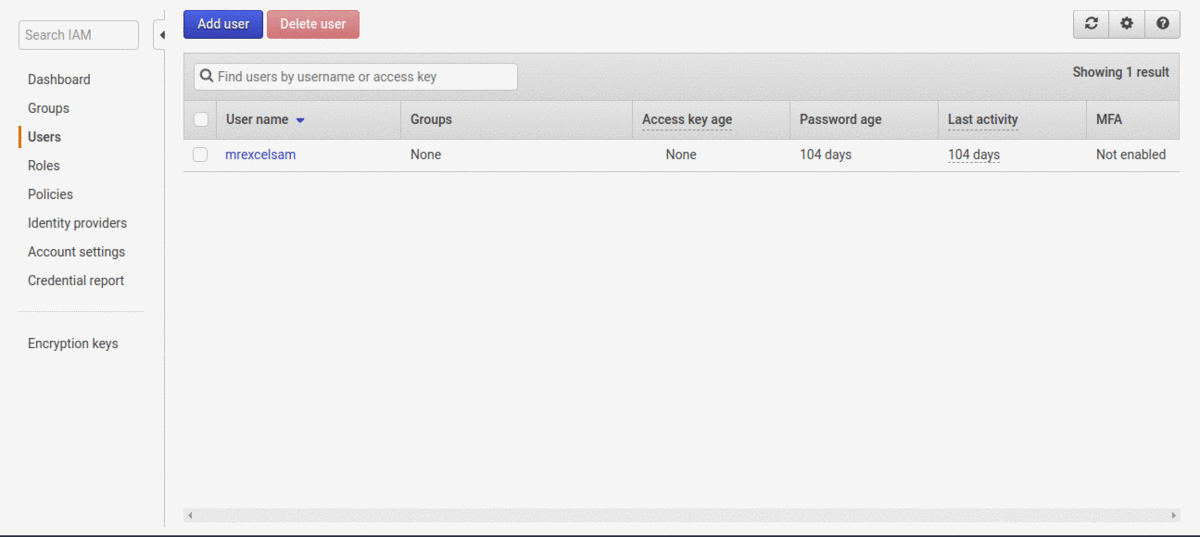
Download the .csv file containing your account details for future reference and keep it safe and secure, if a malicious user get hold of your ACCESS KEY and PASSWORD they could do a lot of havoc with it.
PS: I will be deleting the user account i created immediately after this tutorial.
Next we need to configure aws-shell with or new user details. If you are still in the aws shell(if not run aws-shell to go back then) run command configure and follow the prompt.
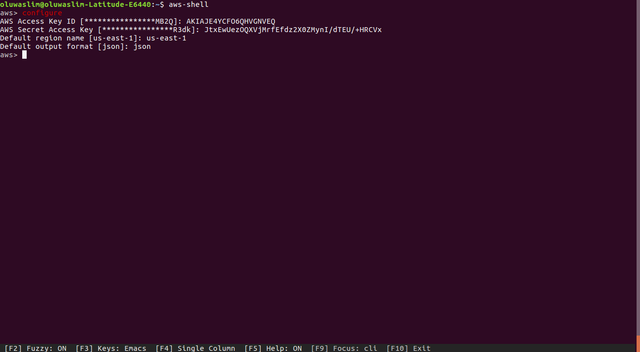
- Provide your Access Key
- Next provide your Secret Access Key
- Select from the available aws region : us-west-1, us-west-2, us-east-1, us-east-2, ca-central-1. view here for more regions
- Finally select output format between json or text (default)
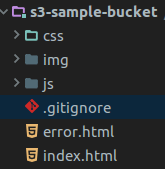
Now for this tutorial i already have a simple static website, by modifying one of bootstrap default template. But if you have one you want to use, just go ahead with that instead. It must have an index.html and error.html.
You can download the zipped file here or clone directly from github https://github.com/slim12kg/sample-s3-bucket.
You should have a directory tree similar to this
The steps we need to follow to conclude this tutorial includes:
- Create a new bucket
- Push the local directory content to the bucket
- Configure the bucket
aclto read-only - Configure the bucket for static website hosting
- Add a few other pages to the website, then sync to the bucket to update it
Remember bucket names are unique globally, so if anyone across the world have used a name for a bucket already, you would have to choose another one.
To create a new bucket, from the aws-shell terminal run command
s3 mb s3://youruniquebucketname
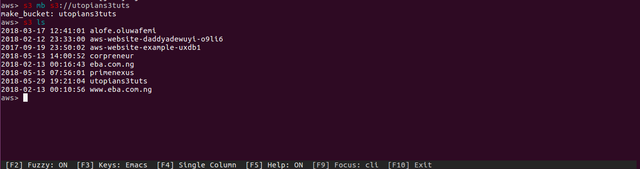
In my case i used bucket name utopians3bucket
Next we will push our local directory to the bucket, configure the acl to read-only . Again from the terminal in the aws-shell run command
s3 cp /var/www/html/s3-sample-bucket s3://youruniquebucketname --recursive --acl public-read --exclude ".git/*" --exclude ".idea/*"
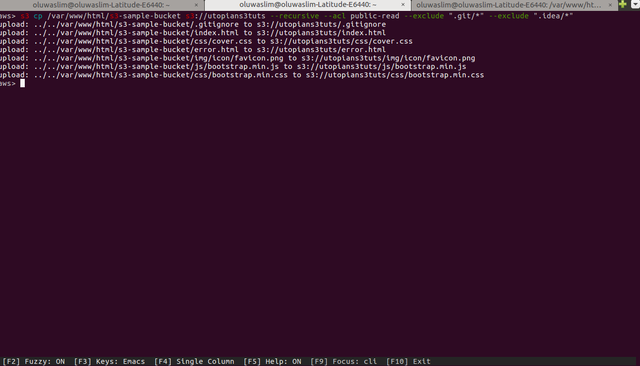
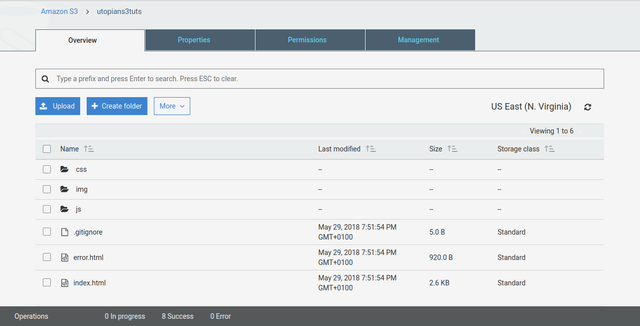
On AWS console you will see your newly created bucket with your files successfully uploaded.
Note the usage of cp subcommand to copy files, --acl subcommand to set the access control to read only for people publicly accessing out objects, and lastly the --exclude subcommand to exclude the .git and .idea folder.
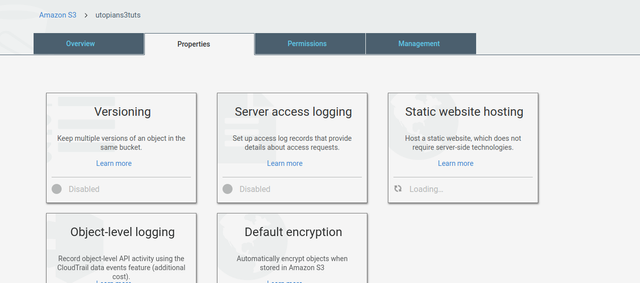
Now we need to configure the bucket for static website hosting.
From the aws console open your bucket, under the properties tab, the option for Static website hosting menu should not be active yet.
To toggle ON the option for the Static website hosting from the aws-shell terminal, run command
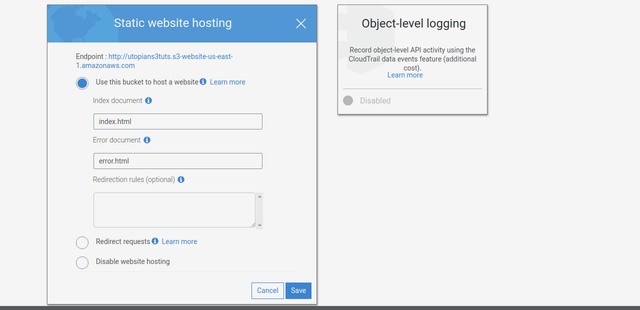
s3 website s3://youruniquebucketname --index-document index.html --error-document error.html
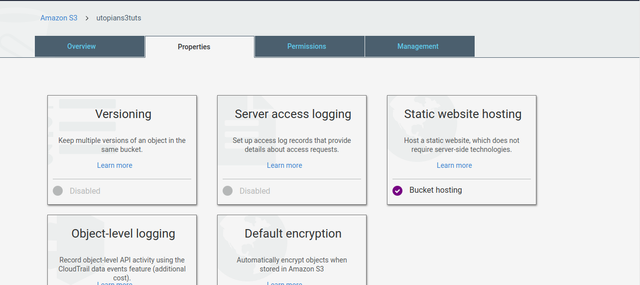
Now if you refresh the page you should see the Static website hosting option checked now.
Click on the Static website hosting tab to retrieve your Endpoint url
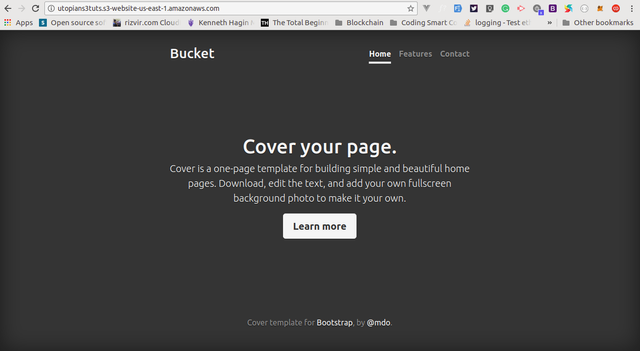
Visit your endpoint url and you will see the website index page load up.
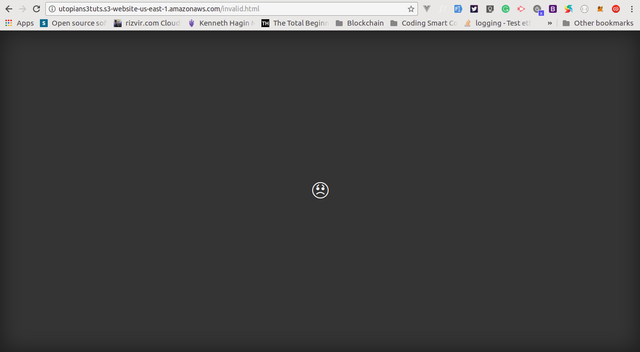
If you try to access an object that doesn't exist on the bucket, in my case i was trying to load invalid.html file that doesn't exist (see url tab in image) you should see theerror.html page load up which we've configured earlier from our previous command to behave like that. In some cases, i just use index.html for both index document and error page so visitors are redirected to my index page if they hit a 4XX (400, 404, etc...) server error.
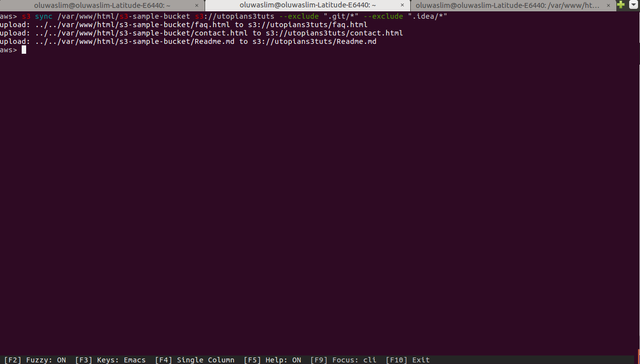
To round up this tutorial we need to add a few files to our local directory, and then sync to the s3 bucket to see how the updating of the site using aws-shell works. In my case i will be adding contact.html , faq.html, copy the content of index.html into them, then a readme.md file with the content of this tutorial, then from the aws-shell window in terminal run command
s3 sync /var/www/html/s3-sample-bucket s3://utopians3tuts --exclude ".git/*" --exclude ".idea/*"
Voila! We have been able to accomplish our task.
In my following tutorial iIwill be writing a shell script that can take care of complex cases when having a complicated file structure for a site that does beyond been static.
@alofe.oluwafemi you were flagged by a worthless gang of trolls, so, I gave you an upvote to counteract it! Enjoy!!
Hello @alofe.oluwafemi, thank you for your contribution!
It seems you are contributing to a project which has not received any program code update for the past 6 months. Sorry to break it to you that this goes against one of our most fundamental rules.
I would suggest you to review our most recent guidelines and modify your future contributions to ensure a potential reward.
Looking forward for more!
😞 How could I have missed that!!