Fetching Data From Steem Blockchain And Using It In Web App Using Flask

Welcome to my new tutorial in which I'll be teaching some very useful stuff that you might want to take a look at. In this article we will be building a web app using Flask that will showcase all posts from a certain tag of steem blockchain. You will be able to read all the posts and they are going to be all from created tab of a tag which means they will be sorted by newest to oldest. I will also be using a library for accessing steem blockchain which is known as Beem by @holger80, it is like steem-python but it out classes it in many functions. This tutorial will be abit fast paced for the new users of Python but hopefully I will be available to answer any question that you will ask in the comments.
Repository
https://github.com/pallets/flask
What Will I Learn?
- Upgrading CSS
- Using Beam
- Making our own dictionary with all the information of the post you need
- Importing file into the app.py file and assigning variable to allow it to be used inside html file
- Using the information we took by Python in our html
- Allowing the usage of markdown in our Flask Web App
Requirements
You must know basics of Python and stuff like while loops and for loops. You must also know what are variables, strings and integers etc. You also need a good code editor and I recommend PyCharm because it is very convenient. I will also be using PyCharm in this tutorial. You need to know the basics of the Flask and basic use of Beem. You will need the code used in the previous tutorial because I will be following from where I left it from the last part.
Difficulty Level
- Intermediate
Tutorial
Upgrading CSS
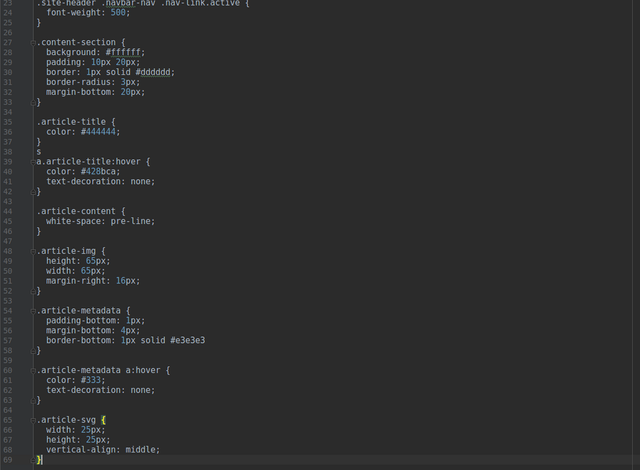
The first step will be to update the css you had from the last part. Copy the css from here and past it into the css file you had in the static directory, this will have all the necessary css you need for this tutorial. Again the reason I am not discussing this css file is that because I want to keep my completed focus on teaching you Flask.
Using Beem
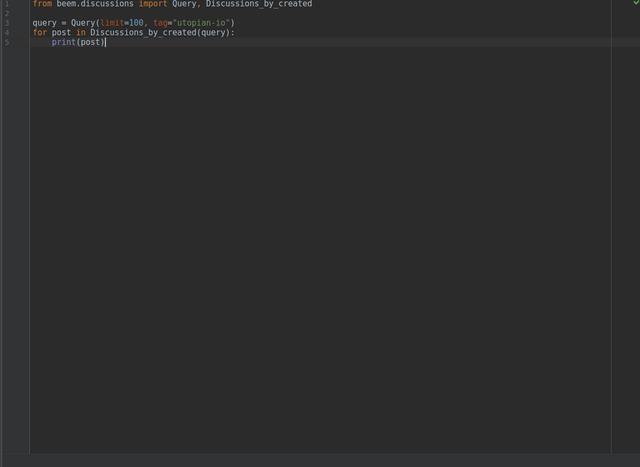
Create a new python file in the main directory and you can name it something like "steem" or something because all the code inside it will be used for connecting steem to your web app. After creating the file, add the following code in it.
from beem.discussions import Query, Discussions_by_created
query = Query(limit=10, tag="utopian-io")
for post in Discussions_by_created(query):
    print(post)
The first line in the above is us importing some functions from Beem and the next line is us setting up query variable to Query function which returns us posts and we can type of filter it, we have assigned two parameters to it. The first parameter is limit which is set to 10 so we only want 10 posts and don't our page filled with ton of posts. The second parameter is tag so we can only get the posts from a certain tag which is "utopian-io" for this tutorial. Third line is a for loop, in this for loop we are looping through a each post and then printing them in line four.
Making our own dictionary with all the information of the post you need!
We don't want to print the information but we will loop through each of the ten posts, save needed information about that post and move on, this way we can easily get what information we need. Here are the things that we need are listed below, of course we can get more things but to keep it as simple as possible I am getting these things.
- Author Name
- Title Of Post
- Content Of Post
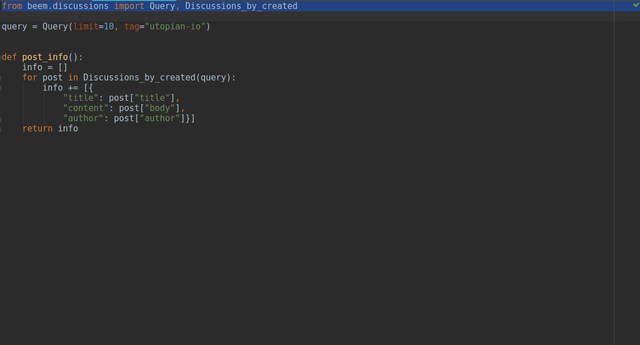
We can do these things by getting the information of interest from each post. First step will be to create a variable known info and set it as just an empty list using "[]". Now inside the for loop remove the print statement and paste the code given below inside the for loop.
info += [{
        "title": post["author"],
        "content": post["body"],
        "author": post["author"]
    }]
Put the whole for loop inside a function known as post_info so we can use it different files and also add "return info" like done in the image below, also make sure the info variable is inside the function.
Importing file into the app.py file and assigning variable to allow it to be used inside html file
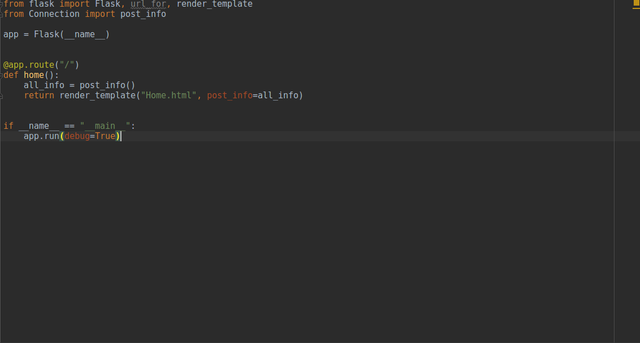
Ok, we have now a function that returns us the information of first 10 posts of "utopian-io" tag. The next step will be importing it in the main app.py file. You can easily import the function by typing from [filename] import post_info at the top of app.py file. Make sure to replace [filename] with the filename of the file in which you made your function.
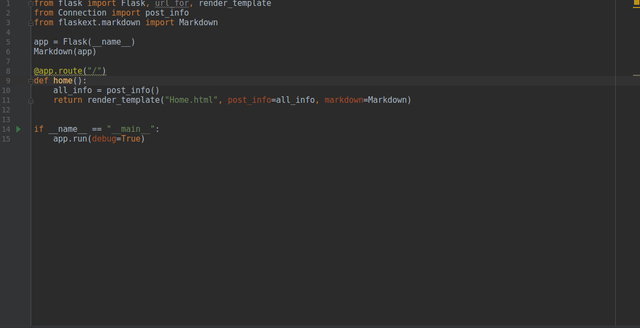
To use variables in the HTML we need to tell Flask that we will be using these variables in our HTML and we can do that easily. First step will be to make a variable inside the function of route that will store all data from the function, so type "all_info = post_info()" this will give "all_info" variable all the information we need to use on the web app. Our route's return has a render_template code, after the HTML add a comma and type "post_info = all_info" like done in the image below.
Using the information we took by Python in our html
Open the html file (not the layout) which was for home. You will have code like one given below.
{% extends 'layout.html' %}
{% block content %}
Something Here
{% endblock %}
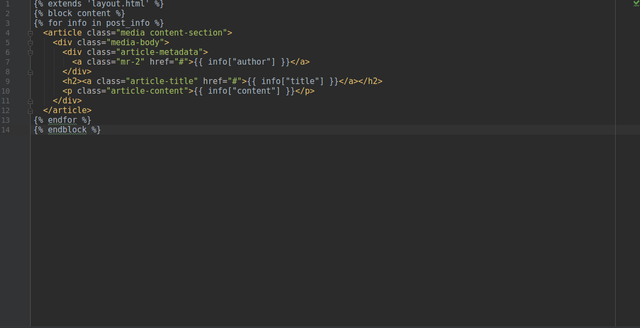
That's a good start, now what we will need to do is start a for loop that will loop through each post and then we can get information from each post and print it. Read the code and try to understand it. When copying and pasting the code given below make sure you paste it inside the content block.
{% for info in post_info %}
  <article class="media content-section">
    <div class="media-body">
      <div class="article-metadata">
        <a class="mr-2" href="#">{{ info["author"] }}</a>
      </div>
      <h2><a class="article-title" href="#">{{ info["title"] }}</a></h2>
      <p class="article-content">{{ info["content"] }}</p>
    </div>
  </article>
{% endfor %}
If you got the answer give yourself a pat on the back, well done! We are looping through each post_info in the dictionary and printing it. The html is just to give it some style and most of it is just basic html so I won't go in detail. {{ }} are used for printing variables or used for variables in general while {% %} are known as logic and most of the time they are used for python functions.
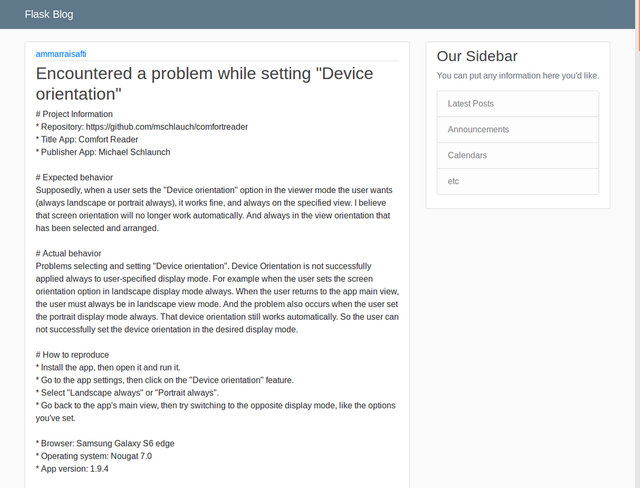
Magic
Now it's time to see the magic and run the file, violla!
Extras
Here is some a little extra tutorial that might help you in the future. You might have noticed that markdown isn't working. To solve this from flaskext.markdown import Markdown in the main app.py and on the next line type Markdown(app). Now add it after the previous variable in the route.
Now go to home html file and just above the paragraph tag with class article-content type "{% filter markdown %}" and after the variable that we printed before type"{% endfilter %}" like done in the image below.
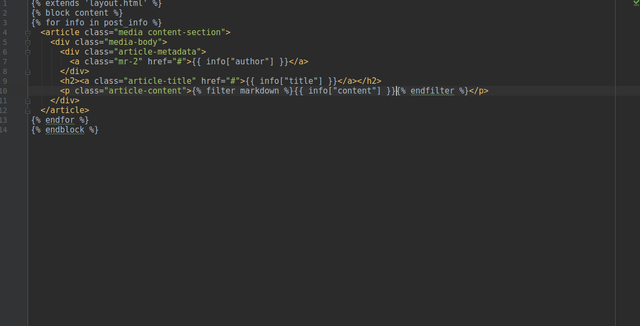
Now restart the server and you'll see that markdown is working!
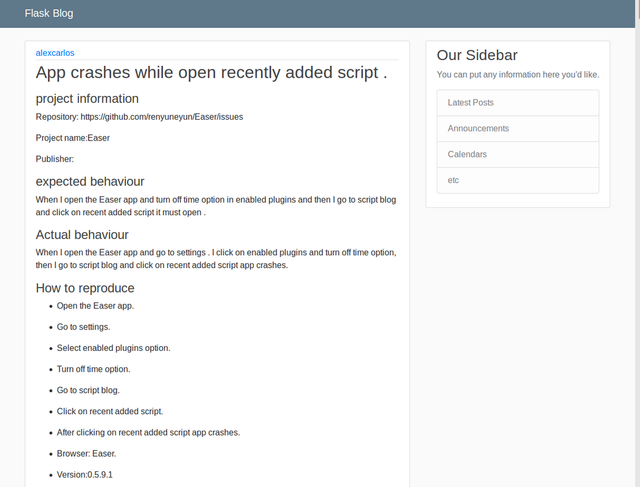
What we did in this tutorial?
First we created a new file for getting all the information of articles from steem blockchain and to do so we used Beem which is a steem library by @holger80. Then from the data we got we created a dictionary of the data we wanted that was (author, title and content). We imported all the data from the file to the main app.py file where we stored all the information in a variable known as all_info then we imported the variable into html by adding a comma then assigning the variable. We then looped through each information in the html with the help of {% %} (logic) and printed each information in it's place. We also used abit of html. We also learned how we can allow usage markdown in Flask and how simple it is to do that. At the end we are left with a web app that shows 10 newest post of targeted tag which was "utopian-io" in this case.
Curriculum
Related article in which you might be interested in:
Code
All the code using in this tutorial can be found here.
Great Post! The pictures helped me alot and the overall quality of contribution was great, really loved it!
Thank you for your contribution.
Looking forward to your upcoming tutorials.
Your contribution has been evaluated according to Utopian rules and guidelines, as well as a predefined set of questions pertaining to the category.
To view those questions and the relevant answers related to your post,Click here
Need help? Write a ticket on https://support.utopian.io/.
Chat with us on Discord.
[utopian-moderator]
Hey @anonfiles
Thanks for contributing on Utopian.
We’re already looking forward to your next contribution!
Contributing on Utopian
Learn how to contribute on our website or by watching this tutorial on Youtube.
Want to chat? Join us on Discord https://discord.gg/h52nFrV.
Vote for Utopian Witness!
Pretty cool. i've only used Django so far, but Flask looks quite similar.