[Tutorials] Introduction. Prepare your MAC for website developing. (Part 1)
What Will I Learn?
- Preparing your MacOS for further work
Requirements
- Computer with MacOS X installed
- Basic Computer Skills
Difficulty
- Basic
Tutorial Contents
Introduction
First of all, I would like to introduce about myself and that you can expect from me.
I'm developing websites for 7 years and want to share my knowledge to you. I will try to write these tutorials mostly for users, which doesn't have any experience in programming at all. We will learn to use HTML, CSS, Javascript and PHP. I will not go in teaching you in basics of HTML and CSS, but will try to explain my code as much as will it be possible. Hope, you will understand it.
If you also doesn't know, what HTML, CSS, Javascript and PHP stands for, I will explain in understandable for everyone language.
HTML - it's some kind of skeleton of the website;
CSS - it's skin of the skeleton, so with it, you will be able to style your website as you want;
Javascript - are mostly used for interactivity;
PHP - makes your website functional. So, you will be able to validate form data, store data in database etc.
First years of programming, actually, I wrote all functions and code by myself. I didn't want to trust in the code, that was written by anyone else. But after some time, I discovered a lot of useful frameworks that's actually made my facilitated my work a lot, so I can't imagine my programming anymore without them. That's why in these tutorials we will use:
- Laravel Framework - it's PHP framework, which helps a lot, because it has a lot of functions and classes, that's already created for you. So, you don't need to reinvent the wheel.
- Bootstrap Framework - HTML, CSS and Javascript framework. Mostly, I use it to create responsive templates, so you can make the same website look beautiful for desktop, tablets and mobile phones.
Let's start
Firstly, you must to prepare your computer for further work. In the first part of tutorial, I will show, how to prepare your MacOS. In the next parts, I will show you also, how to prepare your computer, if you are using Ubuntu or Windows.
Step 1 - downloading required packages
We will need some software to download, before we will be able to start programming. So, we will need download VirtualBox and Vagrant.
We will start with VirtualBox, so visit the Virtual Box Official Website and download VirtualBox platform package for OS X hosts.

Open the downloaded file and Double click on the VirtualBox.pkg icon.
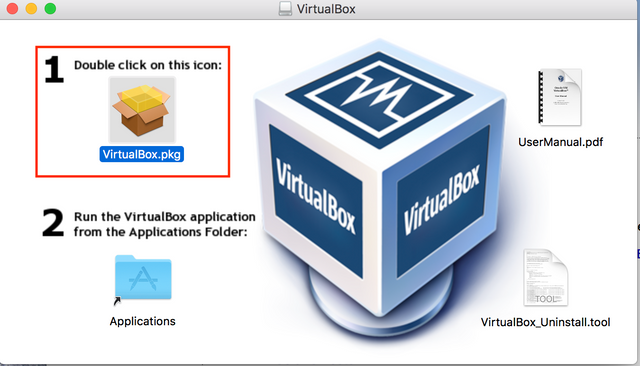
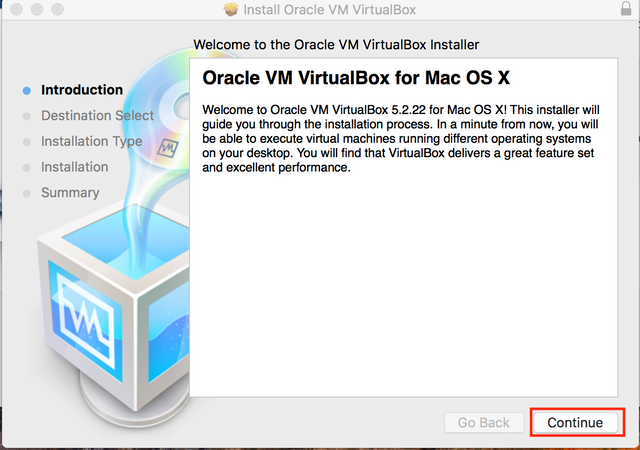
Press Continue
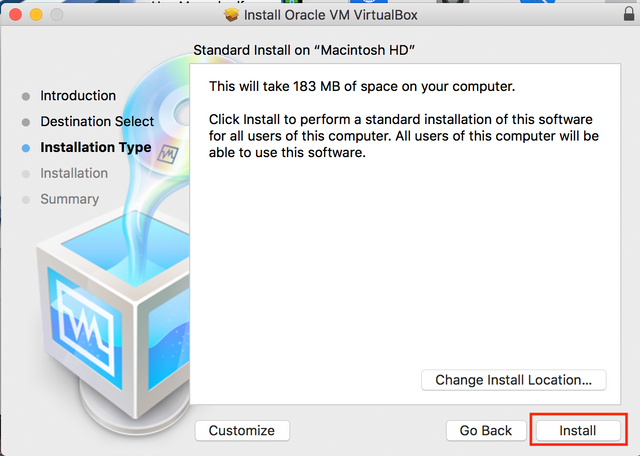
Press Install
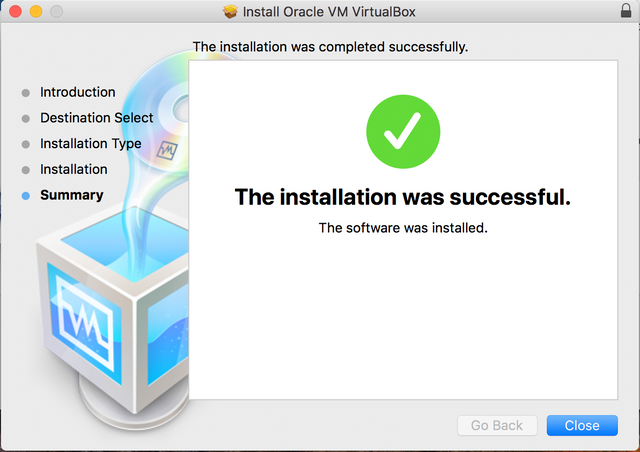
Finally VirtualBox has been installed. So, Just press Close button.
Also, we will need to install Vagrant. So, visit the Vagrant Official Website and download the Vagrant for MAC OS.

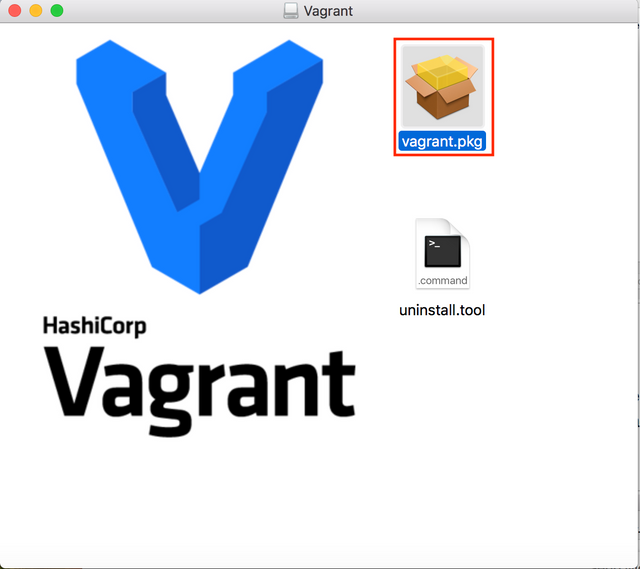
Open downloaded file and click to the vagrant.pkg icon.
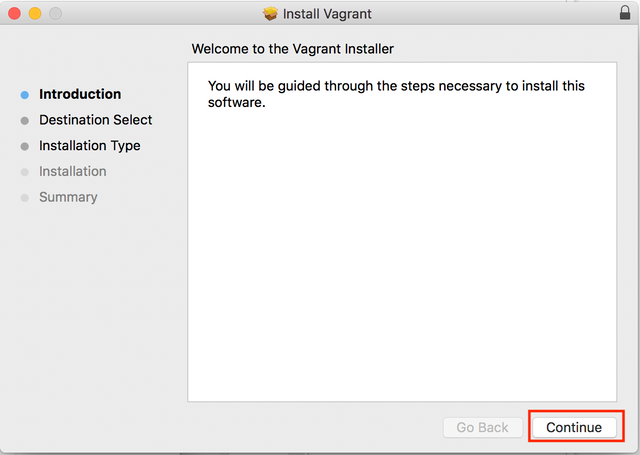
Press Continue
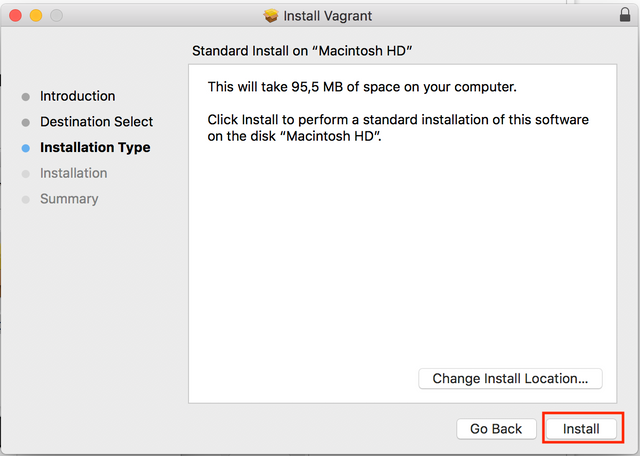
Press Install
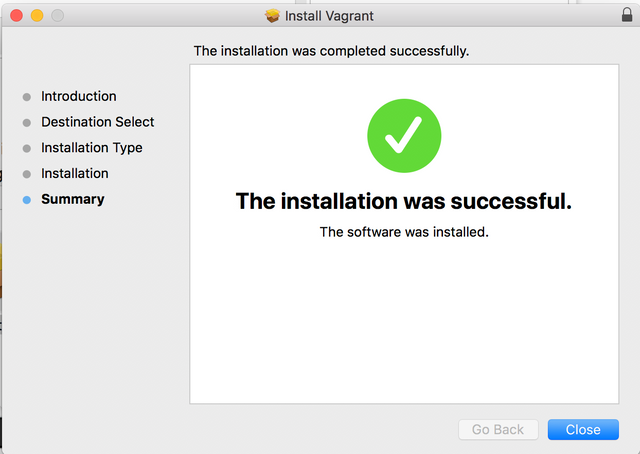
Vagrant are also installed. Just press the Close button
Step 2 - Setting up Virtual Box and Laravel Homestead
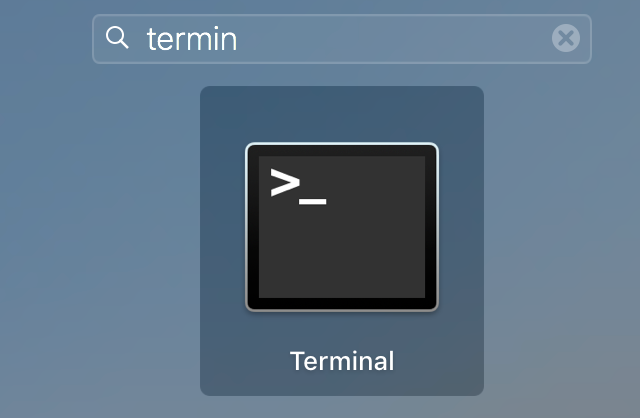
You will need to open Terminal. So, Open Launchpad and search for Terminal and click to the icon as you see below.
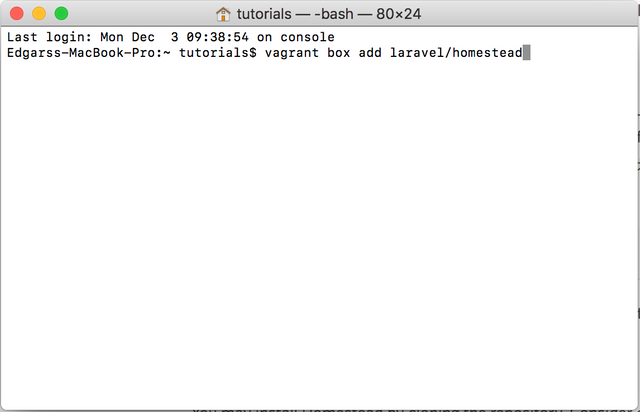
You must run the command vagrant box add laravel/homestead in Terminal to add box to Vagrant installation.
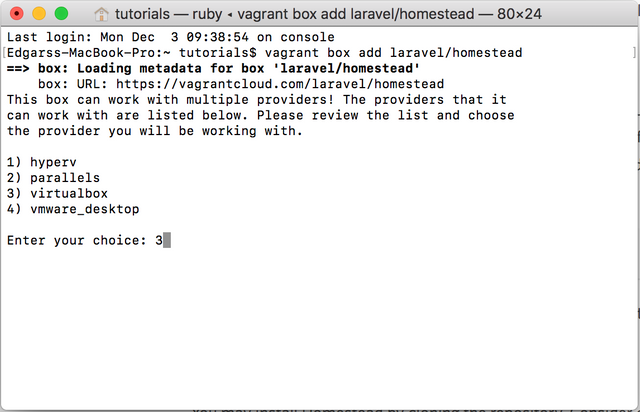
If terminal asks to choose Provider then choose virtualbox
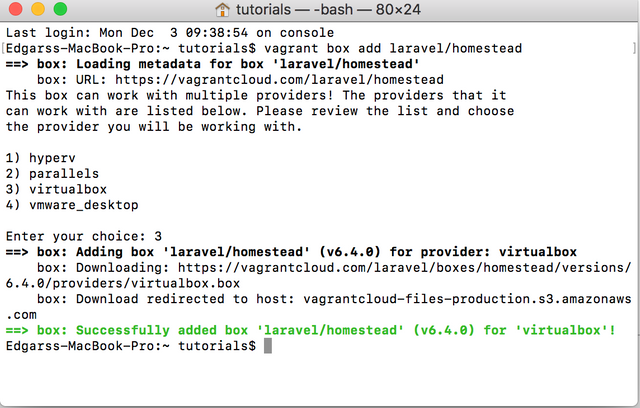
Laravel Homestead box now are also added.
Don't worry, we are almost done with creating the Virtual Machine. Now we must to download Laravel Homestead. It can be easily done, buy running the command git clone https://github.com/laravel/homestead.git ~/Homestead
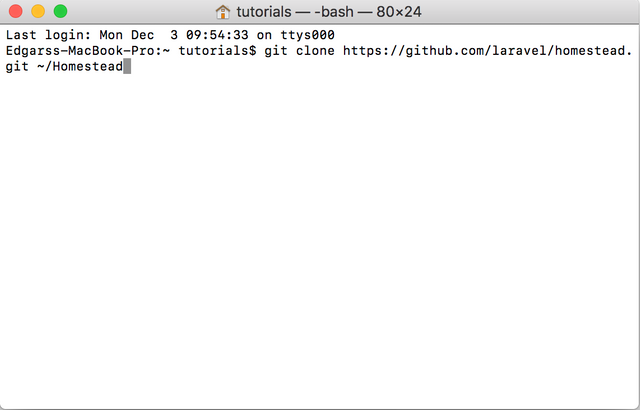
Now we must to change the directory to the folder, which we just downloaded. So run the command cd ~/Homestead and now we must to initialise Homestead so run the command bash init.sh .
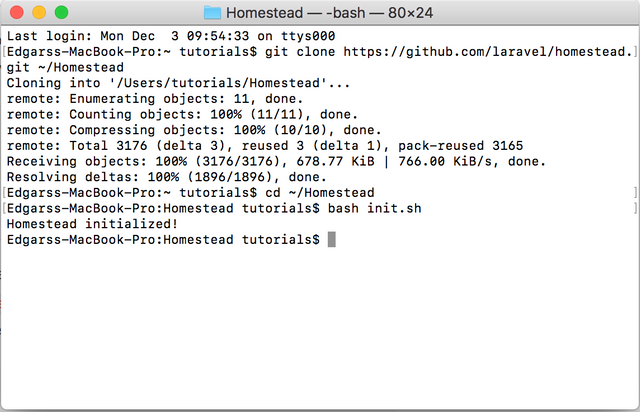
Now, open Finder and open Homestead which are located in home directory. We will need to edit Homestead.yaml file. My configuration file you can find below...
---
ip: "192.168.10.10"
memory: 2048
cpus: 1
provider: virtualbox

authorize: ~/.ssh/id_rsa.pub

keys:
    - ~/.ssh/id_rsa

folders:
    - map: ~/code/tutorial1
      to: /home/vagrant/code/tutorial1

sites:
    - map: tutorial1.test
      to: /home/vagrant/code/tutorial1/public

databases:
    - tutorial1

# ports:
#     - send: 50000
#       to: 5000
#     - send: 7777
#       to: 777
#       protocol: udp

# blackfire:
#     - id: foo
#       token: bar
#       client-id: foo
#       client-token: bar

# zray:
#  If you've already freely registered Z-Ray, you can place the token here.
#     - email: [email protected]
#       token: foo
#  Don't forget to ensure that you have 'zray: "true"' for your site.
.png)
Step 3 - configuring computer
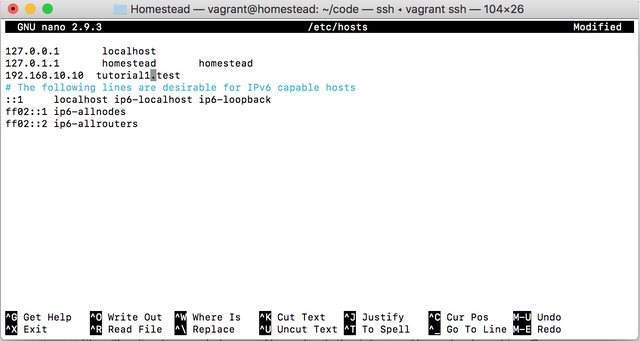
In your Terminal run command nano /etc/hosts and insert the line anywhere in the file192.168.10.10 tutorial1.test. After that, close file, by pressing CMD+X, enter Y and press Enter.
Also, we will need to create Private and Public key, so we will be able to connect to our Virtual Machine. You can create it by running the command ssh key -t rsa in your Terminal and press Enter every time, when it asks something, so we will use the default directories.
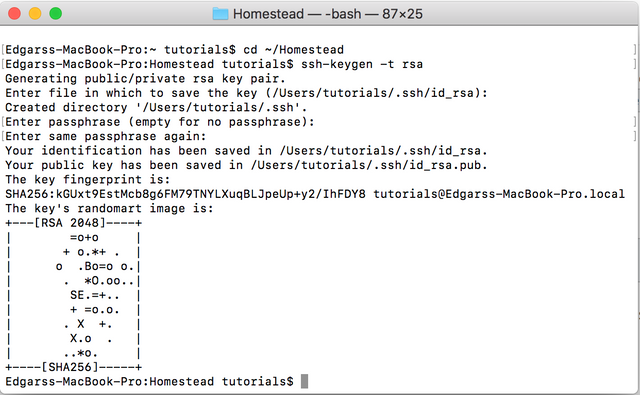
The final step, before launching our Virtual Machine is creating the directory where you will be able to edit your files of the website. So, run the command mkdir -p ~/code/tutorial1.

Now, change again to the Homestead directory by running cd ~/Homestead and run vagrant up command, so your Virtual Machine will be started. It make some time, so be patient
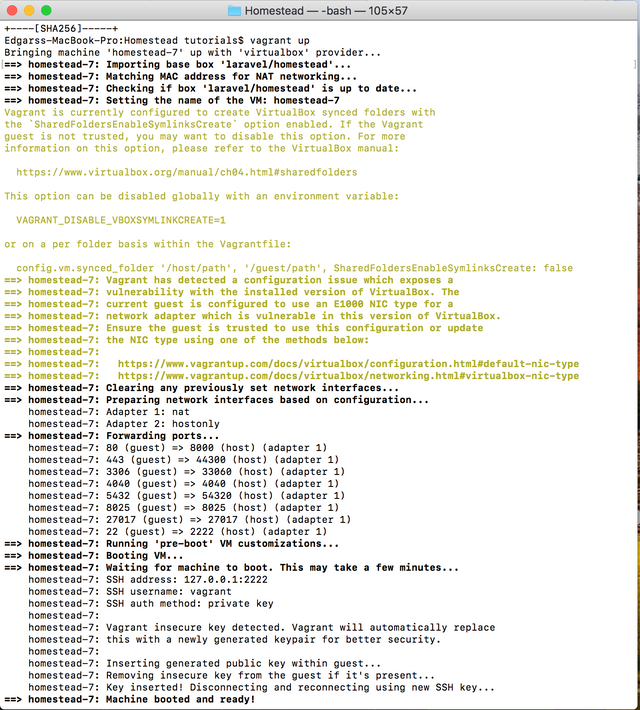
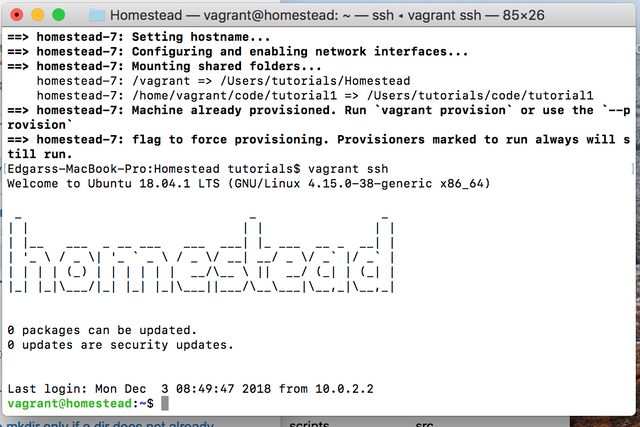
Now we are able to connect to our virtual machine, so run the command vagrant ssh.
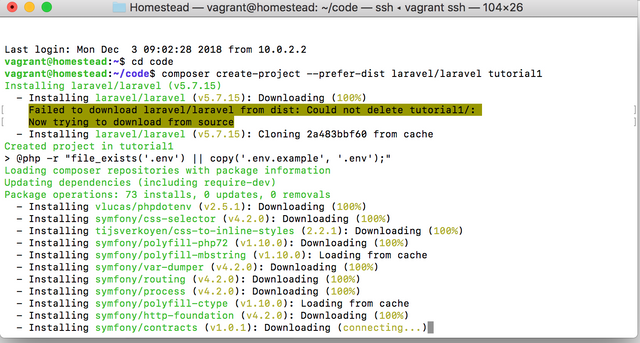
We will change directory by running command cd code.
Step 4 - install laravel
Launch the command composer create-project --prefer-dist laravel/laravel tutorial1. Wait until all files will be installed.

Now, you can open the browser and open http://tutorial1.test and check, that everything has been installed.
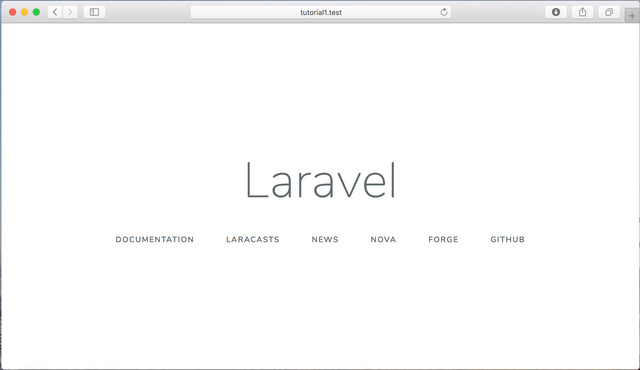
Congratulations ! Now you are ready to start creating websites. In next parts of tutorial, I will also show you, how to prepare your computer if you are using Ubuntu or Windows.
Thank you for your contribution @edgarsloskots.
We suggest the following points below:
Avoid installation steps which are already well documented.
There is already a lot of information like installing virtualbox, vagrant and laravel on macOS. Try to bring a more important and more innovative subject to the open source community.
When using code include proof of work under the shape of a gist or your own github repository containing your code.
See this tutorial which is a good example to follow. Link
We are waiting for your most innovative tutorial. Thank you for your work.
Your contribution has been evaluated according to Utopian policies and guidelines, as well as a predefined set of questions pertaining to the category.
To view those questions and the relevant answers related to your post, click here.
Need help? Write a ticket on https://support.utopian.io/.
Chat with us on Discord.
[utopian-moderator]
Thank you for your review, @portugalcoin! Keep up the good work!
Thank you for your suggestions ! I will keep in mind them !
Since I would like to teach also the users, who just want to try his abilities in programming, and never tried it before, then I also wanted to create tutorial like this. So any newbie also will be available to create his new first app, following by only this tutorial.
Thank you for the tutorial, keep up with the good work!
Hey, @edgarsloskots!
Thanks for contributing on Utopian.
We’re already looking forward to your next contribution!
Get higher incentives and support Utopian.io!
Simply set @utopian.pay as a 5% (or higher) payout beneficiary on your contribution post (via SteemPlus or Steeditor).
Want to chat? Join us on Discord https://discord.gg/h52nFrV.
Vote for Utopian Witness!
Thank you ! Will be very happy to support Utopian.io ! :)
Congratulations @edgarsloskots! You have completed the following achievement on the Steem blockchain and have been rewarded with new badge(s) :
Click here to view your Board of Honor
If you no longer want to receive notifications, reply to this comment with the word
STOPDo not miss the last post from @steemitboard:
Congratulations @edgarsloskots! You have completed the following achievement on the Steem blockchain and have been rewarded with new badge(s) :
Click here to view your Board of Honor
If you no longer want to receive notifications, reply to this comment with the word
STOPCongratulations @edgarsloskots! You received a personal award!
You can view your badges on your Steem Board and compare to others on the Steem Ranking
Vote for @Steemitboard as a witness to get one more award and increased upvotes!