How to Create Infrared Effects with GIMP | GIMP Tutorial
Hi friends, this time I re-shared a tutorial using GIMP. This tutorial is "How to Create Infrared Effects with GIMP". In this tutorial we will discuss how to membrikan effect of infrared camera on a photo. Infrared effects can be created using GIMP by utilizing Desaturate, Levels and Filter Noise commands. In order not to damage the original image, duplicate the layer first and then we apply the command Desaturate and Levels. The next step is to create a black layer for us to give noise, and blend mode Screen to be merged with the photo below. The amount of noise can be set via opacity.
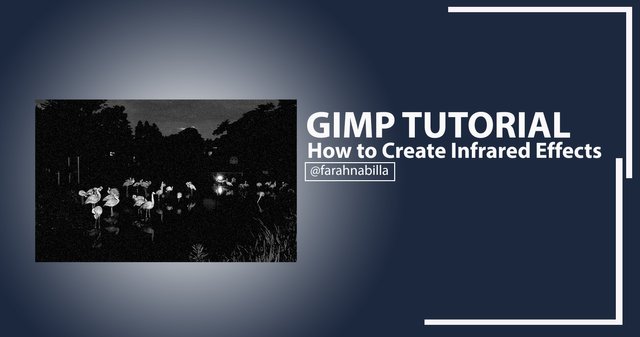
To start editing the addition of Infrared effects, the first thing you should prepare is GIMP software. If you do not have the software yet, please click the download link below.
If you already have an application, to start the process of editing the addition of infrared effects, please follow the steps below.
How to Create Infrared Effects
First step, Prepare the photo sample you want to edit. If you do not have any photos you want to edit, you can use photos like me (Click Here).
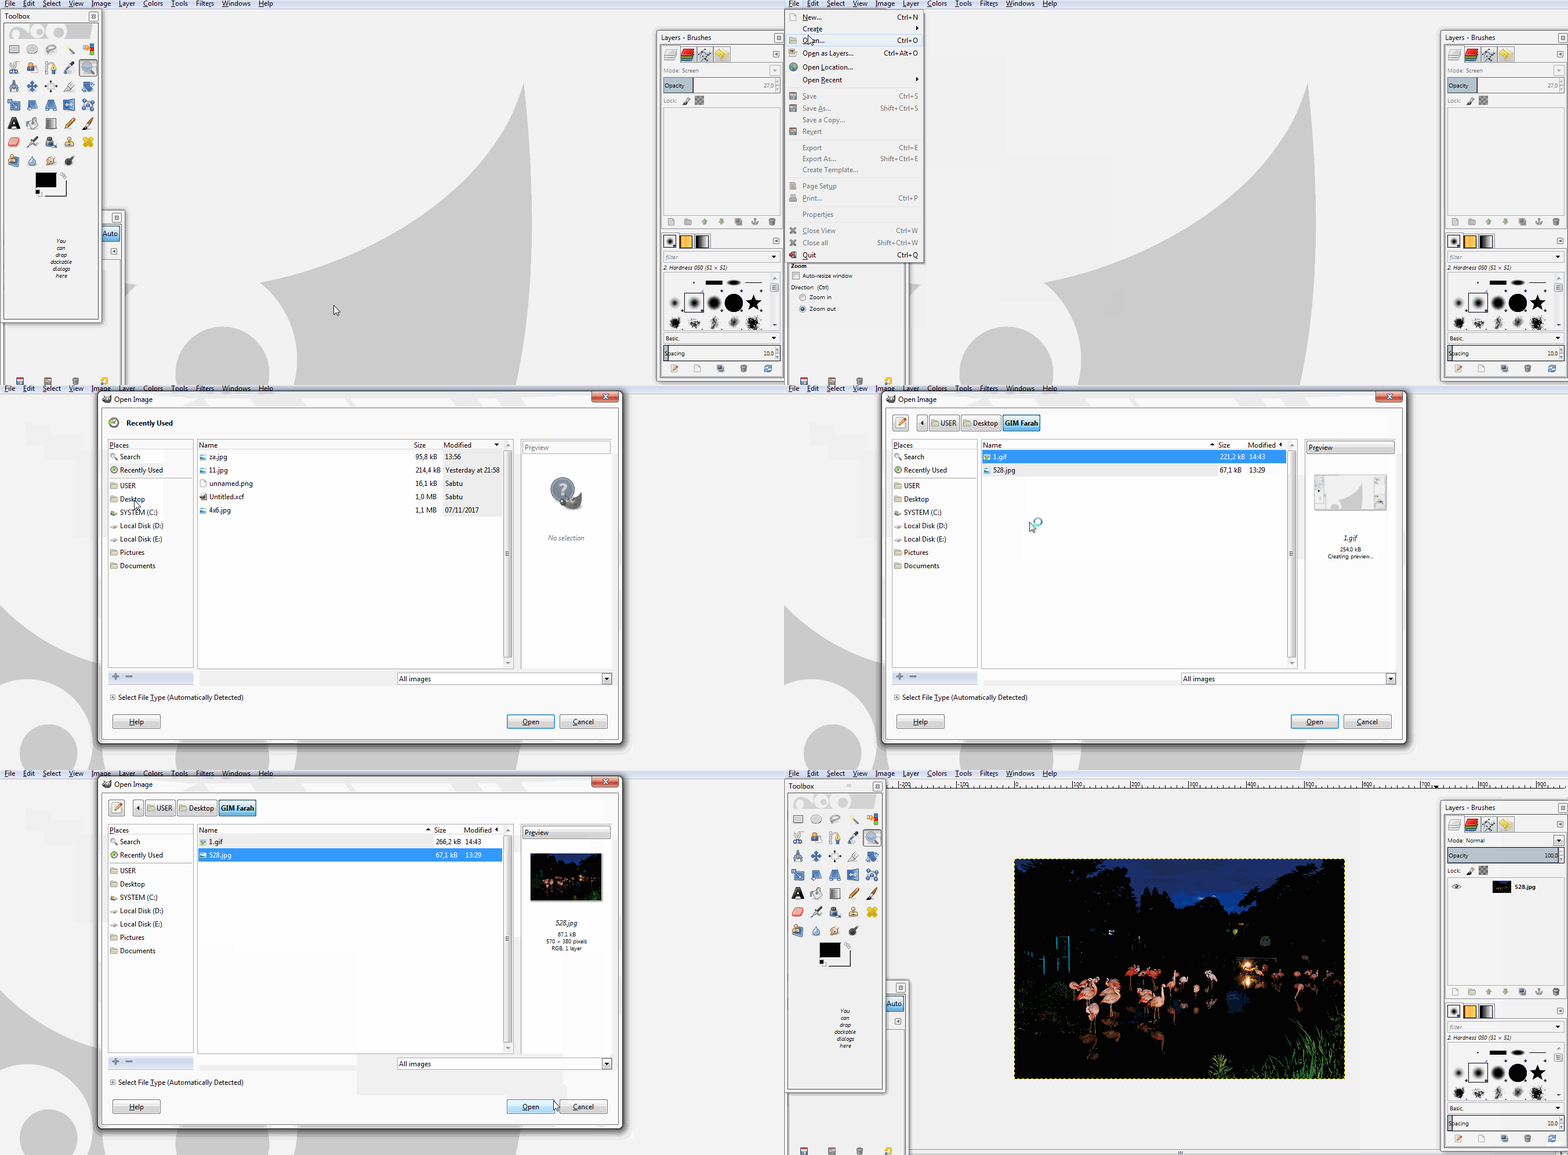
Next open your GIMP software, then enter the photo you want to edit. How to click Menu File> Open> And Find the photo you want to edit.
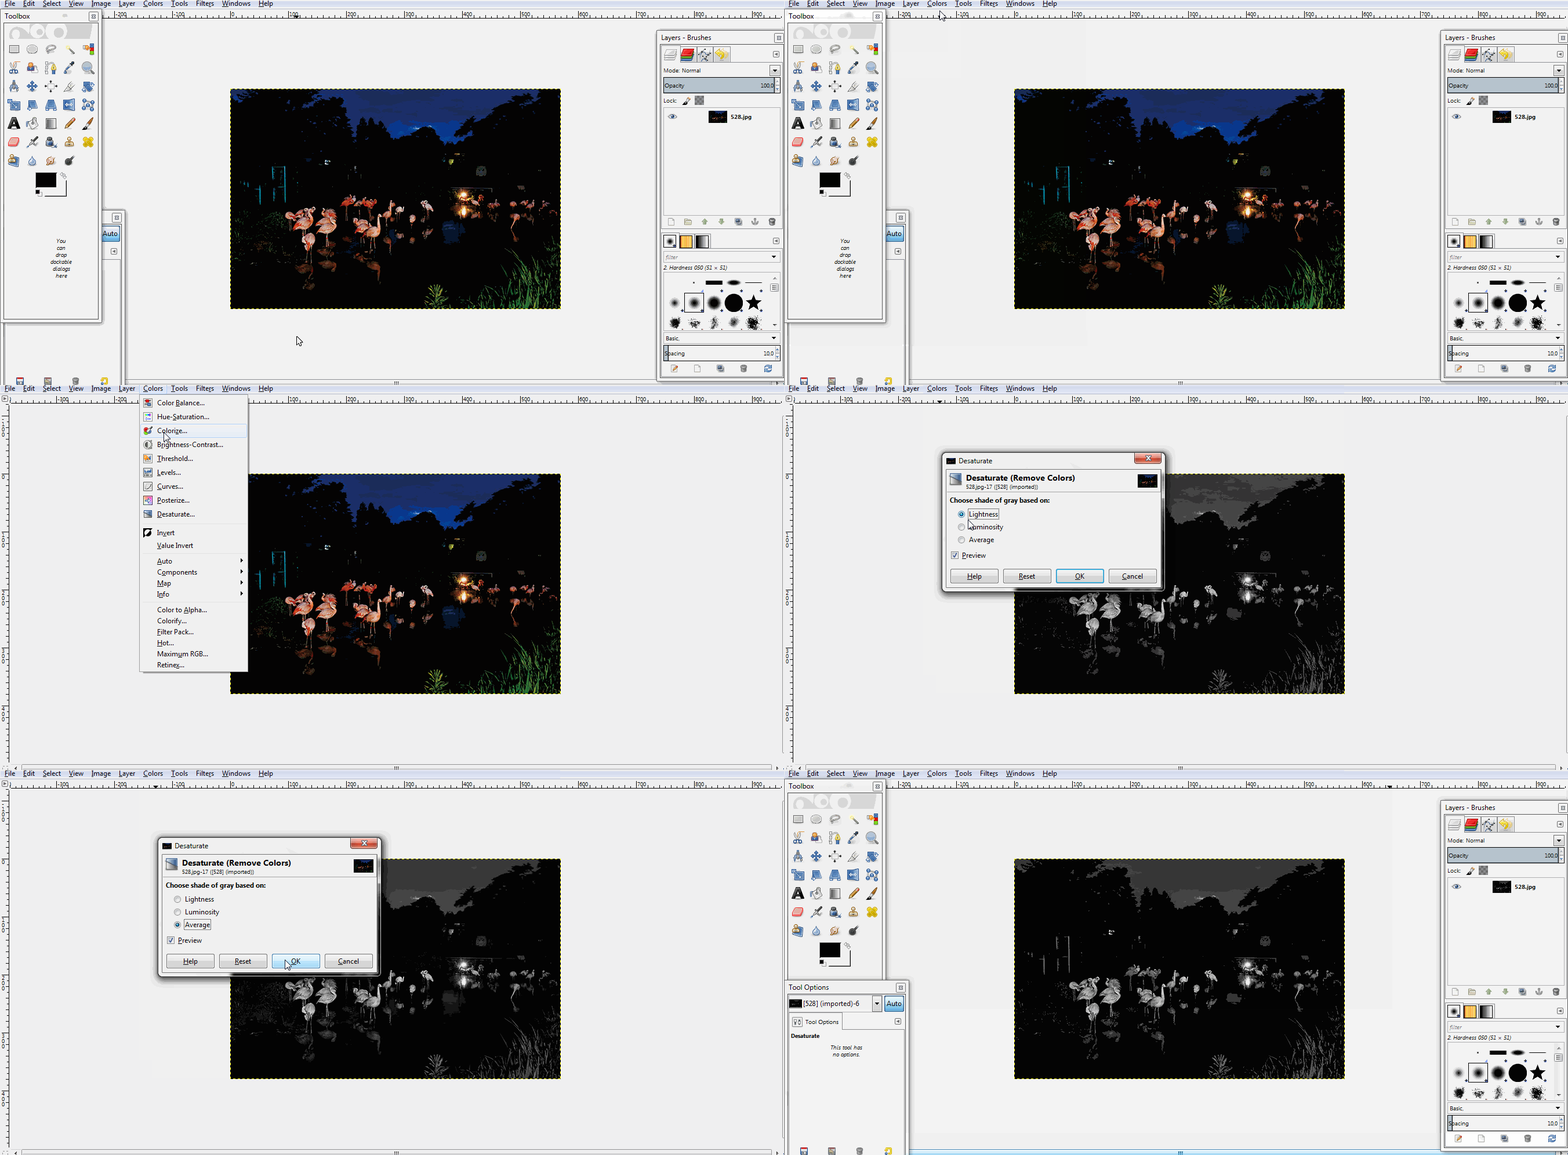
Add "Desaturate" to the photo to remove the color of the photo. How to click Menu Color > Desaturate > select 'Average' > Last click OK. For more details, please see the picture below.
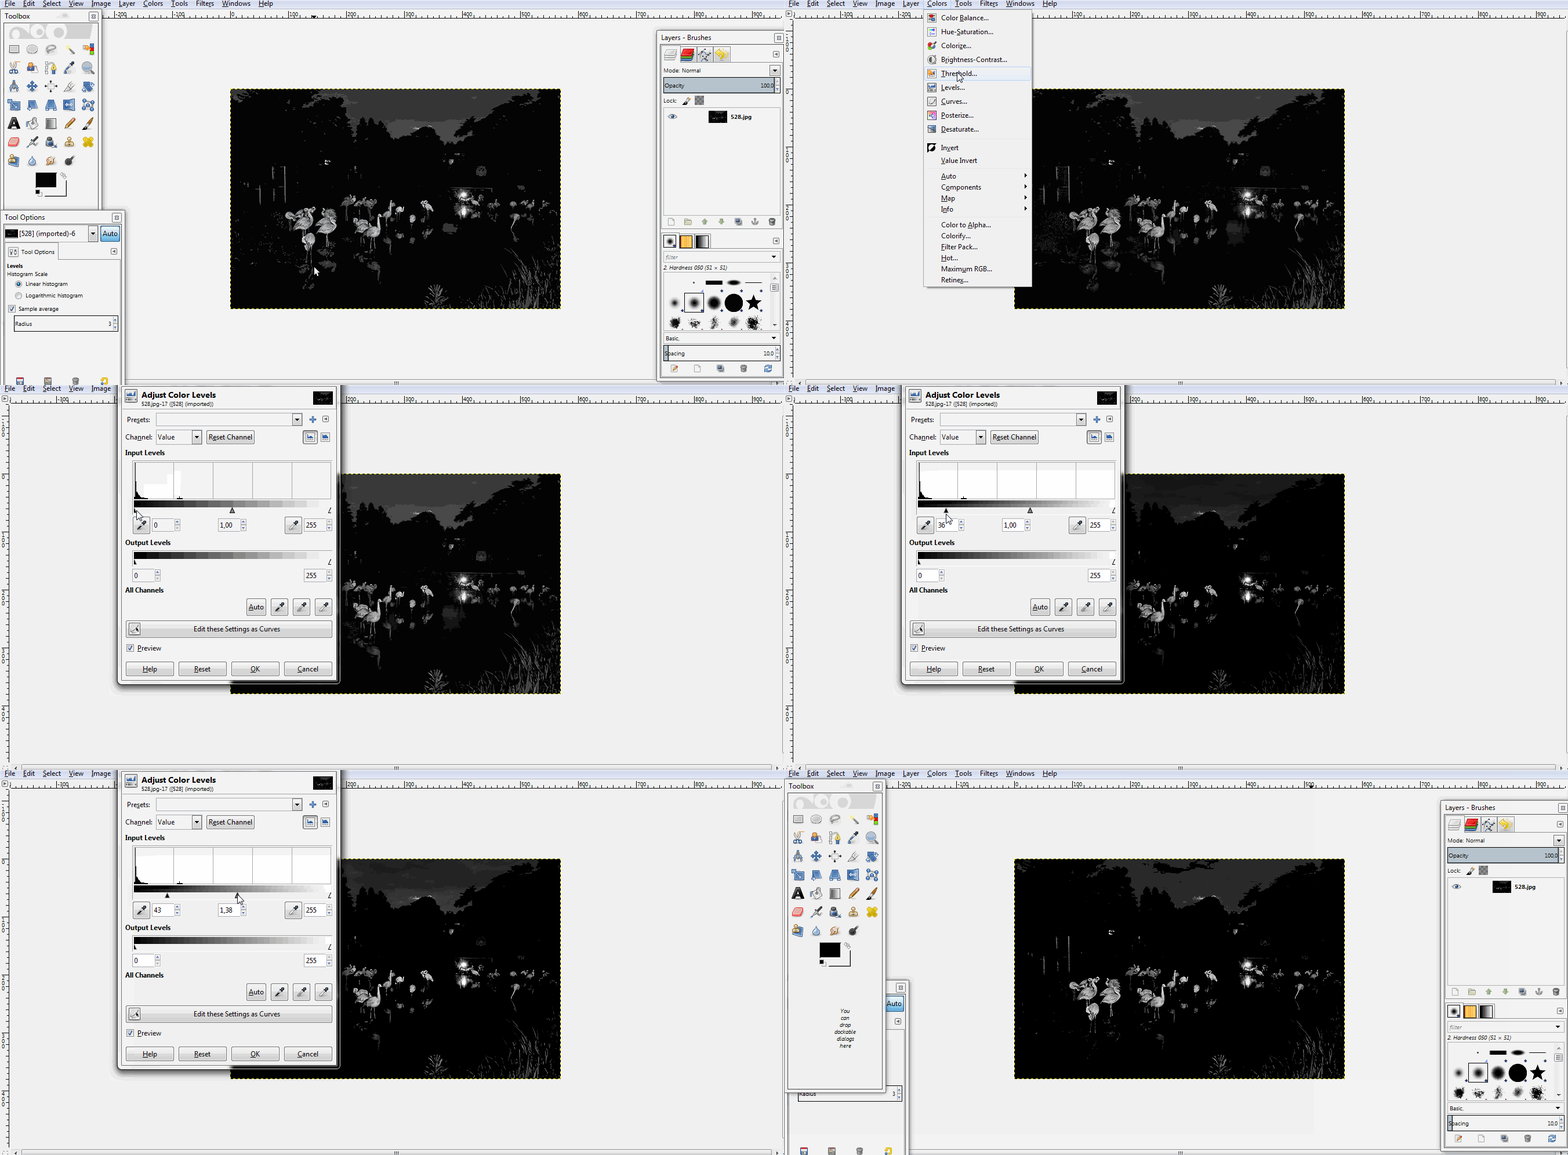
Next set the Color Levels, by clicking Menu Color > Levels > and set as the example below.
If so, make a New Layer to give Noise effect. How to click Menu Layer > New Layer > Fill the layer name as you wish > and select 'Foreground Color'> Finally click OK.
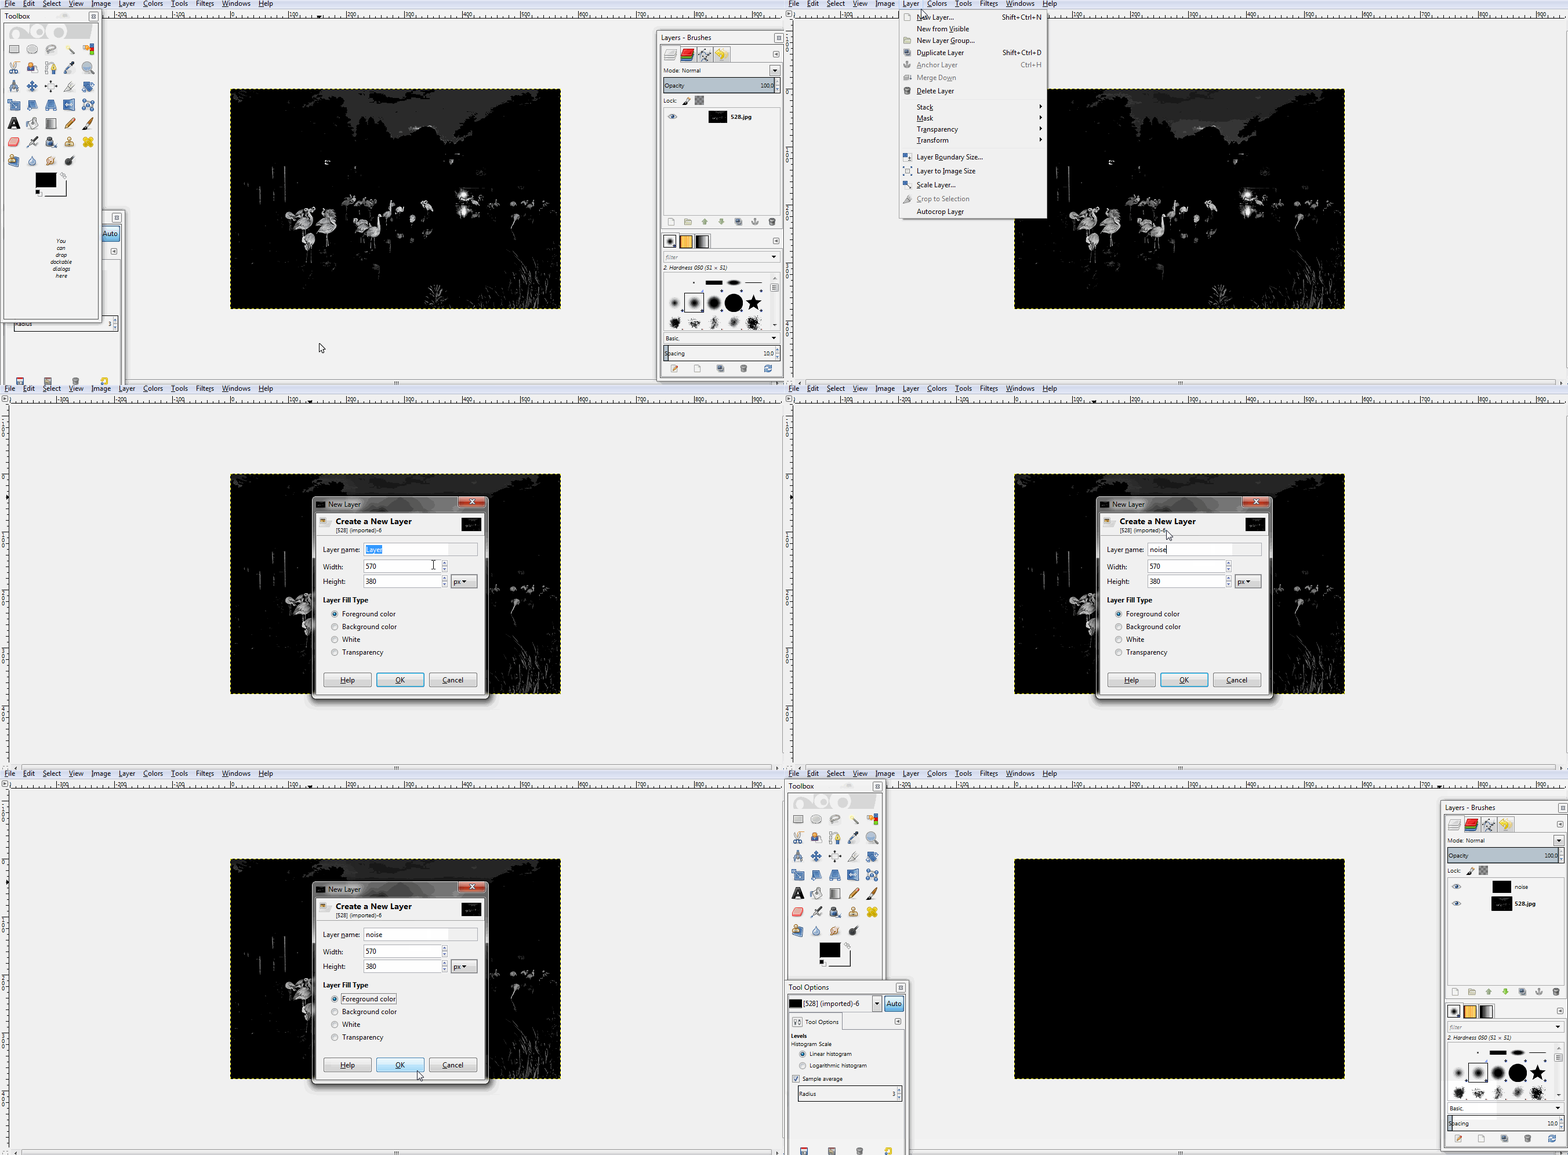
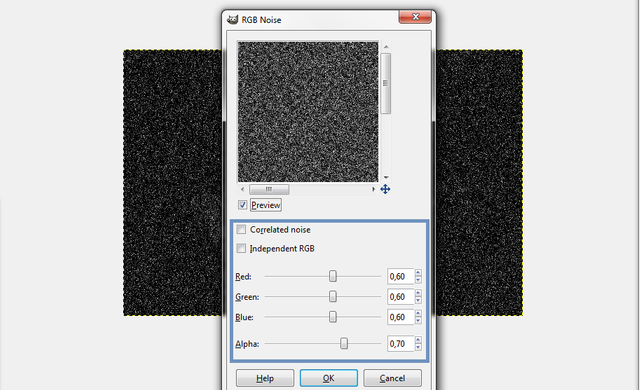
Next click Filter> Noise> RGB Noise> And set it as shown below.
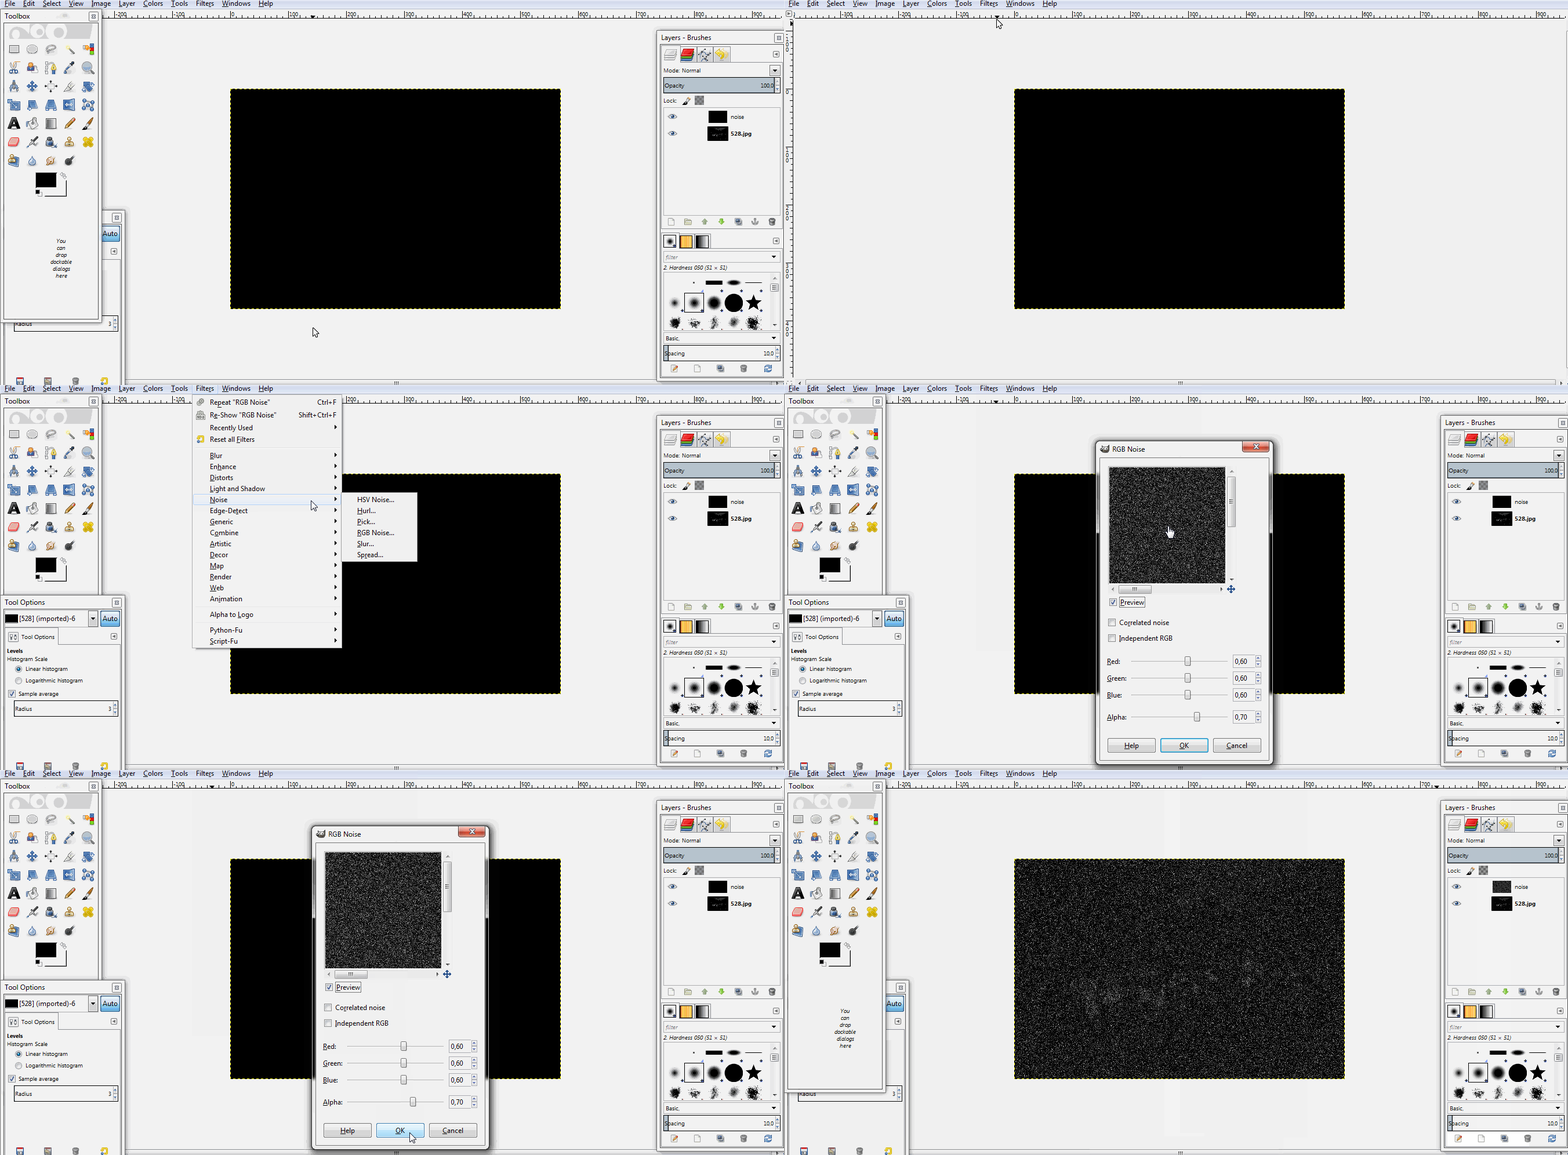
Set as below:
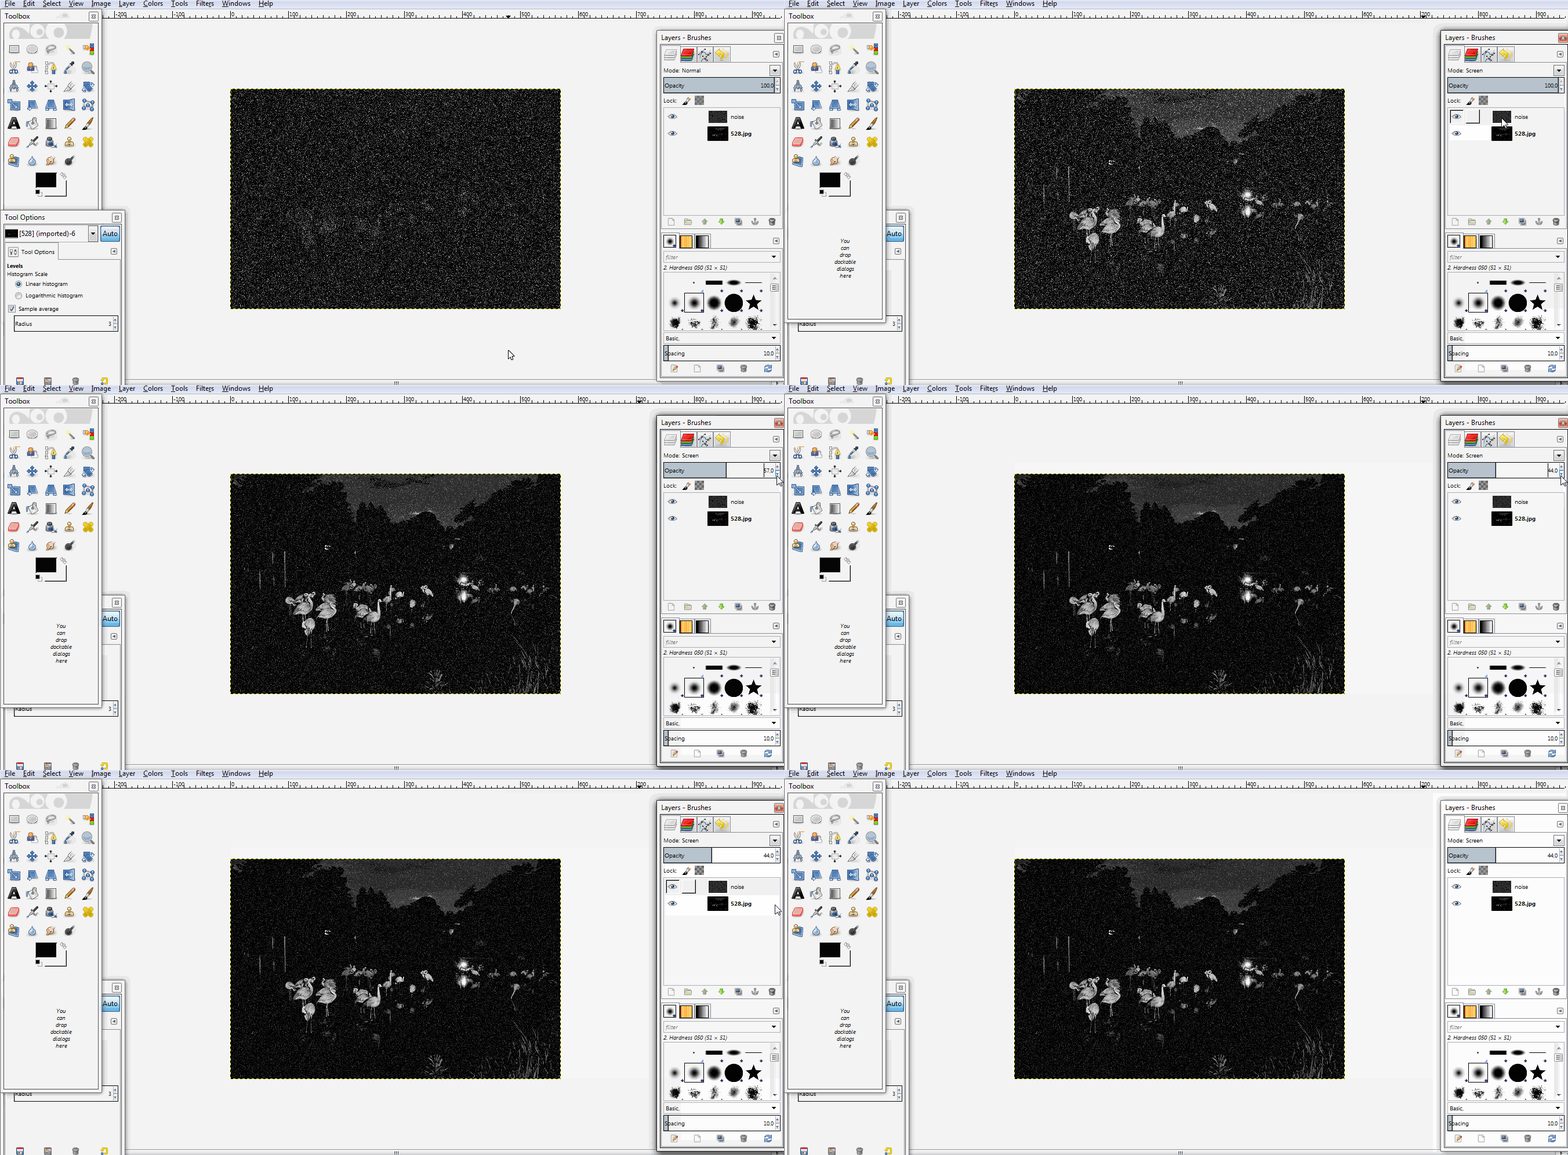
Next change 'Mode' from Normal to Screen. And subtract Opacity so that Noise effect is not too thick.
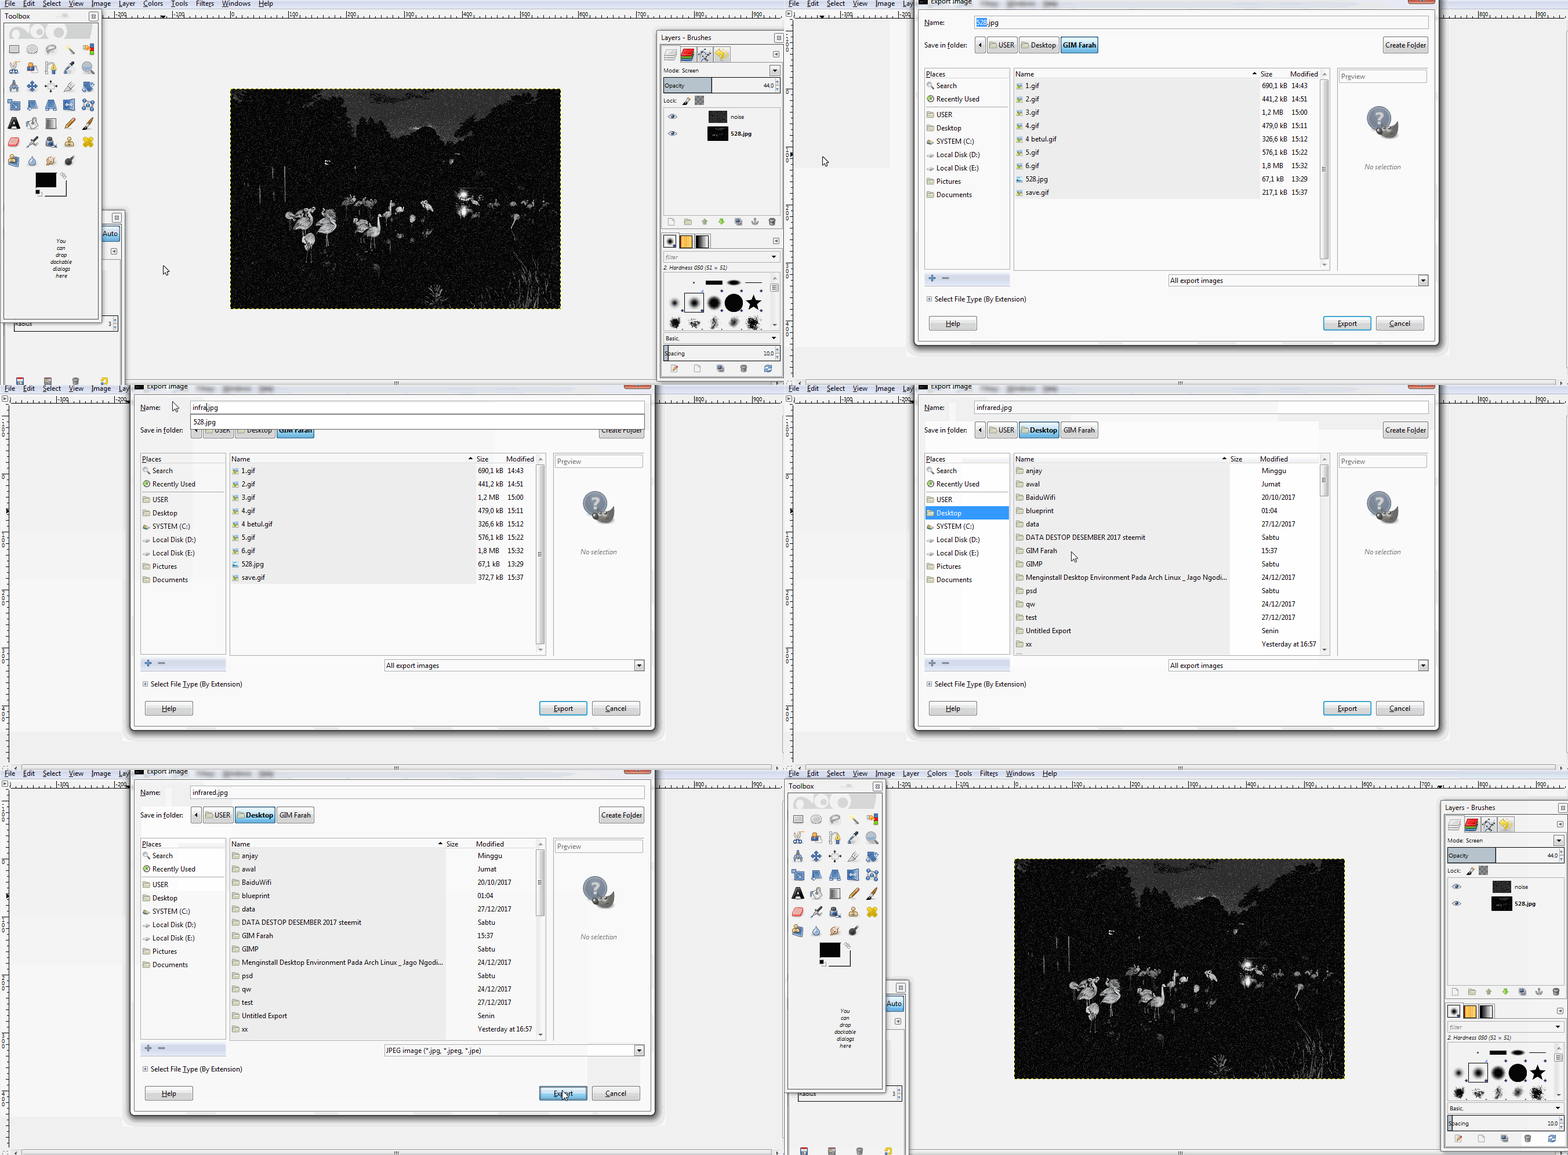
Editing process is done. If you want to save or export the photos you have edited, click File > Export As ... > Set File name > Set File Format and Where File is saved> Finally click Export.
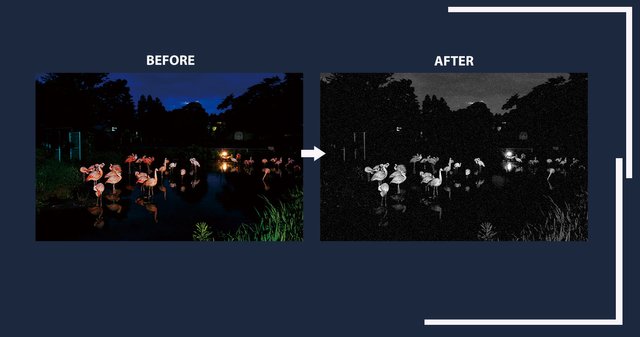
To see the edits I made, see the picture below:
Hopefully this tutorial "How to Create Infrared Effects with GIMP" above can be useful, and thanks for visiting my post.
Thank You
Posted on Utopian.io - Rewarding Open Source Contributors
Thank you for the contribution. It has been approved.
You can contact us on Discord.
[utopian-moderator]
Upvote back guys
Hey @farahnabilla I am @utopian-io. I have just upvoted you!
Achievements
Suggestions
Get Noticed!
Community-Driven Witness!
I am the first and only Steem Community-Driven Witness. Participate on Discord. Lets GROW TOGETHER!
Up-vote this comment to grow my power and help Open Source contributions like this one. Want to chat? Join me on Discord https://discord.gg/Pc8HG9x