Tutorial Making "Polar Panorama" With GIMP | GIMP Tutorial
Although GIMP is a free editing app, GIMP is worth pairing with other professional software such as Adobe Photoshop, Adobe Lightroom, and more. All the features of professional editing software like Adobe photoshop, owned by GIMP. And after using it for several weeks, I think GIMP is quite satisfying to meet the needs of my photography hobby.
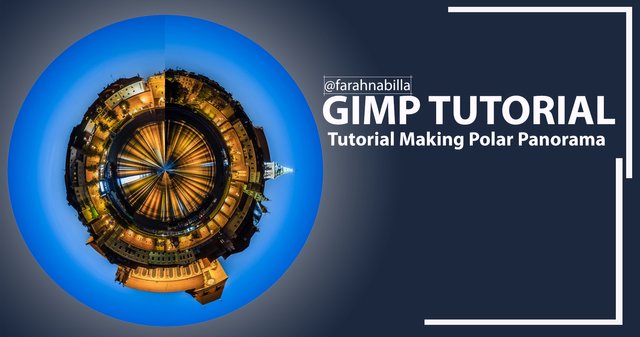
On this occasion I will share the tutorial "How To Make Polar Panorama With GIMP". Polar panorama is one of the photo effects that we may have seen and used in making a photo interesting. With a panoramic Polar effect, we can create a unique little planet, can create a beautiful panorama.
For friends who want to directly try to create Polar Panorama effects using GIMP, please follow the steps below:
How To Make Polar Panorama With GIMP
First of all prepare the panorama photo to be made into Polar panorama. In this tutorial I use photos that I get from Google images, for you who want to download them (Click Here)
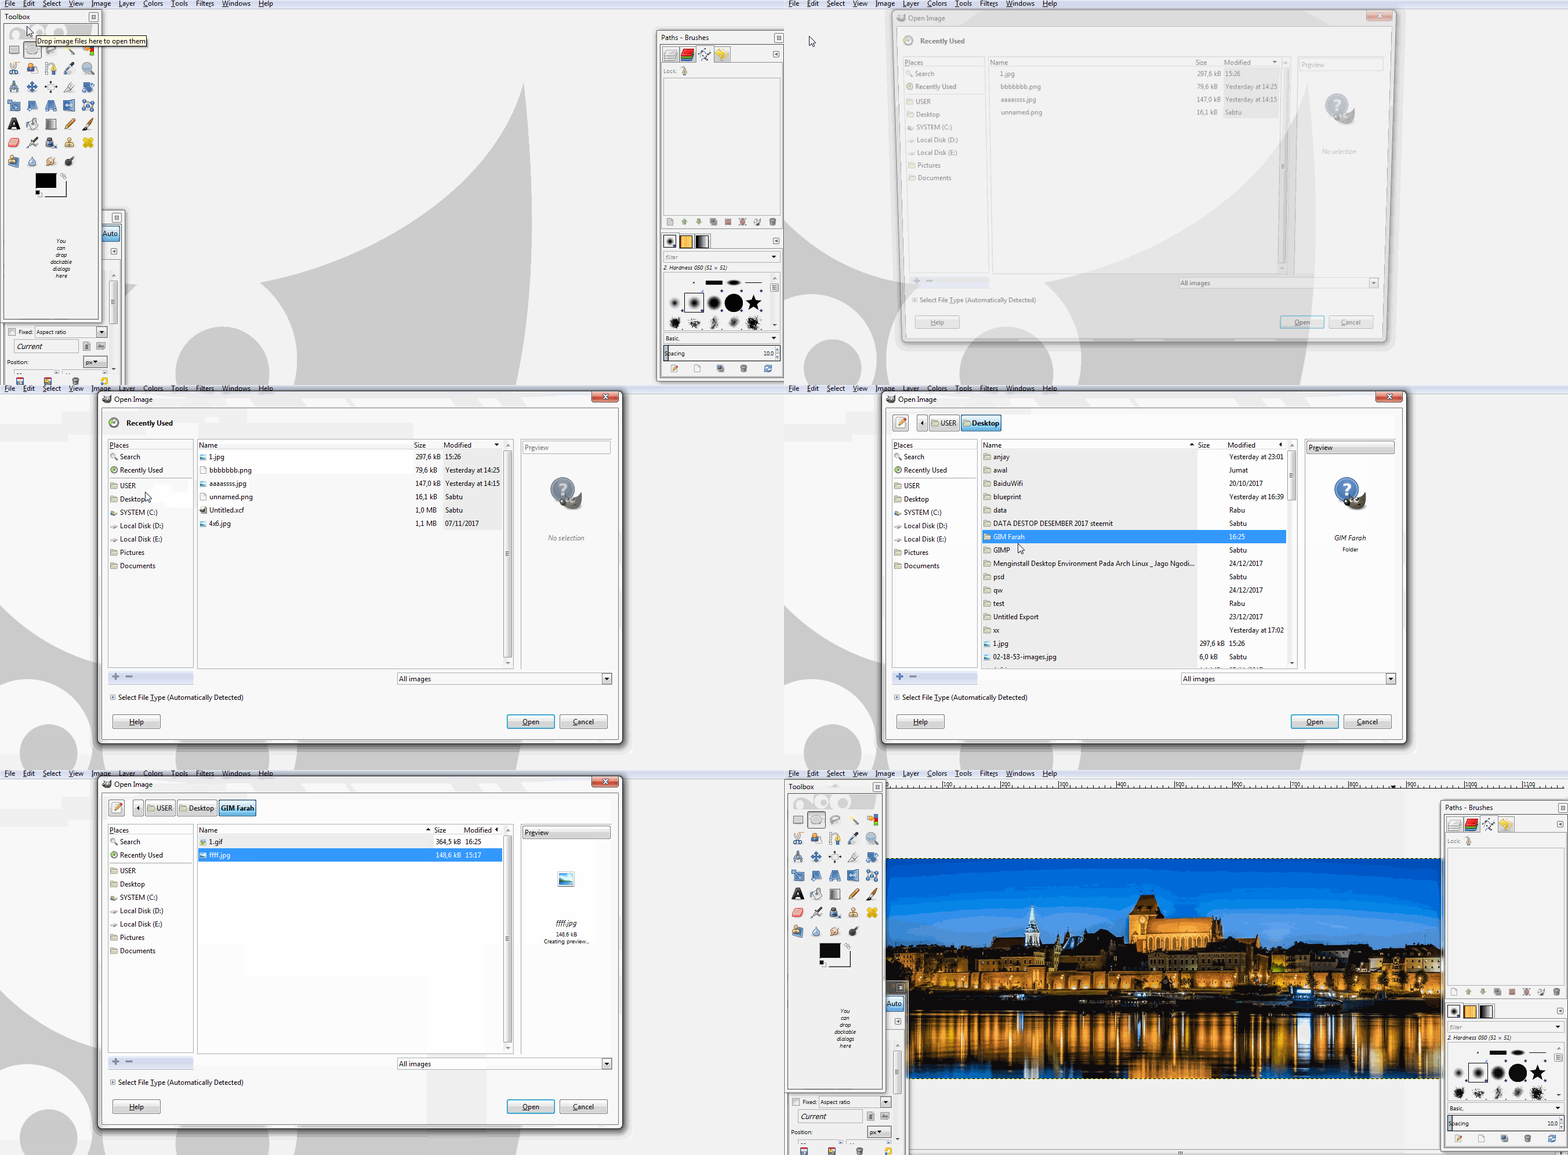
Next open your GIMP app, and enter the photo you want to edit by Click File> Open> and the file / photo you want to edit.
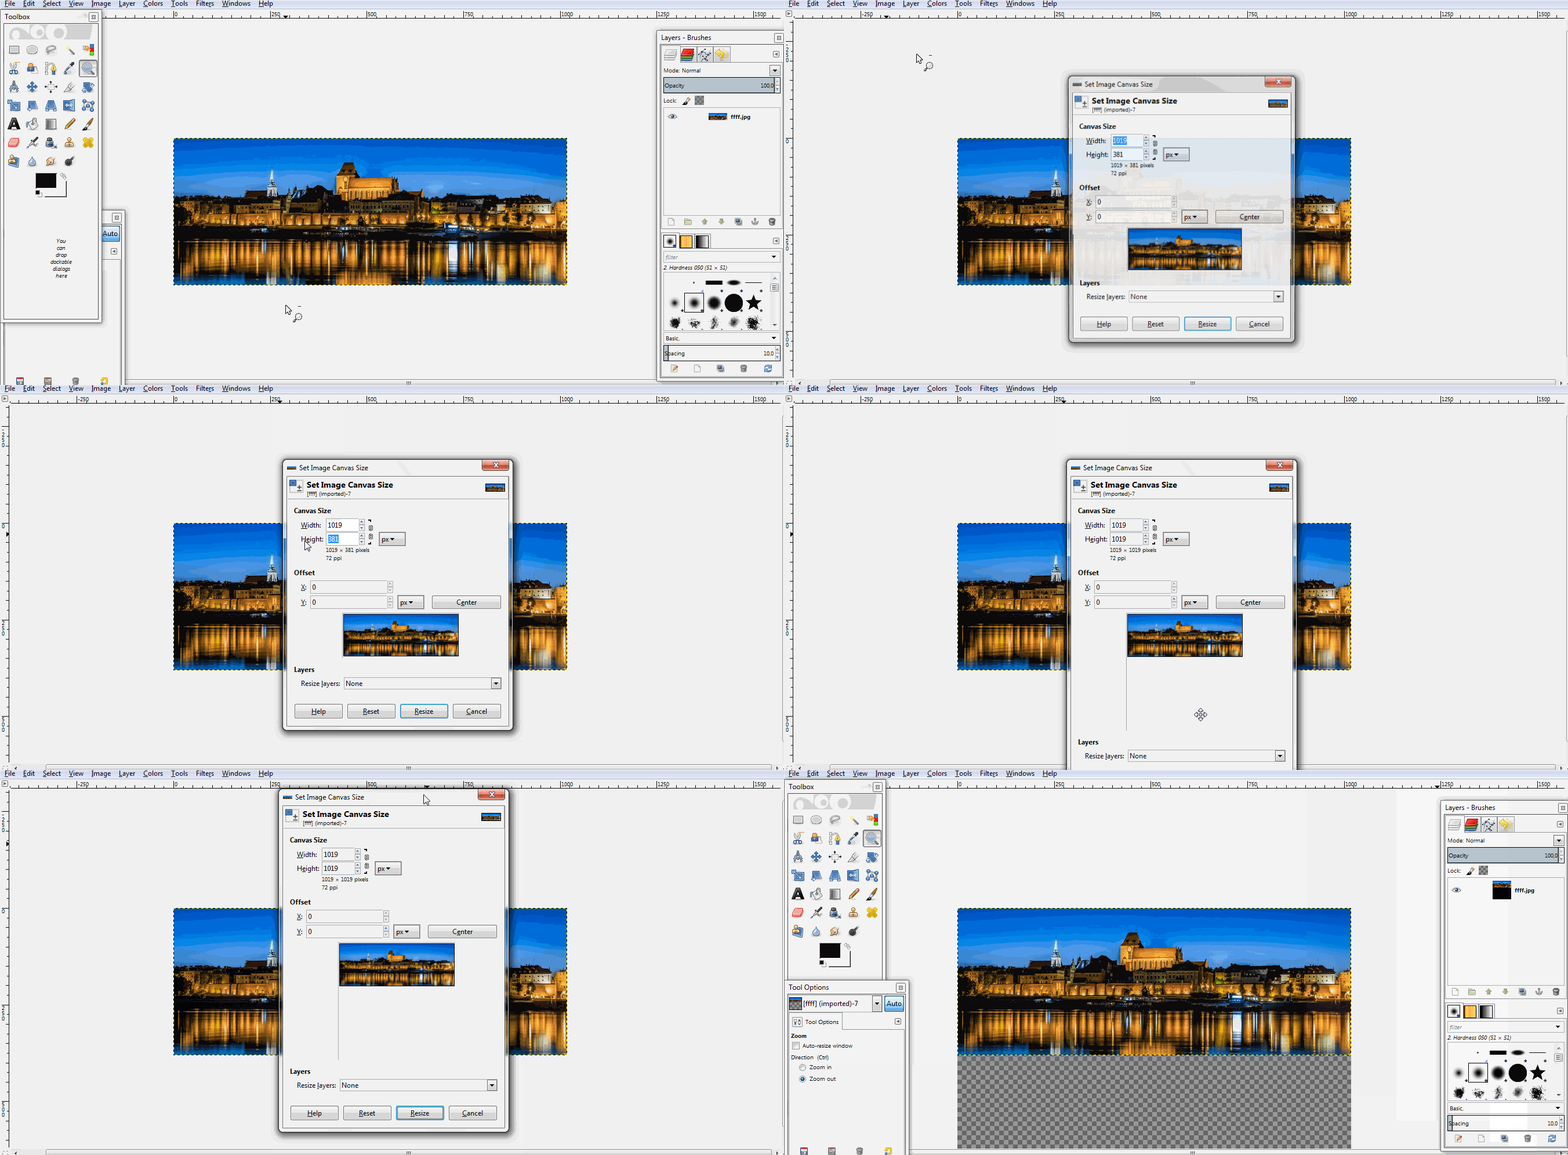
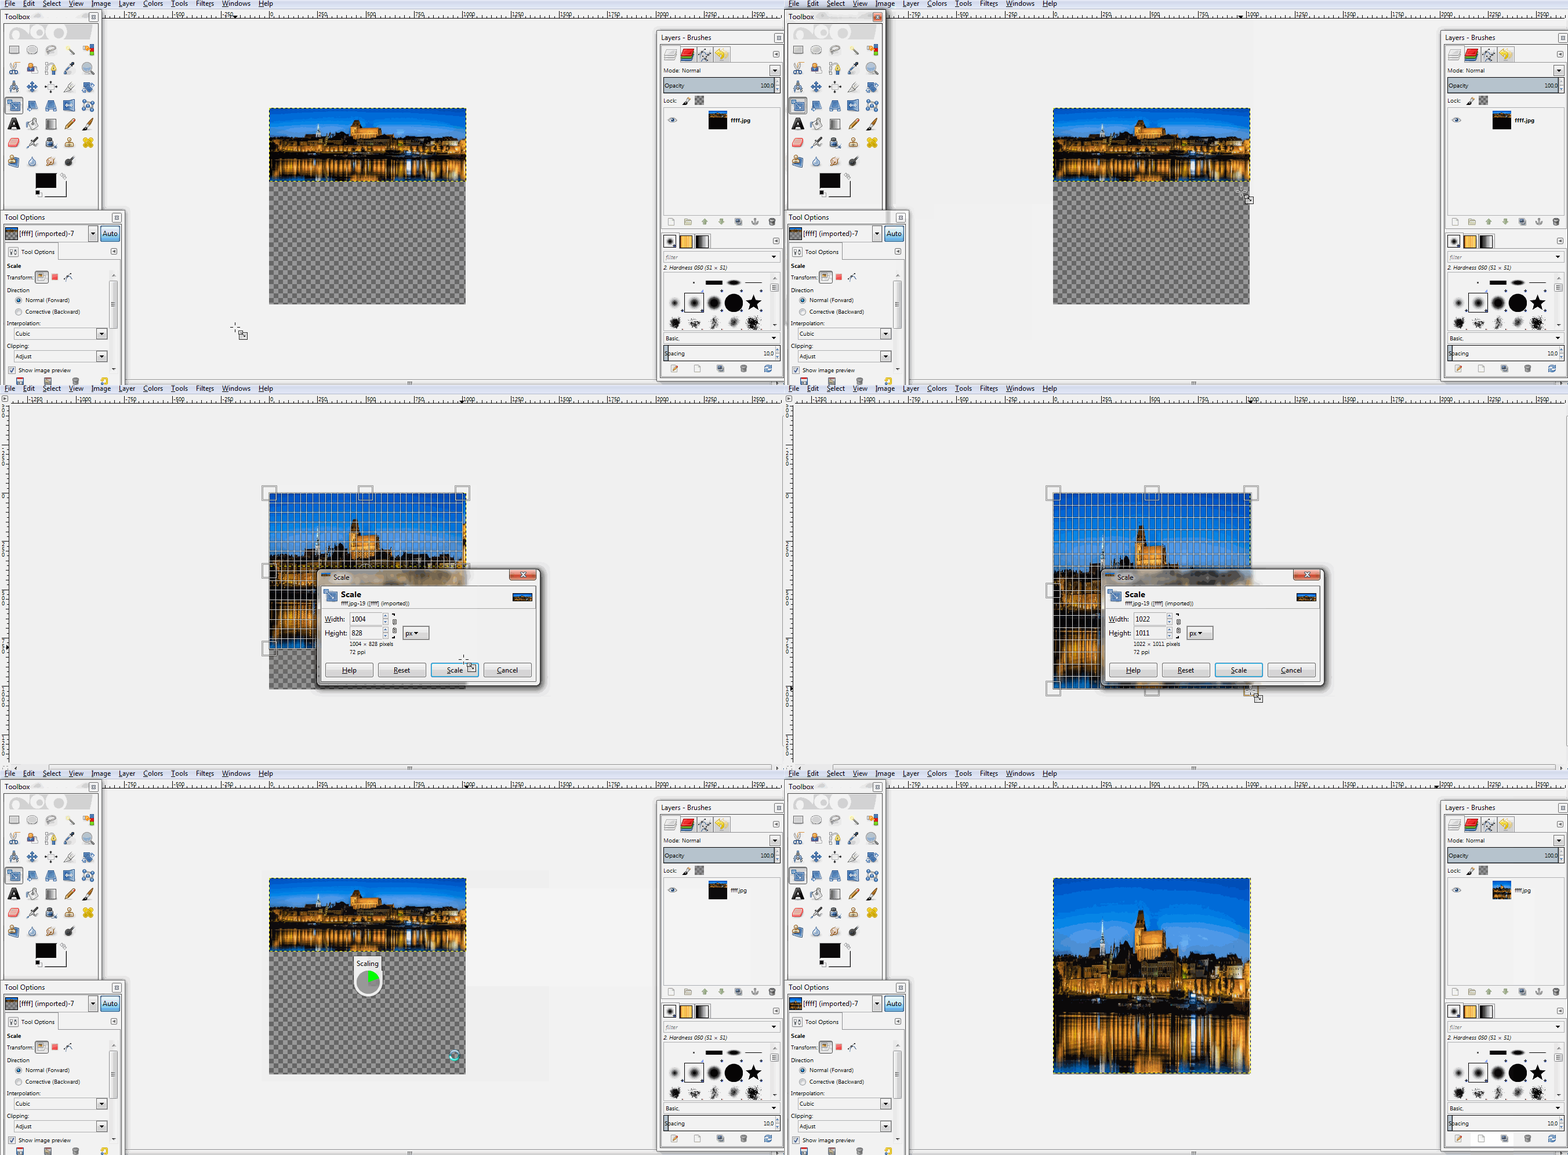
Then equate the canvas size between the height and width, how to select the menu Images> Canvas Size> and set the same Height numbers with Width> last click Resize.
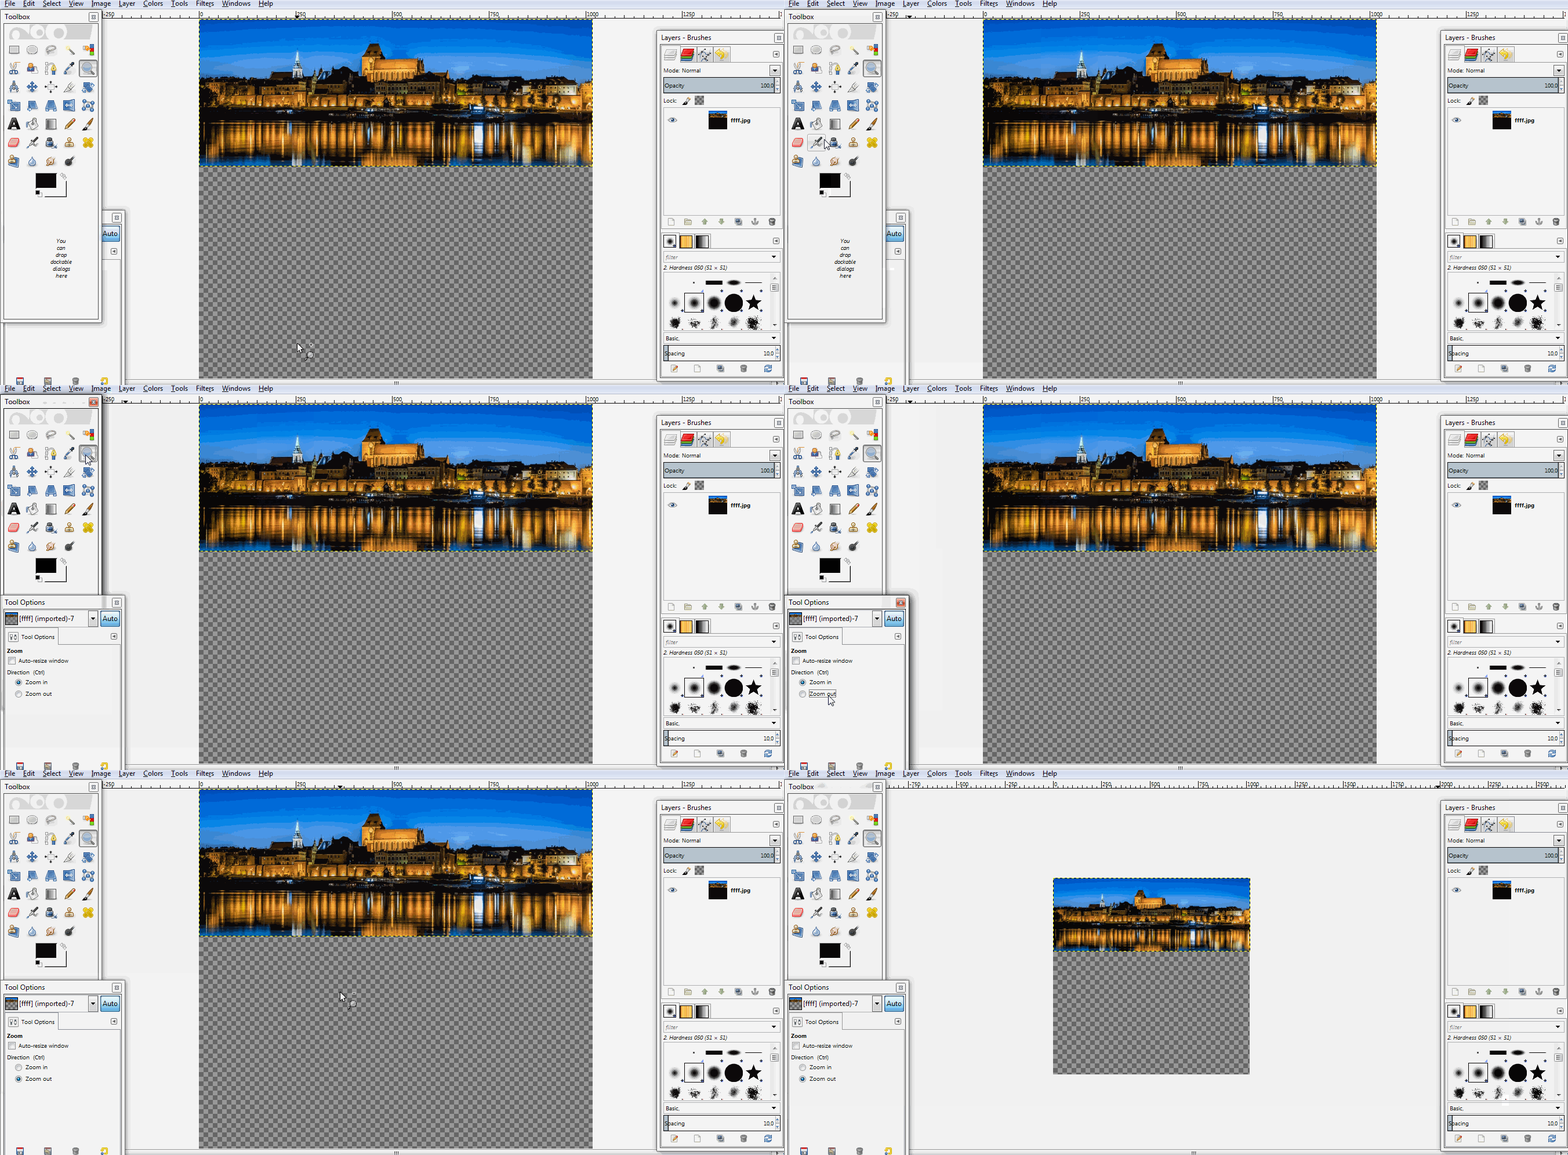
If so, set Zoom to make editing easier. How to click Zoom Tool> And click "Zoom Out" to zoom out the image.
Then drag the image and equate it with the canvas size. How to use Scale Tool> And drag the Image as the example below, Last click on Scale.
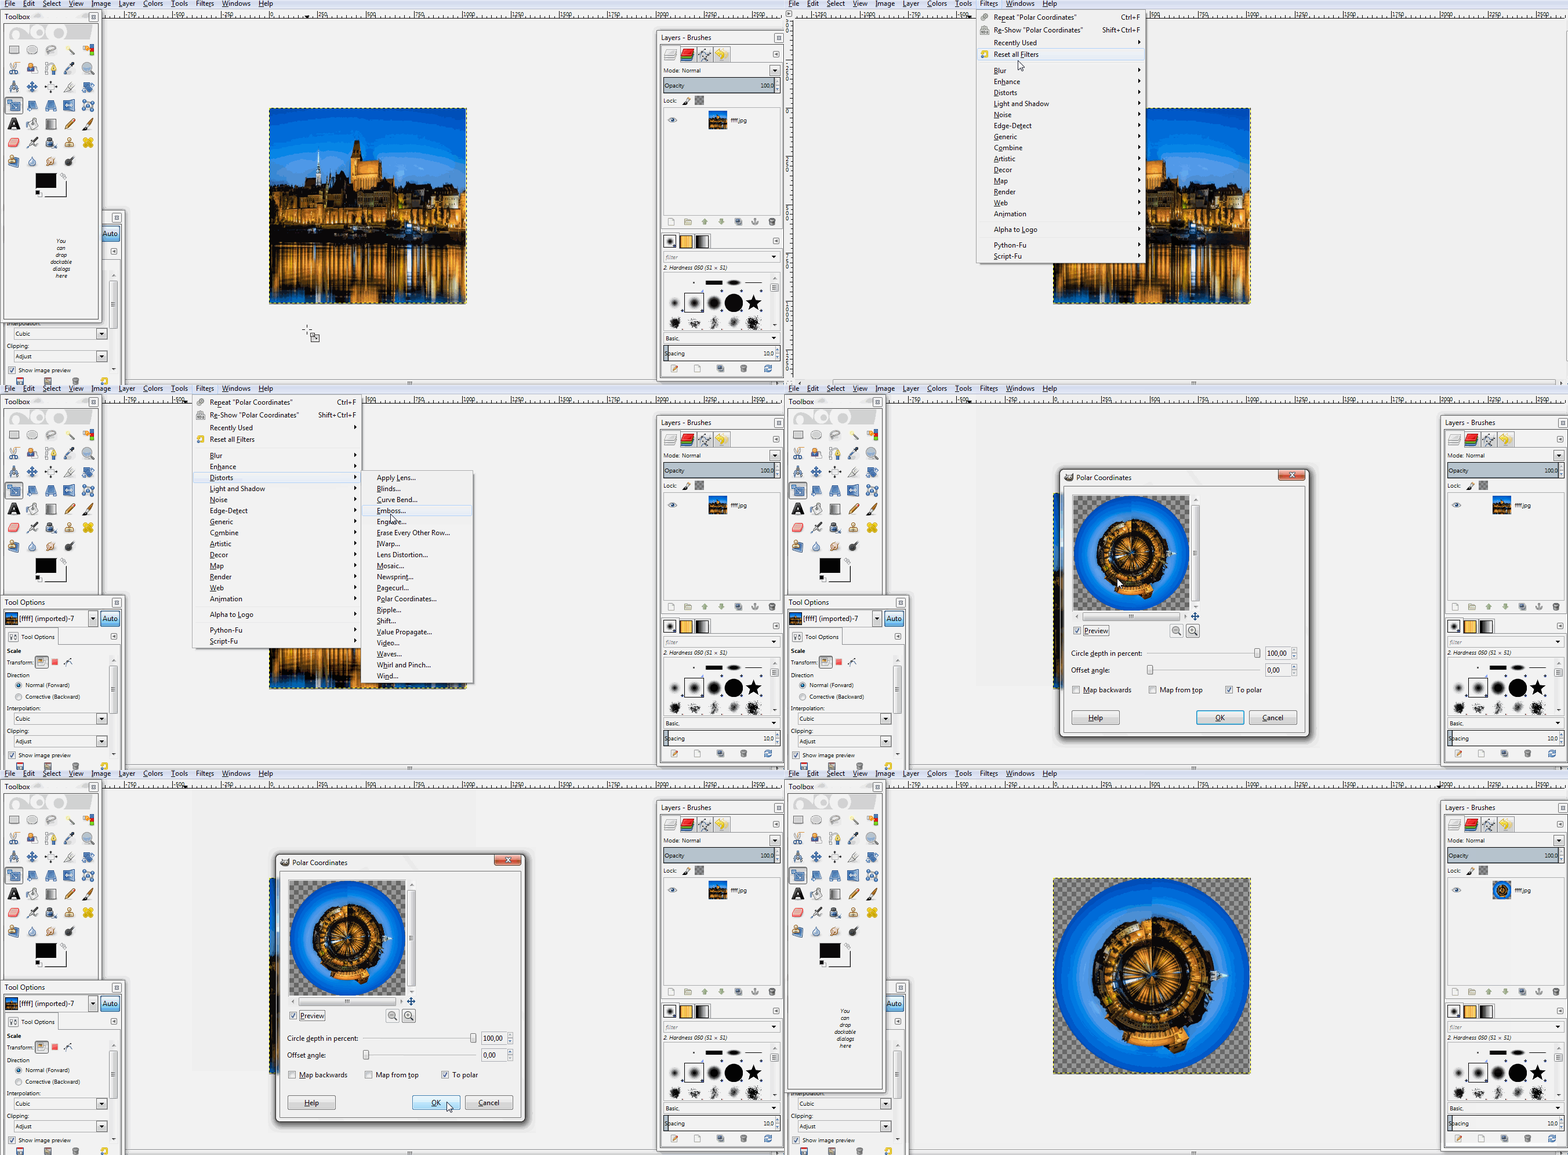
Next add the "Polar Coordinates" filter. How to click menu Filters> Distorts> Polar Coordinates. And Check it in "To Polar". Finally click OK. For more details see the picture below:
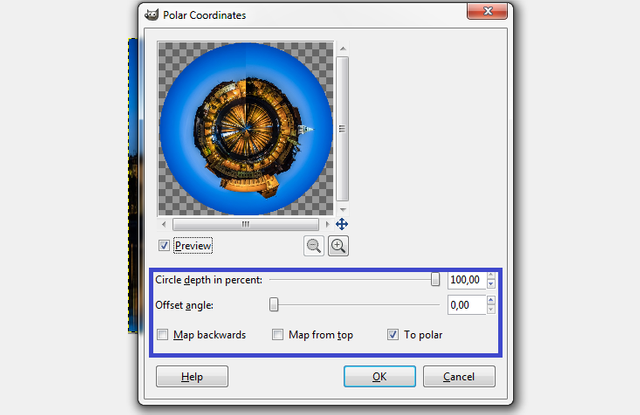
Set as below:
The editing process is done, if you want to save / export the edited file. Click File> Export As> Set file name, Set File Format, And set storage. And finally click "Export".
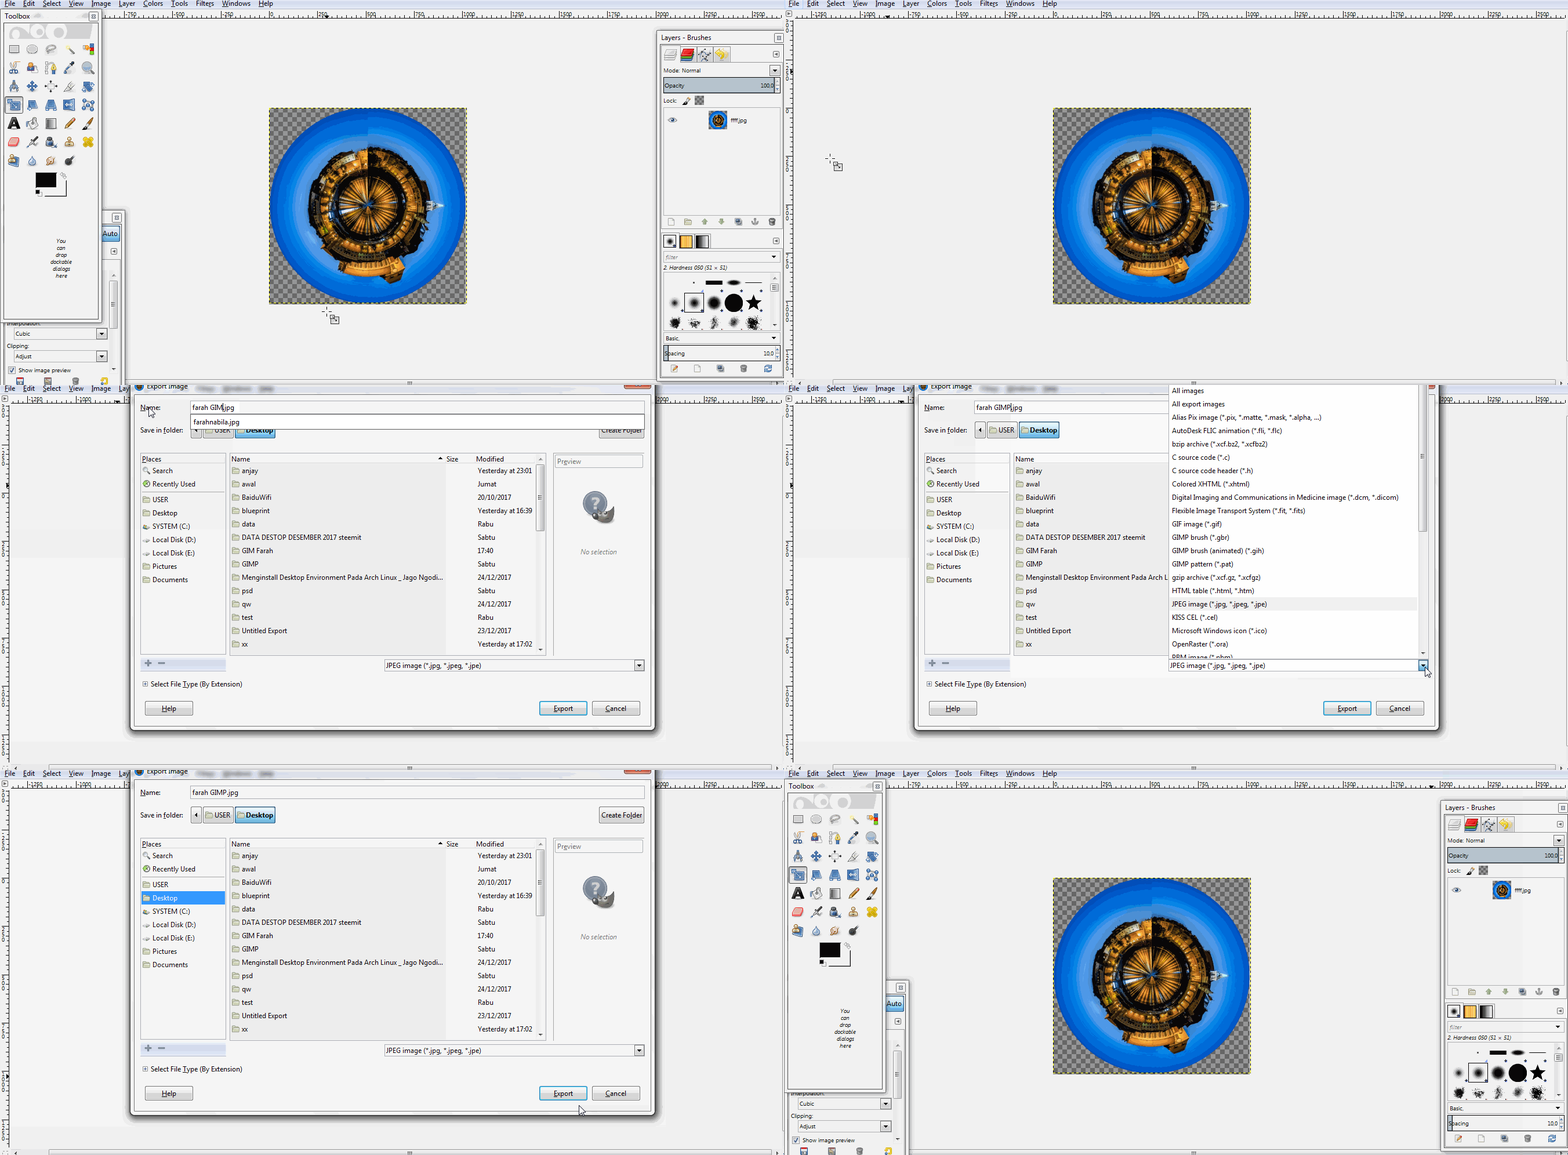
To get a transparent Background, choose the PNG format
Below is the result of Polar Panorama photo edits I made:
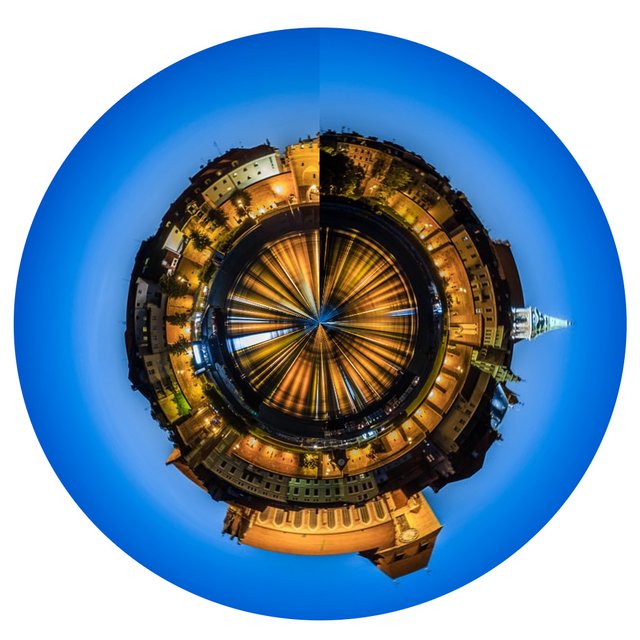
DONE
Hopefully my tutorial is useful and can be used by you, and thank you for visiting this post. See you later.
Suggestion:
To create a more interesting "Polar Panorama" effect, you can use your own panoramic photo, and set effects like contrast, saturation and some other effects to enhance it
Thank You
Posted on Utopian.io - Rewarding Open Source Contributors
Hey @farahnabilla I am @utopian-io. I have just upvoted you!
Achievements
Suggestions
Get Noticed!
Community-Driven Witness!
I am the first and only Steem Community-Driven Witness. Participate on Discord. Lets GROW TOGETHER!
Up-vote this comment to grow my power and help Open Source contributions like this one. Want to chat? Join me on Discord https://discord.gg/Pc8HG9x
Thank you for the contribution. It has been approved.
You can contact us on Discord.
[utopian-moderator]