Simple Shopping Cart Using Vue.js and Materialize - 1
Repository
What Will I Learn
In this tutorial we will build a simple shopping cart application using the VueJs and framework.
VueJs is a JavaScript framework for building interactive web interfaces.
What this implies is that VueJs allows us to build components that possess the ability to communicate, pass data and react to events between themselves on a webpage.
To know more about VueJs and its core features check out the official documentation.
This tutorial is the first in a series and in this tutorial we will cover the following
- Vue Installation
- Vuex Installation
- Building Components
Requirements
To get VueJs up and running we need to have the following installed on your machine
- Latest version of NPM and NodeJs.
To install NodeJs and NPM please refer to the official guide on how to get that done.
Note: Installing NodeJs will automatically install NPM on your machine. Every NodeJs distribution comes with latest version NPM included.
- After installing node and npm we can verify to see if both software were installed correctly.
To verify for node run this command
node -v
To verify for NPM run this command
npm -v
If both were installed correctly the version installed will be outputted, if that's not the case on your end you might want to reinstall.
- Code Editor
Difficulty
Intermediate
Tutorial Contents
1. Vue Installation
Once we have all requirements set up we have to install the vue-cli to create an global instance of vue that we can build our application.
- To install Vue run the following command
npm install -g vue-cli
This command will install VueJS globally.
- After installing the vue-cli, we'd go on to initialize a new project which in this case is our shopping cart project, the command for initializing a new Vue project
vue init webpack-simple shoppingcart
- After the initialization navigate to the project folder using the command
cd shoppingcart
- In the folder run the following command to install all vue dependencies
npm install
Wait for a minute or two to allow this command run successfully
- The last step of the installation process is to run the vue application and to achieve that run the following command
npm run dev
Our vue application is now ready for use, to view our vue application visit the following URL in your browser
localhost:8080
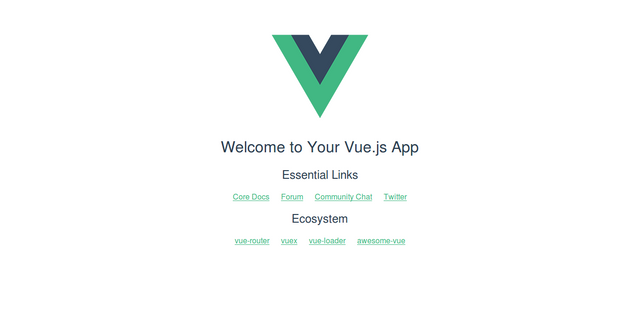
If Vue was correctly installed you'll be redirected to a page like the one in the picture below

2. Installing Additional Dependencies
In this tutorial we will be using the MaterializeCSS framework for our front end HTML/CSS.
Additionally we will be using the vue-ionicons library for all icon instances in our app.
We need to install and import both distributions.
To install MaterializeCSS run the following commands
npm install materialize-css@next
Next, we import materializecss dependencies in the
main.jsfile for our app.Add the following lines of code in the
main.js.
import  '../node_modules/materialize-css/dist/css/materialize.min.css'

import  '../node_modules/materialize-css/dist/js/materialize.min.js'
Save the file and we have successfully integrated materializecss with our vuejs project.
Next we integrate vue ionicons with our vuejs project, to do that run this command
npm i vue-ionicons
After installing vue-ionicons we need to reference its CSS file in our VueJS project.
Add the following code in your main.js file
require('../node_modules/vue-ionicons/ionicons.css')
Now that we have materialize and ionicons installed we can begin building our components
3. Store
Let's create our store.js file.
This file will be used to manage states shared between component.
For our state management we will use the Vuex library.
For further reading on the vuex state management library.
To install vuex, go to the project directory in your terminal or command prompt and run the following command
npm i -S vuex
After installing Vuex we then add a new file in the src directory, name it store.js.
Code for our Store
import  Vue  from  'vue';

import  Vuex  from  'vuex';


Vue.use(Vuex)


export  default  new  Vuex.Store({

state: {

products: [

{ id:  1, name:  'Lorem', image:  'https://cdn.pixabay.com/photo/2014/07/31/23/00/wristwatch-407096__340.jpg', price:  340 },

{ id:  2, name:  'Ipsum', image:  'https://cdn.pixabay.com/photo/2016/12/10/16/57/shoes-1897708__340.jpg', price:  500 },

{ id:  3, name:  'Finis', image:  'https://cdn.pixabay.com/photo/2017/09/03/14/41/mock-up-2710535__340.jpg', price:  600 },

{ id:  4, name:  'Amor', image:  'https://cdn.pixabay.com/photo/2017/08/27/05/33/trousers-2685231__340.jpg', price:  600 },

{ id:  5, name:  'Roco', image:  'https://cdn.pixabay.com/photo/2016/06/25/14/39/baseball-cap-1479012__340.png', price:  600 },

{ id:  6, name:  'Salva', image:  'https://cdn.pixabay.com/photo/2016/04/16/17/46/glasses-1333433__340.jpg', price:  600 },

],

inCart: []

},

getters: {

products:  state  =>  state.products,

inCart:  state  =>  state.inCart

},

mutations: {

ADD_TO_CART(state, id) {

state.inCart.push(id);

},

REMOVE_FROM_CART(state, index) {state.inCart.splice(index, 1)}

},

actions: {

addToCart(context, id) {

context.commit('ADD_TO_CART', id);

},

removeFromCart(context, index) {

context.commit('REMOVE_FROM_CART', index);

}

}

})
Analysis
First we import an instance of
vueusingimport Vue from 'vue';We also import an instance of
vuexusingimport Vuex from 'vuex';We indicate that
Vueshould make use of the state management libraryvuexWe then set our
Storeup for export usingexport default new Vuex.Store({})Inside our
Storeinstance we add astate: {}property, which contains two arraysproductsandinCart.The
productsarray contains details about each product in stock. The following information can be found for each productidfor each productnamefor each productimagefor each productpricefor each product
The
inCartarray is an empty array which will only be populated whenever a product is added to the cart.
We will cover other parts of the store as we go deeper into the tutorial.
To use the state we just created we need to import our store in our main.js file
In the main.js file add the following code after the line import App from './App.vue'
import store from './store'
Inside the Vue instance created add the word store such that the code looks like below
new  Vue({

el:  '#app',

store,

render:  h  =>  h(App)

})
We can now use the $store variable to access the data in our store.js file.
4. Building Components
We will be building the following components in order to make our app take shape
- Navbar
- Product List
- Shopping Cart
Before building our components let's have a brief introduction to familiarize ourselves with VueJS components.
What are VueJS Components?
VueJS components are reusable Vue instances.
VueJS treats extended Vue subclasses as reusable components.
Components can be used as custom HTML elements in the root Vue instance and even in other components.
Common examples and implementation of components include navigation bar, footer, sidebar.
Vue.js comes installed with a root component App.vue.
Through the App.vue component we can render all other components needed to give our app the desired layout.
App.vue can be described as the parent components which holds all other child components.
Inside App.vue we also set the layout for which these components appear.
Vue.js components always end with a .vue extension (App.vue).
The syntax for creating vue components
<template>

</template>

<script>

</script>

<style>

</style>
Analysis
<template></template>will hold all the html tags for the component<script></script>will hold all JS needed for the component<style></style>will hold all the CSS styles for the component.
For our App.vue component we need to remove some parts of the existing code in order to output our shopping cart.
Remove all the code inside the <template></template> tag leaving only <div id="app"></div>.
In the <script></script> tag, remove the contents of the data() function.
Finally, remove everything within the <style></style> tag.
Navbar
The first component we'll be building is the navigation bar(navbar).
- Create a new file in the
srcdirectory of your Vue.js project, we'll call our filenavbar.vue.
Code for our Navbar Component
<template>

<nav>

<div  class="nav-wrapper cyan white-text">

<a  href="#"  class="brand-logo"  style="margin-left: 20px;">Cart</a>

<ul  class="right">

<li><a  class="waves-effect waves-light btn blue darken-3">LOG OUT</a></li>

</ul>

</div>

</nav>

</template>


<script>

export  default {

name:  'navbar'

}

</script>
Analysis
Inside the
<template></template>tag we insert HTML code and use materialize CSS classes for styling.We create a
<div class="nav-wrapper cyan white-text"></div>to create a wrapper around the navigationTo create the brand logo we add a new link
<a href="#" class="brand-logo" style="margin-left: 20px;">Cart</a>. The link has aclass="brand-logo"will set the contents of the link as the logo for the page.For the remaining contents of the navigation bar we add a new unordered list using
<ul></ul>tagInside our new list we have
<li><a class="waves-effect waves-light btn blue darken-3">LOG OUT</a></li>which creates a new list item and a button inside the list item.Now we will add our JS code in between our
<script></script>tagOn the first line we use the
export default {}statement to indicate that this module be set for export so it can be imported and used in another module.Inside the curly braces we specify a name for our component
name: navbar. The string specified as the value for name will be used to import this components in other components.To render our
navbarin our root componentApp.vuefile we insert<navbar />in between the tag<div id="app"><div>.We also need to import the
navbarcomponent fromnavbar.vue, to do that we place the following code in between the<script></script>tag
<script>
import  navbar  from  './navbar.vue';
export default {
// other code goes here
}
</script>
In order to register our component name we use the
components: {}optionOur
App.vue's<script></script>tag would now hold the following code
<script>
import  navbar  from  './navbar.vue';

export default {
name: 'app',
components: {
navbar
}
}
</script>
- Save both files and visit
localhost:8080to see the navbar.

Product List
We are now going to create the product list component which will output the products in stock and some details.
- Just like we did for
navbar.vuecreate a new file in thesrcdirectory, we can call our fileproductlist.vue.
Code for our Product List Component
<template>

<div  class="col l4">

<div  class="card">

<div  class="card-image">

<img  :src="image"  height="250">

</div>

<div  class="card-content">

<div  class="row">

<div  class="col l6">

{{ name }}

</div>

<div  class="col l6">

{{ "$"  +  price }}

</div>

</div>

</div>

<div  class="card-action">

<a  class="waves-effect waves-light btn blue lighten-2"  @click="addToCart(id)">Add To Cart</a>

</div>

</div>

</div>

</template>


<script>


export  default {

name:  'productlist',

props: ['id', 'name', 'image', 'price'],

methods: {

addToCart(id) {

this.$store.dispatch('addToCart', id);

}

},

}

</script>
Analysis
Inside the
<template></template>tag we create a new column using the tag<div class="col l4"></div>We create a new card for displaying the products using
<div class="card"></div>Inside the card we create a
<div class="card-image"></div>which styles the area so we can insert images of our productsInside
class="card-image"tag we add<img :src="image" height="250">:src="image"will bind the value of thesrcattribute to the value ofimage:in the array that holds the data about the products in stockWe then go on to create a
<div class="card-content"></div>which will create the main content area for the card.Inside the
class="card-content"tag we create a row with two columns
<div class="row">
    <div class="col l6"></div>
    <div class="col l6"></div>
</div>
In the first column we bind
{{ name }}which will set the contents of that column to the name of the product being outputted for that card.In the second column we bind
{{ "$" + price }}which will set the contents of that column to the price of the product being outputted for that card.We add a new
<div class="card-action"></div>and inside the tag we add a button using the tag<a class="waves-effect waves-light btn blue lighten-2" @click="addToCart(id)">Add To Cart</a>.The button has an event listener
@click="addToCart(id)"which fires a methodaddToCart(id)whenever the button is clicked.
For the JavaScript code of our component, between the <script></script> tag we add a export default {} statement so the component can be set for export to use in other component.
We define a
name:property for our component, this component will be referred to in external modules with the name set here.We then create
props:which holds an array that will accept data on each product in stock from the parent component for outputting the product details.We also add the
methods: {}property which holds one methodaddToCart(id) {}.The method
addToCart(id) {}is called at the instance of the event@click="addToCart(id)"and the following code is executed
this.$store.dispatch('addToCart', id);
The method above will
dispatchaaddToCartaction to the$store(store.js) file andidwill be used to identify the product we wish to add to our shopping cart.We must specify an action to react to this event in our
Store. The following code in ourstore.jswill handle that
addToCart(context, id) {

context.commit('ADD_TO_CART', id);

},
The above action is inserted in the actions: {} property in our store.js
Actions are used to synchronize operations and commit mutations/modifications to the present state.
The mutation committed by this action can be found in the mutations option in our
store.js
ADD_TO_CART(state, id) {

state.inCart.push(id);

},
Now whenever the
Add To Cartbutton is clicked, it fires up an event which performs action in our store.To output our products in our root component add the following code after the
<navbar />tag.
<div  class="row"  style="margin-top: 100px;">

<div  class="col l9">

<productlist  v-for="product  in  products"  :key="product.id"  :id="product.id"  :name="product.name"  :image="product.image"  :price="product.price"  />

</div>

<div  class="col l3"></div>

</div>
The tag
<productlist />will render the component needed to output the contents of our store.To add the data to be displayed we used the
v-fordirective to bind datav-for="product in products"will loop through theproductsarray in our store.For each
productin theproductsarray theid,name,imageandpricewill be passed as data to theproductlistcomponent for use.We also need to import our component, so add the following code within the
<script></script>tag
import productlist from './productlist.vue';
- Register the component with the components property like so
components: {
navbar,
productlist
}
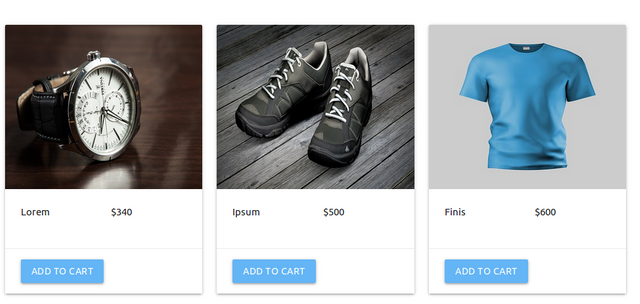
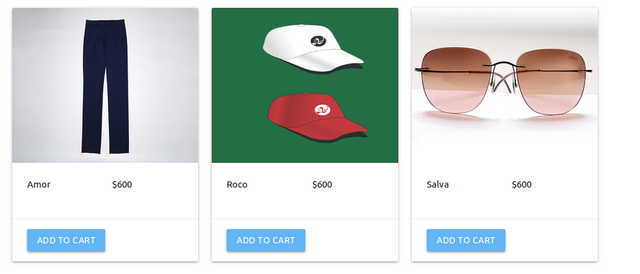
Save all files and view the shopping cart at the URL localhost:8080.


Nice work.
You did not leave your contact, someone may actually want to outsource job to you.
Thanks for your contribution.
Your contribution has been evaluated according to Utopian rules and guidelines, as well as a predefined set of questions pertaining to the category.
To view those questions and the relevant answers related to your post,Click here
Need help? Write a ticket on https://support.utopian.io/.
Chat with us on Discord.
[utopian-moderator]
Hey @gotgame
Thanks for contributing on Utopian.
We’re already looking forward to your next contribution!
Contributing on Utopian
Learn how to contribute on our website or by watching this tutorial on Youtube.
Want to chat? Join us on Discord https://discord.gg/h52nFrV.
Vote for Utopian Witness!
Congratulations @gotgame! You have completed some achievement on Steemit and have been rewarded with new badge(s) :
Click on any badge to view your own Board of Honor on SteemitBoard.
To support your work, I also upvoted your post!
For more information about SteemitBoard, click here
If you no longer want to receive notifications, reply to this comment with the word
STOP@therealwolf 's created platform smartsteem scammed my post this morning (mothersday) that was supposed to be for an Abused Childrens Charity. Dude literally stole from abused children that don't have mothers ... on mothersday.
https://steemit.com/steemit/@prometheusrisen/beware-of-smartsteem-scam