Supporting multiple languages in play 2.6.x(Scala)
.png)
Repository
https://github.com/playframework/playframework
What Will I Learn?
In this tutorial you will learn the following
- You will learn about internationalization in play
- You will learn how to use messages with controllers and views
Requirements
State the requirements the user needs in order to follow this tutorial.
- Intellij IDEA
- sbt
- playframework with slick installed
- Web browser
- Basic knowledge of Scala programming language
- Basic knowledge of HTML and CSS
Difficulty
- Intermediate
Tutorial Contents
Welcome to today's tutorial on how to build a web application that supports multiple languages. This tutorial serves as a guide on internationalization, which is a concept that enables the same web application to be served in different languages.
The arrival of the internet has brought with it the need to build web applications that supports users in different geographical location. In order to cash in on the global market, web applications are adding support for different languages, so as to extend service to users in their own language.
Internationalization
Internationalization also known as localization is the process of products an services that are customized to meet the language needs of individual user.
Play has built in I18n support that allows developers to create translations by adding the files which contain the translation. When we use messages to create translations the apply method of the play.api.i18n.Messages object
is called.
You can specify a particular language through what is known as a language tag. For example short codes like en, fr, and es are language tags for English, French, and Spanish respectively. If you are curious to know some more tags you can find some here
To begin with, you will need to specify the languages your application will support in the conf/application.conf file, we will be adding support for English and French
.png)
Inside the conf/application.conf we will add the following code:
play.i18n {
  # The application languages
  langs = [ "en","fr"]
}
Inside our configuration file we are simply adding support for 2 languages: English and French, which are specified as en and fr. You can simply add more languages by separating the tags with commas. So, if you want to add two more languages like Spanish and Hindi, just do the following:
langs = [ "en","fr","es","hi"]
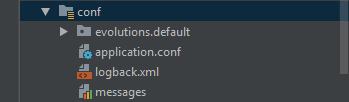
Now that we have specified the languages in our conf/application.conf file, we need to create separate language files for each of the languages that the application would support. This method is better because we don't have to create a new view anytime we are adding a new language.
Let's create a messages file for our first language which is English, to do that we would create a file called conf/messages.en. Please note that the name of messages file is called messages.en which is located in the conf directory, if you look at the screenshot above you will know where to place this file. Let's type the following code into the file
enquiry.title = Welcome to play
enquiry.instruction = Enter your name and age
enquiry.name = Enter your name
enquiry.age = Enter your age
enquiry.button = Add user
The variables, like enquiry.title, enquiry.instruction, enquiry.name and enquiry.agewill be passed as messages to views, and their values will be displayed to user. This variables will remain the same for our french translation, but the only difference will be their values.
For our second messages file, we will call it messages.fr, and this file contains the french translation for our application, let's type in the following code:
enquiry.title = Bienvenue la play
enquiry.instruction = Entrez votre nom et âge
enquiry.name = Entrez votre nom
enquiry.age = Entrez votre âge
enquiry.button = ajouter une personne
Just as explained above we use the same variable names like enquiry.title, enquiry.name, enquiry.instruction, enquiry.name and enquiry.age for our french translation, but we only changed their values to reflect our new language.
So when we are creating new translations we will still use the same variables, but the values will contain vocabulary from the target language. We can add other variables if desired but they must be defined in their corresponding views. Additional translations can be made by creating more messages.language-name files.
Using messages with views and controllers
Now we are going to create our views, and we will see how the translation variables can be applied here. We define a view to create a simple enquiry form with 2 fields- name, and age. Below the form fields will be links that allows us to select the desired language.
Messages with views
We will define our views by typing the following code:
@import helper._

@main(Messages("enquiry.title")) {
    <h3>@Messages("enquiry.instruction")</h3>
  @form(routes.PersonController.addPerson()) {
        @inputText(person(Messages("enquiry.name")))
        @inputText(person(Messages("enquiry.age")))
        @CSRF.formField

        <div class="buttons">
            <input type="submit" value="@Messages("enquiry.button")"/>
        </div>
    }
    <h5>Change language</h5>
    <p><a href ="@routes.PersonController.setDefault()">English</a></p>
    <p><a href ="@routes.PersonController.displayFrench()">French</a></p>

}
In the above code we start by importing helpers into our view and this is done by using the @import helper._, this would allow us to use the various form input helpers like input types buttons and so on.
Our view is divided into 2 parts the header and the body. The parameters inside the @main() reflects the title of our page, and this would be displayed in the title bar, whereas the content between the opening and closing brace reflects the content of the page. See content below, for clearer explanation
@main(title){
    body
}
For our title which is inside the @main, we call the enquiry.title inside the Messages, by doing this we are making reference to the Messages trait. So to call the title inside our conf/messages.language-name file we simply type Messages("enquiry.title"). We can do the same for Messages("enquiry.instruction"), Messages("enquiry.name"), Messages("enquiry.age"), and Messages("enquiry.button") as they would simply return the values stored inside the messages.language-name file
Using @routes.PersonController.setDefault() and @routes.PersonController.displayFrench() we create routes that enable us choose different language options. The setsetDefault() method chooses the default language, which is English in our case, and the displayFrench() method changes the language to french.
Messages with controllers
We cannot preview our work yet, because we have not defined our controllers, so to do that we would create a file inside the controllers package called controllers/PersonController, and it would have the following basic definition.
package controllers
import javax.inject._
import play.api.i18n._

class PersonController @Inject()(cc: MessagesControllerComponents)
  extends MessagesAbstractController(cc) with I18nSupport{...}
We begin our controller definition by creating a named controller, just for this example ours will be called PersonController. We would inject the MessagesControllercomponents and extend the MessagesAbstractController controller class with I18nSupport. This is our basic controller definition for internationalization.
The next thing we will do is to define our enquiry form inside our controller class
val personForm: Form[CreatePersonForm] = Form {
    mapping(
      "name" -> nonEmptyText,
      "age" -> number
    )(CreatePersonForm.apply)(CreatePersonForm.unapply)
  }

case class CreatePersonForm(name: String, age: Int)
The beginning of our form definition starts with naming our form, personForm, and setting it to type form which accepts theCreatePersonForm case class as it's parameters. It has 2 fields, name and age, which has been set to accept text and number respectively. We do this by setting name and age to nonEmpty text and number respectively. Then we set the form mapping to the CreatePersonForm case class apply and unapply methods.
Now we would start creating method known as index that renders our form, and also define two methods displayFrench and setDefault to enable us switch between french and English language.
 def index = Action { implicit request =>
    Ok(views.html.index(personForm))
  }

 def displayFrench = Action{
    Redirect("/").withLang(Lang("fr"))
  }

  def setDefault = Action {
    Redirect("/").withLang(Lang("en"))
  }
The first of the three methods index renders the view with the form using an action. The index.html.index() determines what appears in the index page, it's parameter personForm is the variable name of our form.
The second method displayFrench translates the language into french, it redirects back to the index page using the Redirect function and sets the language to french in the play language cookie using withLang in order to retrieve it for future requests.
The setDefault method uses the same way as above to set the language to English, but an alternative way to implement this method is like this:
def setDefault = Action {
    Redirect("/").clearingLang
  }
In the above code we use the clearingLang function to clear the language cookie set with withLang, this clears the cookie and set's the language back to english.
Complete controller code
The complete code for our controller can be found below, with explanations above:
package controllers

import javax.inject._

import play.api.data.Form
import play.api.data.Forms._
import play.api.i18n._

class PersonController @Inject()(cc: MessagesControllerComponents )
extends MessagesAbstractController(cc) with I18nSupport{

  val personForm: Form[CreatePersonForm] = Form {
    mapping(
      "name" -> nonEmptyText,
      "age" -> number.verifying(min(0), max(140))
    )(CreatePersonForm.apply)(CreatePersonForm.unapply)
  }

  def index = Action { implicit request =>
    Ok(views.html.index(personForm))
  }

  def displayFrench = Action{
    Redirect("/").withLang(Lang("fr"))
  }

  def setDefault = Action {
    Redirect("/").withLang(Lang("en"))
  }
}
case class CreatePersonForm(name: String, age: Int)
Creating routes
Our application cannot be viewed in the browser without creating routes for each of the entry points of our application.
GET     /                                          controllers.PersonController.index
GET    /deflanguage                 controllers.PersonController.setDefault
GET    /showfrench                  controllers.PersonController.displayFrench
The first point specifies the path to the index page which is rendered by the index method, in the PersonController class. The second point which is the /deflanguage which sets the default language, in our case is english. The third point which is /showfrench sets the language to french, it does this by calling the displayFrench method in the PersonController``` class.
Running the application
To run the application, open command prompt, then type cd followed by the complete path of the application, after that type sbt and then type run. Your result should look the same as below
.png)
screenshot showing the default page
When we click on french we get the following results
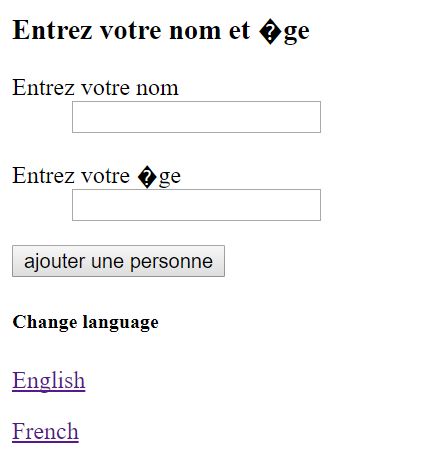.png)
Curriculum
- Building custom websites with play 2.6.x(Scala) part 2
- Building custom websites with play 2.6.x(Scala) part 1
- Creating a file upload system with play 2.6.x(Scala) part 1: Multipart/form-data
- Creating a user registration system in play 2.6.x (scala) using mysql
- Creating a user registration system in play 2.6.x (Scala) using mysql
- Retrieving a particular user and initiating GET requests in play 2.6.x(Scala)
- Updating a particular user in play 2.6.x using slick
- Deleting a User and sorting elements in play(Scala) 2.6.x
- Carrying out aggregations in Play(Scala) 2.6.x
- Retrieving Data From 2 Tables in play 2.6.x(Scala) Using Slick: Part 1
Proof of Work Done
Proof of work done can be found here
https://github.com/leczy642/play-scala-internationalization
Thank you for your contribution.
Your contribution has been evaluated according to Utopian policies and guidelines, as well as a predefined set of questions pertaining to the category.
To view those questions and the relevant answers related to your post, click here.
Need help? Write a ticket on https://support.utopian.io/.
Chat with us on Discord.
[utopian-moderator]
Thanks for your moderation and recommendations.
Hey @leczy
Thanks for contributing on Utopian.
We’re already looking forward to your next contribution!
Want to chat? Join us on Discord https://discord.gg/h52nFrV.
Vote for Utopian Witness!
Writing codes have been a very difficult things for me, even when I was in 200 level in the University I remembered I did one programming it was very difficult but when I go through this tutorial I found it a little bit more easier than in the University.
Thumbs up @leczy
I am glad you find this tutorial very helpful. Coding can be a little bit difficult at first, but with patience and persistence you can become very good at it.
Congratulations! Your post has been selected as a daily Steemit truffle! It is listed on rank 24 of all contributions awarded today. You can find the TOP DAILY TRUFFLE PICKS HERE.
I upvoted your contribution because to my mind your post is at least 22 SBD worth and should receive 95 votes. It's now up to the lovely Steemit community to make this come true.
I am
TrufflePig, an Artificial Intelligence Bot that helps minnows and content curators using Machine Learning. If you are curious how I select content, you can find an explanation here!Have a nice day and sincerely yours,

TrufflePigCongratulations @leczy! You received a personal award!
You can view your badges on your Steem Board and compare to others on the Steem Ranking
Vote for @Steemitboard as a witness to get one more award and increased upvotes!