Arduino Nano: Changing the blinking frequency of the arduino led by means of the u and d keys.

photocredits
for this activity you must remember the concepts shown below.
if statement
The if statement allows you to control if a program enters a section of code or not based on whether a given condition is true or false.
serial communication
Serial ports are the main way to communicate an Arduino board with a computer. Thanks to the serial port we can, for example, move the mouse
There are endless possibilities in which the use of the serial port is required. Therefore, the serial port is a fundamental component of a large number of Arduino projects, and it is one of the basic elements that we must learn in order to take full advantage of Arduino.
Serial ports
A port is the generic name with which we name interfaces, physical or virtual, that allow communication between two computers or devices.
A serial port sends the information through a sequence of bits. This requires at least two connectors to perform data communication, RX (reception) and TX (transmission). Sometimes you will see refer to the serial ports as UART.
Arduino and the Serial Port
Virtually all Arduino boards have at least one UART unit. Many models of Arduino boards have a USB or Micro USB connector connected to one of the serial ports, which simplifies the process of connecting to a computer. However some boards, such as the Mini Pro, do not have this connector so the only way to connect to them is directly through the corresponding pins.
we will connect using the USB cable.
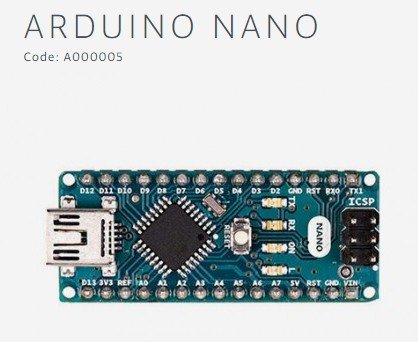
Here we are going to see a photo of the arduino nano:
PhotoCredits
Activity
we are going to change the blinking frequency of the arduino led by means of the u and p keys.
difficulty
This tutorial is for those who know the basics of Arduino.
Requirement
- Arduino nano with USB Cable
- Laptop with Arduino IDE
Steps to follow
- Prepare the equipment needed for the activity.
- Connect the arduino to the Laptop using the usb cable
- Open Arduino IDE
now we are going to open a new project in arduino:
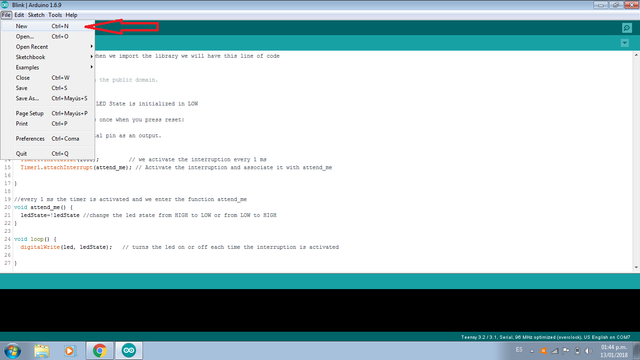
you will see this window:

we will see the code to change the blinking frequency of the arduino led by means of the keys u and p. Remember that you must have basic arduino notions.
Program
now you must write the following code that I have explained:
This is the text code:
int frec=500; //initialize the variable frec in 500ms
int key=0;
// the setup routine runs once when you press reset:
void setup() {
// initialize the digital pin as an output.
pinMode(13, OUTPUT); //We declare that we use pin 13 as output
Serial.begin(9600); //sets the baud rate of the UART for serial transmission
}
// the loop routine runs over and over again forever:
void loop() {
if (Serial.available()>0){
//Get the number of bytes (characters) available for reading
//from the serial port. if the number of bytes available to read is greater than 0
//we continue.
key=Serial.read(); //Reads incoming serial data and
//returns the first byte of incoming serial data available.
if(key=='u'){
frec=frec+100; //if we press the key u add 100ms to frec
}
if(key=='d'){
frec=frec-100; //if we press the key d subtract 100ms to frec
}
}
if(frec>0){
//the initial delay time is 500 ms and it will increase or decrease
//by 100 according to the key you press.
digitalWrite(13, HIGH); //the led turns on
delay(frec); //wait for the time indicated by the variable frec.
digitalWrite(13, LOW); // the led turns off
delay(frec);
}
}
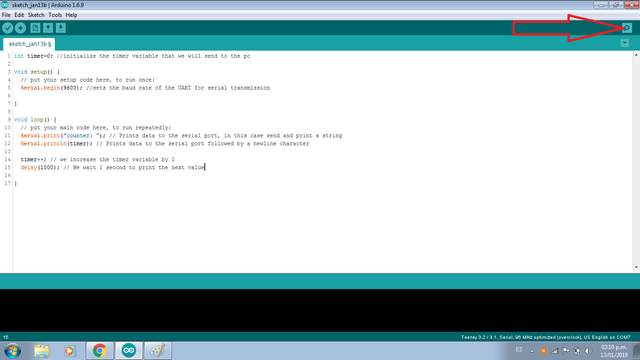
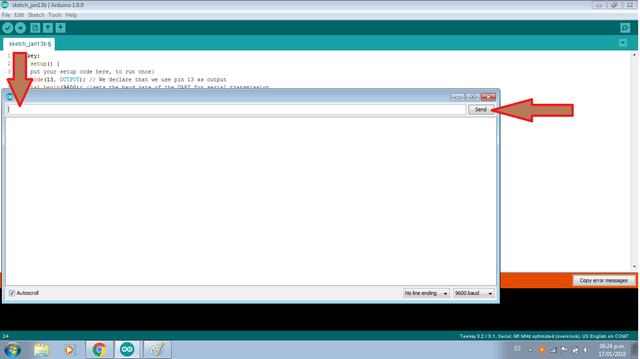
The serial port monitor is a small utility integrated within IDE Standard that allows us to easily send and receive information through the serial port. In the image we see how to open the serial monitor:
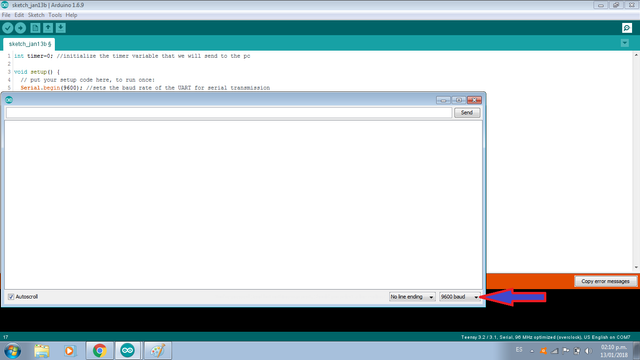
Using the serial monitor is very simple, and has two zones, one that shows the data received, and another to send them. You should check that the baud is 9600 as you configured it with the Serial.begin(9600) function.
Run the code. The characters will be sent to Arduino using the Serial Monitor. When we press u and SEND, the led decreases the blinking frequency. When we press d and SEND, the led increases the blinking frequency.
if the variable frec is less than or equal to zero, the LED does not turn on. The minimum value for the variable frec is 100 if you want to increase it to turn on the led again you must press the key u.
remember that decreasing the frequency is increasing the delay.
try to run the code and start to learn.
Collaborations
Posted on Utopian.io - Rewarding Open Source Contributors
Hey @luisrod I am @utopian-io. I have just upvoted you!
Achievements
Suggestions
Get Noticed!
Community-Driven Witness!
I am the first and only Steem Community-Driven Witness. Participate on Discord. Lets GROW TOGETHER!
Up-vote this comment to grow my power and help Open Source contributions like this one. Want to chat? Join me on Discord https://discord.gg/Pc8HG9x
Thank you for the contribution. It has been approved.
You can contact us on Discord.
[utopian-moderator]