Tutorial: Building a web app with React, Redux, and the Steem Javascript API, PART 4
https://github.com/facebook/react
Building a web app with React, Redux, and the Steem Javascript API, Part 4

Image from mit.edu
In part 3 of this tutorial series we gravitated away from using local state in React and got set up with Redux. In addition to moving to Redux we also installed json-query and simplified iterating through the nested JSON data returned from the API. In this part of the series we will install the MUICSS material design CSS framework and add some styling to our project, use Moment.js to better format the Unix timestamp returned by the API, and we will add slick Utopian-io inspired colors and fonts to the project.
What you will learn in this tutorial:
- Using the MUICSS framework to add styles ( Header, footer, buttons, etc) easily to our project
- How to use Moment.js to simplify working with Unix timestamps and display times in a more readable way
- Adding Utopian flavored fonts using Google Fonts
- Using CSS gradients to create a Utopian blue-to-purple background that is often used in graphics on Steemit
Requirements:
- All the requirements from parts 1, 2, and 3 of this series
- MUICSS framework
- Moment.js
- Google Fonts
Difficulty: Intermediate
What the project currently looks like
The current look of the project
As you can see the project doesn't currently look very nice. The previous tutorials focused on the API, React itself, and Redux. As of part 3 the project is retrieving the data and is set up well with React and Redux, but now it's time to focus on aesthetics a little.
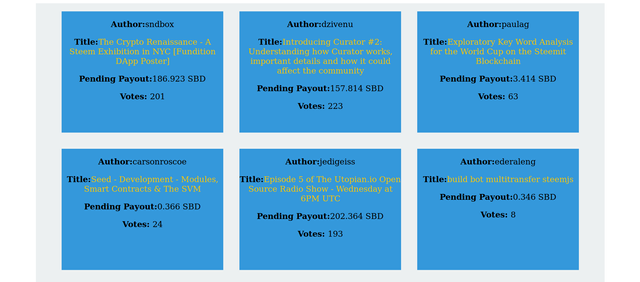
Drawing inspiration from Utopian and The Crypto Renaissance Exhibition in NYC
If you follow some of the open source/blockchain pages on Steemit you might already be familar with sndbox and the Crypto Renaissance Exhibition in NYC. The recent posts pertaining to the Steem exhibition contain graphics made by the sndbox team and creativecrypto, and all the images are high quality and open source and free to use. They were even kind enough to share a link to a Google drive page containing the images. I drew some inspiration from these images and decided to use CSS gradients to style the background of our project in a similar fashion to the background in this graphic:
Pretty sharp looking, huh?
Using CSS gradients to recreate this background in our project
I used the Eyedropper tool in Firefox's developer tool kit to grab the CSS values for the blue color in the top right of the image and for the purple color in the bottom left. The two CSS values for these colors are `#3baee5` and `#a21879`. Using these two CSS values and CSS3's `linear-gradient` property we can create a gradient exactly like the one in the graphic.
Add the following to _Global.scss and remove the dark grey color we previous used for the background:
body {
 background-image:
    linear-gradient(
     45deg,
     #3baee5, #a21879
    );
}
Now our project looks like this:
The project is already looking a bit sharper
Getting the fonts used on utopian.io from Google Fonts for use in our project
Using Firefox's dev tools I was able to see that the Utopian-io website uses a font called Lato on the site. To use Lato add the following to the _Global.scss file
@import url('https://fonts.googleapis.com/css?family=Lato');

body {
 background-image:
    linear-gradient(
     45deg,
     #3baee5, #a21879
    );
 font-family: 'Lato', sans-serif;
}
By adding the import statement and setting the font-family to Lato we can now use the Lato font everywhere in our project. Now instead of using the generic font the project uses the same font as the real Utopian-io website.
Installing and using MUICSS to help style our project
MUICSS is a CSS framework that let's us easily use premade Material Design elements on our project. Install MUICSS via npm install --save muicss. After installing it add the following script to the head of your index.html file in the public folder:
(html comment removed:  MUI Material Design for React )
<link href="//cdn.muicss.com/mui-0.9.39/css/mui.min.css" rel="stylesheet" type="text/css" media="screen" />
Now we can use MUICSS in the project. After that is installed create a new folder within src named elements. Inside of that new folder create a file called Menu.js. In this file we will create a menu with navigation buttons using MUICSS. The MUICSS documentation offers examples of the various elements you can easily assemble using the framework. We will be creating an Appbar element that contains several buttons, each representing a different Utopian-io tag. For example, our menu with have a button for trending that when clicked by the user will display trending Utopian posts, a button called hot that will display hot Utopian posts and so on.
To create our Menu element with the Appbar containing the various buttons we need for our navigation add the following to Menu.js:
import React, { Component } from 'react';
import Button from 'muicss/lib/react/button';
import Appbar from 'muicss/lib/react/appbar';

class Menu extends Component {

  render() {
    return (
      <div className="menu-container">
        <Appbar>
          <Button variant="raised" color="accent">Hot</Button>
          <Button variant="raised" color="accent">Trending</Button>
          <Button variant="raised" color="accent">Cash</Button>
          <Button variant="raised" color="accent">Utopian-io</Button>
          <Button variant="raised" color="accent">Weekly Picks</Button>
        </Appbar>
      </div>
    );
  }
}

export default Menu;
Add the following to _Global.scss:
.mui-appbar {
  background-color: $dark-grey;
  height: 5em;
  text-align: center;
  margin-bottom: 5em;

  .mui-btn {
    display: inline-block;
    margin: 1em;
  }
}
In Utopian.js wrap the HTML elements in our Return function in a Container element. Also, while we're here let's create an h1 element:
return (
      <Container>
        <div className="utopian-container">
          <h1>Top Utopian-io Posts from the Steem Blockchain</h1>
          <hr/>
          {display}
        </div>
      </Container>
);
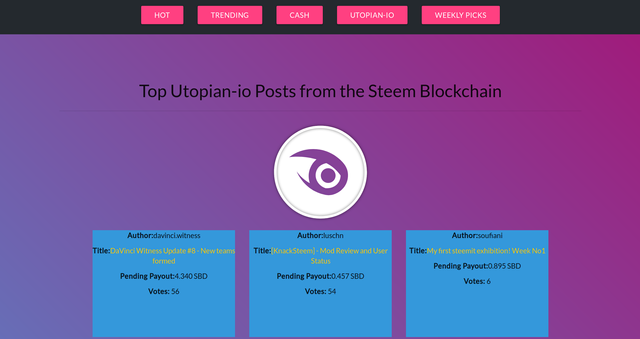
Our Menu.js element is now coming together nicely and we've created a basic navigation for our site with the buttons we've created. The top of the project now looks like this:

Now our project has a nice header
The project now has a header with navigation. We will be setting up the routes later on in another part of the tutorial and hooking up the buttons so they can serve as links to other parts of our app. For now the buttons are not functional.
Now let's add the Utopian logo to make our app look even cooler.
Adding the Utopian logo to our project
Our project is looking better already. Now let's make it look cooler by adding the Utopian logo.
Download the image and save it in the elements folder as utopian-logo.svg. Then import it in the Utopian.js component like so:
import logo from '../elements/utopian-logo.svg';
Now that the image is downloaded and imported into the component we can display it by putting it in the Render function:
return (
         <Container>
           <div className="utopian-container">
             <h1>Top Utopian-io Posts from the Steem Blockchain</h1>
             <hr/>
             <img src={logo} id="logo"/>
             {display}
           </div>
         </Container>
       );
The logo is now added via <img src={logo} id="logo" />. The top of the project now looks like this:
The header/menu, background gradient, and logo are looking good for now. We'll add more CSS styles to this later but for now let's move on to the posts items. We'll start by using Moment.js to format the cashout time for the post in a human readable form.
Using Moment.js to convert the Unix timestamp for the cashout time for the post
Add the following line of code in the Render function of Utopian.js underneath where we used json-query in the previous tutorial to grab nested data within the JSON returned from the API:
var cashoutTime = jsonQuery('[*][cashout_time]', { data: this.props.data.utopianCash }).value;
Now we can console.log cashoutTime. When we console.log that the API returns the cashout time for each post in the following format: "2018-07-16T20:20:09". As you can see this is not ideal for a human to read. Moment.js can help us display the cashout times for each post in a more readable and human friendly way.
Moment.js is a great library that can parse and manipulate dates and times in Javascript. Install the library via npm install moment --save. Then import it in Utopian.js via import moment from 'moment';. Now we can use the library in our project and start formatting the cashout times the way we want.
The following code will transform the UNIX timestamp into a readable form:
{moment(cashoutTime[i]).format('MMMM Do YYYY, h:mm:ss a')}
Our Utopian.js file now looks like this in it's entirety:
import Menu from '../elements/Menu';
import Container from 'muicss/lib/react/container';
import logo from '../elements/utopian-logo.svg'
import React, { Component } from 'react';
import dsteem from 'dsteem';
import { Client } from 'dsteem';
import jsonQuery from 'json-query';
import { connect } from 'react-redux';
import { fetchUtopianHot } from '../actions/UtopianHot-action';
import {bindActionCreators, compose, applyMiddleware, createStore} from 'redux';
import thunk from 'redux-thunk';
import moment from 'moment';


class Utopian extends Component {
    componentDidMount() {
      this.props.fetchUtopianHot();
    }


  render() {
  const utopian = Object.keys(this.props.data.utopianCash);

  var author = jsonQuery('[**][author]', { data: this.props.data.utopianCash }).value
  var title = jsonQuery('[**][title]', { data: this.props.data.utopianCash }).value
  var payout = jsonQuery('[*][total_payout_value]', { data: this.props.data.utopianCash }).value
  var postLink = jsonQuery('[*][url]', { data: this.props.data.utopianCash }).value
  var pendingPayout = jsonQuery('[*][pending_payout_value]', { data: this.props.data.utopianCash }).value
  var netVotes = jsonQuery('[*][net_votes]', { data: this.props.data.utopianCash }).value
  var cashoutTime = jsonQuery('[*][cashout_time]', { data: this.props.data.utopianCash }).value;

  var cashout = (new Date(cashoutTime)).toString();
  console.log(cashout);

      let display = utopian.map((post, i) => {
      return (
        <div className="utopian-items">
          <h3 className="author">
            <strong>Author:  </strong>
            <a href={`https://www.steemit.com/@` + author[i]}>{author[i]}</a>
          </h3>
          <p>
            <strong>Title:  </strong>
            <a href={`https://www.steemit.com` + postLink[i]}>{title[i]}</a>
          </p>
          <p>
            <strong>Pending Payout:  </strong>
            {pendingPayout[i]}
          </p>
          <p>
            <strong>Cashout:   </strong>
            {moment(cashoutTime[i]).format('MMMM Do YYYY, h:mm:ss a')}
          </p>
          <p class="votes">
            <strong>Votes:  </strong>
            {netVotes[i]}
          </p>
        </div>
      )
    });


    return (
      <Container>
        <div className="utopian-container">
          <h1>Top Utopian-io Posts from the Steem Blockchain</h1>
          <hr/>
          <img src={logo} id="logo"/>
          {display}
        </div>
      </Container>
    );
  }
}


 const mapDispatchToProps = dispatch => ({
  fetchUtopianHot: () => dispatch(fetchUtopianHot())
})


const mapStateToProps = state => ({
  data: state.utopianHotReducer
})

export default connect(mapStateToProps, mapDispatchToProps)(Utopian);
95% of the component looks identical to how it was at the end of part 3 of this series. All I did was import the Moment.js library, create a new cashoutTime variable that stored the time data for each post, and added a new paragraph element in the render function that output the time using Moment.js.
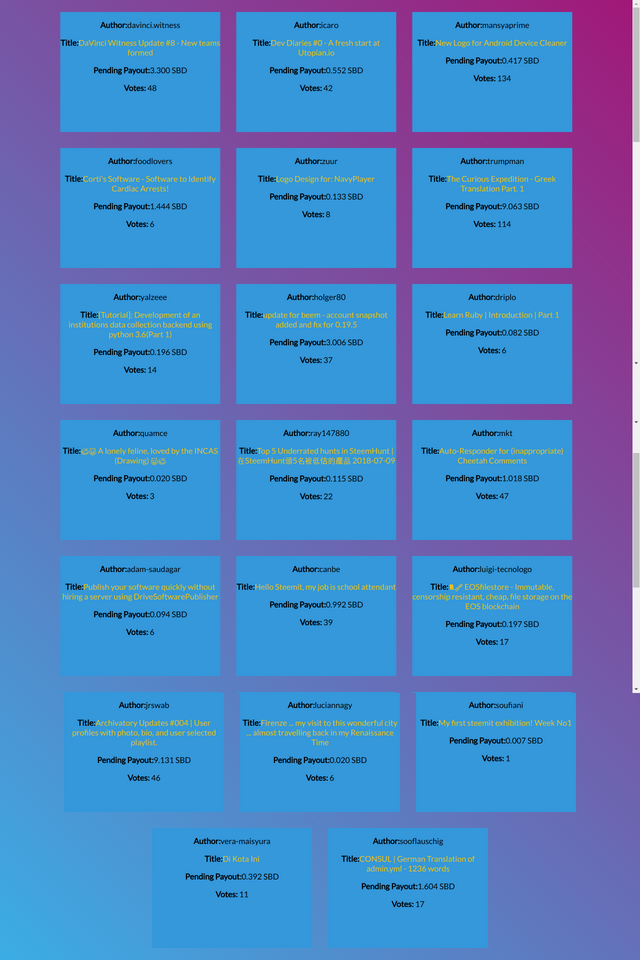
Now each post list item displays the time:

Cashout time is now displayed in a human readable form
Now let's make the Utopian.js component look a little prettier. Add the following to _Utopian.scss:
$light-grey: #fafbfc;
$blue: #4786f1;
$purple: #8d378e;
$dark-grey: #24292e;


.utopian-container {
  height: auto;
  margin: auto;
  text-align: center;

  h1 {
    color: snow;
    font-style: italic;
  }

  hr {
    border-color: snow;
    background-color: snow;
    height: .5px;
  }
}


.utopian-items {
  width: 20em;
  height: 20em;
  margin: 1em;
  background-color: $dark-grey;
  display: inline-block;
  vertical-align: middle;
  color: snow;
  text-align: left;
  position: relative;

  a {
    text-decoration: none;
    color: $blue;
    font-weight: bolder;

    &:hover {
      color: $purple;
    }
  }


  p {
    margin: 1em;
  }


  .author {
    color: $light-grey;
    text-align: center;
    padding-bottom: 1em;
  }

  .votes {
    color: $light-grey;
    bottom: 0;
    left: auto;
    right: auto;
    position: absolute;
    text-align: center;
  }
}
While we're in the styles folder update the _Global.scss file to look like this:
$light-grey: #fafbfc;
$blue: #4786f1;
$purple: #8d378e;
$dark-grey: #24292e;


.utopian-container {
  height: auto;
  margin: auto;
  text-align: center;

  h1 {
    color: snow;
    font-style: italic;
  }

  hr {
    border-color: snow;
    background-color: snow;
    height: .5px;
  }
}


.utopian-items {
  width: 20em;
  height: 20em;
  margin: 1em;
  background-color: $dark-grey;
  display: inline-block;
  vertical-align: middle;
  color: snow;
  text-align: left;
  position: relative;

  a {
    text-decoration: none;
    color: $blue;
    font-weight: bolder;

    &:hover {
      color: $purple;
    }
  }


  p {
    margin: 1em;
  }


  .author {
    color: $light-grey;
    text-align: center;
    padding-bottom: 1em;
  }

  .votes {
    color: $light-grey;
    bottom: 0;
    left: auto;
    right: auto;
    position: absolute;
    text-align: center;
  }
}
Adding a footer
The last logical thing to add to our project is a footer. Let's add a minimalist footer with a little bit of basic info about the project. In the elements folder create a file named Footer.js. Then create a _Footer.scss file in the styles folder.
Inside Footer.js add the following:
import React, { Component } from 'react';
import logo from '../elements/utopian-logo.svg';


class Footer extends Component {

  render() {
    return (
      <div className="footer">
        <p>This site uses the dsteem API to communicate with the Steem blockchain and display data pertaining to the Utopian.io Open Source Software project fetched from the blockchain.</p>
        <img src={logo} id="logo"/>
      </div>
    );
  }
}

export default Footer;
Add the following to the _Footer.scss file:
@media only screen and (min-width : 320px) {
  .footer {
    background-color: $dark-grey;
    height: auto;
    color: snow;
    margin-top: 10em;

    p {
      font-size: 1.2em;
      width: 80%;
      height: auto;
      margin-left: auto;
      margin-right: auto;
      padding-top: 2em;
      padding-bottom: 2em;
    }

    #logo {
      height: 50px;
      width: 50px;
      padding: 1em;
    }

  }


  .utopian-items .votes {
    width: 100%;
    margin-left: 0;
    margin-right: 0;
  }

}

/* Extra Small Devices, Phones */
@media only screen and (min-width : 480px) {

}


/* Medium Devices, Desktops */
@media only screen and (min-width : 992px) {
  .footer {
    p {
      width: 30%;
    }
  }

}
Let's see how our project looks after dressing it up with some SCSS
Writing a tutorial that shows CSS/SCSS and that has this many separate parts is difficult to do. The purpose of this tutorial was not to teach CSS fundementals and for the sake of brevity I didn't dwell on individual CSS properties. The point wasn't to dwell on CSS but to dress up our project and make it look more presentable.
The CSS in it's entirety can be found in the Github repo if you're interested in seeing it all in one place. The styles in this tutorial are hardly a finished project and I will likely tweak a lot of them moving forward.
Now without further delay let's take a look at what our project looks like now!
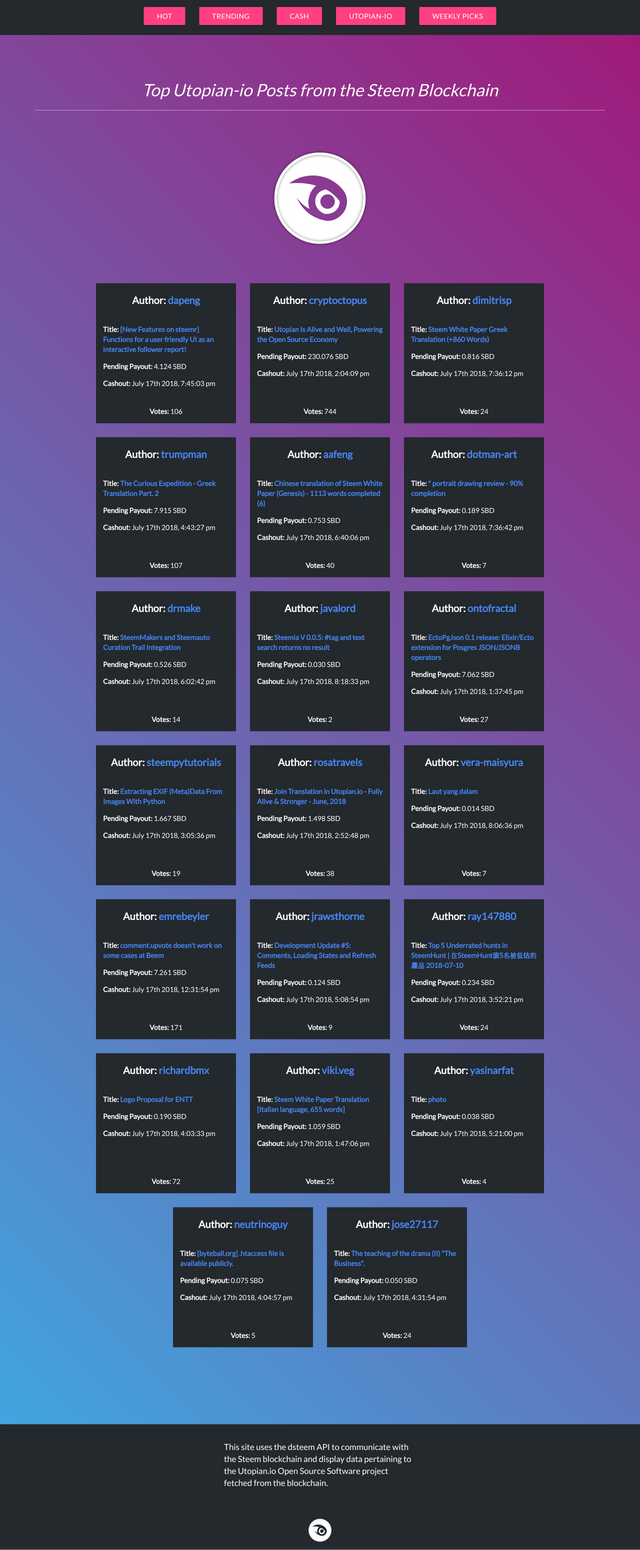
The project is looking way better than it did at the end of the last tutorial
This concludes part 4 of the series. In upcoming parts I will be teaching you how to use a router so that we can make our buttons in the navigation functional and we will be making more requests to the API to retrieve new types of data. I also plan on adding some filtering functionality so that users can filter posts low to high or high to low based on criteria such as payout, number of votes, cashout time, etc..
Proof of work:
https://github.com/Nicknyr/Steem.js_API_Tutorial
Thank you for your contribution @nicknyr.
I really enjoyed your tutorial, good work.
Your contribution has been evaluated according to Utopian policies and guidelines, as well as a predefined set of questions pertaining to the category.
To view those questions and the relevant answers related to your post, click here.
Need help? Write a ticket on https://support.utopian.io/.
Chat with us on Discord.
[utopian-moderator]
Hey @nicknyr
Thanks for contributing on Utopian.
We’re already looking forward to your next contribution!
Want to chat? Join us on Discord https://discord.gg/h52nFrV.
Vote for Utopian Witness!
Congratulations @nicknyr! You have completed the following achievement on Steemit and have been rewarded with new badge(s) :
Click on the badge to view your Board of Honor.
If you no longer want to receive notifications, reply to this comment with the word
STOPDo not miss the last post from @steemitboard:
SteemitBoard World Cup Contest - Home stretch to the finals. Do not miss them!
Participate in the SteemitBoard World Cup Contest!
Collect World Cup badges and win free SBD
Support the Gold Sponsors of the contest: @good-karma and @lukestokes