Making Enemy Rain Game Using HTML 5 SVG With PabloJs(Part-1)
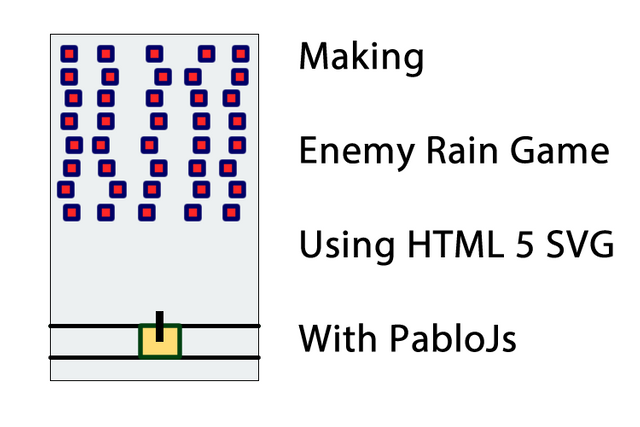
Repository
Making Enemy Rain Game Using HTML 5 SVG With PabloJs(Part-1)
What Will I Learn?
- You will learn how to build games using
HTML5 SVG. - You will learn to create svg objects more easily using
Pablojs. - You will learn how to perform certain operations at certain time intervals in a game system.
- You will learn
setInterval()function in javascript. - You will learn
rect()function in pablojs. - You will learn
remove()andempty()functions in pablojs. - You will learn
arraysinjavascripts. - You will learn
Math.random()andMath.floor()functions in javascript. - You will learn
attr()function in pablojs. - You will learn
parseInt()in javascript.
Requirements
Difficulty
- Basic
Tutorial Contents
Hello to everyone.
In this article series I will show you how to do Enemy-Rain Game.
Let me first explain what the game is. From the highest point of the game area, your enemies fall into the zone you are protecting at certain time intervals and you are trying to destroy all enemies without reaching your protected area with a weapon that shoots your enemies.
Together with this game you will comprehend the javascript array structure and you will be able to master the algorithm logic of events occurring at certain time intervals.
You will also learn how to create rectangle, circle and line operations using Pablojs.
In this article, we will create more than one enemy from the top of the playing field and we will make the enemies fall down.
We'll create enemies using the rect() function and will not create more than 5 enemies in a row.
We'll randomly set the position of the first enemy in a row and spaces between enemies. We will use the Math.random() function for random operations.
The enemies created will be kept in an array and the movement of the enemies will be provided with the help of this array.
To ensure the movement of the coordinates of the enemy within the array will be obtained with the attr() function and the change of the coordinate to the number of the operation will be provided with the parseInt() function.
Let’ start.
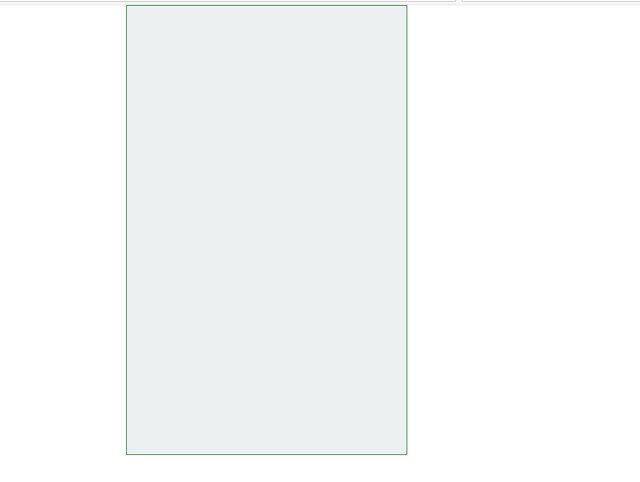
Design Of Playground
I will use the Bootstrap library to design the playground and give the style to display the playground on all screens.
<head>
    <meta charset="utf-8">
    <title></title>
    <link href="bootstrap.css" rel="stylesheet">
    <script src="jquery.js"></script>
    <script src="pablo.js"></script>
    <script src="script.js"></script>
  </head>
In the meantime we will use Jquery and pablojs libraries.
Let's create one div for the playground and set it as ground.
<body>
      <div class="container">
        <div id="ground">
        </div>
      </div>
  </body>
We can give style to container class and ground div. I want both to use 50% of the width and 80% of its height.
<style>
          .container{
            height: 80vh;
            width:50vh;
          }
          #ground {
            height: 80vh;
            width:50vh;
            border: 1px solid #060;
            background-color: #ECF0F1;
          }
    </style>
Screenshot 1
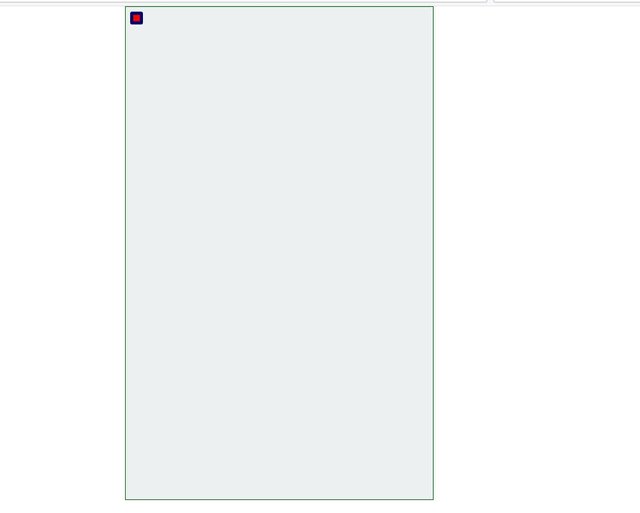
Create The Enemy
To create svg objects first, we need to create svg using pablojs. We will create rectangles,circles and lines in this svg.
var svg = Pablo('#ground').svg({ //create svg with height and width
          width: 485,
          height: 775
      });
I will use rectangles to create enemies. The rect() function is used to create a rectangle in Pablojs.
Let's define a function and create a rectangle with the help of this function. In order to have the coordinates we want, we give x and y points as the function parameter.
var enemy;
var enemySize=15;//I set rectangle's size 15px

function enemyBuilder(x,y,color){
    enemy=svg.rect({
          x:x, y:y,
          width:enemySize, height:enemySize,
          fill:  color,
          stroke:'#006',
          'stroke-width': 5,
          'stroke-linejoin': 'round'
    });

  return enemy;
}
I keep the dimensions of the rectangle in a variable so that I can change the value of this variable when I want to make a change in the future.
I've defined a stroke in the rectangle here thus I create a line around the rectangle. I can adjust the thickness of this line with stroke-width property.
Now I can create a rectangle using this function.
enemy=enemyBuilder(10,10,'red');//pressing rect in screen
We are pressing a red rectangle in screen.
Screenshot 2
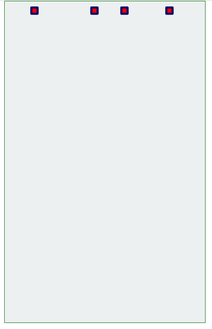
Move The Enemy
To move the rectangle we need to change the x and y points at certain time intervals and we need to delete the previous rectangle.
Because the name of our game is the enemy rain, we only need to change the y coordinate of the rectangle so the enemy will appear to be falling down.
We can use the setInterval() function to perform certain tasks at certain time intervals.
var enemyInterval=setInterval(function(){
  //some functions to be run
  }, 100);
We need to delete the rectangle created first and increase the y coordinate and re-run enemyBuilder() function.
We have set the specific time interval to 100. So a setInterval() function will work in 100 milliseconds.
var enemyInterval=setInterval(function(){
       enemy.remove();
       var y=enemy.attr('y');//accessing the y property of the rectangle
       var x=enemy.attr('x');//accessing the x property of the rectangle
       y=parseInt(y)+15;
      enemy=enemyBuilder(x,y,'red');
  }, 100);
The remove() function is used to delete an svg object. We use empty() to delete all objects in an svg object.
The attr() function is used to access the properties of an svg object. Since we will change the y point of the rectangle, we need to access the y property with the attr() function but the attr () function returns the properties as string, so we need to make the y property integer.
When we want to make a variable integer ,we will use parseInt() function.
The following image will appear when we complete the setInterval() function.
Screenshot 3
Create Multiple Enemies
To create multiple enemies, you must run multiple enemyBuilder() functions in a row by changing x points. We can use the for loop to create more than one.
We can follow the path to create enemies.
We can start the i variable in the for loop from zero and re-return it with a 15 px increment until I get 465.
We create one variable and assign 0 or 1 to this variable randomly. When this variable is 1, we can draw the rectangle.
Finally, we need to throw these rectangles into an array.
var flag;//To draw a rectangle
var enemyColor='red';
var enemyArray=new Array();

for (var i = 0; i <465 ; i=i+15) {
            flag=Math.floor(Math.random() * 2);
            if(flag==1){
                enemy=enemyBuilder(i,0,enemyColor);
                enemyArray.push(enemy);
            }
    }
With the Math.random() function we can generate random numbers between 0 and 1.
We complete the number obtained by Math.floor() as an integer up.
The above code snippet creates rectangles in only one row at certain time intervals. We must move these rectangles downwards.
We can use the enemyArray array to move. We must access and move each element in the array and update the current value of the array from old value.
In setInterval()
for (var i = 0; i < enemyArray.length; i++) {

      var x=enemyArray[i].attr('x');
      var y=enemyArray[i].attr('y');

      enemyArray[i].remove();

      y=parseInt(y)+15;
      enemy=enemyBuilder(x,y,enemyColor);

      enemyArray[i]=enemy;//set new value
    }
so we moved all enemies downwards.
Screenshot 4
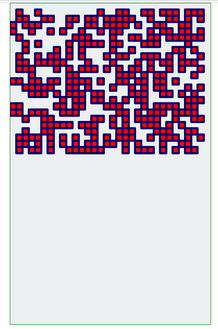
Set The Speed And Number Of Enemies
If we complete our codes, the enemies will become too much and move very quickly.
Let's increase the time we set in setInterval() and trigger it in 1000 milliseconds.
  var enemyInterval=setInterval(function(){
  }, 1000);
The new version of the game is as follows.
Screenshot 5
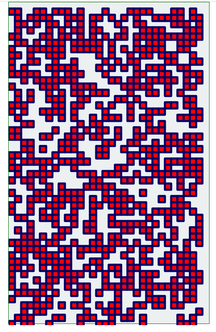
With this state, the enemies slowed down, but they are still too much. If we do not produce more than 5 enemies in a row, we can reduce it.
To do this, let's define a variable and draw the enemy when that variable is greater than 0 and reduce this variable by one when we draw the enemy.
var enemyCount=5;
var enemyInterval=setInterval(function(){
    enemyCount=5;
    for (var i = 0; i <465 ; i=i+15) {

      if(enemyCount>0){
            flag=Math.floor(Math.random() * 2);

            if(flag==1){
                enemy=enemyBuilder(i,0,enemyColor);
                enemyArray.push(enemy);
                enemyCount=enemyCount-1;
            }
          }

    }
Screenshot 6
When we do, we get a concentrated look on the left side of the playground.
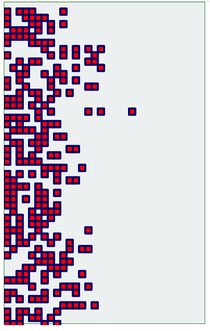
To overcome this problem, let's set the first element of the loop randomly and set a random number again, not the increment amount 15 also increase the range that the flag value can take.
var separation;
var first;

  separation=Math.floor(Math.random() * 30)+15;//space between rectangles
    first=Math.floor(Math.random() * 30)+15;//first y coordinate

    for (var i = first; i <465 ; i=i+separation) {

      if(enemyCount>0){
            flag=Math.floor(Math.random() * 4);

            if(flag==1){
                enemy=enemyBuilder(i,0,enemyColor);
                enemyArray.push(enemy);
                enemyCount=enemyCount-1;
            }
          }
    }
Screenshot 7
Proof of Work Done
https://github.com/onepicesteem/Making-Enemy-Rain-Game-Using-HTML-5-SVG-With-PabloJs-Part-1
I thank you for your contribution. Here are my thoughts;
What you are doing here is teaching same thing over and over again just with different examples. Your older tutorials are teaching the same concept just with different kind of games. Here are the tutorials that I'm talking about;
As you can see, you already teached setInterval and math etc.
Your contribution has been evaluated according to Utopian policies and guidelines, as well as a predefined set of questions pertaining to the category.
To view those questions and the relevant answers related to your post, click here.
Need help? Write a ticket on https://support.utopian.io/.
Chat with us on Discord.
[utopian-moderator]
Thank you for your review, @yokunjon!
So far this week you've reviewed 2 contributions. Keep up the good work!
Hi @onepice!
Your post was upvoted by @steem-ua, new Steem dApp, using UserAuthority for algorithmic post curation!
Your post is eligible for our upvote, thanks to our collaboration with @utopian-io!
Feel free to join our @steem-ua Discord server
Hey, @onepice!
Thanks for contributing on Utopian.
We’re already looking forward to your next contribution!
Get higher incentives and support Utopian.io!
Simply set @utopian.pay as a 5% (or higher) payout beneficiary on your contribution post (via SteemPlus or Steeditor).
Want to chat? Join us on Discord https://discord.gg/h52nFrV.
Vote for Utopian Witness!