Making Ping Pong Game With Phaser 3 (Part-2)

Repository
Making Ping Pong Game With Phaser 3 (Part-2)
What Will I Learn?
- You will learn
text()andsetText()functions in phaser 3. - You will learn
setBounce()functions in phaser 3. - You will learn
setVelocityY()andsetVelocitX()functions in phaser 3. - You will learn
addKey()andKeyCodes()functions in phaser 3. - You will learn
collider()functions in phaser 3. - You will learn
setCollideWorldBounds()functions in phaser 3.
Requirements
- Have basic html5 and javascript knowledge.
- Visual Studio Code
Difficulty
- Basic
Tutorial Contents
In this article, I will complete the ping-pong game.
In the previous article, we prepared to create a game with phaser 3 and provided the plater’s movement. I also collided the player with the game limits and prevented it from leaving the playing area.
In this article, I will create the second player and move the second player with the keyboard's W and S keys. I will create and move the ball of the game.
I'll make the ball hit the players and it will change direction after they hit the players.
If the players can not hit the ball and can not ball's change direction I will print the score to the other side and show them on the screen and I'll restart the game to start over.
Create Second Player
We created the first player using the image in previous article. We will create the second player using the image.
var pc;
function preloadGame ()
 {
  this.load.image('pc','assets/pc.png');
 }
We will first install the pc.png image in the assets folder in order to use it in-game. Then we will create this picture by giving it its position.
function createGame ()
{

    pc=this.physics.add.sprite(20, 200, 'pc');
    pc.setCollideWorldBounds(true);

}
I used setCollideWorldBounds to prevent the pc player from leaving the playing field.
Screenshot 1

Move The Second Player
We used the createCursorKeys to access the keyboard's directional keys, and we only had access to the direction keys. We'll use addKey() to move the player with the keyboard's W and S keys.
To use W and S we need to install. We can install the keys we want by using KeyCodes.
function createGame ()
{
    this.keyW=this.input.keyboard.addKey(Phaser.Input.Keyboard.KeyCodes.W);
    this.keyS=this.input.keyboard.addKey(Phaser.Input.Keyboard.KeyCodes.S);
}
We can now use W with this.keyW key and S with this.keyS.
In the updateGame () function, we can provide the movement of the pc player according to the key pressed.
function updateGame ()
{
  if(this.keyW.isDown)
  {
    pc.setVelocityY(-150);
  }
  else if(this.keyS.isDown)
  {
    pc.setVelocityY(150);
  }
  else
  {
    pc.setVelocityY(0);
  }

}
With setVelocityY, we provide movement up and down. When the w key is pressed, we need to create minus to create the upward movement.
Screenshot 2
Create Ball
To move the ball, we must first load the ball.png image.
var ball;

function preloadGame ()
 {

   …
  this.load.image('ball','assets/ball.png');
 }
We need to use physics to create the ball because we want to move. We cannot move the picture if we create it as a normal picture.
function createGame ()
{
    ball = this.physics.add.sprite(400, 200, 'ball');

    ball.setCollideWorldBounds(true);
    ball.setBounce(1);


}
The ball must remain within the playing field constantly, and it must collide with the game world areas and change direction.
I've already shown collision with game borders. We need to use setBounce(value) to set the bounce of when it crashes into the playing field. The setBounce () function takes the parameter into it, which is between 1 and 0. We must set it to 1 to prevent the speed change in the jump event.
We created the ball but ball did not move.
Screenshot 3
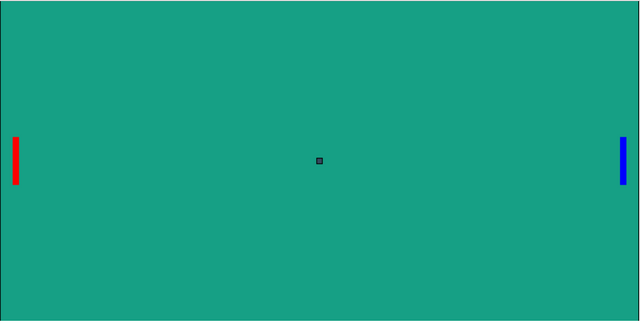
Ball Movement
The ball must move by itself and provide this movement in two dimensions. That is, ball must continue with x and y coordinates.
When the game starts, we must assign a random value to allow the ball to move at a random speed. We can provide this random value with Math.random, as well as with Phaser.Math which is also included in the Phaser library.
We must change the setVelocityX and setVelocityY properties of the ball to provide two-dimensional movement.
var velocityX=Phaser.Math.Between(-100, 100);
var velocityY=100;

function createGame ()
{
    ball = this.physics.add.sprite(400, 200, 'ball');

    ball.setCollideWorldBounds(true);
    ball.setBounce(1);

    //it do horizontal and vertical movement.
    ball.setVelocityY(velocityY);
    ball.setVelocityX(velocityX);

}
Screenshot 4
Ball's Collision With Players
The ball must collide with the player and the pc bars and the ball must change the direction. I'll produce the function for this multiplication operation.
We use the collider() function to understand collisions with phaser. this function takes a function that will collide the objects as a parameter and determine what happens as a result of the collision.
With the player bar let's define the function that will work on the collision moment of the ball.
function hitPlayer(ball,player)
{
  velocityX=velocityX+50;
  velocityX=velocityX*-1;
  console.log(velocityX);

  ball.setVelocityX(velocityX);

  if(velocityY<0)
  {
    velocityY=velocityY*-1
    ball.setVelocityY(velocityY);
  }
  player.setVelocityX(-1);
}
I changed the direction of the ball with this function and In the event of a collision, the player is also going backwards, so I moved it back to its original position.
//in createGame()
    this.physics.add.collider(ball, player, hitPlayer, null, this);
I've created a colide in the createGame() function.
Screenshot 5

With the player bar, the collision is complete, so let's perform a collision with the pc bar.
Let's define a function in pc.
function hitPc(ball,pc)
{
  velocityX=velocityX-50;
  velocityX=velocityX*-1;
  console.log(velocityX);
  ball.setVelocityX(velocityX);

  if(velocityY<0)
  {
    velocityY=velocityY*-1
    ball.setVelocityY(velocityY);
  }
  pc.setVelocityX(1);
}
Let's create a collision moment with the ball as in the same player.
this.physics.add.collider(ball, pc, hitPc, null, this);
Screenshot 6
I am gradually increasing the speed of the ball when colliding with the rods so the game gets harder as time goes by in the game.
Game Restart
If the ball strikes the walls protected by the bars, we must restart the game. The reboot of the game is to actually re-set the position of the ball and the bars according to the beginning.
I'm going to create a function and set any properties that change in the game as in the beginning.
function reset()
{
  velocityX=Phaser.Math.Between(-100, 100);
  velocityY=100;
  ball.x=400;
  ball.y=200;
  player.x=780;
  player.y=200;
  pc.x=20;
  pc.y=200;
  ball.setVelocityX(velocityX);
  ball.setVelocityY(velocityY);
}
It is enough to reset the game when we call this function when the ball hits the protected walls.
With this reset function, I set the position of the ball and the rods as well as the ball's speed and direction.
Write Score
We will use phaser's text() function to write scores on the screen. With the text () function, we can specify the position and properties of the text.
When the game opens, both players will print zero and each bar's score will be in its color.
To do this you must first keep the score.
var scorePlayer = 0;
var scorePc = 0;
var scoreTextPlayer;
var scoreTextPc;
I'll change the score as the ball hits the walls so I've created scoreTextPc and scoreTextPlayer variables.
//in createGame()
scoreTextPc = this.add.text(16, 16, 'score: 0', { fontSize: '16px', fill: '#F00' });
scoreTextPlayer = this.add.text(700, 16, 'score: 0', { fontSize: '16px', fill: '#00F' });
I have adjusted the positions and colors of the scores of the pc and player bars.
Screenshot 7

As soon as the ball touches the wall, I will change the score and reset the game.
function updateGame ()
{
…
  if(ball.x==796)
  {
    scorePc += 1;
    scoreTextPc.setText('Score: ' + scorePc);
    reset();

  }

  if(ball.x==4)
  {
    scorePlayer += 1;
    scoreTextPlayer.setText('Score: ' + scorePlayer);
    reset();
  }
}
With the setText function we can update the text that we wrote on the game screen.
Screenshot 8
Curriculum
Making Ping Pong Game With Phaser 3 (Part-1)
Proof of Work Done
Project codes In Github
Thank you for your contribution @onepice.
After reviewing your tutorial we suggest the following points listed below:
We suggest that you put the key words html5 and javascript in the title of your contribution.
Using the first person in the tutorials makes it difficult to understand the tutorials. We suggest using the third person in your text.
Nice work on the explanations of your code, although adding a bit more comments to the code can be helpful as well.
Using GIFs to show results is definitely better than standard still images.
Thank you for your work in developing this tutorial.
Looking forward to your upcoming tutorials.
Your contribution has been evaluated according to Utopian policies and guidelines, as well as a predefined set of questions pertaining to the category.
To view those questions and the relevant answers related to your post, click here.
Need help? Chat with us on Discord.
[utopian-moderator]
Thank you for your review, @portugalcoin! Keep up the good work!
Hey, @onepice!
Thanks for contributing on Utopian.
We’re already looking forward to your next contribution!
Get higher incentives and support Utopian.io!
Simply set @utopian.pay as a 5% (or higher) payout beneficiary on your contribution post (via SteemPlus or Steeditor).
Want to chat? Join us on Discord https://discord.gg/h52nFrV.
Vote for Utopian Witness!