Build A Blog Site With React, Redux Firebase And MaterializeCSS (Part 2)

Repository
React
https://github.com/facebook/react
Material-ui
https://github.com/mui-org/material-ui
My Github Address
This Project Github Address
https://github.com/pckurdu/Build-A-Blog-Site-With-React-Redux-Firebase-And-MaterializeCSS-Part-2
What Will I Learn?
- You will learn how to do routing operations using the
react-router. - You will learn the
cardclass inMaterializeCSS. - You will learn
SwitchandRoutemodules in react-router. - You will learn how to send and access parameters when routing.
- You will learn the
pathattribute and theexactattribute that provides the exact path orientation in the routing process. - You will learn
NavLink, which is performing the routing process with the navigation method.
Requirements
- text editor (I used visual studio code editor)
- Basic javascript information
- Basic react information
Difficulty
- Basic
Tutorial Contents
In this tutorial we will create the dashboard page of our project. When creating the dashboard page, we will use the Switch and Route modules in the react-router structure. In the dashboard page, we'll create the Notifications and ProjectList components in the dashboard creation section and import them into the Dashboard Component.
In the next section, we will create the ProjectDetails component and run the routing process with the parameter. We'll show you how to access parameters and paths within a react component.
In the next section we'll show you how to create routing using the NavLink feature on the links on the navbar.
The sections in this tutorial are listed below:
- Create Dashboard Component
- Exposing The Dashboard Component
- Create ProjectDetails Component
- Create NavLink
Create Dashboard Component
In this section, we'll set up the dashboard page that the user will see after logging in. We will divide this dashboard page into two. On the left side of the page we'll show the project list in the right side of the page we'll show the notifications.
We can create the Dashboard component as follows by sticking to the plan described above.
import React, { Component } from 'react'

class Dashboard extends Component {
  render() {
    return (
      <div className="dashboard container">
        <div className="row">
        {/* 6 pieces were used depending on the grid structure. */}
          <div className="col s12 m6">
            {/* here ProjectList Component  */}
          </div>
          {/* Depending on the grid structure, 5 pieces were used and 1 column was shifted. */}
          <div className="col s12 m5 offset-m1">
            {/* here Notifications Component  */}
          </div>
        </div>
      </div>
    )
  }
}

export default Dashboard
So we have defined the dashboard component but the components in the separated pages have not yet been created.
Let's import this to the dashboard page by creating the Notifications component.
Within the notifications component, we will notify all users of any changes made by a user but it is enough to write only the codes required for the component to ocur because we create the Dashboard component in this section.
In Notifications.js
import React from 'react'

//with arrow function we create notifications  component
const Notifications = () => {
  return (
    <div>
      <p>Notifications</p>
    </div>
  )
}

export default Notifications
Once you have created the Notifications component, it must be imported to view this component on the dashboard page.
In Dashboard.js
import Notifications from './Notifications'
…
{/* Depending on the grid structure, 5 pieces were used and 1 column was shifted. */}
          <div className="col s12 m5 offset-m1">
            {/* here Notifications Component  */}
            <Notifications/>>
          </div>
Below you can see the Notifications component created.

When we create the Notifications Component and add it to the Dashboard component, we can create the ProjectList Component.
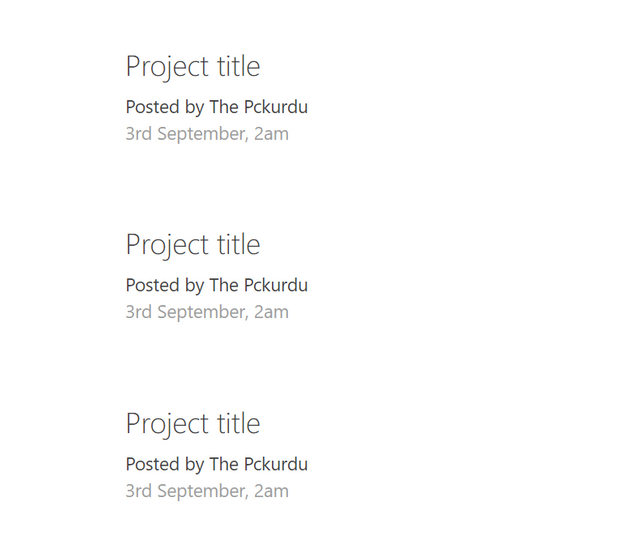
The ProjectList component will contain a list of projects. I will use the card design in materializecss to show the projects. For the time being, we will create content containing the summary of the project and then we will bring the project information from the firebase-firestore.
In ProjectList.js
import React from 'react'

const ProjectList = () => {
  return (
    <div className="project-list section">

    {/* We use the card class to create a card. */}
      <div className="card z-depth-0 project-summary">
      {/* With the card-content class, we create the body part of the card space. */}
        <div className="card-content grey-text text-darken-3">
          <span className="card-title ">Project title</span>
          <p>Posted by The Pckurdu</p>
          <p className="grey-text">3rd September, 2am</p>
        </div>
      </div>

      <div className="card z-depth-0 project-summary">
        <div className="card-content grey-text text-darken-3">
          <span className="card-title ">Project title</span>
          <p>Posted by The Pckurdu</p>
          <p className="grey-text">3rd September, 2am</p>
        </div>
      </div>

    </div>
  )
}

export default ProjectList
Let's import the ProjectList component in the Dashboard component.
In Dashboard.js
import ProjectList from '../projects/ProjectList'
…
{/* 6 pieces were used depending on the grid structure. */}
          <div className="col s12 m6">
            {/* here ProjectList Component  */}
            <ProjectList/>
          </div>
Below you can see the ProjectList component created.
Since we created the Dashboard component, we can define it in the App.js file so that it can be viewed in the project.
Exposing The Dashboard Component
Since the dashboard page is a page to be seen after the user has logged in, we cannot place it directly into the App component. If we place the page directly, it will be seen when the project is opened because the App component is the main component and because the user is not logged in, the information will be missing.
To provide this event, we can use the routing event in the react. If it is within the routing structure within the app component, it can only be seen as a result of the routing process.
Let's import the modules and component that we will use first.
In App.js
//Import the routing module,Switch and Route.
import {BrowserRouter,Switch, Route} from 'react-router-dom';
//Let's import the Dashboard function in the file
import Dashboard from './components/dashboard/Dashboard'
We need Switch and Route modules for routing. The switch module contains the routes that will make certain routing and the Route module performs routing.
{/* we keep the routing routing together with the switch. */}
        <Switch>
            <Route path='/'component={Dashboard} />
        </Switch>

Create ProjectDetails Component
In this section, we will create the ProjectDetails Component and examine id submission during the routing process and according to this id sent ProjectDetails components we will create.
Let's start by creating the function in the ProjectDetails.js file.
import React from 'react'

const ProjectDetails = (props) => {
  return (
    // details of a project into the card structure.
    <div className="container section project-details">
      <div className="card z-depth-0">
        <div className="card-content">
          <span className="card-title">Project title</span>
          <p>Lorem ipsum dolor sit amet consectetur adipisicing elit. Et labore quaerat quibusdam vel saepe, ab voluptate accusantium culpa nemo fuga earum? Soluta amet nobis officia sed neque fuga aperiam quia?</p>
        </div>
        <div className="card-action grey lighten-4 grey-text">
          <div>Posted by The Pckurdu</div>
          <div>2nd September, 2am</div>
        </div>
      </div>
    </div>
  )
}

export default ProjectDetails
After creating the page, we must define it in the Switch structure in App.js. So we can access this page with the router structure.
In App.js
//Let's import the ProjectDetails function in the file
import ProjectDetails from './components/projects/ProjectDetails'
…
{/* we are routing to the page when referring to the id. */}
     <Route path='/project/:id' component={ProjectDetails} />
Using path attribute, we can do routing with id. The error will not occur when we run the page, but we can not do routing.

We need to use exact attribute to overcome this problem, it occurs because path = '/' is redirected. Since there is a '/' in the two orientations, the react is referring to the first path according to the definition. When we use exact, we give the direction command when the path is exactly written to the page, and the error disappears.
<Switch>
            <Route exact path='/'component={Dashboard} />
            {/* we are routing to the page when referring to the id. */}
            <Route path='/project/:id' component={ProjectDetails} />
</Switch>

The page is directed as we want now that we can perform the capture process. Now we have to catch the id.
id information is contained in the props in component. So let's create this componentte props and print the props information to the console.
In ProjectDetails.js
const ProjectDetails = (props) => {
    console.log(props)
…
}
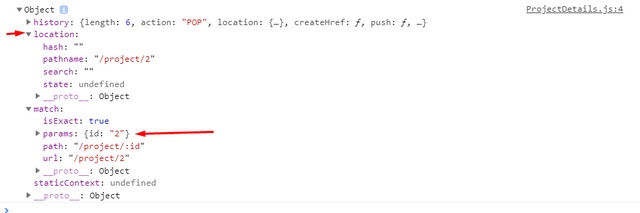
We can capture path with location information in props and we can access the parameter with the match information in props.
Then let us access the id using this information and print this parameter next to title.
const ProjectDetails = (props) => {
    const id = props.match.params.id;
  return (
    // details of a project into the card structure.
    <div className="container section project-details">
      <div className="card z-depth-0">
        <div className="card-content">
          <span className="card-title">Project title- {id}</span>
          <p>Lorem ipsum dolor sit amet consectetur adipisicing elit. Et labore quaerat quibusdam vel saepe, ab voluptate accusantium culpa nemo fuga earum? Soluta amet nobis officia sed neque fuga aperiam quia?</p>
        </div>
        <div className="card-action grey lighten-4 grey-text">
          <div>Posted by The Pckurdu</div>
          <div>2nd September, 2am</div>
        </div>
      </div>
    </div>
  )
}
Create NavLink
In this section we will perform the forwarding process that will take place when the buttons on the navbar are clicked.
Let us create the appropriate components for the links on the navbar.
Create SignIn Component
import React from 'react'

export default function SignIn() {
  return (
    <div>
    SignIn
    </div>
  )
}
Create SignUp Component
import React from 'react'

export default function SignUp() {
  return (
    <div>
    Sign Up
    </div>
  )
}
Create CreateProject Component
import React from 'react'

export default function CreateProject() {
  return (
    <div>
    CreateProject
    </div>
  )
}
In the SignInLinks.js file, set '/create' to New Project.
<ul className="right">
           <li><NavLink to='/create'>New Project</NavLink></li>
           <li><NavLink to='/'>Log Out</NavLink></li>
           <li><NavLink to='/' className="btn btn-floating red">PK</NavLink></li>
</ul>
In the SignOutLinks, we make the necessary adjustments as follows.
<ul className="right">
           <li><NavLink to='/signup'>Signup</NavLink></li>
           <li><NavLink to='/signin'>Login</NavLink></li>
        </ul>
If we leave it like this it will not work the way we want. We need to set the places to work on. We need to define this setting within the switch structure.
In App.js
import SignIn from './components/auth/SignIn'
import SignUp from './components/auth/SignUp'
import CreateProject from './components/projects/CreateProject'
…
<Switch>
            <Route exact path='/'component={Dashboard} />
            {/* we are routing to the page when referring to the id. */}
            <Route path='/project/:id' component={ProjectDetails} />
            {/* required settings for routing */}
            <Route path='/signin' component={SignIn} />
            <Route path='/signup' component={SignUp} />
            <Route path='/create' component={CreateProject} />
        </Switch>
Curriculum
Proof of Work Done
https://github.com/pckurdu/Build-A-Blog-Site-With-React-Redux-Firebase-And-MaterializeCSS-Part-2
Thank you for your contribution @pckurdu.
After analyzing your tutorial we suggest the following points:
Your contribution was very good. Well structured, explained and with GIFs showing the results of your development.
Thanks for your attention to our suggestions in the previous tutorials. Your tutorials are getting better.
Looking forward to your upcoming tutorials.
Your contribution has been evaluated according to Utopian policies and guidelines, as well as a predefined set of questions pertaining to the category.
To view those questions and the relevant answers related to your post, click here.
Need help? Chat with us on Discord.
[utopian-moderator]
Thank you for your review, @portugalcoin! Keep up the good work!
Hi @pckurdu!
Your post was upvoted by @steem-ua, new Steem dApp, using UserAuthority for algorithmic post curation!
Your post is eligible for our upvote, thanks to our collaboration with @utopian-io!
Feel free to join our @steem-ua Discord server
Congratulations @pckurdu! You have completed the following achievement on the Steem blockchain and have been rewarded with new badge(s) :
Click here to view your Board
If you no longer want to receive notifications, reply to this comment with the word
STOPVote for @Steemitboard as a witness and get one more award and increased upvotes!
Hey, @pckurdu!
Thanks for contributing on Utopian.
We’re already looking forward to your next contribution!
Get higher incentives and support Utopian.io!
Simply set @utopian.pay as a 5% (or higher) payout beneficiary on your contribution post (via SteemPlus or Steeditor).
Want to chat? Join us on Discord https://discord.gg/h52nFrV.
Vote for Utopian Witness!