Build A Blog Site With React, Redux Firebase And MaterializeCSS (Part 7)

Repository
React
https://github.com/facebook/react
Material-ui
https://github.com/mui-org/material-ui
My Github Address
This Project Github Address
https://github.com/pckurdu/Build-A-Blog-Site-With-React-Redux-Firebase-And-MaterializeCSS-Part-7
What Will I Learn?
- You will learn how to enable the firebase auth.
- You will learn
firebaseReducerin react-redux-firebase. - You will learn
isLoadedandisEmptyin firebaseReducer. - You will learn
connectmodule in react-redux. - You will learn
timestampsInSnapshotsin firestore. - You will learn to create input and button in
materializeCSS.
Requirements
- text editor (I used visual studio code editor)
- Basic javascript information
- Basic react information
Difficulty
- Basic
Tutorial Contents
Hello to everyone,
In this tutorial we will make the necessary adjustments for firebase auth. We will create the necessary infrastructure to perform firebase auth operations with redux structure. We will also design components for login and signup within the react application.
We will make Email / Password method enable within the firebase project. We will contact the firebase auth using the Email / Password method functions with the react application. We will also create a test user and create the user's id value.
In the second section we will create firebaseReducer to use firebase auth in redux structure. We will learn how to access and use firebaseReducer elements from component.
Then we will eliminate the errors that occur in the application and edit the components to be login and signup. We will use materializecss when creating the designs and we will process the events when the button is clicked.
It is always best to separate tutorials into sections to better understand:
- Setup Sign-in Method In Firebase
- Building Infrastructure For Access to Auth in Redux
- Fix Errors
- Create SignIn Component
- Create SignUp Component
Let’s start and enjoy.
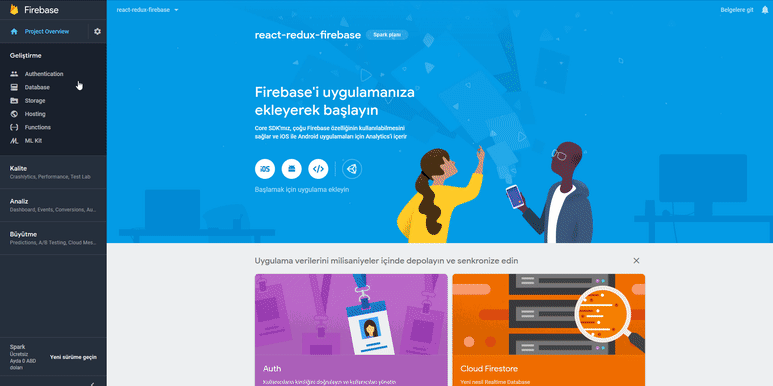
1-Setup Sign-in Method In Firebase
In this section we will open auth settings on firebase web page and create the first user.
We can perform auth operations very easily in application by using firebase's authorization process. In the application we can provide the user's signup and user’s login with firebase auth.
We can use auth operations in multiple ways. These ways are set to passive by default. We can enable the way we want to use in the application.
In the firebase we can set the setup sign-in method.
We can now use the Email/Password method of firebase authorization in the application.
With the application using the firebase auth functions can perform login and signup but we can add users with firebase web page.
Let's add our first user on the firebase web page.
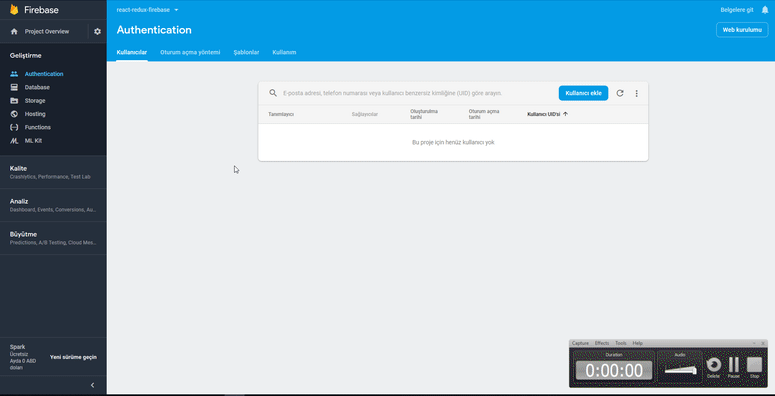
When the user is added firebase sets an id value of guid to that user. We can access the user using this id.
It's not a good way to keep users on the firebase-authentication side. If we want to keep user information, we need to create users collection in firestore. So we can access users to healthier.
As we do the firebase authentication settings, we can make the app accessible to auth.
2-Building Infrastructure For Access to Auth in Redux
In this section we will create redux infrastructure to access firebase auth and edit .
We must use the firebaseReducer module to connect to firebase authentication. We need to link firebaseReducer to the store. So we can also access the firebaseReducer elements when using the components store and use the information required for authentication.
We've already mentioned that the store used one reducer in previous tutorials. If we were to use more than one reducer, we had to combine these reducers. Since we combine all the reducers that we use in the rootReducer.js file, we must merge the firebaseReducer into this file.
In rootReducer.js
//Let's import firebaseReducer
import {firebaseReducer} from 'react-redux-firebase';
…
//Let's do the merge using combineReducer.
const rootReducer=combineReducers({
    auth:authReducer,
    project:projectReducer,
    firestore:firestoreReducer,
    //We can access firebaseReducer with the firebase keyword.
    firebase:firebaseReducer
});
According to what we have merge in rootReducer, we can now use it in components as firebase.
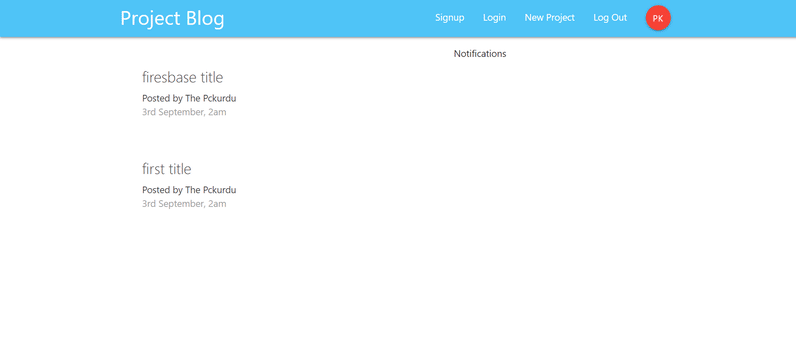
We have placed the SignedInLinks and SignedOutLinks components in the Navbar component.
In Navbar.js
//navbar forming class
<nav className="nav-wrapper light-blue lighten-2">
     <div className="container">
          <Link to='/' className="brand-logo">Project Blog</Link>
           {/* login is */}
          <SignedInLinks/>
           {/* logout is */}
          <SignedOutLinks/>
     </div>
</nav>
These links need to be seen according to the login status. So if the user is logged in, the SignedInLinks component should be seen and the SignedOutLinks links should not be seen.
Since the user knows the login information in the store with the firebaseReducer, we must call the store in the Navbar component.
To call a component store, we need to connect with the connect module. With the state information in the connect module, we have access to the store.
Let's print this state information to the console and talk about what we can access.
In Navbar.js
//import connect modul
import {connect} from 'react-redux';
…
//we should use connect when exporting the component.
export default connect()(Navbar)
Let's define a function for the connect module to access the store.
//to be used in connect.
const mapStateToProps=(state)=>{
    console.log(state);
    //have to be return
    return {

    }
}

//we should use connect when exporting the component.
export default connect(mapStateToProps)(Navbar)
So we can examine the state. In this function we will transfer the data we need in state to componentin props. So we will access the store elements from the component.
So we have access to the data in the store. If we take a closer look at the console.
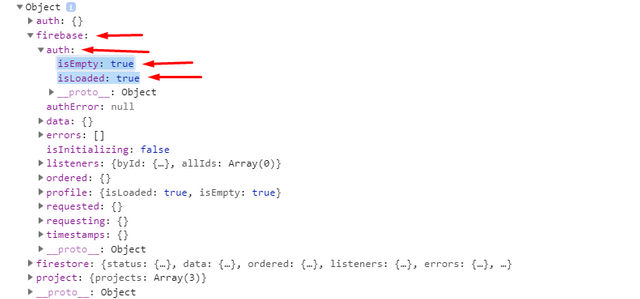
We have reached the firebaseReducer we created with the firebase keyword. We can access more than one information in this firebase. We want to find the user input in navbar for now, we are interested in the auth object.
The auth object has isLoaded and isEmpty objects set to true. These objects are set to true so we can know that the user is not logged in.
We can adjust the links according to the values of these objects.
3- Fix Errors
In this section we will correct any errors in past tutorials.
Let's start with our first mistake.

We see above error message related to firestore settings. We set the firestore's timeStamp settings manually in past tutorials. In firebase, we don't need to make any adjustments anymore because the timestampsInSnapshots property is set to true by default.
Then we do not need this line in firebaseConfig.js file.
In firebaseConfig.js
//firebase.firestore().settings({timestampsInSnapshots:true});
Our second mistake is that we use the key in the wrong place
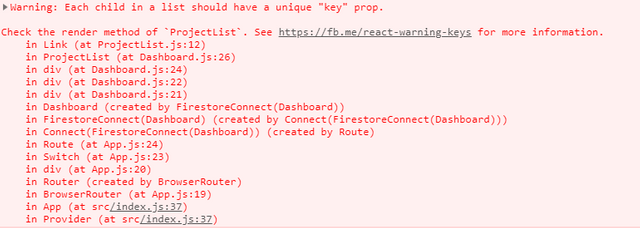
We used the key property as a ProjectSummary attribute in the ProjectList.js file.
In ProjectList.js
//We are forwarding with project.id.
return (
   <Link to={'/project/'+project.id}>
     <ProjectSummary project={project} key={project.id}/>
   </Link>
)
The key value must be defined in the repeating component. Where the repeated component is Link, and we get the error because we use key in ProjectSummary.
If we use the key in the Link, the error will disappear.
//We are forwarding with project.id.
 return (
     <Link to={'/project/'+project.id} key={project.id}>
        <ProjectSummary project={project} />
     </Link>
 )
4-Create SignIn Component
Since we created the infrastructure for firebase auth, we need to make sure that the user is a member, and we should include the user in the system. We must design SignIn and SignUp components to perform these operations.
In this section we will create the SignIn component for future use.
To be able to signIn the user must be able to enter mail and password. To enter these fields, we will create two inputs and one button.
In SignIn.js
export default function SignIn() {
  return (
     <div className="container">
        <form className="white">
          <h5 className="grey-text text-darken-3">LogIn</h5>
          {/* for email */}
          <div className="input-field">
            <label htmlFor="email">Email</label>
            <input type="email" id='email' />
          </div>
          {/* for password */}
          <div className="input-field">
            <label htmlFor="password">Password</label>
            <input type="password" id='password' />
          </div>
          {/* for submit */}
          <div className="input-field">
            <button className="btn green lighten-1 z-depth-0">Login</button>
          </div>
        </form>
      </div>
  )
}
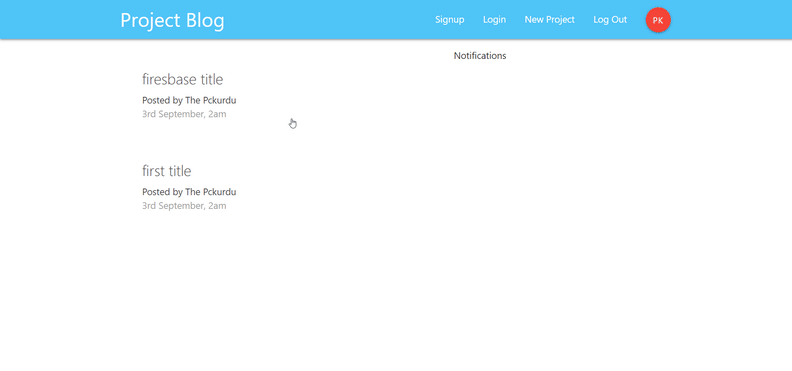
The following view occurs when the Login link is clicked.
5- Create Signup Component
In this section we will design the SignUp component.
Unlike signIn component, we will also get user information from this component. For example name,last name.
We using email and password values to create a user in the field of firebase authentication. In the name and last name entries, we will create the users' collection in the future and use them in that collection.
In SignUp.js
export default function SignUp() {
  return (
    <div className="container">
      <form className="white">
        <h5 className="grey-text text-darken-3">Sign Up</h5>
        {/* for email in auth */}
        <div className="input-field">
          <label htmlFor="email">Email</label>
          <input type="email" id='email' />
        </div>
        {/* for password in auth */}
        <div className="input-field">
          <label htmlFor="password">Password</label>
          <input type="password" id='password'/>
        </div>
        {/* for first name in firestore */}
        <div className="input-field">
          <label htmlFor="firstName">First Name</label>
          <input type="text" id='firstName' />
        </div>
        {/* for last name in firestore */}
        <div className="input-field">
          <label htmlFor="lastName">Last Name</label>
          <input type="text" id='lastName' />
        </div>
        <div className="input-field">
          <button className="btn blue lighten-1 z-depth-0">Sign Up</button>
        </div>
      </form>
    </div>
)
}
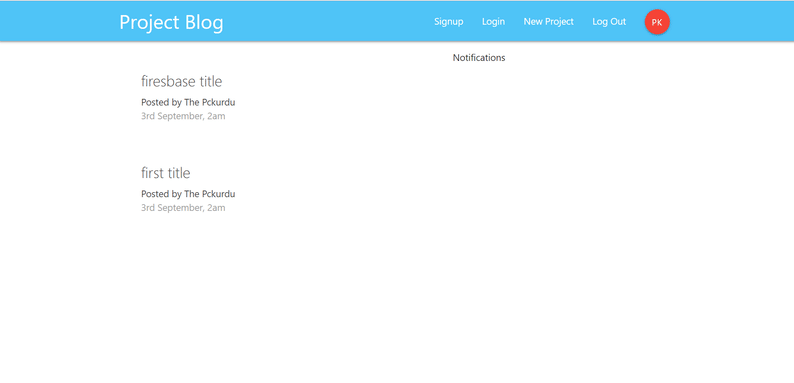
The following view occurs when the SignUp link is clicked.
Curriculum
Proof of Work Done
https://github.com/pckurdu/Build-A-Blog-Site-With-React-Redux-Firebase-And-MaterializeCSS-Part-7
Thank you for your contribution @pckurdu.
Your contribution is clear and very well structured. Good work for the development of this tutorial.
Using GIFs to show results is definitely better than standard still images.
Thank you for your work in developing this tutorial.
Looking forward to your upcoming tutorials.
Your contribution has been evaluated according to Utopian policies and guidelines, as well as a predefined set of questions pertaining to the category.
To view those questions and the relevant answers related to your post, click here.
Need help? Chat with us on Discord.
[utopian-moderator]
Thank you for your review, @portugalcoin! Keep up the good work!
Hey, @pckurdu!
Thanks for contributing on Utopian.
We’re already looking forward to your next contribution!
Get higher incentives and support Utopian.io!
Simply set @utopian.pay as a 5% (or higher) payout beneficiary on your contribution post (via SteemPlus or Steeditor).
Want to chat? Join us on Discord https://discord.gg/h52nFrV.
Vote for Utopian Witness!
Congratulations @pckurdu! You have completed the following achievement on the Steem blockchain and have been rewarded with new badge(s) :
You can view your badges on your Steem Board and compare to others on the Steem Ranking
If you no longer want to receive notifications, reply to this comment with the word
STOPTo support your work, I also upvoted your post!
Do not miss the last post from @steemitboard:
Vote for @Steemitboard as a witness to get one more award and increased upvotes!