Build A Library Application With Graphql ExpressJs React-Apollo and MongoDB (Part 6)

Repository
React
https://github.com/facebook/react
Graphql
https://github.com/graphql/graphql-js
Apollo
https://github.com/apollographql/apollo-client
Express
https://github.com/expressjs/express
My Github Address
This Project Github Address
What Will I Learn?
- You will learn how to create a react project using create-react-app packages.
- You will learn how to create Component in react.
- You will learn how to use Graphql queries in the react application.
- You will learn how to install Apollo Client.
- You will learn how to access the address of the graphql server using ApolloClient.
- You will learn how to make the react application ready for graphql using ApolloProvider.
Requirements
- text editor (I used visual studio code editor)
- Basic javascript information
- Basic react information
Difficulty
- Basic
Tutorial Contents
Hello to everyone,
In this tutorial we will create the react project and make the necessary settings to use graphql queries in the react project.
After creating the react application, we will create React Component to show the book list. We will perform Apollo installation as there will be graphql queries required to bring the Book List on this component.
When you finish this tutorial you will learn the features listed below:
- You will be able to create a react project using create-react-app packages.
- You will be able to create a component in the react project.
- You will be able to install Apollo Client and get react projects ready for grahql queries.
Let’s start.
1-Use create-react-app Packages
In this section, we will create react project in the graphql project file using create-react-app packages.
In the previous tutorials, we formed the basis of our graphql structure and tested the data insertion and getting processes in GraphiQL environment. Since we need to develop an application, we need react project because the GraphiQL environment is only used for testing and is not a user-friendly environment.
In our library application, user can access the book information or author information he wants more easily via react application. The react application will access the data on mLab using Graphql queries. In addition, we will be able to perform data adding operations via react application again using graphql queries.
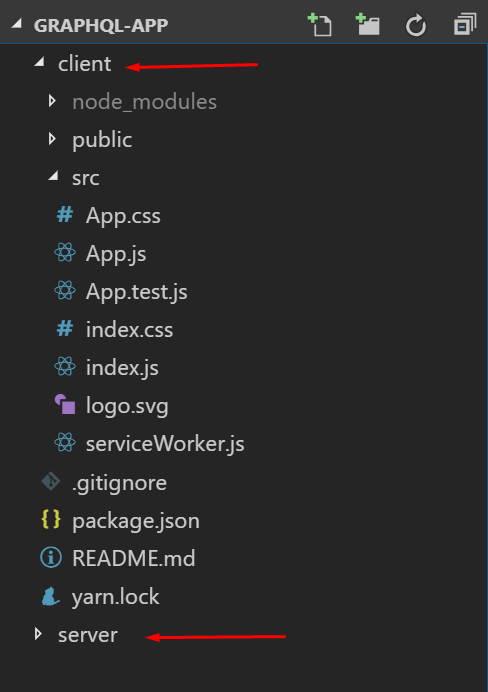
We created a server folder to create graphql queries and schemas. The reason we do this is that these queries will run on the server because we access the database in mLab from here. The react application will run on the client side and it will be sufficient to access the graphql queries on the server. Therefore we need to create the react application in a folder other than the server folder.
To create a react project using create-react-app, globally create-react-app packages must be installed. Let's set up in new console screen.
npm install create-react-app -g

Let's create a default react project by running the following code while it is in the graphql-app folder.
create-react-app client
So we create an empty react project in the client folder.
In order to run the react application, we have to do our operations in the client folder. In the picture below you can see the required code to switch to the client folder and run the application.
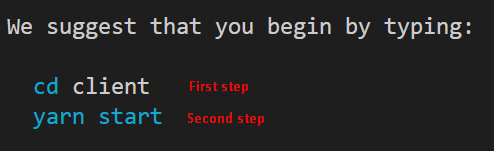
Then let's run our react application.
graphql1.gif
All we have to do now is to get rid of the unnecessary files in the react project and start creating the application to use graphql queries. We will delete all files except App.js, index.js and index.css.
In App.js
import React from 'react';

//main component
function App() {
  return (
    <div id="main">
      <h1>Hello React</h1>
    </div>
  );
}

export default App;
And index.css
body {
    background: #00cee4;
    font-family:'Courier New', Courier, monospace;
}
2-Create BookList Component
In this section we will create a component to see the list of books required for the library application. Thus we will learn how to create a components with react.
If we created a react project using create-react-app, we need to create the components in the src folder. If we create it in a folder other than src, application will fail. To create a more organized folder structure by keeping all the components in a folder that we create will make it easier for us to find what we are looking for when the project grows.
After all this information, we will create a components folder inside the src folder and add the BookList.js file to this folder.
The src folder should look like the picture below.
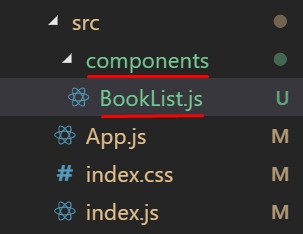
The information I described above may seem simple, but it will make our job easier when the project gets complicated. We can now create the component.
In BookList.js
//import to create component
import React,{Component} from 'react';

class BookList extends Component{
    render(){
        return(
            <div>
            {/* graphql query result book list  */}
            </div>
        )
    }
}
//export to access from other files
export default BookList;
Since the list of books will be included in BookList component, let's create ul-li structure.
return(
  <div>
    {/* graphql query result book list  */}
    <ul id="book-list">
       <li>
         Book Name 1
       </li>
       <li>
         Book Name 2
       </li>
       <li>
         Book Name 2
       </li>
    </ul>
  </div>
)
When we use the BookList component in the App.js file, the BookList will be visible in the application.
In App.js
//import BookList
import BookList from './components/BookList';

//main component
function App() {
  return (
    <div id="main">
      <h1>Hello React</h1>
      <BookList/>
    </div>
  );
}
The application looks as follows picture.

3- Setup Apollo Client
In this section we will install apollo client packages and react project will be able to use apollo.
In order to use graphql in react projects we need apollo packages because we use graphql queries using ApolloProvider.When using ApolloProvider we need to access the address of graphql and create a client.
Then let's download the necessary packages. Since we will use Apollo in the react project, we have to download the packages into the client folder.
To use Apollo, we need to download packages:
- apollo-boost
- react-apollo
- graphql
Let's download packages at this time using yarn.
yarn add apollo-boost react-apollo graphql
We will use apollo-boost packages to create ApolloClient. With ApolloClient, we will be able to access the address of the graphql server and generate graphql queries.
In App.js
//use create client
import ApolloClient from 'apollo-boost';

//Accessing the address for graphql queries
const client=new ApolloClient({
  uri:'http://localhost:4000/graphql'
})
After creating ApolloClient we should use ApolloProvider. With ApolloProvider, we can use graphql queries in react projects. We need to use react-apollo packages to access the ApolloProvider module.
In App.js
//use create provider
import {ApolloProvider} from 'react-apollo';
…
//main component
function App() {
  return (
    // Using provider with client
    <ApolloProvider client={client}>
      <div id="main">
        <h1>Hello React</h1>
        <BookList/>
      </div>
    </ApolloProvider>
  );
}
So our react project is ready to run grahql queries.
Curriculum
Part 1 - Part 2 - Part 3 - Part 4 - Part 5
Thank you for your contribution @pckurdu.
After reviewing your tutorial we suggest the following points listed below:
Your tutorial is very well structured and explained. Keep up the good work!
It would be interesting to put some GIFs with small demonstrations of the operation of what is developing.
Thanks for following our suggestions we gave in previous tutorials.
Looking forward to your upcoming tutorials.
Your contribution has been evaluated according to Utopian policies and guidelines, as well as a predefined set of questions pertaining to the category.
To view those questions and the relevant answers related to your post, click here.
Need help? Chat with us on Discord.
[utopian-moderator]
Thank you for your review, @portugalcoin! Keep up the good work!
Hi @pckurdu!
Your post was upvoted by @steem-ua, new Steem dApp, using UserAuthority for algorithmic post curation!
Your post is eligible for our upvote, thanks to our collaboration with @utopian-io!
Feel free to join our @steem-ua Discord server
Hey, @pckurdu!
Thanks for contributing on Utopian.
We’re already looking forward to your next contribution!
Get higher incentives and support Utopian.io!
Simply set @utopian.pay as a 5% (or higher) payout beneficiary on your contribution post (via SteemPlus or Steeditor).
Want to chat? Join us on Discord https://discord.gg/h52nFrV.
Vote for Utopian Witness!