Arduino UNO Activity: An Application & Tutorial in Using Arduino | Part 6 - " How to Make A Piano Using Push Buttons and Buzzer? "
What Will I Learn?
Basic Information (Overview)
The Arduino UNO is a widely used open-source microcontroller board based on the ATmega328P microcontroller and developed by Arduino.cc. The board is equipped with sets of digital and analog input/output (I/O) pins that may be interfaced to various expansion boards (shields) and other circuits. The board features 14 Digital pins and 6 Analog pins. It is programmable with the Arduino IDE (Integrated Development Environment) via a type B USB cable. It can be powered by a USB cable or by an external 9 volt battery, though it accepts voltages between 7 and 20 volts. The Uno board is the first in a series of USB Arduino boards, and the reference model for the Arduino platform. The ATmega328 on the Arduino Uno comes preprogrammed with a bootloader that allows to upload new code to it without the use of an external hardware programmer. It communicates using the original STK500 protocol. The Uno also differs from all preceding boards in that it does not use the FTDI USB-to-serial driver chip. Instead, it features the Atmega16U2 (Atmega8U2 up to version R2) programmed as a USB-to-serial converter. The Arduino UNO is generally considered the most user-friendly and popular board.
At the end of this tutorial, the users/readers will learn the following:
- You will learn simple but useful Arduino codes which has connections to Buzzer (PiezoSpeaker) and Pushbuttons.
- You will learn how to make a " Basic Piano - Arduino UNO Version (Do-Re-Mi-Fa-So-La-Ti-Do) "
- You will learn how to apply the said codes as well as on how to make the required circuit on the breadboard.
- You will know the necessary requirements and fundamentals of making a piano.
Requirements
The following are the list of the requirements for the users in order to follow this tutorial:
- Eight (8) pieces of 330 Ohms Resistor
- Eight (8) pieces of Pushbutton
- One (1) piece of 1000 Ohms Resistor
- One (1) piece of Breadboard
- One (1) piece of Buzzer (PiezoSpeaker)
- Connecting Wires
- Wire Stripper
- Analog Multitester
- Arduino UNO with USB Cable
- Laptop with Arduino Application
Difficulty
- Intermediate
Tutorial Contents
How it Works?
This project is an Arduino UNO version of piano in which the pushbuttons acts as the piano keyboards. Each pushbutton has been programmed with designated frequency, duration, pitch and delay which has been replicated (somehow made similar) with the do-re-mi-fa-so-la-ti-do tone or the so-called music notes. Everytime you push the button, it produces a sound with corresponding frequency, duration, pitch and delay which it has been programmed to do so and suddenly stops once the corresponding frequency, duration, pitch and delay has been attained. Starting from the left portion of the breadboard, a pushbutton has been assigned to produce a sound which corresponds to the “ DO ” tone. The succeeding pushbuttons, next to the “ DO ” tone pushbutton, which is following the left to right direction has also been assigned to produce a sound which corresponds to the “ RE, MI, FA, SO, LA, TI ” and “ DO ” tones.
What Resistor should I use? How many ohms and why?
The type of Resistor that will be used is a Linear Resistor having a value of 330 ohms and 1000 ohms. The reason why we will be using a 330 ohms and 1000 ohms resistor is because the amount of current and voltage that we will be producing is only small, about 5 volts only. Also, since the purpose of the 330 ohms is for the LED Light and the 1000 ohms is for the Buzzer (PiezoSpeaker), the values of the said resistors will suffice the required amount of current and voltage on the circuit that will be made for the activity.
Step By Step Process
First:
Prepare the necessary equipment (mentioned above) needed for this tutorial.
Second:
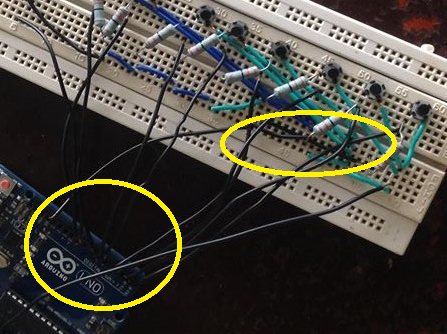
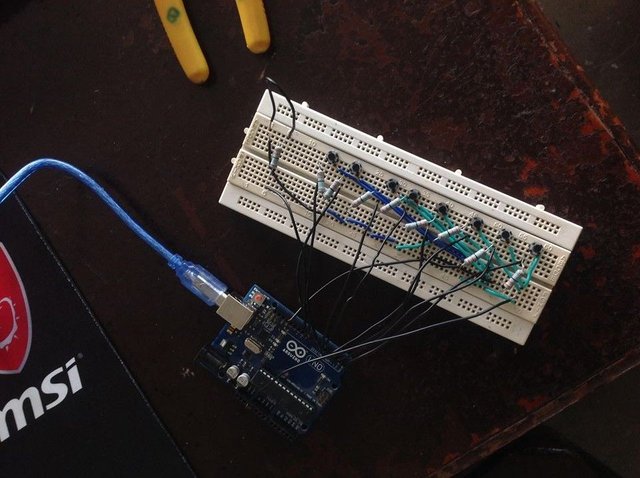
With the breadboard provided, make a circuit. In making the circuit, the first thing that you must have to do is put all the pushbuttons in the breadboard having similar distances from each other.
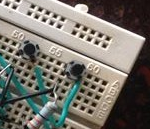
This is to make the circuit presentable and the pushbuttons easier to make contact with the fingers everytime it will be pressed and play the piano.
Third:
Same thing that you have done with the pushbuttons, you must have to put all the resistors in the breadboard having similar distances from each other since the pushbuttons and resistors are dependent from each other. Another reason is they are interconnected from each other by means of connecting wires.
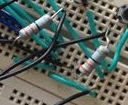
Speaking of connecting wires, it should be properly stripped at both ends and must have enough lengths that could make the connection of the resistors and pushbuttons appropriate. Meaning, it can make the connect from breadboard to breadboard and breadboard to Arduino UNO.
Fourth:
Once done making the needed circuit for this tutorial, make the program using the Arduino Application on the laptop and verify if the created program is working or ready for uploading to Arduino UNO.

Additional Information: Arduino Application has a verification/test button of the created program before running and using it to the circuit created in the breadboard. This is to make sure if the program works well to avoid errors or malfunctions of the system and for the safety of the programmer and the laptop that will be used.

Fifth:
Now, connect the Arduino UNO which has been also connected to the made circuit on the breadboard to the laptop using the USB Cable.
Sixth:
In the Arduino Application on the laptop, upload the created program to Arduino UNO and run the system.
Seventh:
Once the program has been uploaded to the Arduino UNO, the circuit which has been connected to it (in the breadboard) will respond and perform the program uploaded. (Check the Serial Monitor readings.)
Flow/Schematic Diagram
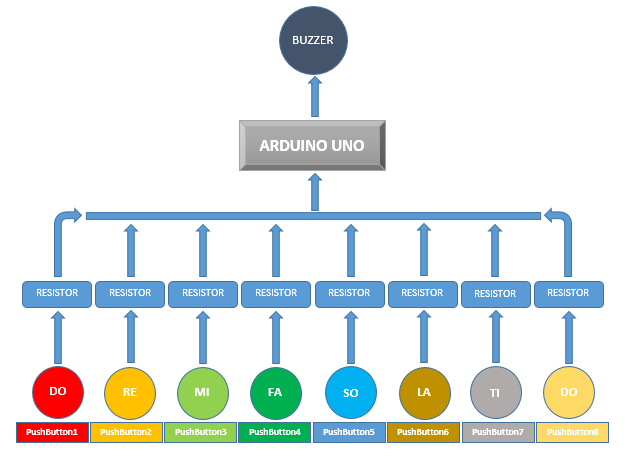
Connection
Codes
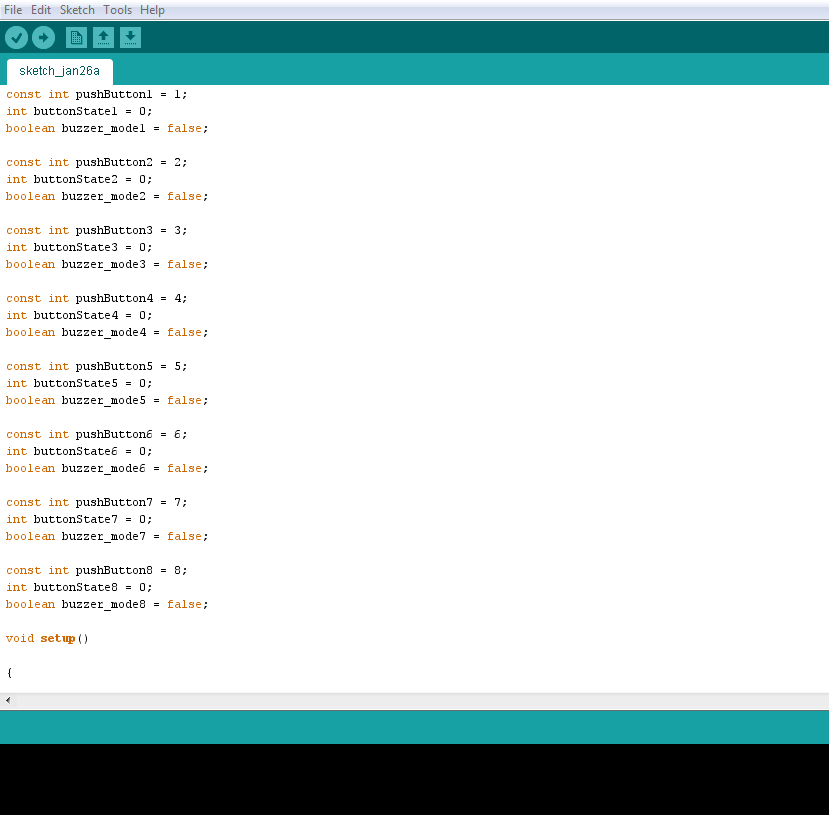
const int pushButton1 = 1;
int buttonState1 = 0;
boolean buzzer_mode1 = false;
const int pushButton2 = 2;
int buttonState2 = 0;
boolean buzzer_mode2 = false;
const int pushButton3 = 3;
int buttonState3 = 0;
boolean buzzer_mode3 = false;
const int pushButton4 = 4;
int buttonState4 = 0;
boolean buzzer_mode4 = false;
const int pushButton5 = 5;
int buttonState5 = 0;
boolean buzzer_mode5 = false;
const int pushButton6 = 6;
int buttonState6 = 0;
boolean buzzer_mode6 = false;
const int pushButton7 = 7;
int buttonState7 = 0;
boolean buzzer_mode7 = false;
const int pushButton8 = 8;
int buttonState8 = 0;
boolean buzzer_mode8 = false;
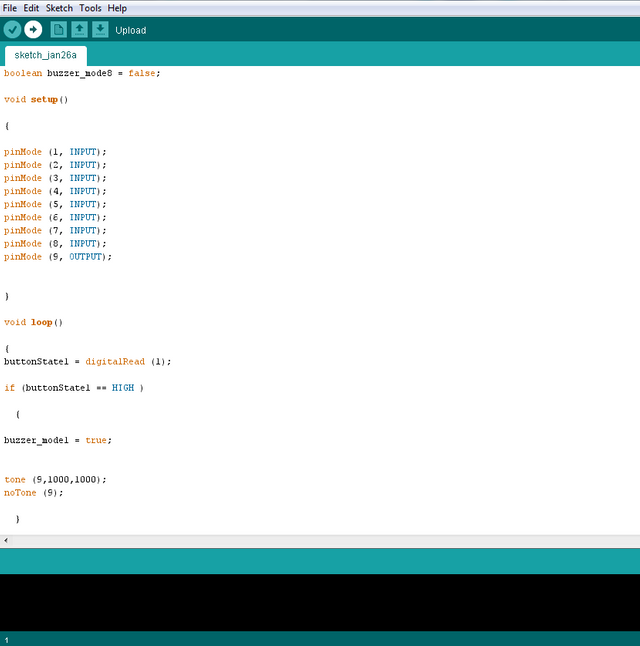
void setup()
{
pinMode (1, INPUT);
pinMode (2, INPUT);
pinMode (3, INPUT);
pinMode (4, INPUT);
pinMode (5, INPUT);
pinMode (6, INPUT);
pinMode (7, INPUT);
pinMode (8, INPUT);
pinMode (9, OUTPUT);
}
void loop()
{
buttonState1 = digitalRead (1);
if (buttonState1 == HIGH )
{
buzzer_mode1 = true;
tone (9,1000,1000);
noTone (9);
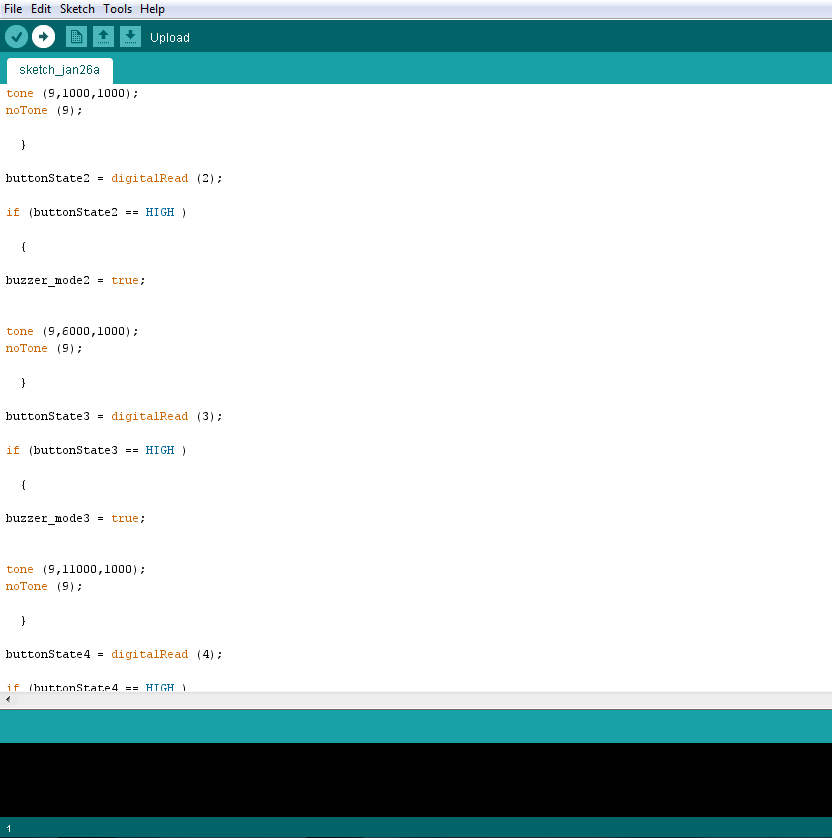
}
buttonState2 = digitalRead (2);
if (buttonState2 == HIGH )
{
buzzer_mode2 = true;
tone (9,6000,1000);
noTone (9);
}
buttonState3 = digitalRead (3);
if (buttonState3 == HIGH )
{
buzzer_mode3 = true;
tone (9,11000,1000);
noTone (9);
}
buttonState4 = digitalRead (4);
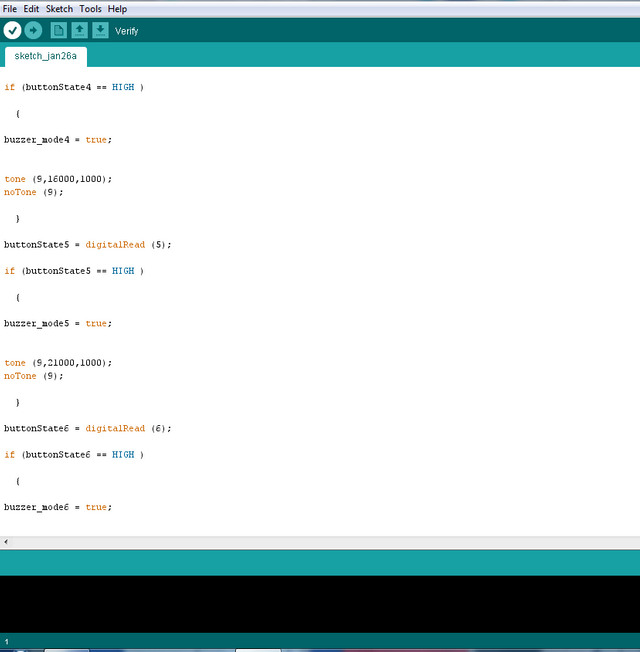
if (buttonState4 == HIGH )
{
buzzer_mode4 = true;
tone (9,16000,1000);
noTone (9);
}
buttonState5 = digitalRead (5);
if (buttonState5 == HIGH )
{
buzzer_mode5 = true;
tone (9,21000,1000);
noTone (9);
}
buttonState6 = digitalRead (6);
if (buttonState6 == HIGH )
{
buzzer_mode6 = true;
tone (9,26000,1000);
noTone (9);
}
buttonState7 = digitalRead (7);
if (buttonState7 == HIGH )
{
buzzer_mode7 = true;
tone (9,31000,1000);
noTone (9);
}
buttonState8 = digitalRead (8);
if (buttonState8 == HIGH )
{
buzzer_mode8 = true;
tone (9,36000,1000);
noTone (9);
}
}
Curriculum
Here is the list of the related or past Arduino tutorials. If you wish to know more about Arduino, please visit the links below by clicking it.
- Arduino Tutorial Part 1
- Arduino Tutorial Part 2
- Arduino Tutorial Part 3
- Arduino Tutorial Part 4
- Arduino Tutorial Part 5
Posted on Utopian.io - Rewarding Open Source Contributors
Thank you for the contribution. It has been approved.
Note:
Please use
<"code"> for code so it looks like this
exampleYou can contact us on Discord.
[utopian-moderator]
thank you for the approval and tips sir @fuzeh...
Congratulations! This post has been upvoted by SteemMakers. We are a community based project that aims to support makers and DIYers on the blockchain in every way possible. Find out more about us on our website: www.steemmakers.com.
If you like our work, please consider upvoting this comment to support the growth of our community. Thank you.
Hey @rejzons I am @utopian-io. I have just upvoted you!
Achievements
Community-Driven Witness!
I am the first and only Steem Community-Driven Witness. Participate on Discord. Lets GROW TOGETHER!
Up-vote this comment to grow my power and help Open Source contributions like this one. Want to chat? Join me on Discord https://discord.gg/Pc8HG9x