JavaTutorial #11 : How to create Delegating SP aplication using java Netbeans IDE
Repository
https://github.com/dmlloyd/openjdk
What Will I Learn?
- You will learn about steemconnect link for delegating SP
- You will learn how to create form for this aplication
- You will learn how to combine data from the form in steemconnect link
Requirements
- NetBeans IDE Software
- Basic Knowledge about Java Programing and Netbeans
Difficulty
- Basic
Tutorial Contents
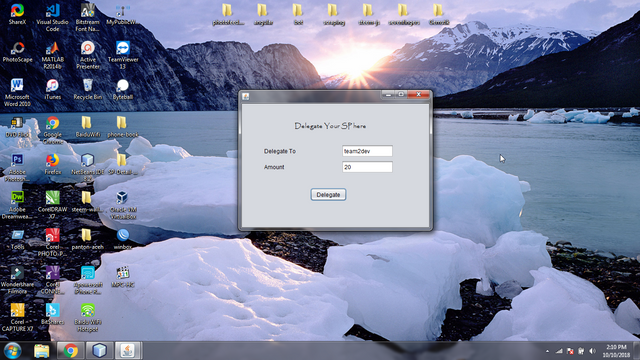
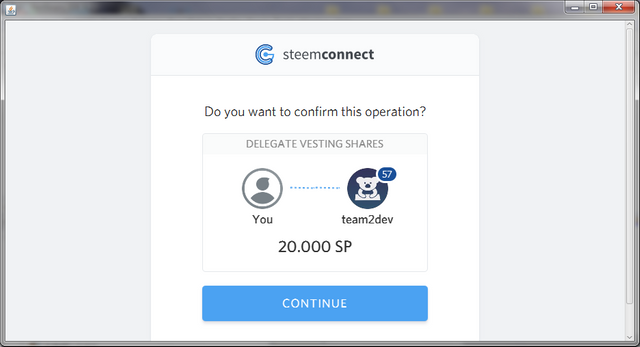
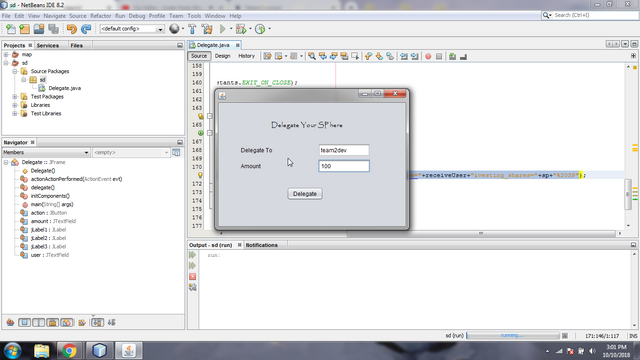
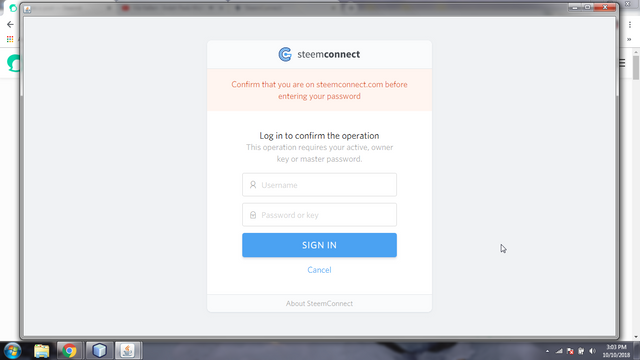
Here, I will try to create an aplication for delegating SP to another user using java Netbeans IDE. This aplication contains a form to input the destination and number of SP to be delegated. When user press the delegate button, a new window will appear where the user is that required to login using steemconnect. For more details, you can see in the picture below.
Create a form
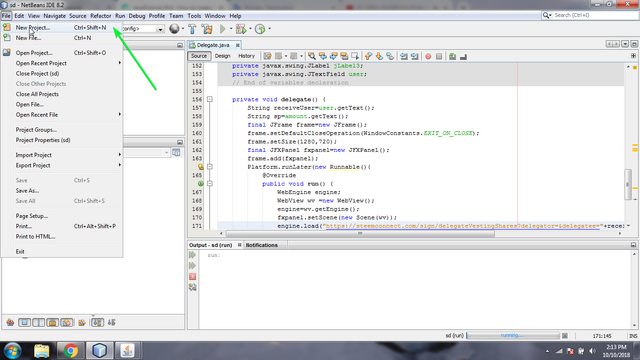
open Netbeans IDE software then create new project
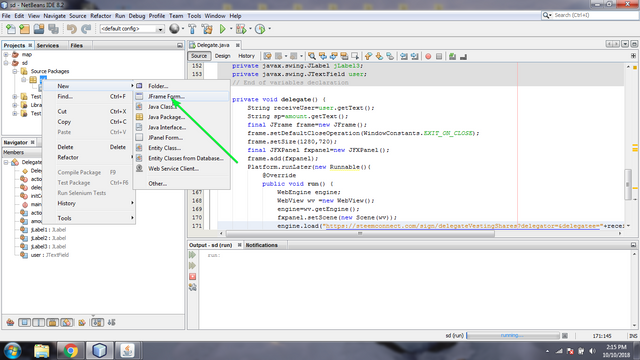
Add new JFrame Form
Add JLabel, JTextField, JButton like following screenshot

Edit Source Code
Double click on button in form design
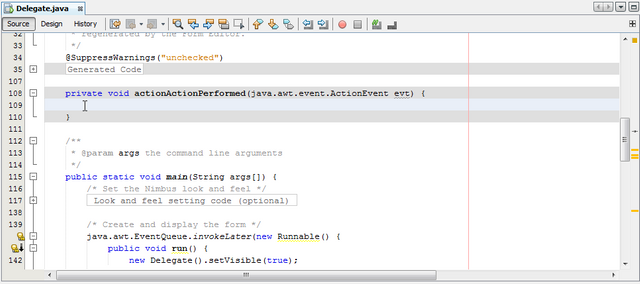
add some method, here I use
delegate()method.

Left Click on hint simbol then double click on
create method "delegate"

go to
delegate()method
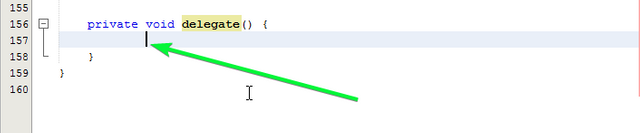
Adding code to delegate() method
- Create 2 string variables to accomodate destination and amount delegation from user input.
String receiveUser=user.getText();
String sp=amount.getText();
getText() is a method to get text from user input. Data that taken using getText() mehtod are in String form
- Add a code to open new JFrame Form for opening steemconnect login
        final JFrame frame=new JFrame();
        frame.setDefaultCloseOperation(WindowConstants.EXIT_ON_CLOSE);
        frame.setSize(1280,720);
frame the variable name for new JFrame. setDefaultCloseOperation is method to set the the exit button on right-top corner. setSize() is method to set the width and height of the new frame
Note : before adding the code above, you need to import package javax.swing.JFrame;
- Initialize new JFX panel to open the mini browser
        final JFXPanel fxpanel=new JFXPanel();
        frame.add(fxpanel);
- Then add following code under it
        Platform.runLater(new Runnable(){
            @Override
            public void run() {
                WebEngine engine;
                WebView wv =new WebView();
                engine=wv.getEngine();
                fxpanel.setScene(new Scene(wv));
                engine.load("https://steemconnect.com/sign/delegateVestingShares?delegator=&delegatee="+receiveUser+"&vesting_shares="+sp+"%20SP");
            }
        });
        frame.setVisible(true);
Platform.runLateris method to run some task on JFXpanel
@Overrideto implement all abstract method
public void run()is run method.
WebEngine engine;Inisialize web engine
WebView wv =new WebView();inssialize web view
engine=wv.getEngine();get view from web engine
fxpanel.setScene(new Scene(wv));set scene on JFXpanel
engine.load("https://steemconnect.com/sign/delegateVestingShares?delegator=&delegatee="+receiveUser+"&vesting_shares="+sp+"%20SP");load the url
Modify Steemconnect URL
Here we need steemconnect URL, and this url we need to modify. steemconnect URL for delegating steem power :
https://steemconnect.com/sign/delegateVestingShares?delegator=&delegatee=[UserDestination]&vesting_shares=0%[amount]SPWe modify
[UserDestination]and[amount]as variable that get data from user input. So the RL become like this :"https://steemconnect.com/sign/delegateVestingShares?delegator=&delegatee="+receiveUser+"&vesting_shares="+sp+"%20SP"
Running aplication
Save the project and Click the play button to run the project

Curriculum
- JavaTutorial #10 : How to create Maps Aplication (Google Maps in Desktop Version) with java using Netbeans
- [Java Tutorial #7] - How to create Converter Calculator Aplication for STEEM and SBD using Netbeans
- [Java Tutorial #8] - How to create SP to Vests Converter Calculator Aplication using Netbeans
Proof of Work Done
https://gist.github.com/team2dev/cad5b352ce9d51725d83008e91b72ebc
Thank you for your contribution @team2dev.
We've been reviewing your contribution and suggested the following improvements to your upcoming tutorials:
Thanks for your work on developing this tutorial. I hope the next tutorial follows our suggestions.
Your contribution has been evaluated according to Utopian policies and guidelines, as well as a predefined set of questions pertaining to the category.
To view those questions and the relevant answers related to your post, click here.
Need help? Write a ticket on https://support.utopian.io/.
Chat with us on Discord.
[utopian-moderator]
Thank you for your review, @portugalcoin!
So far this week you've reviewed 8 contributions. Keep up the good work!
Hi @team2dev!
Your post was upvoted by @steem-ua, new Steem dApp, using UserAuthority for algorithmic post curation!
Your post is eligible for our upvote, thanks to our collaboration with @utopian-io!
Feel free to join our @steem-ua Discord server
Hey, @team2dev!
Thanks for contributing on Utopian.
We’re already looking forward to your next contribution!
Get higher incentives and support Utopian.io!
Simply set @utopian.pay as a 5% (or higher) payout beneficiary on your contribution post (via SteemPlus or Steeditor).
Want to chat? Join us on Discord https://discord.gg/h52nFrV.
Vote for Utopian Witness!