Blender Tutorials : Adding A Movie Title Screen
[ENGLISH]
What Will I Learn?
Hello everyone...!!!
Today i want make a tutorial about adding a movie title screen still using blender app on my computer. Blender is the free and open source 3D creation suite. It supports the entirety of the 3D pipeline—modeling, rigging, animation, simulation, rendering, compositing and motion tracking, even video editing and game creation. Advanced users employ Blender’s API for Python scripting to customize the application and write specialized tools; often these are included in Blender’s future releases.
- You will learn how to use blender appplicatio according to your computer specifications
- Requirement, install blender app and run the appn on your computer
- You will learn shortcut function in the blender app
- You will learn how to editing video in blender app
Requirements
To follow the tutorial, prepare some of the following tools :
- Requirement, computer or laptop
- Requirement, download the download the blender application according to your computer specifications
- Requirement, install blender app and run the app
- Requirement, an image and a movie clip
Difficulty
- Basic
Description
How to editing a simple video such as Setting Blender up for video editing, Adding a movie title screen , adding a vidio after that make audio and video will be synchronized.
Ok lets go...
Step 1
Run Blender app
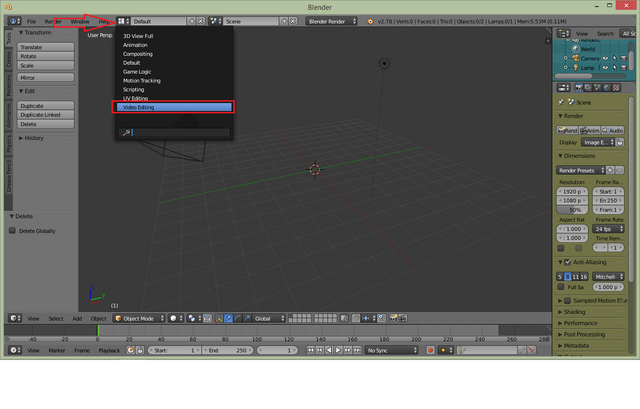
Step 2
Click the Choose Screen Layout button and select Video Editing in the
dropdown, like this:
Step 3
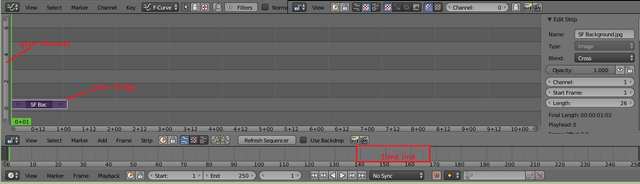
You can see therea are the timeline, NLA editor and The graph editor.

- The timeline view is where your timeline controls are, as well as controls for setting keys,
video duration etc. - The NLA editor sequence area is where we add all of our video elements, such as video,
audio and images. In the top right it is in preview mode ( they are both the same window
types ), showing a preview of the video we are creating. - The graph editor is for fine tune control using f curves and will not be used much in this
tutorial.
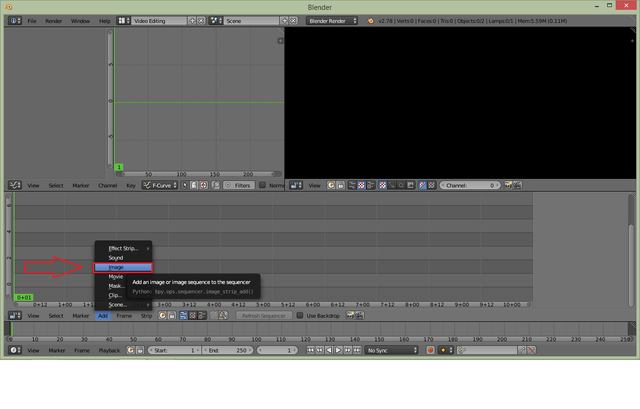
Step 4
In the NLA Editor sequence window, locate the menu and choose Add Image.
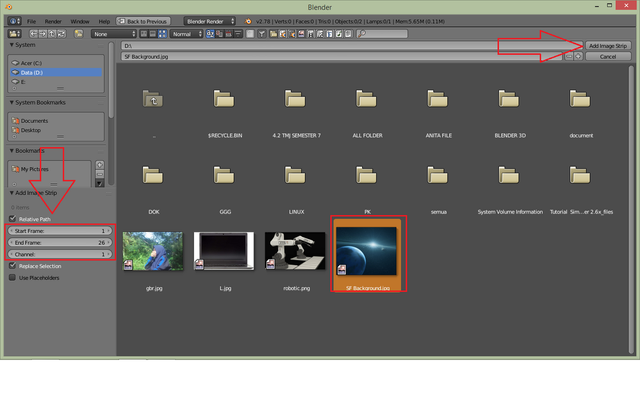
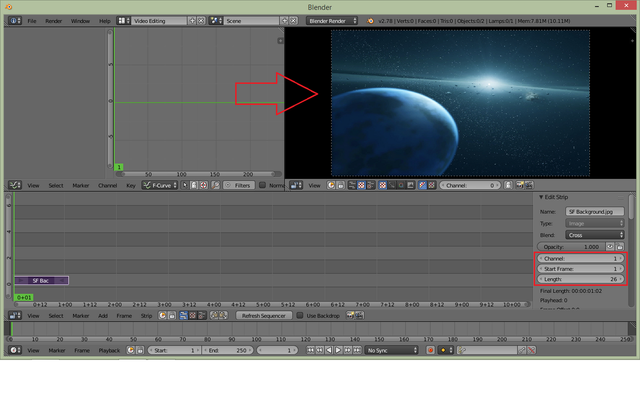
Step 5
Locate the file you want as a title screen. In the left hand side, locate start frame and set
it to 0, and end frame and set it to 150.
Step 6
Now NLA window is showing an active preview, like so:
Step 7
You can see there are your image, channel and timeline.
Step 8
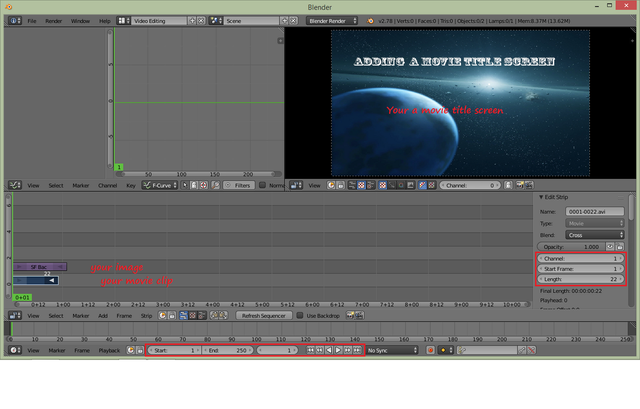
Ok, lets add some video. In the NLA Sequence view, click Add, then Movie.

Step 9
Now you will see the following results in the sequence:
Step 10
In the Timeline window, select Playback, and make sure AV-sync is selected.
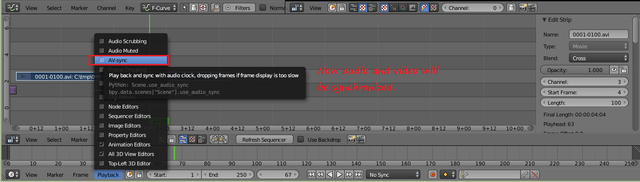
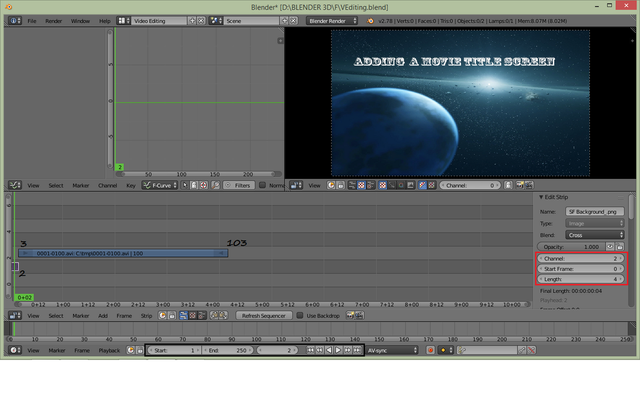
Step 11
Right click your video in the NLA Sequence window and take a look in the properties to
the right ( hit N if the properties Window isn't visible. ). Locate the Length: 250. In the
timeline, locate End, click it in the middle and update to 250:
and dont forget the start frame for image is 0 and Length is 4 (4 seconds).
Step 12
Now you can go ahead and preview with click play in timeline or ALT+A.

Now we have a title screen and a movie with audio, synced and playing back.
Ok if you want this project with extention .blend , please download at this Download this Project
Ok Hopefully usefull and good luck !