Full Root & Swap Encryption Guide for ZEN Secure Node & other custom ISO installed VPS
First steps
This is intended as a supplement to the main custom ISO install guide:
Please refer to the main guide up until the disk partitioning section.
Please note that encrypted swap will perform slower than regular swap, if you are failing secnodetracker challenges with this setup, consider a different partition system and make room for a non-encrypted swap file or partition, or move to a tier with more physical RAM
Implementing Encryption for Root partition and Swap space
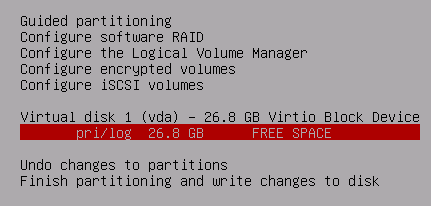
After you have proceeded with the installation via a custom ISO, configure the partitions as follows:
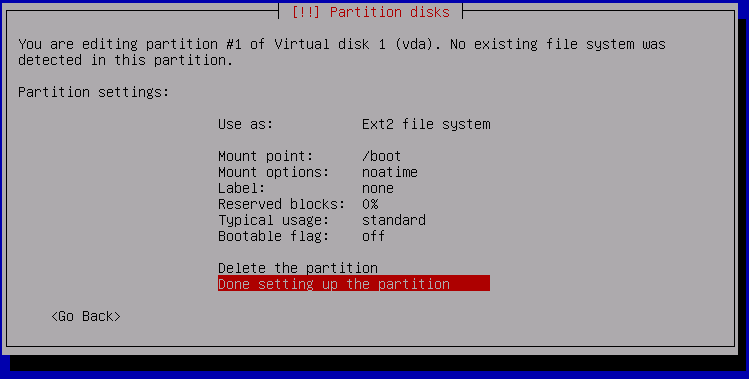
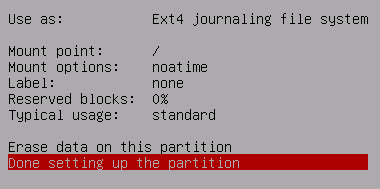
Firstly, create a 512 MB boot partition -- this will NOT be encrypted. It will serve to mount the encrypted root partition at boot time.
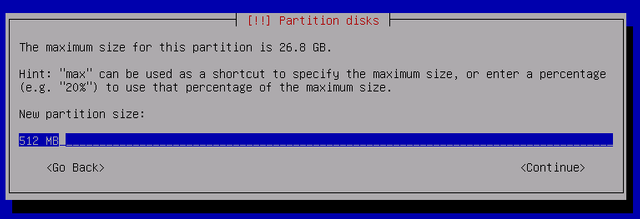
Make it a Primary partition, at the beginning of the disk.
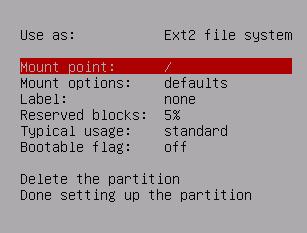
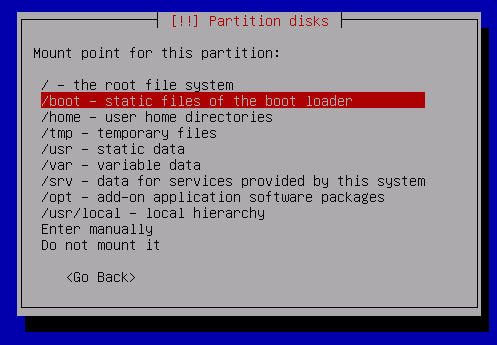
Change the Mount point
Select /boot
Make the filesystem EXT2, EXT3 or EXT4
as the disk is small, for faster disk performance in many cases choose EXT2 (no journal), for better recovery after crashes choose EXT3 or EXT4 (journal)
Select noatime as a Mount option
Reduce the Reserved blocks to 0%
Done setting up the partition
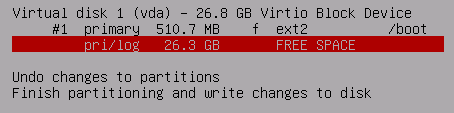
Select the remaining FREE SPACE
Select Use as:
Select physical volume for encryption
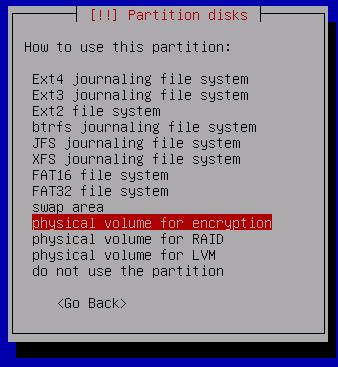
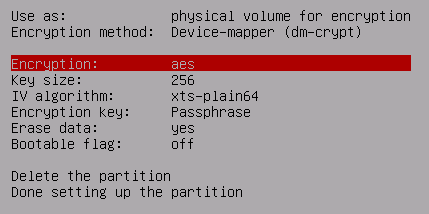
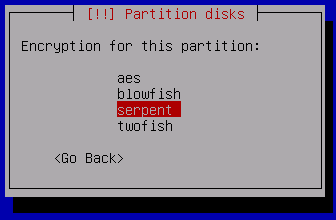
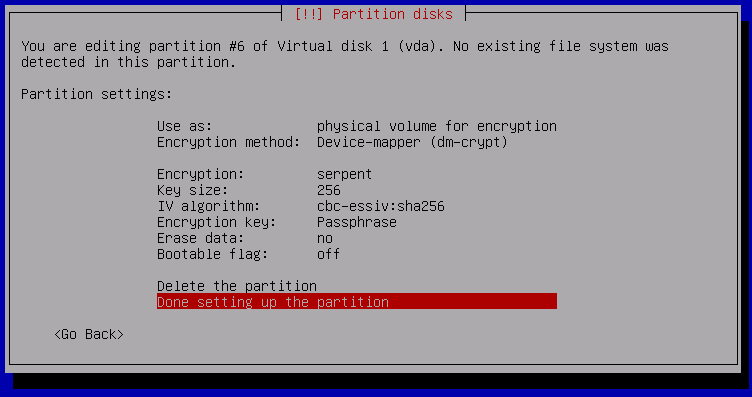
Various options for encryption will now appear. Start by selecting the Encryption type:
Various types of encryption ciphers are available. Each type has its own theoretical & practical strengths & weaknesses.
For this demo we will select Serpent
please refer to books and information you can find online regarding the differences in these encryption ciphers.
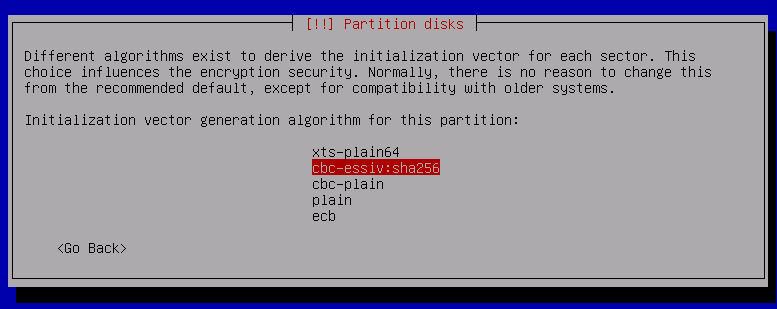
Next, select the IV Algorithm -- again, there are multiple choices each with their own theoretical & practical strengths & weaknesses.
For this demo we will select cbc-essiv:sha256
Change Erase data to no
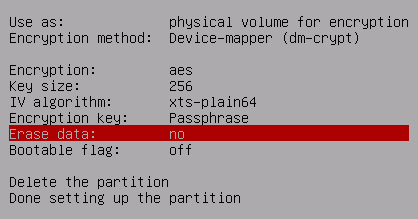
Done setting up the partition
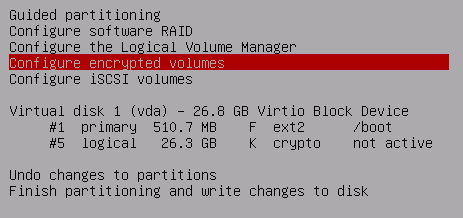
Now select Configure encrypted volumes
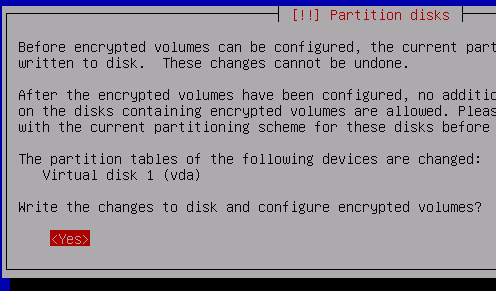
Yes, write the changes to disk
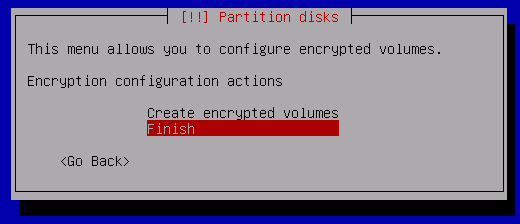
Select Finish here -- we have already made the partition for encryption.
You will now be prompted to enter a passphrase for the encrypted volume.
Make the passphrase strong! At least 20 characters including letters and symbols!
You may use mnemonics to form and remember a complex password, or if you want to risk it you can write it down somewhere or store it in a password manager.
MAKE SURE THE VNC VIEWER IS USING ENCRYPTION (HTTPS://) IF IT IS NOT, ABORT THE INSTALLATION AT THIS POINT AND CHANGE VPS PROVIDER TO ONE WHICH SUPPORTS ENCRYPTED VNC
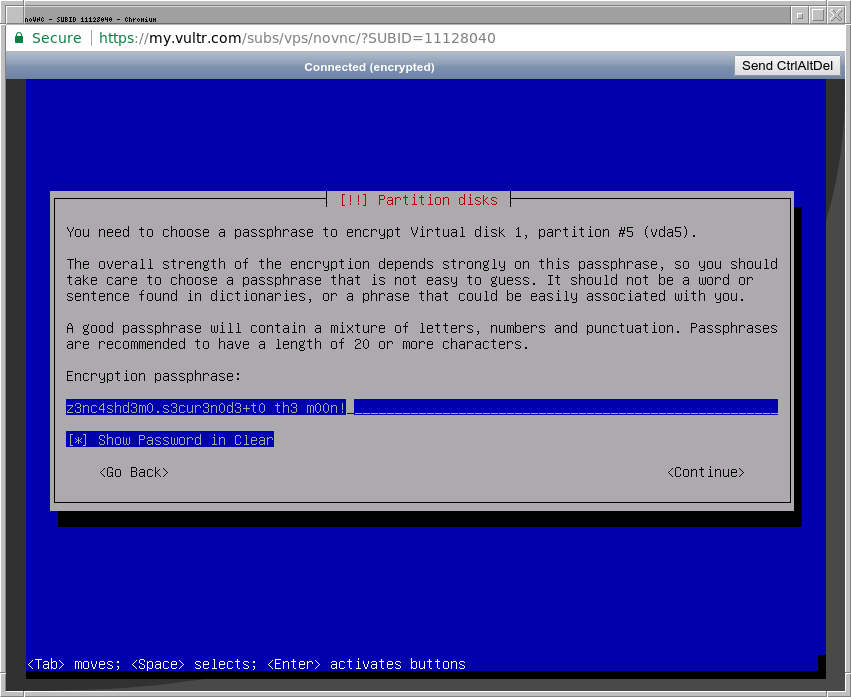
Continue, you will be prompted to enter the passphrase again.
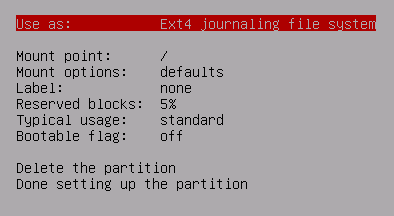
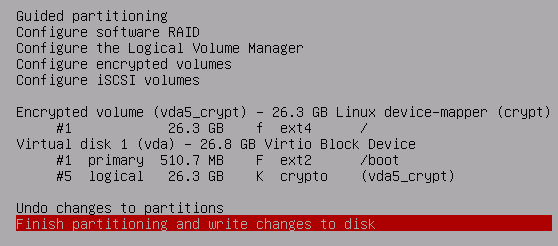
Next, you should see a new Encrypted volume with 1 partition underneath it. Select the partition.
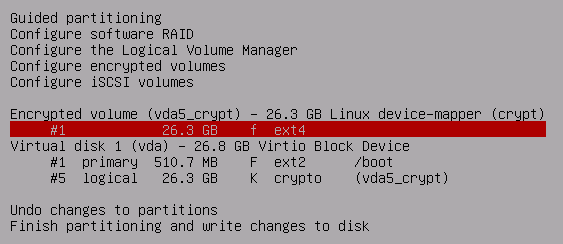
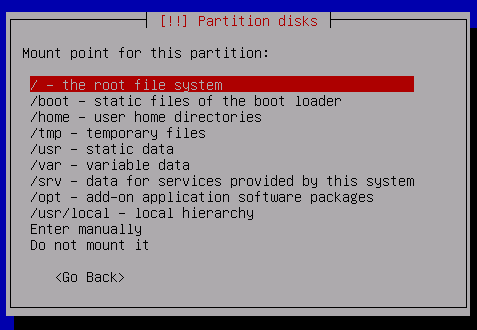
Select the Mount point
Mount it as the root fs
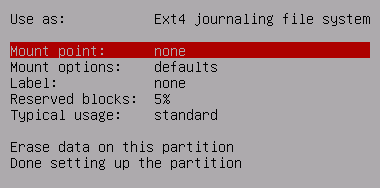
Configure the rest of the partition.
Select noatime as a mount option for optimal disk performance.
As before, select Ext2, Ext3, or Ext4 as the fs type depending on preference.
Set Reserved blocks to 0% or 1% so we can use the whole disk, as it is not a large disk.
Note: If the disk fills up, a 0% option may cause inoperability, be sure to monitor and administer the server -- some log files may grow large for example
Done setting up the partition
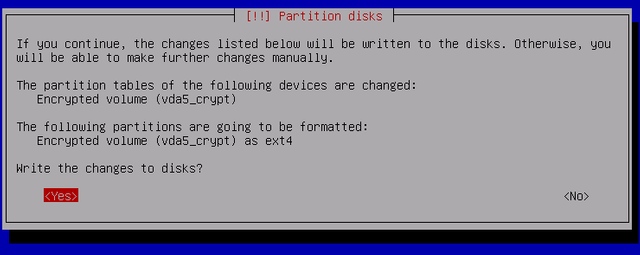
Finish partitioning and write the changes to disk
You will be warned there is no Swap partition. We will be creating it as a file within the encrypted root.
Select no

Select yes
The installation should now proceed as usual, please follow the rest of the main guide up until the end of the installation!
After the installation has finished, make sure the ISO is removed from the VPS and reboot.
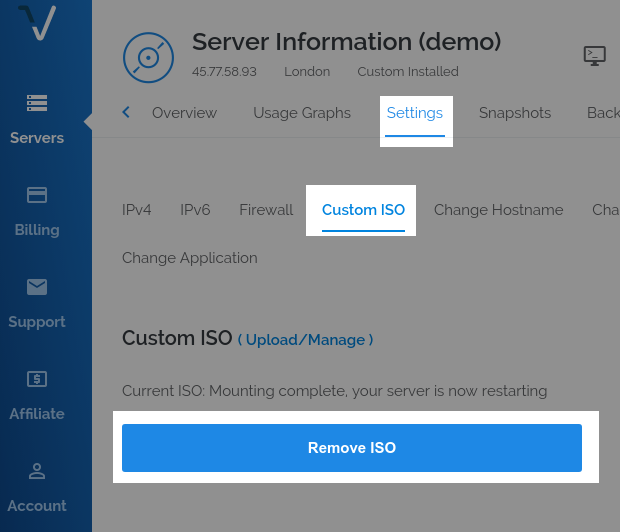
After rebooting, open the VNC console again.
Depending on VPS and VNC type, the boot messages may appear overwritten, pay attention for the line Please unlock disk ..._crypt: (you may even have to enter it blind!)
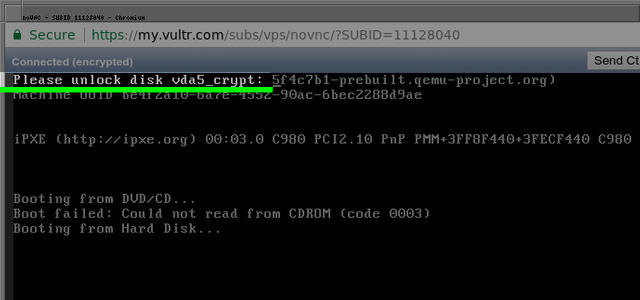
Click into the window, enter your encryption passphrase and press enter. The system should boot into the login screen.
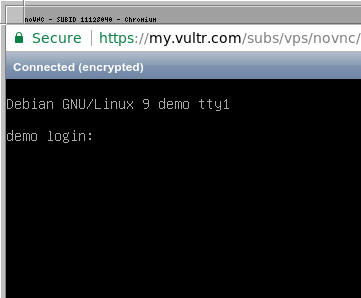
From here you can login via VNC (or login via SSH if you installed it as an option).
Setting up the Encrypted Swap file
Login as root. If you are logging in as a normal user via SSH, invoke su to become root.
Enter the following commands:
fallocate -l 7G /swap
chmod 0600 /swap
mkswap /swap
swapon /swap
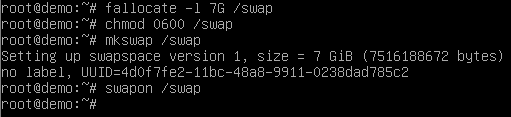
This will create and activate a 7GB swap file at the location /swap, within the encrypted volume.
You now have a fully encrypted root system with encrypted swap! You will only ever need to enter the encryption passphrase when booting the VPS up from a powerdown or restart.
If this guide has helped you, consider a donation:
ZEN: znSTMxvU3AizLV9cAm4iNPT5uLoJ2wbfHy9
Private ZEN: zcK5A39UwgaufiyUVtVqTXMFQXxxCUCvicvuMxcCE9QrgBMAGW5yCQW9a5zRqwZbYBTCMhTZgyhKH3TMMHq4xwLADQvqrM3
BTC: 1EwGXrmGdiD6Xd8uPnmRufyoWowJ7qpkJ1
I followed religiously your guide, and I have chosen also VULTR, 1024Mb with 1CPU, but unfortunately it seems it's not going to be powerfull enough ...
http://devtracksys.secnodes.com/nodes/265/chals
We'll see ... but if the price if zencash continues to go up that shouldn't be a problem to upgrade the VPS. Anyway thanks for your great tutorials, learning a lot ....
I just did some cleaning as you suggested at the beginning of your previous post, we'll see if it helps.
I wonder if using the crypted disk now has a strong CPU cost when the cache is used ?
As I suspected, I reinstalled everything without the encrypted disk and now I pass the challenge. The disk encryption has a CPU cost.
Indeed, an encrypted root fs and swap file will decrease performance as I pointed out at the end of the article. (i edited the article now to explain the performance cost at the beginning)
It would be ideal to have closer to 8GB RAM for the node if the disk is fully encrypted, that way the challenge is not caching to disk instead of using RAM.
There is also the option of testing AES encryption (as opposed to serpent) -- AES is usually hardware accelerated as most CPUs these days have AES instruction sets. A KVM VPS/Virtual Machine should be able to use the host CPU acceleration, but only if the VPS/Virtual Machine is using host-passthrough or similar config for the guest CPU (see https://forum.proxmox.com/threads/aes-ni-extension-on-guest-cpu.12898/)
running
cat /proc/cpuinfo | grep aeson the Vultr VPS shows aes flag is on the virtual CPU, so aes may be a bit faster than serpent, but it still may fail the challenge with just 1GB RAM