Homemade Vanilla Eclairs Detailed Step by Step Recipe
Finally did them! It wasn't easy but I've finally succeeded in making Eclairs at home!
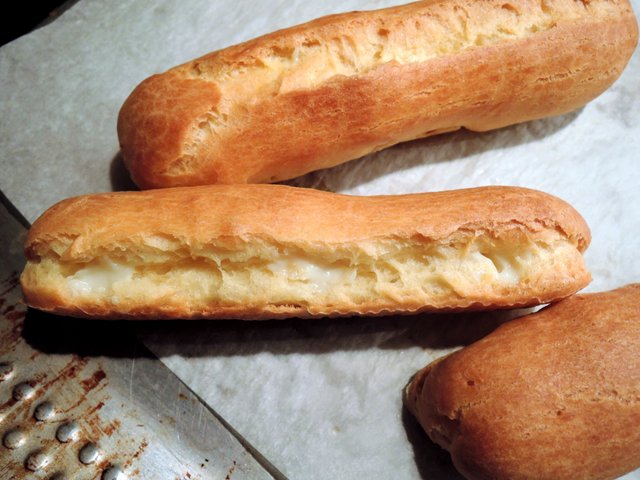
Eclairs might just be my all-time favorite French pastries.
They are just perfectly balanced and you can eat them at any time of the day.
But it can be quite hard to find them in bakeries and are really expensive if you consider that they are usually only about 3 bites. So I thought to myself, why not just do them myself? I mean they seem basic enough. Something like a biscuit filled with some cream and heavy frosting on top. Easy enough.
Well fuck me.
I don't think I ever had to try a single recipe so many times before getting it right. I think this is my 4th attempt with the previous 3 always lacking in some way. But after going through multiple cooking books and online videos, I can safely say that I finally got it right and with a working recipe as well. So enough talking. Here is how you can do them at home as well, without going through this trial and error process that I had to.

Preparations:
Just like my cinnamon rolls recipe, this recipe will take time so don't try without first making sure you don't have to stop halfway through.
Besides the time you also need some tools that are necessary for this recipe. A piping bag with a large round tip (2cm Ø) as well as a long thin tip. Everythings else should be in every kitchen so I won't list it.
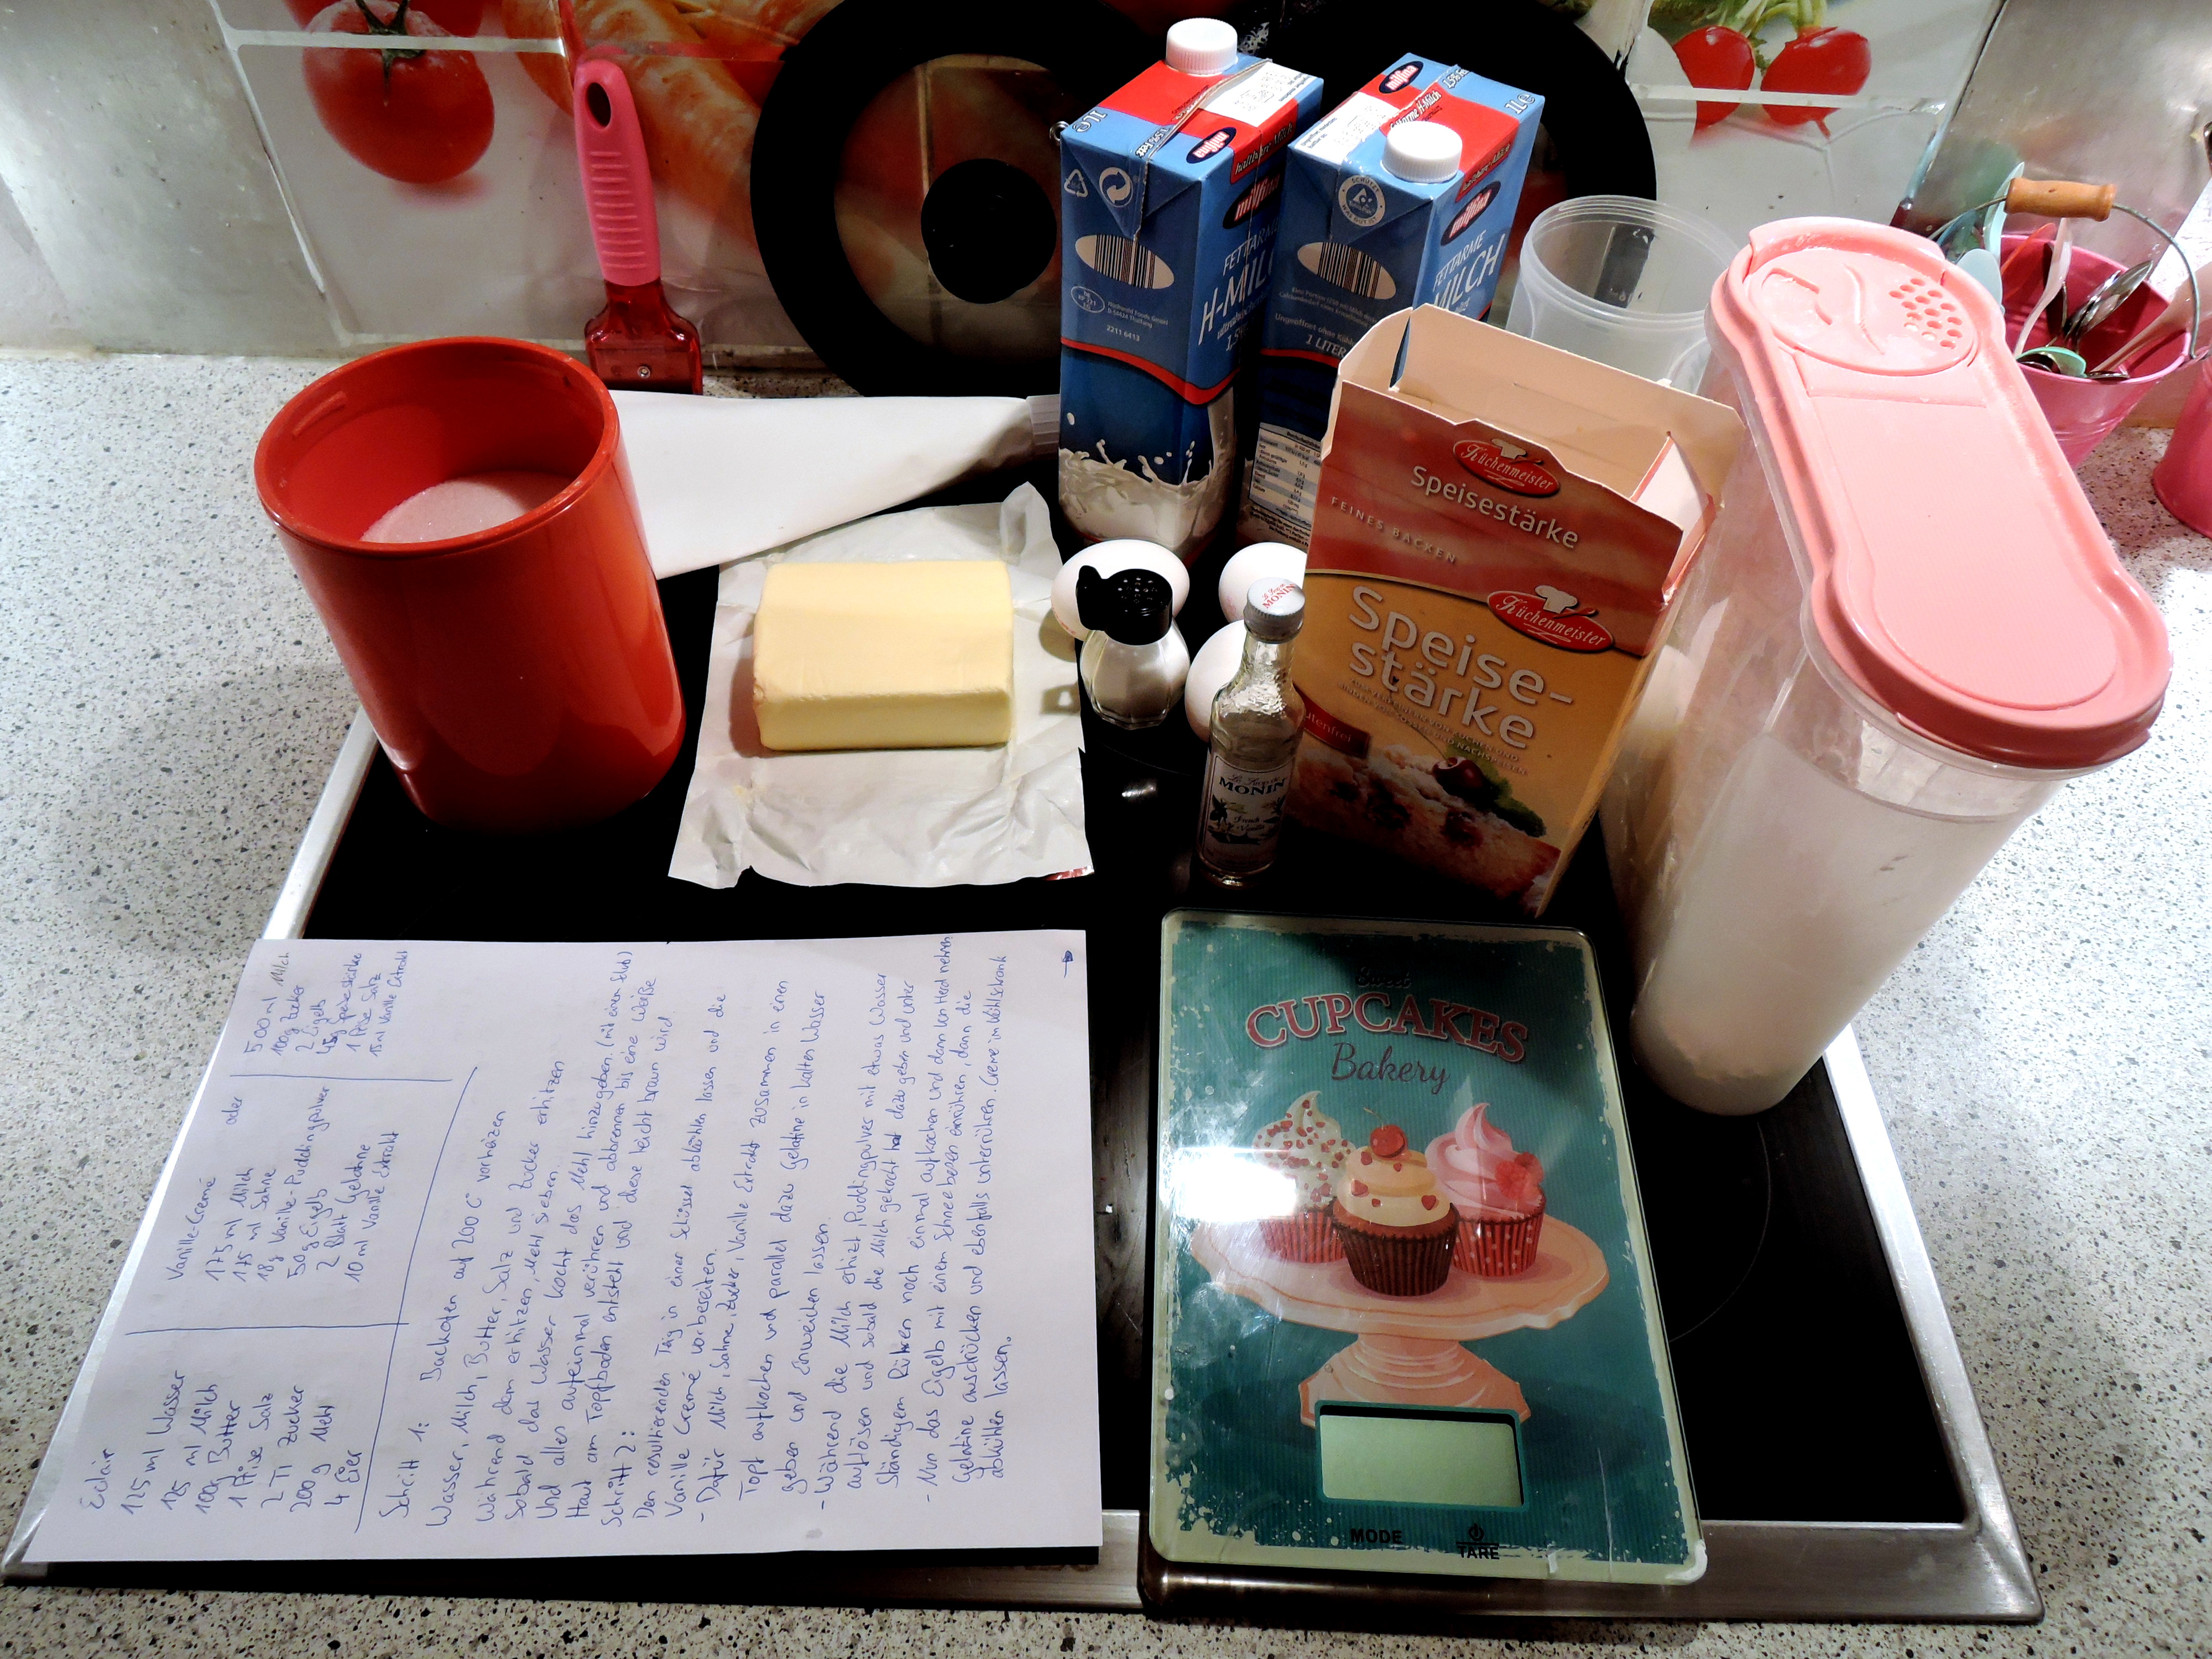
Ingredients:
| Eclairs | Vanilla Creme Filling | Icing |
|---|---|---|
| 125ml Water | 500ml Milk | ~ 30g Egg white |
| 125ml Milk | 100g Sugar | ~ 200g Powdered sugar |
| 100g Unsalted butter | 2 Egg yolks | some lemon juice |
| A pinch of salt | 45g Corn starch | |
| 2 tbsp Sugar | A pinch of salt | |
| 200g Plain flour / all purpose flour | 15ml Vanilla essence | |
| 4 Eggs |
Instructions:
Step 1: First we will work on the dough so sieve the flour and at the same time heat up the milk, water, butter, salt, and sugar in a pot until it boils.
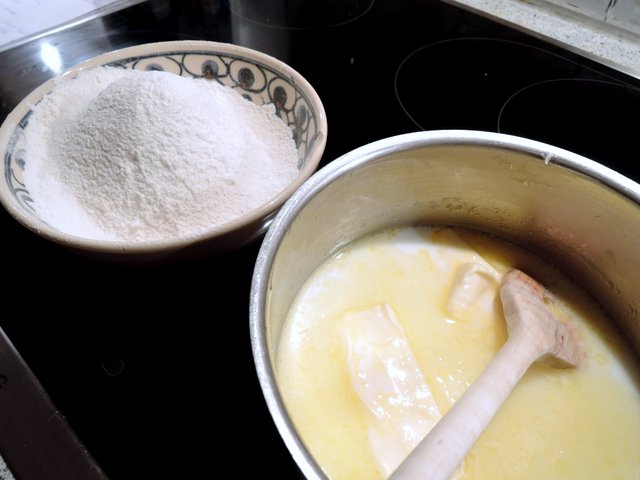
Step 2: Now things will get fast and this is one of the most important steps so read carefully.
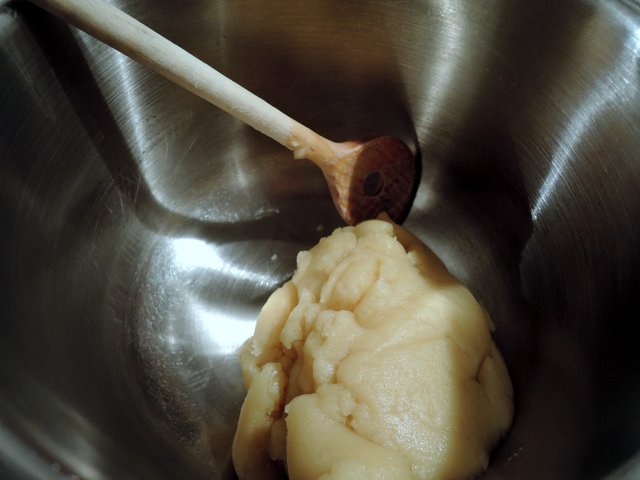
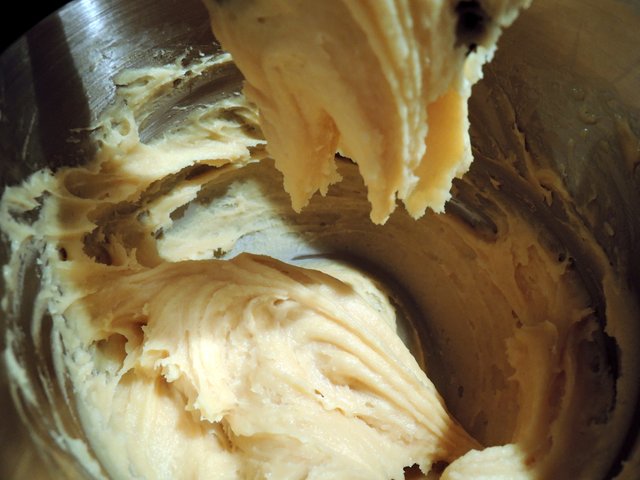
Once the milk mixture boils move it from the stove and in one go pour in all the flour. Then quickly stir the mass with a wooden spoon and move the pot back on to the stove while continuing to stir the dough thoroughly. Lower the heat to medium or half and keep stirring until you can see a white layer form on the bottom. (Note: We want to reduce the water content in the dough so we have to heat up the dough) Once this layer turns slightly brown and your dough combined into a shiny mass, take the pot off the stove and put the dough into a separate bowl and let that cool down until its lukewarm.
(This is what your dough should look like after you are finished with these steps)
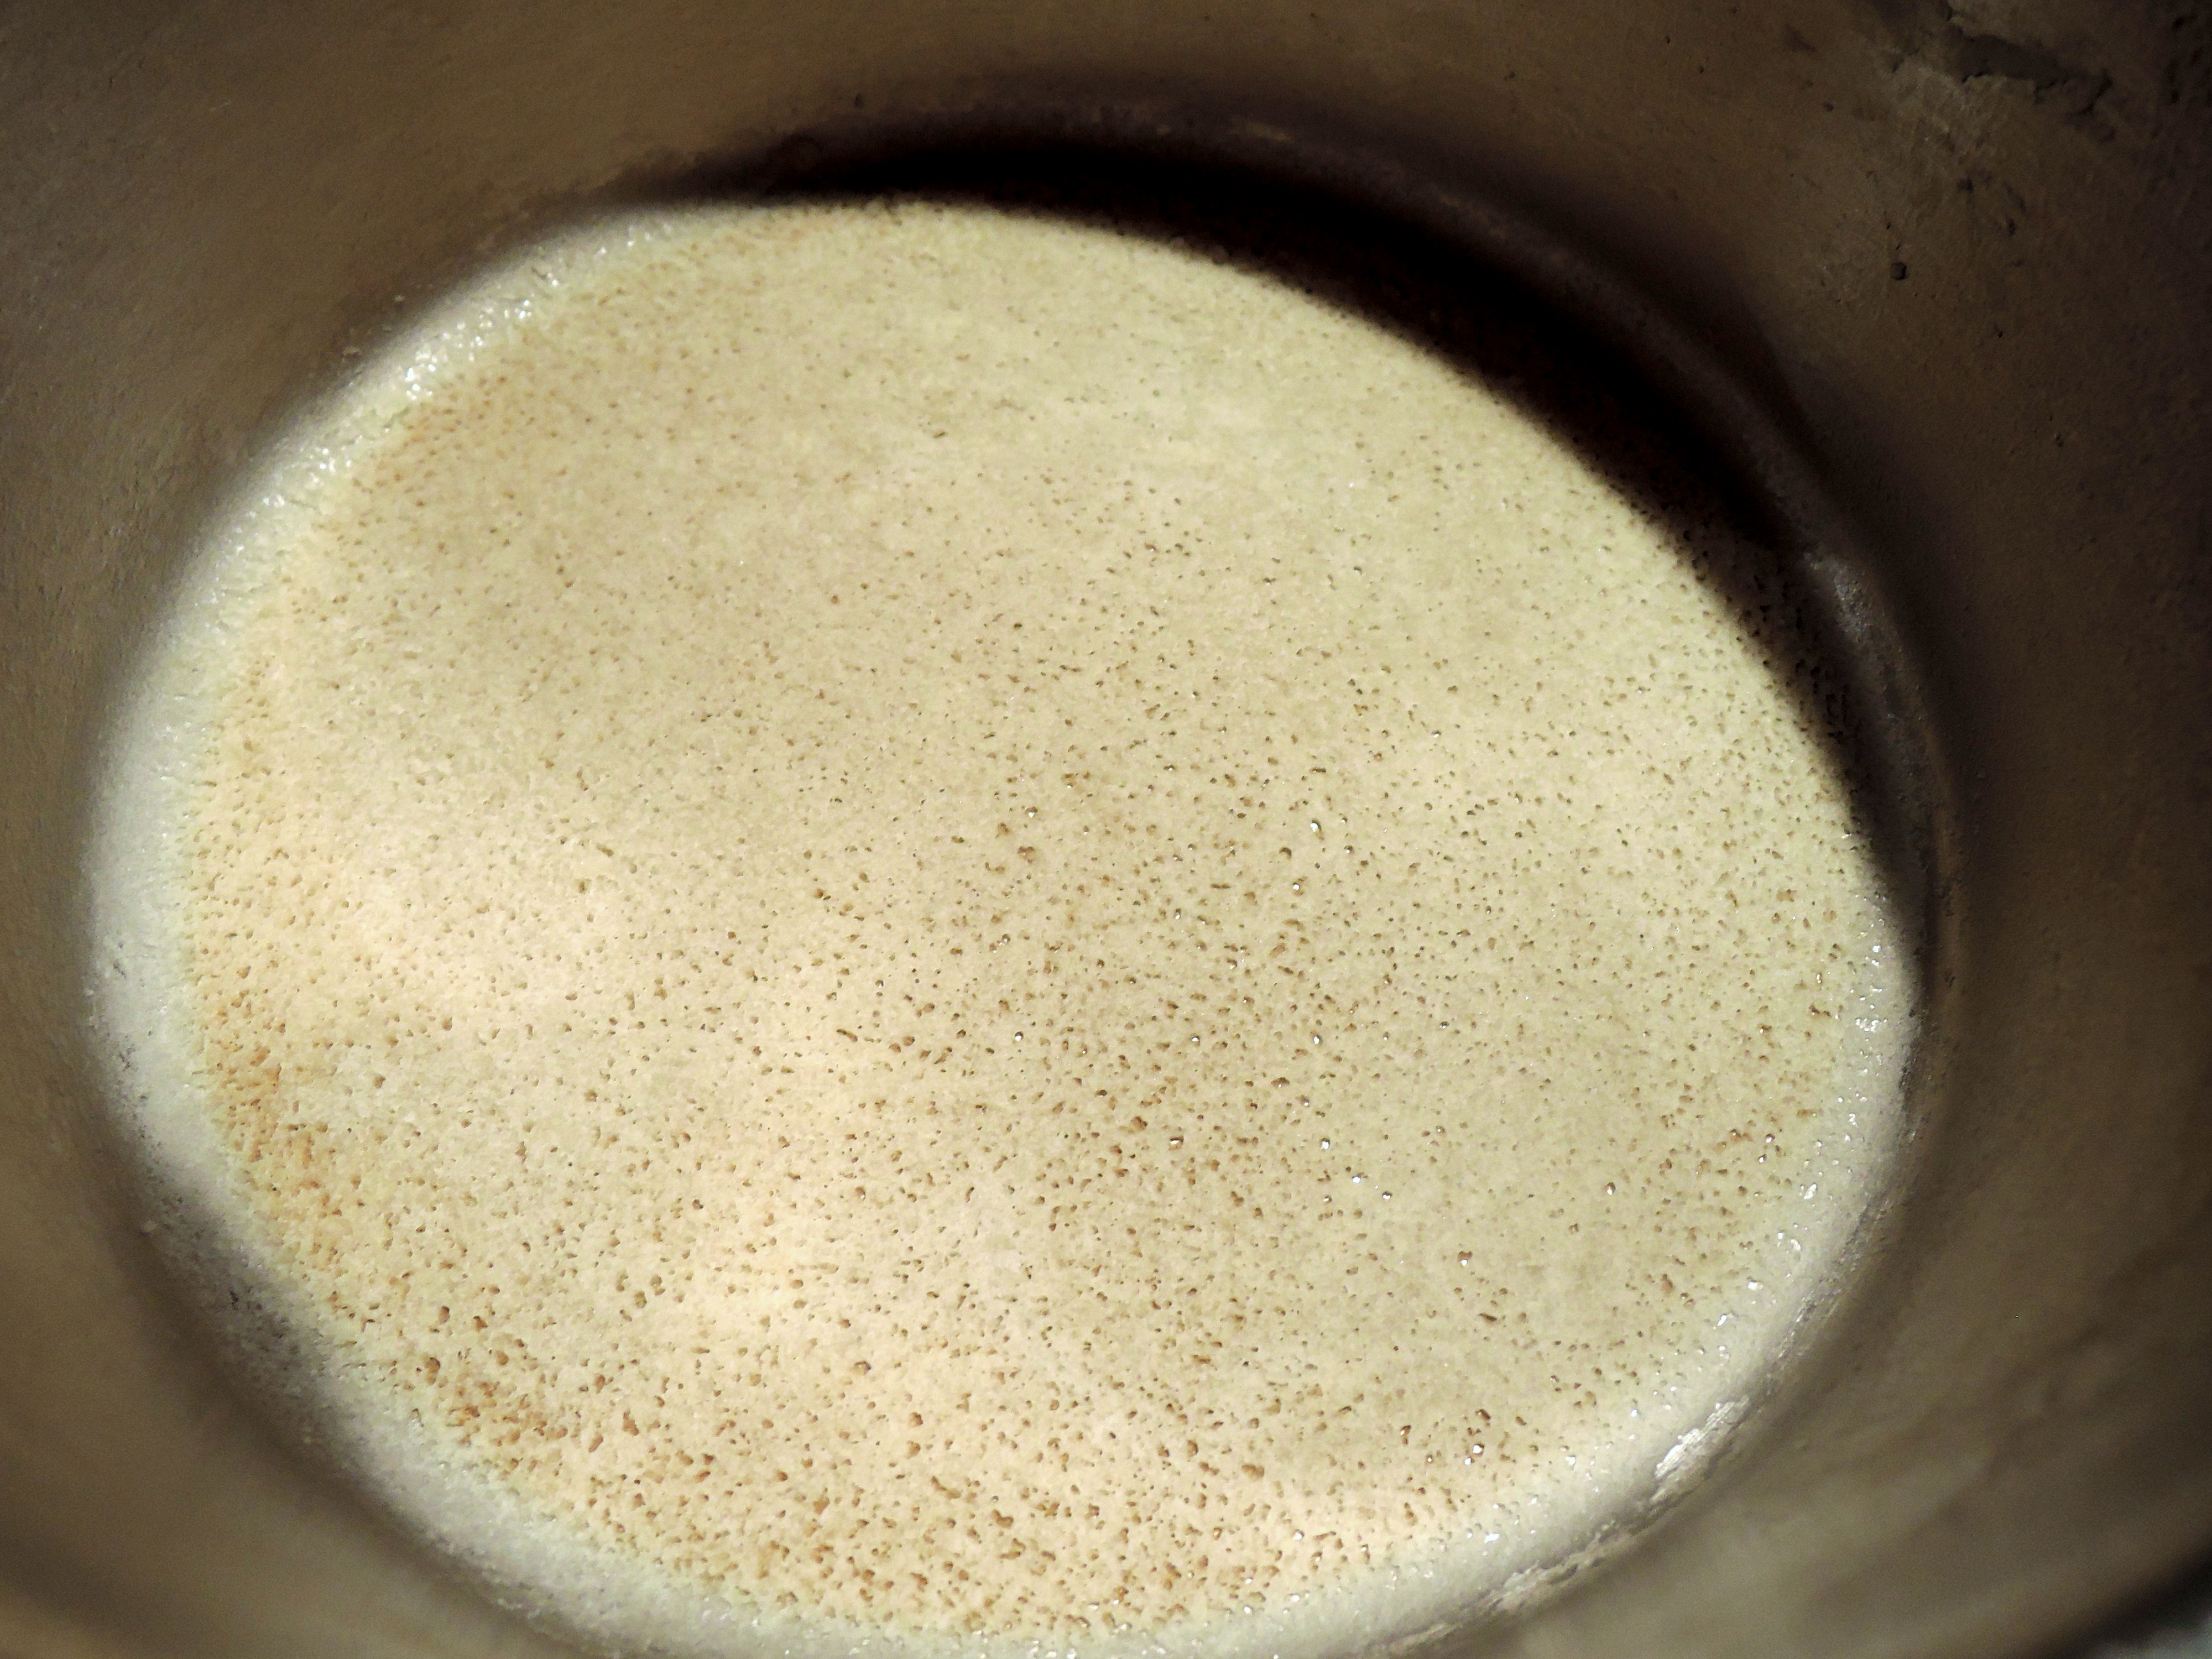
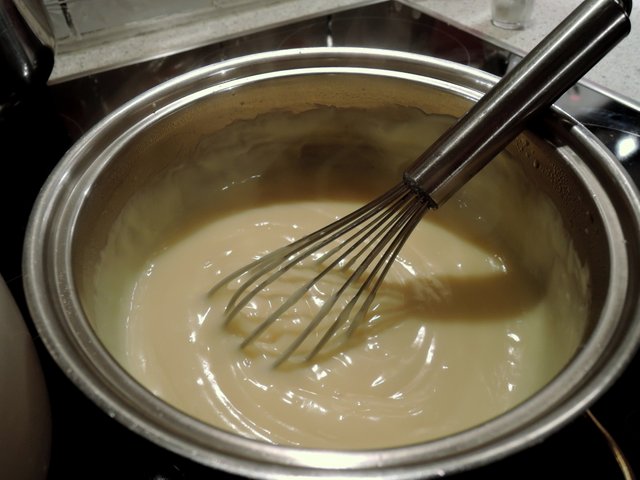
Step 3: While the dough is cooling down we will prepare the vanilla creme. For that pour 3/4 of the milk together with the sugar and vanilla essence into a pot and bring it to boil. While the milk mix is heating up, combine the other 1/4 of the milk with the corn starch, salt, and egg yolk. (Make sure you mix this well and don't increase the amount of egg yolk or the egg could separate in the next step.)
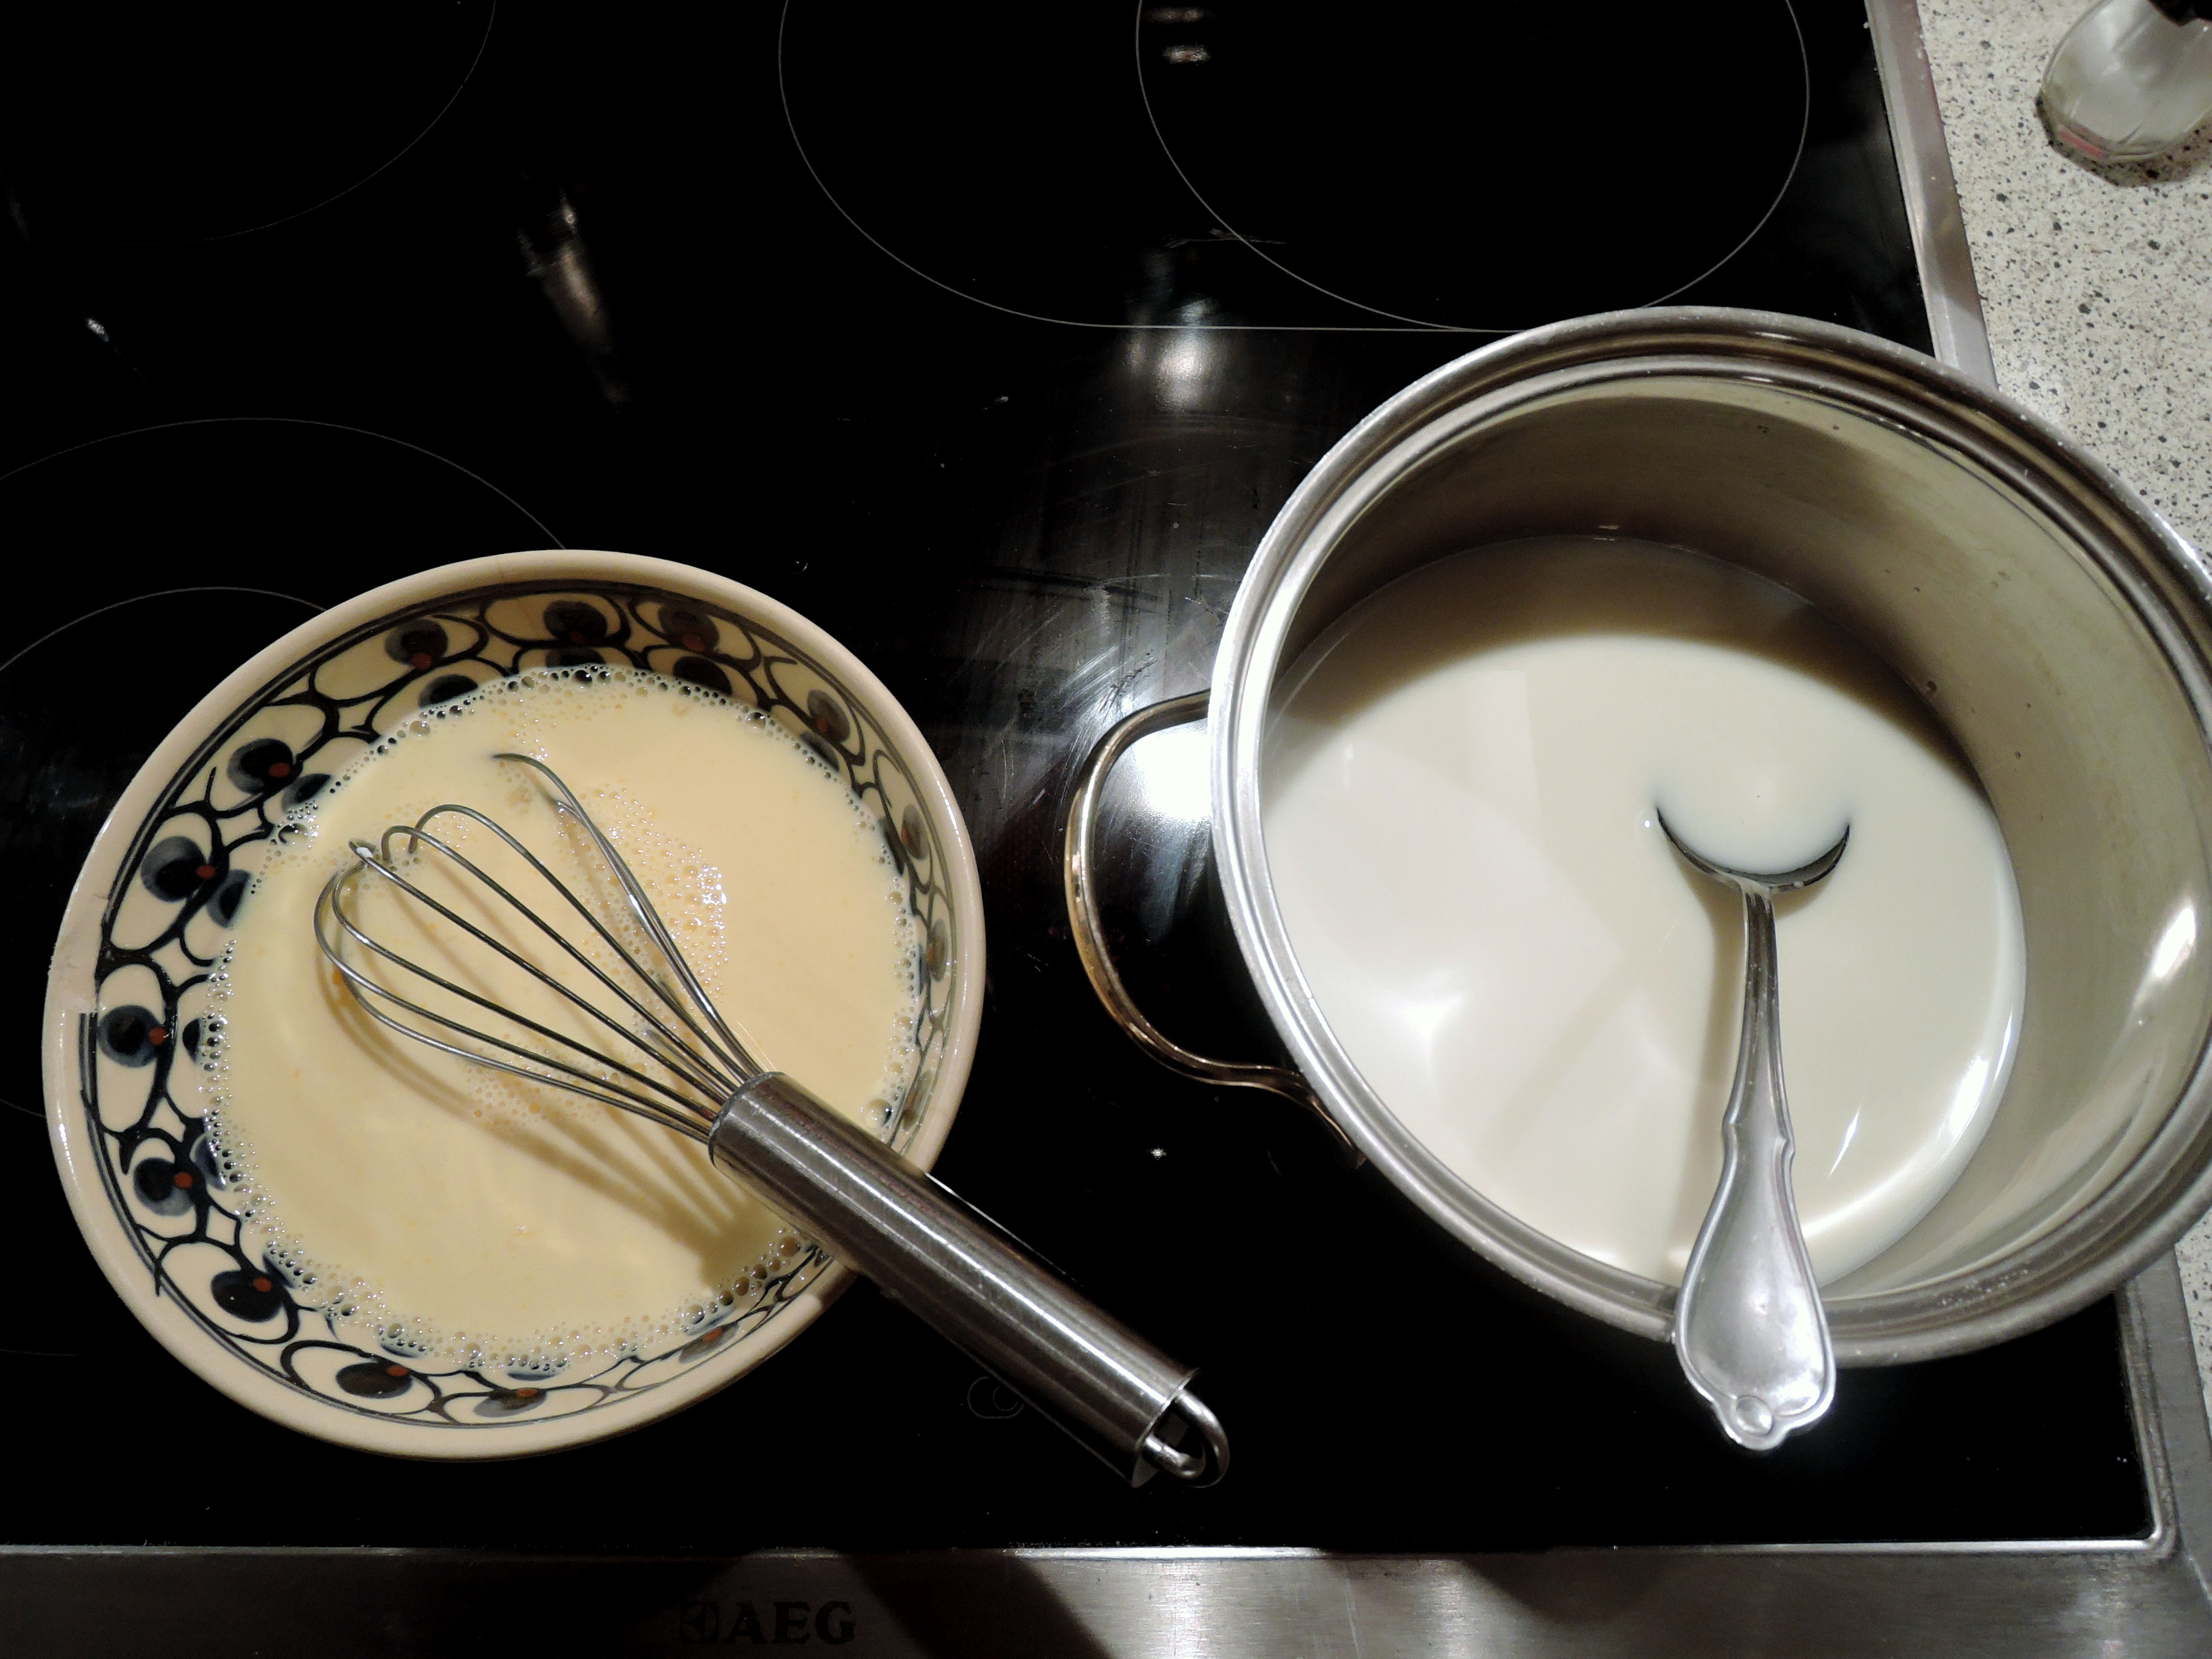
Step 4: Once the milk is boiling you can take it off the stove and mix it with your egg mixture. Now you can put the pot back on to the stove and keep stirring the mixture on a low heat. The cornstarch will slowly thicken the mixture and once you reached a satisfying consistency for your creme, take it off the stove, pour into a separate bowl and let it cool down completely. ( Depending on your room temperature you might want to put the bowl in your fridge.)
Step 5: Back to the dough. But first, preheat your oven to 200° C or 400° F. Once the dough is only lukewarm you can start working on the next step. For this, get your muscles ready because this step is going to be tiresome. (My kitchen machine can't get it right but maybe you are luckier) Incorporate the 4 eggs one after another into the dough but make sure that you only add another egg once the dough has mixed well with the egg that you added before.
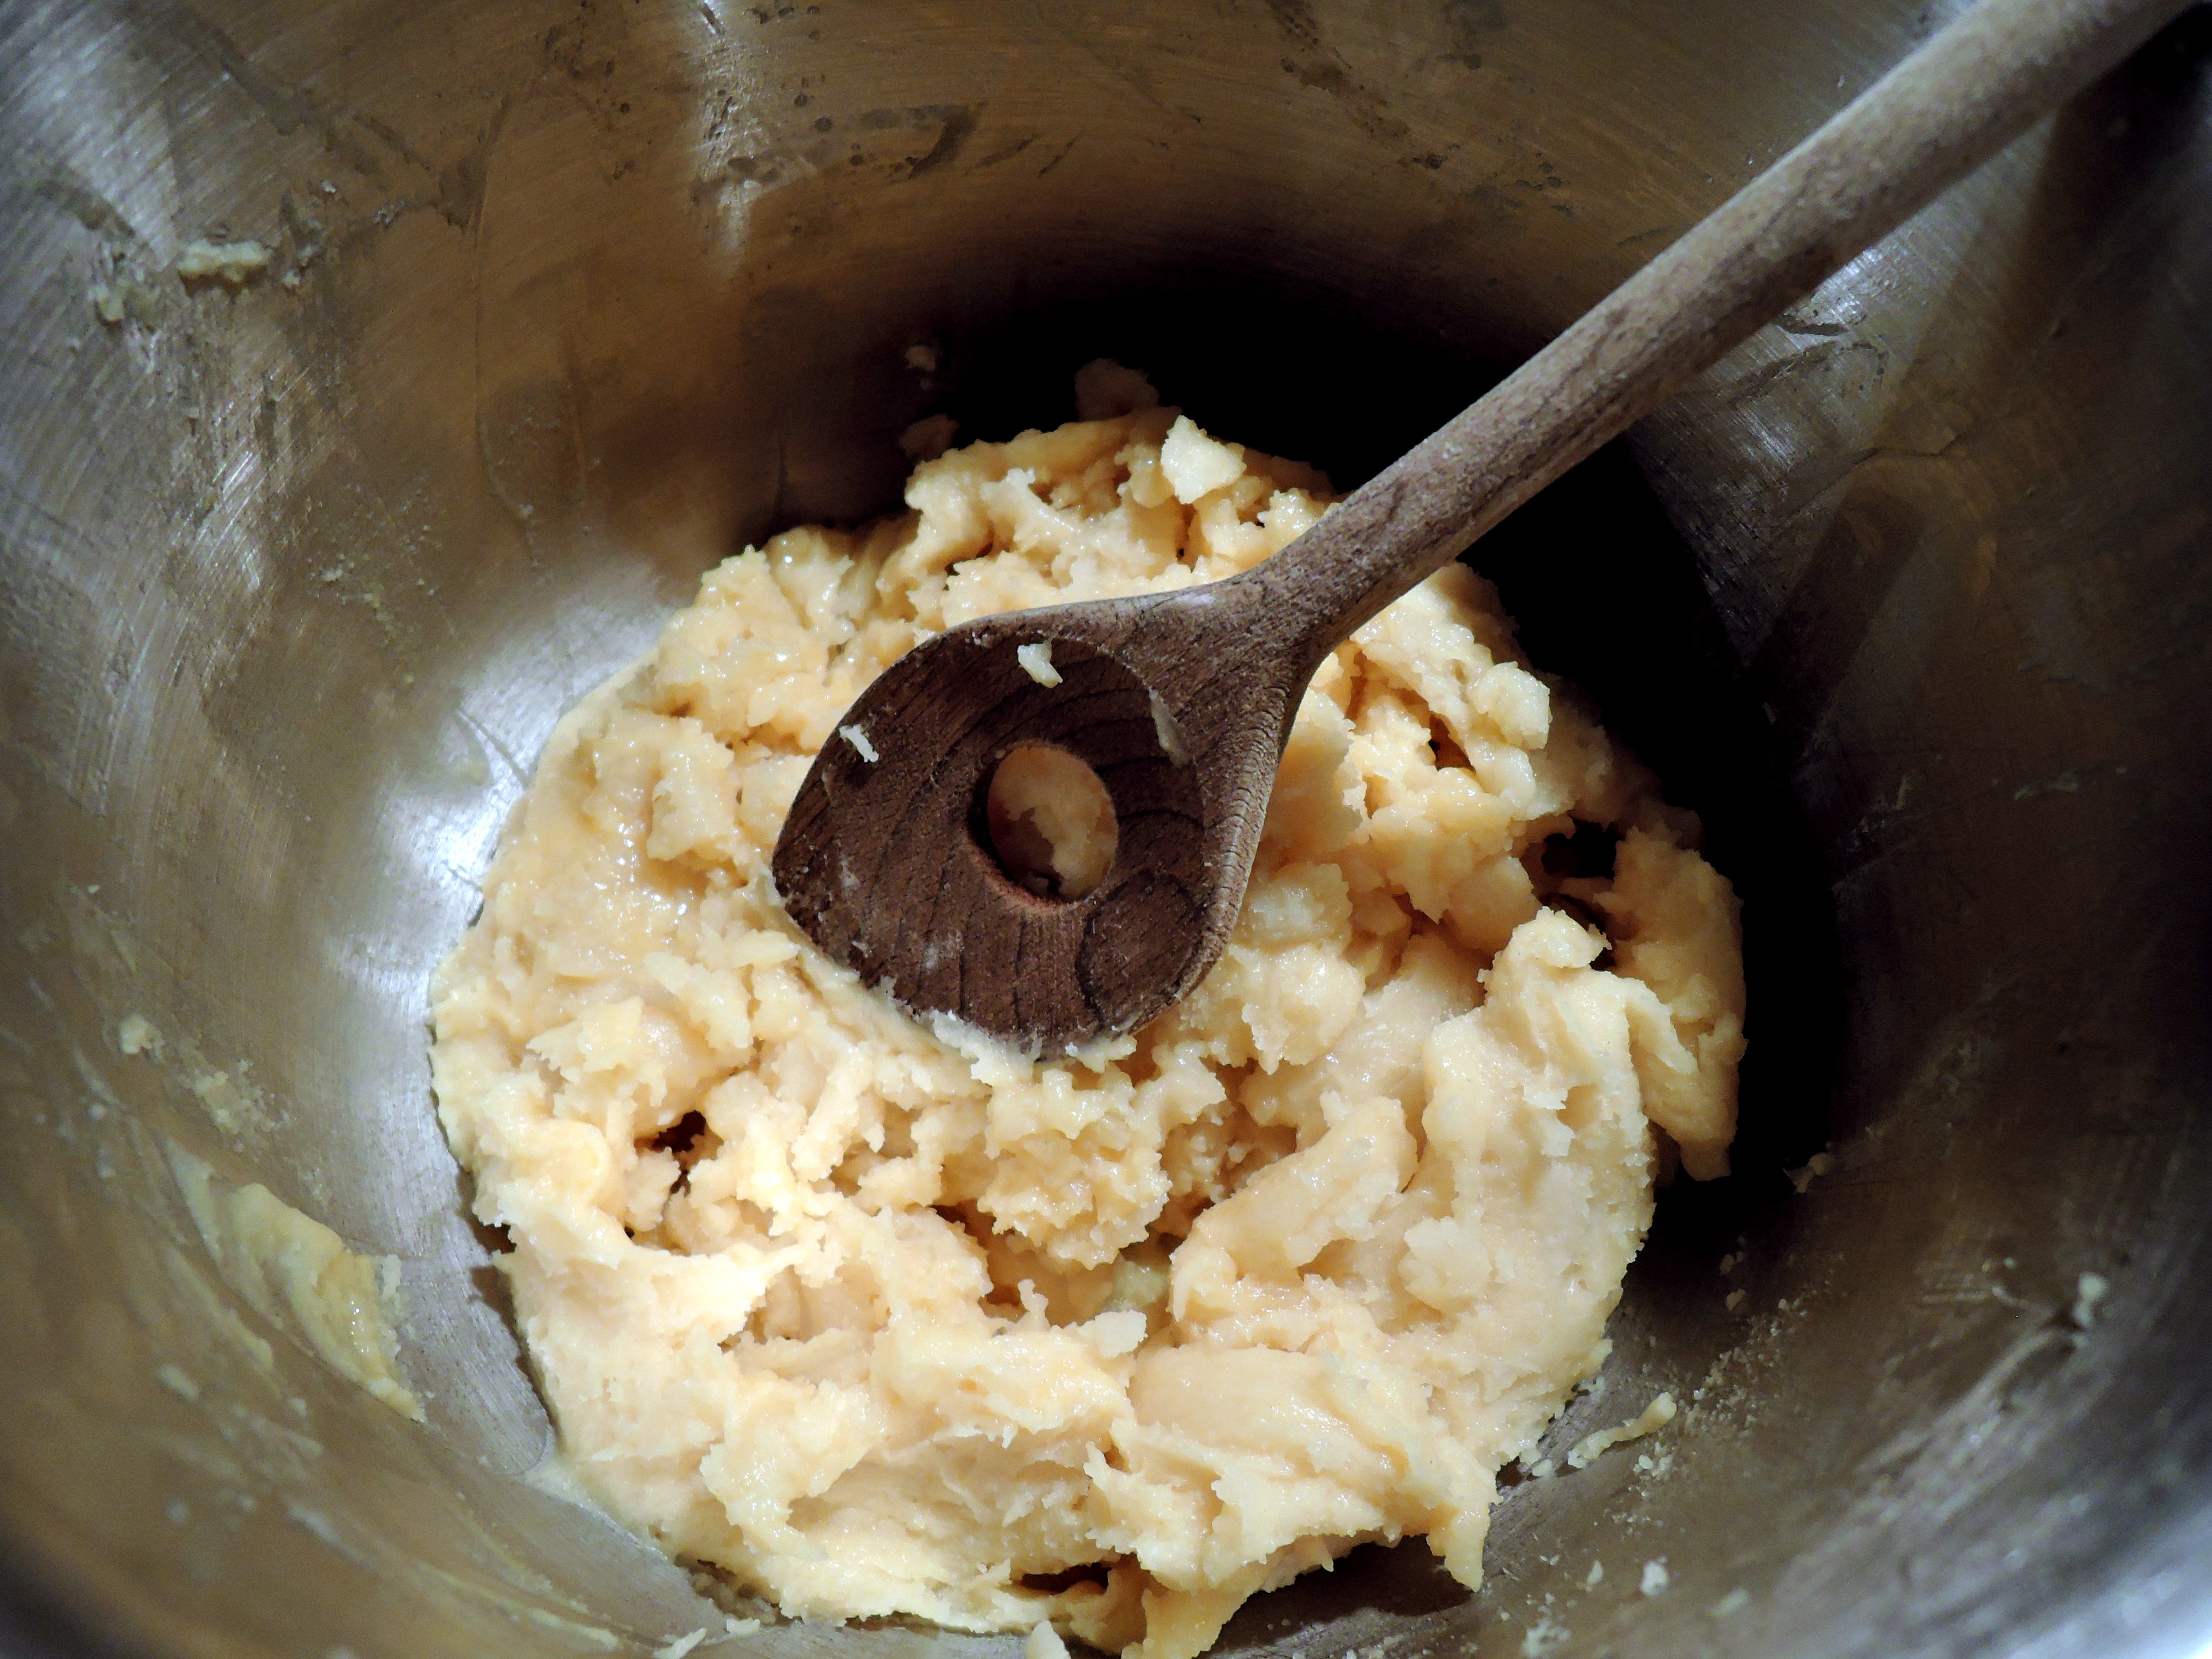
(Only when the dough looks similar to this texture should you add another egg, repeat this step until you get the texture we want. )
Note: The dough is the most difficult task in this recipe. You don't want the dough to be too soft or it won't hold its shape in the oven. So make sure that after each egg you check the texture. If the dough is shiny and ripping from your spoon in thick peaks, its good. Don't add more eggs just because you have some left. Mine was good after 3 1/2 eggs.
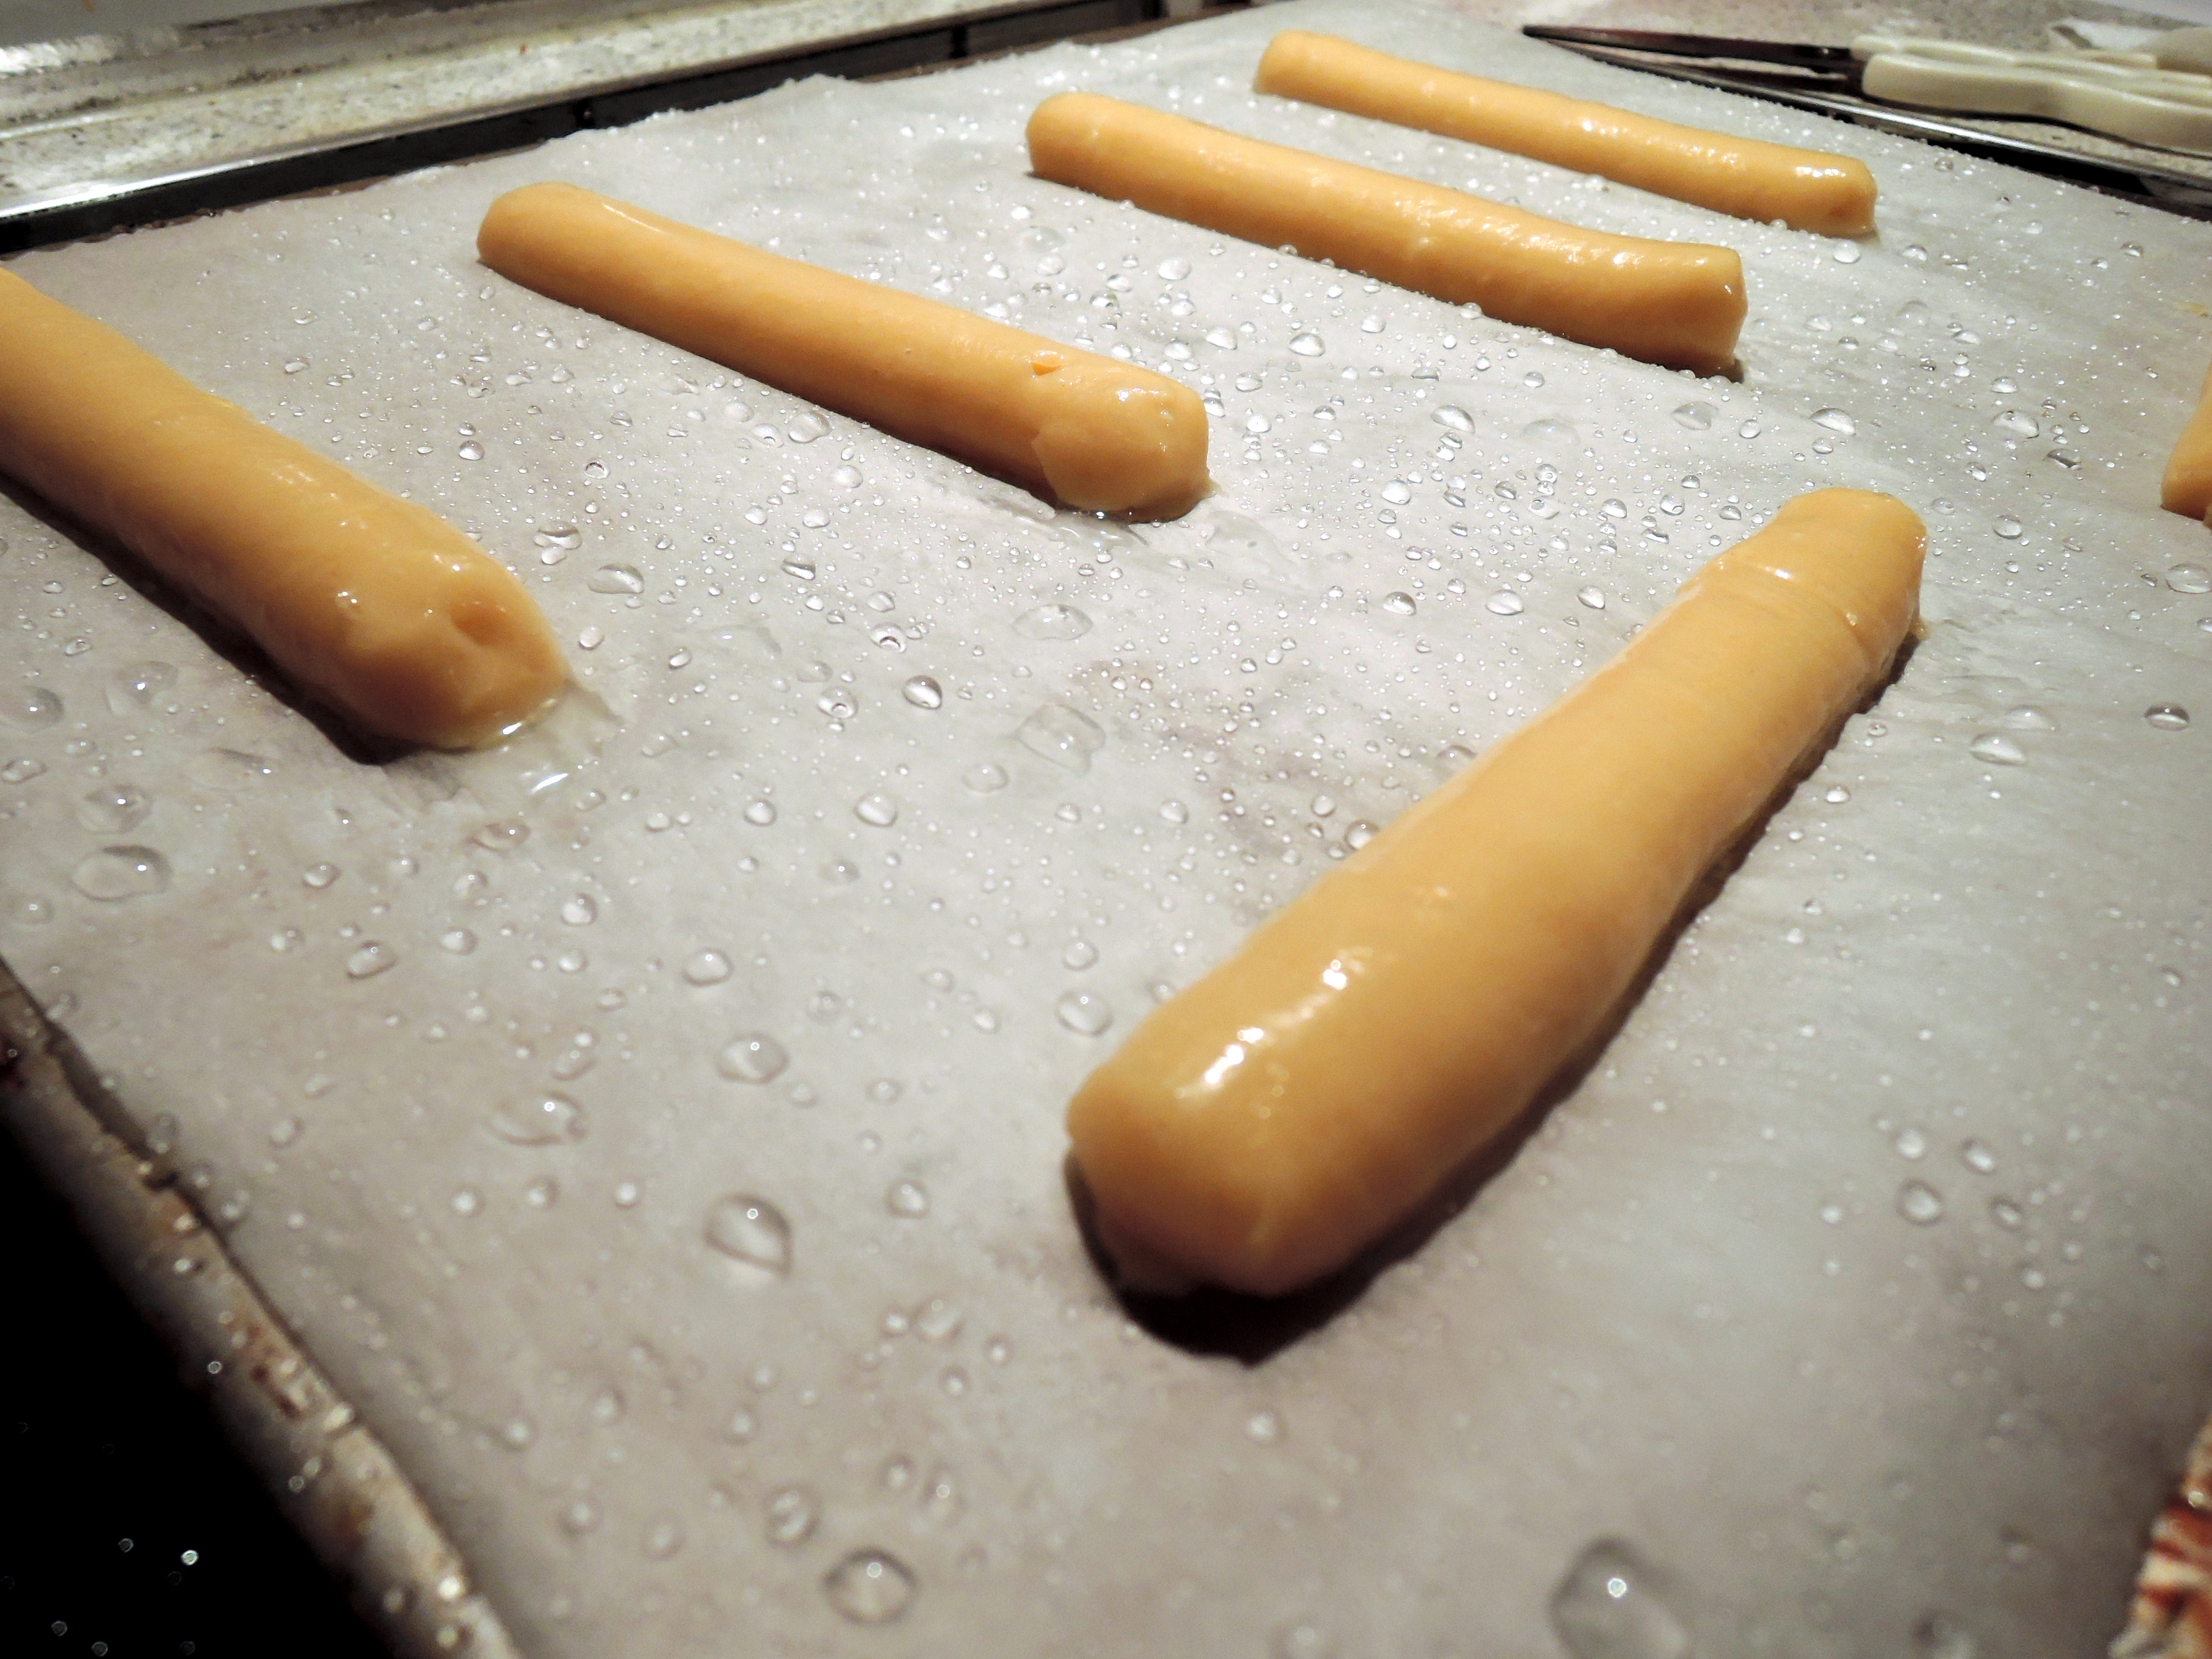
Step 6: Fill your Dough into the piping bag with the 2cm Ø tip and put about 14 cm long / 5.5 inch long eclairs on a baking sheet. If you form tongues or they are simply misshaped, wet your fingertip with water and push the eclair into the correct shape. Afterward, you want to spray the entire baking sheet, with the eclairs on it, with water. This is an important step as the eclairs need the steam to rise.
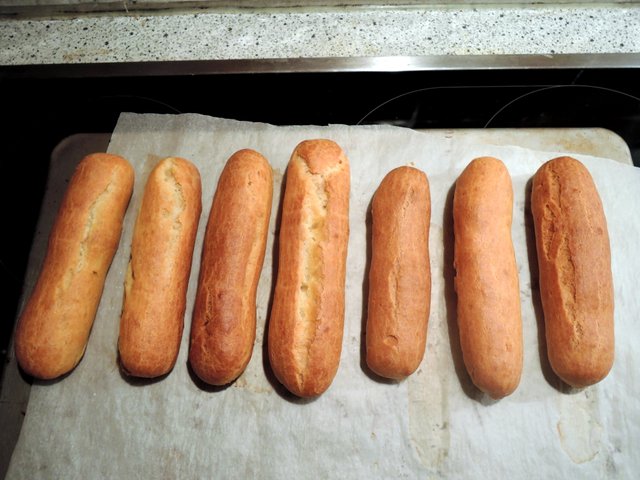
Step 7: Put the eclairs into the oven and while doing that, spray some more water into the oven to ensure that enough steam is in the oven for the eclairs to rise. After closing the oven, drop the temperature to 170° C / 340° F and don't open the oven again for the next 35 minutes or until the eclairs reached a nice golden brown color.
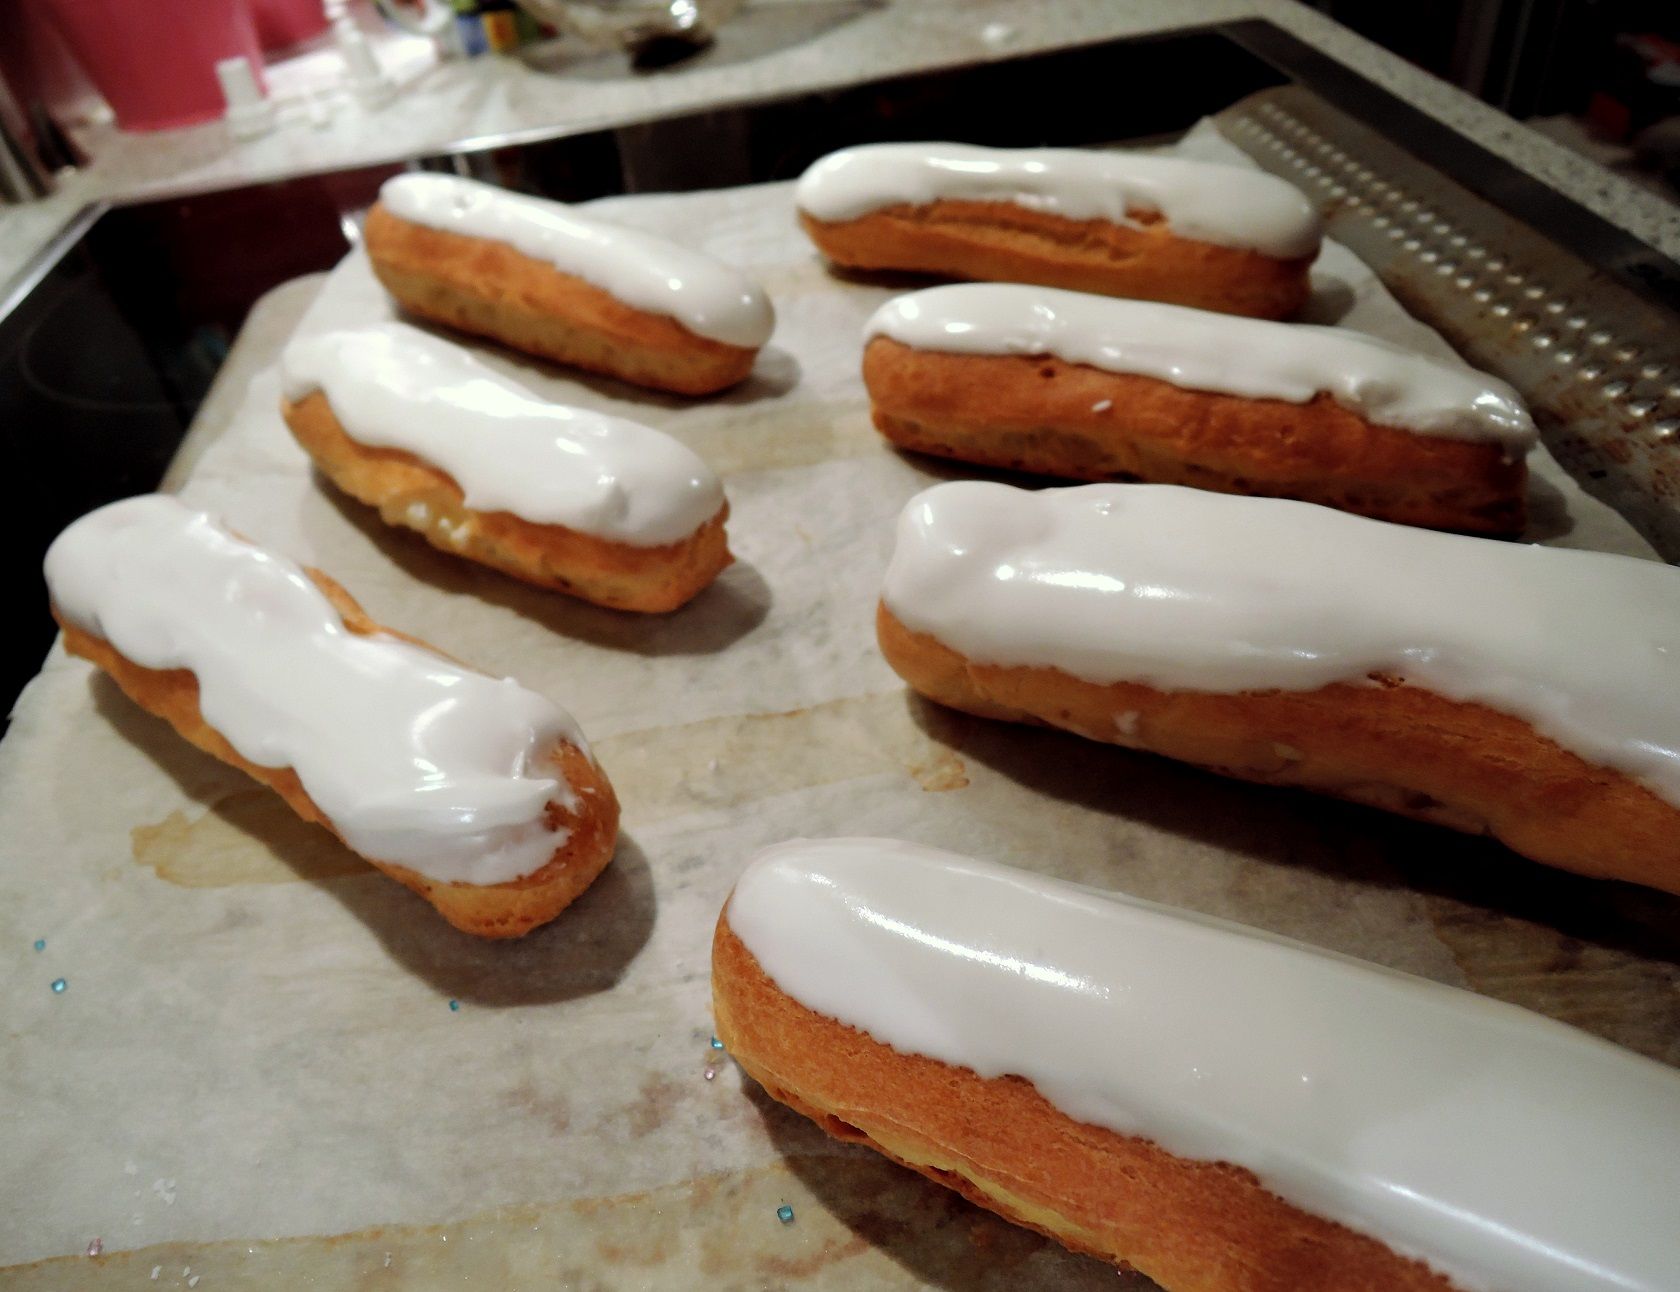
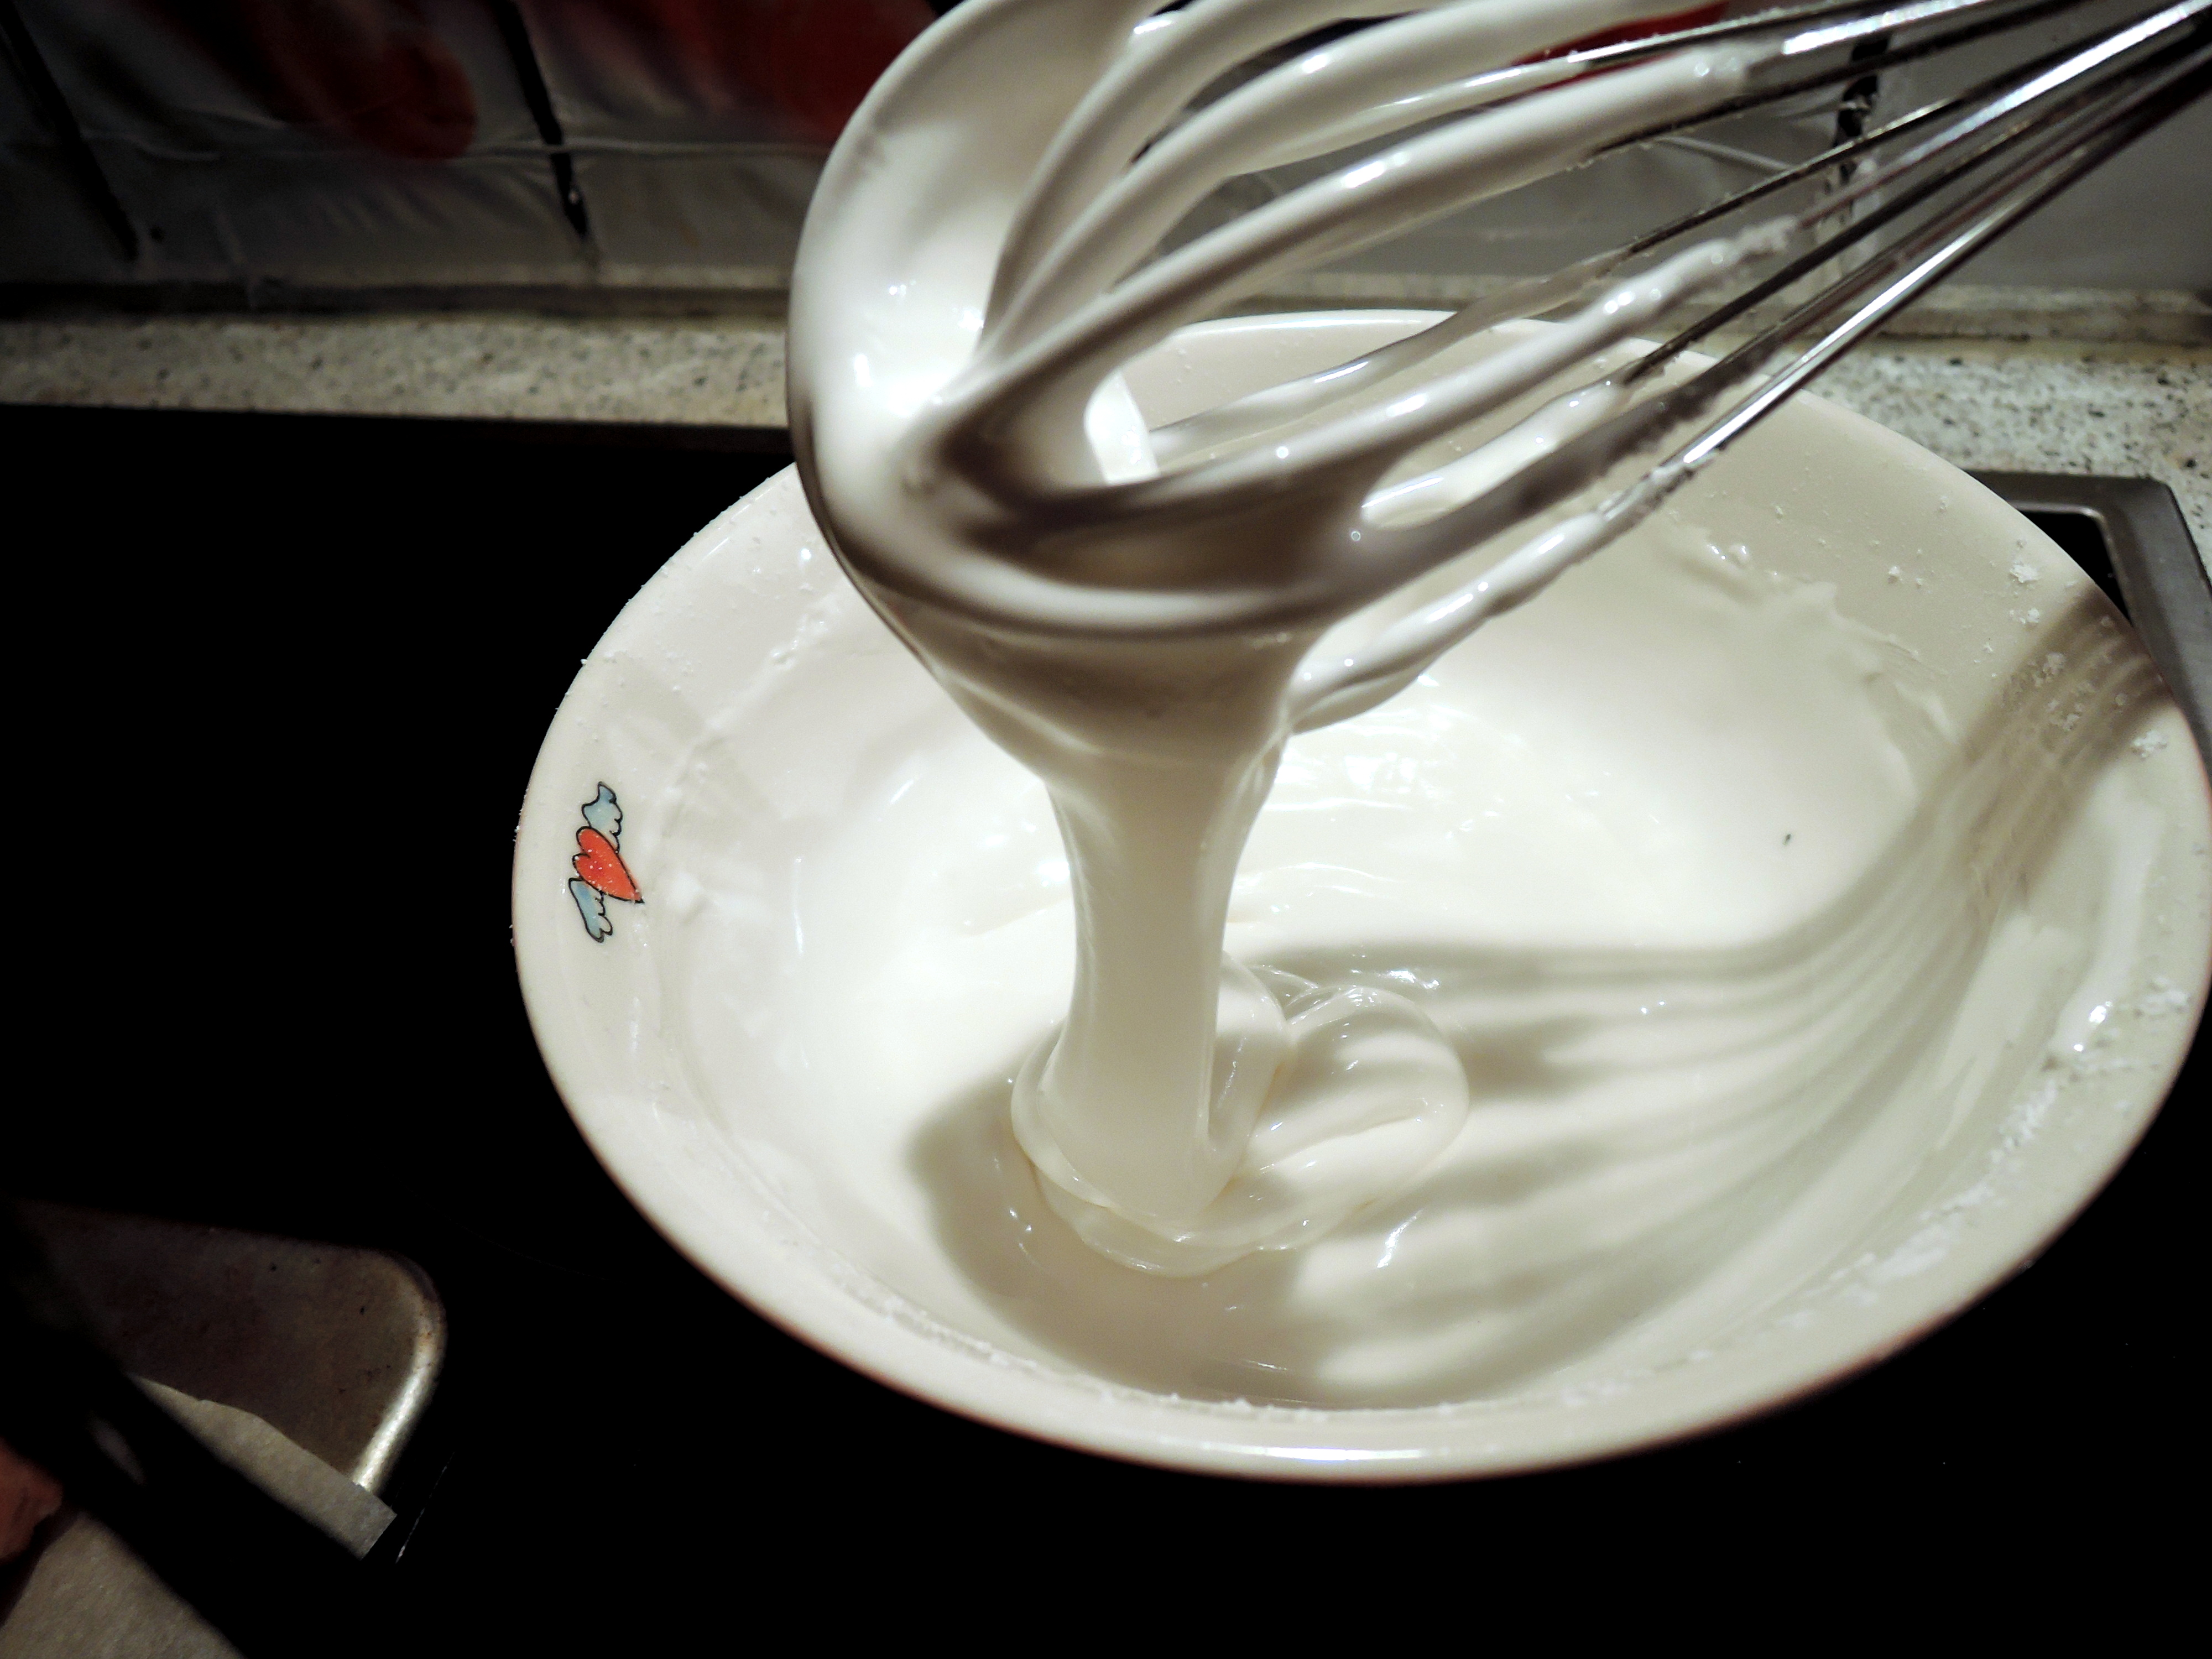
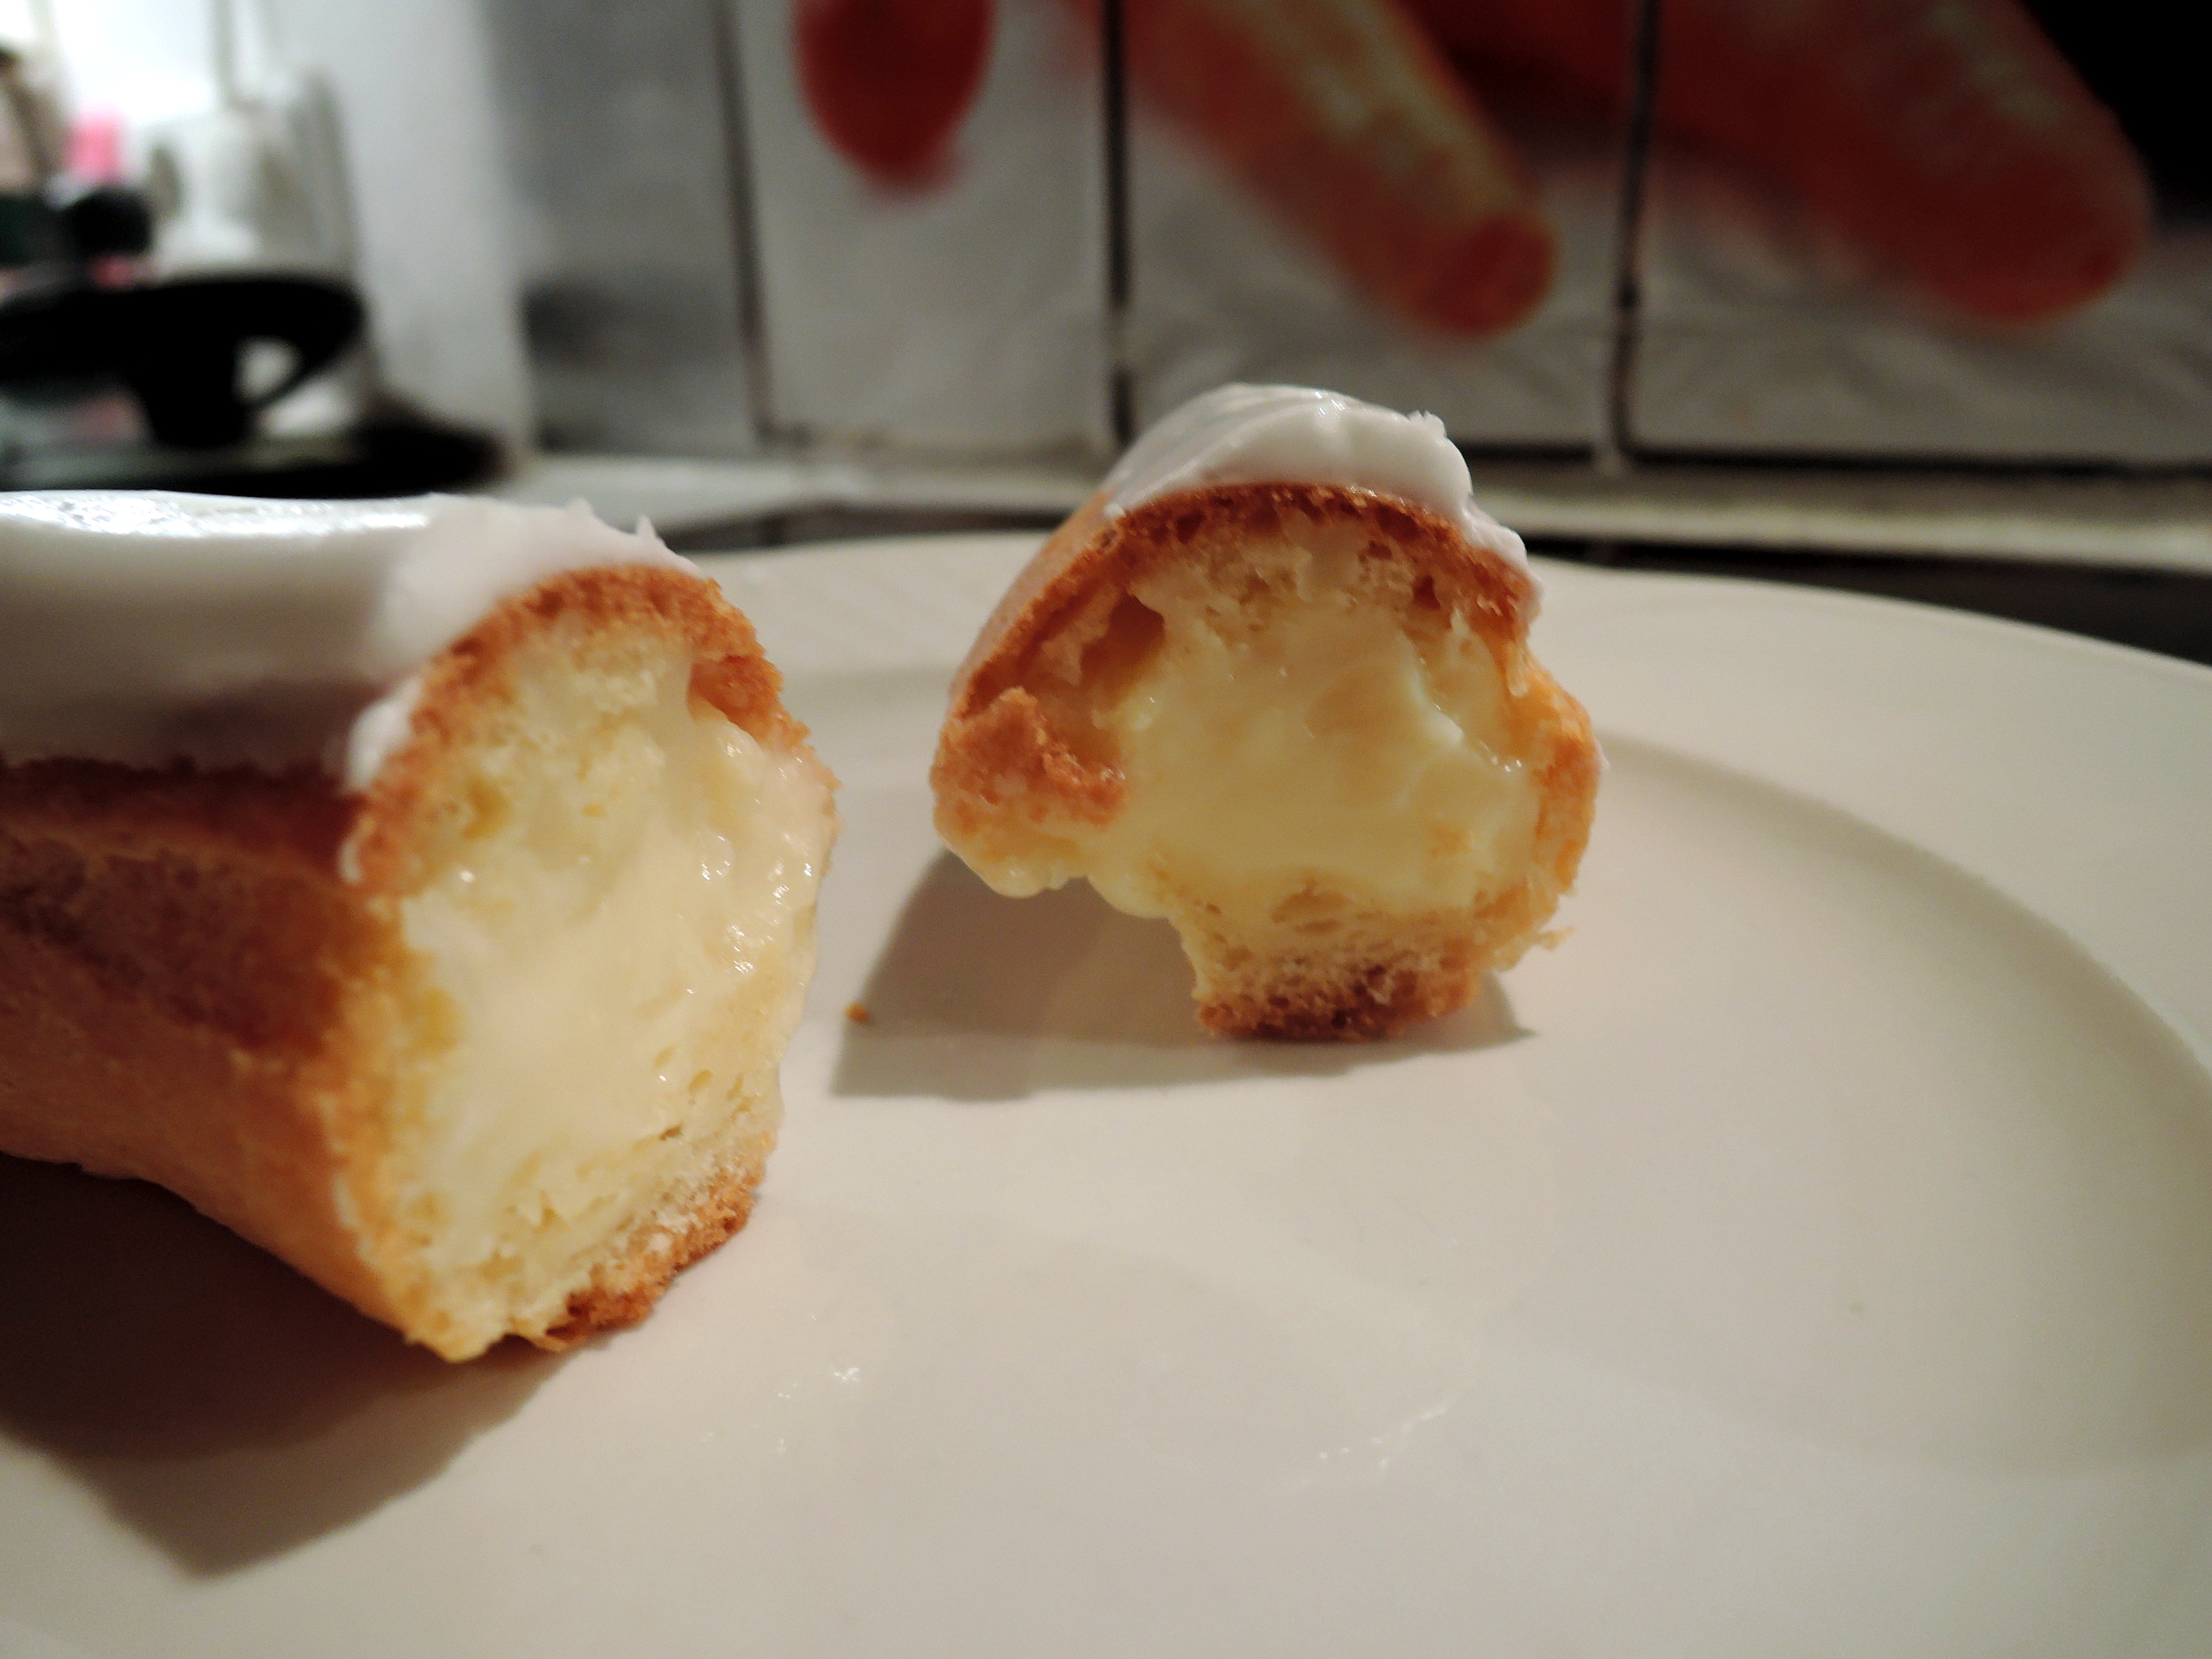
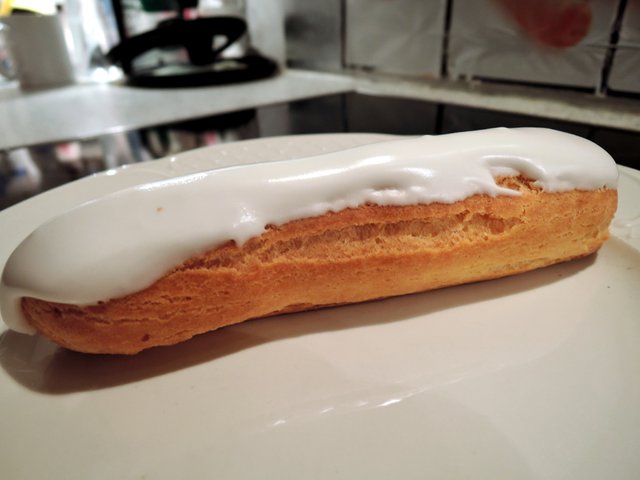
Step 8: Once the Eclairs are done you need to cool them down completely or the filling will clot. The icing is pretty easy. Simply add the powdered sugar to the egg white and keep adding more powdered sugar until you get this thick icing that you need. (Typically the icing should not run at all [you can see in the picture the icing is even folding instead of fusing back into the mass] and to make it smoother add some lemon juice.)
Step 9: Once the Eclairs are cooled down you can fill them with the cream. For that get a thin piping bag tip and poke 3 holes along the Eclair. Now just fill the eclair at those holes and afterward, dip them into the icing. To ensure the icing is even, you can simply use a finger and spread on some more icing.
Footer:
Okay okay yes I know, this is way too long for steemit but whatever I want to write down my recipes and steemit is as good as any other blogging site. So yes the length of this post will probably scare everyone away (at least the 10 views that I get LOL) but ey, if somebody ever wants a detailed eclair recipe. He will find it here. But don't worry those long post won't become the norm. For a matter of fact, I already got another recipe post ready for the weekend and that one will be far simpler and shorter. So look out for that one, because that is going to be just as delicious.
My other Recipes:
Oh and by the way. If there is a dish which you want me to do because you don't know how it is done or for whatever reason, just let me know and I will do it in the coming weeks. Don't know what to do next week anyways :b.
FromAboveHeaven
Congratulations @fromaboveheaven, this post is the eighth most rewarded post (based on pending payouts) in the last 12 hours written by a Dust account holder (accounts that hold between 0 and 0.01 Mega Vests). The total number of posts by Dust account holders during this period was 10076 and the total pending payments to posts in this category was $1492.17. To see the full list of highest paid posts across all accounts categories, click here.
If you do not wish to receive these messages in future, please reply stop to this comment.
Great post and so detailed recipe! Good work! 😀
Thanks, I appreciate it :)
Yeah I know this went on to get a far bigger recipe then I thought and because I myself failed like 3 times, I simply didn't want that to happen to anyone else. So I made this as in-depth as I could ^^. In case anyone ever has trouble with making eclairs my recipe will be his savior :D or at least I hope it will.
Please I need my own to be sent to me via e-mail
Oh gosh, you just sent me to pastry heaven! I could eat Eclares forever, yum! Thank you for this easy to follow recipe.😋
Thanks, ^^ I hope you enjoy it. I made it as detailed as possible so everyone can do it :P
Wow, da haste ja richtig tolle Rewards bekommen, weiter so! :)
Leider hast den Post auf 100% Steempower gestellt, das war eher nicht so klug 😅
Ja das ist schon ordentlich bitter xD Wollte ja eigentlich nur mal mir den Einstellungen rumspiellen, mit den 0.1 die ich normaler weise von nem post bekomme wäre mir das eh schnuppe. Aber das ich dann einmal rum experimentiere und dann darauf direkt 50 $ bekomme, damit hatte ich auch nicht gerechnet x.x aber naja kann ich jetzt auch nixmehr machen. Wie es in den meisten wuxia ja immer gesagt wird. There are no pills for regret ^^. Jetzt mach ich's wieder auf 50 / 50 und bekomme dann wieder 0.1 $ 😅
Naja kann mich aber trozdem nicht beschweren, die 20 SP sind trozdem viel für mich.
Außerdem ists beim aktuellen Kurs eh noch verkraftbar, bei 1SBD=8Dollar hättest Blut gespuckt 😂
Wollte nur sichergehen, ob du das mit der Einstellung auch verstanden hast, nicht dass es wieder passiert :)
Klar so schnell 20 SP sind absoluter Wahnsinn am Anfang! Da würden dich eh schon viele beneiden :)
Btw. hast du dir schon den @ginabot angeguckt/eingerichtet?
Dann hätte ich mich echt umgebracht 😂.
Ja hab alles so weit jetzt verstanden, spiele halt momentan noch en bisschen mit den ganzen Einstellungen rum und probiere verschieden Service wie Steemauto aus.
Hab mir den Bot gerade mal angeschaut und auch direkt mal eingerichtet ^^ echt hilfreiches Ding mit dem Followeralert und so.
Ach was, was dir erst für Rewards entgehen wenn du tot bist 😂
Ja generell für alles, ansonsten bekommst ja nie in echtzeit mit was gerade passiert, außer man hat gerade steemworld offen^^
Ohne meine liebste Gina ginge gar nichts :D
Steemplus ist auch noch interessant falls du das noch nicht hast :)
Dann noch meine Sidebar und du hast schon mal das wichtigste beisammen^^
Hab noch vor in den kommenden wochen rezepte in Deutsch zu schreiben weiß aber noch nicht wie ich das mache. Ob ich das jetzt alles zusammen in einem post mache oder immer zwei verschiedene, ne idee wie ich das am besten machen würd ?^^
Hab gesehen das du auch oft die beiden Sprachen neben einander in einem Post schreibst. Und deine Sidebar ist echt nicht schlecht :b Gute Arbeit.
Nebeneinander ist echt ne Menge Aufwand^^
Ansonsten ginge natürlich noch untereinander oder getrennte Posts..
Ist bisschen Geschmackssache was man nimmt :)
Alle Wege sind gangbar^^
Danke dir, hört man gerne :)
Congratulations on mastering the process! I have tried making similar pastries in the past but no luck :(
They look tasty and awfully sweet 😉 A cup of black coffee would go with them just fine!
I feel you, I love French cuisine but some of their techniques are just super difficult. But they do taste just awesome most of the time 😅. Going try doing macarons in a couple days and see how difficult that is 😋.
Please make a post:)