Bringing it Back from the DEAD!.. PC Tech - Part 21 - Graphics Card Rescue edition.
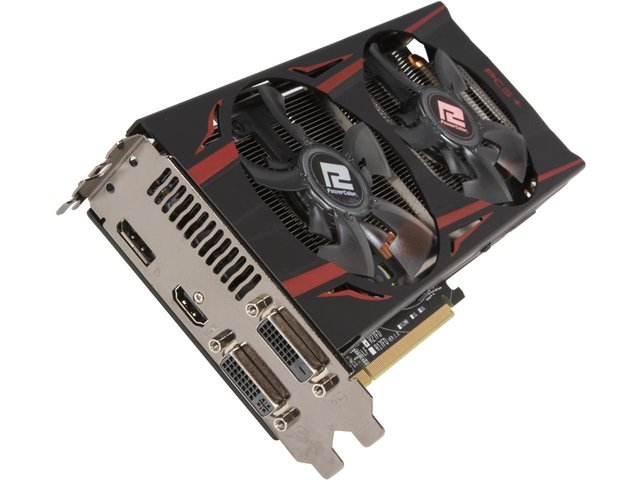
Recently, I changed my Graphics card from the old one, which had a life time of overclocked goodness that finally killed it.
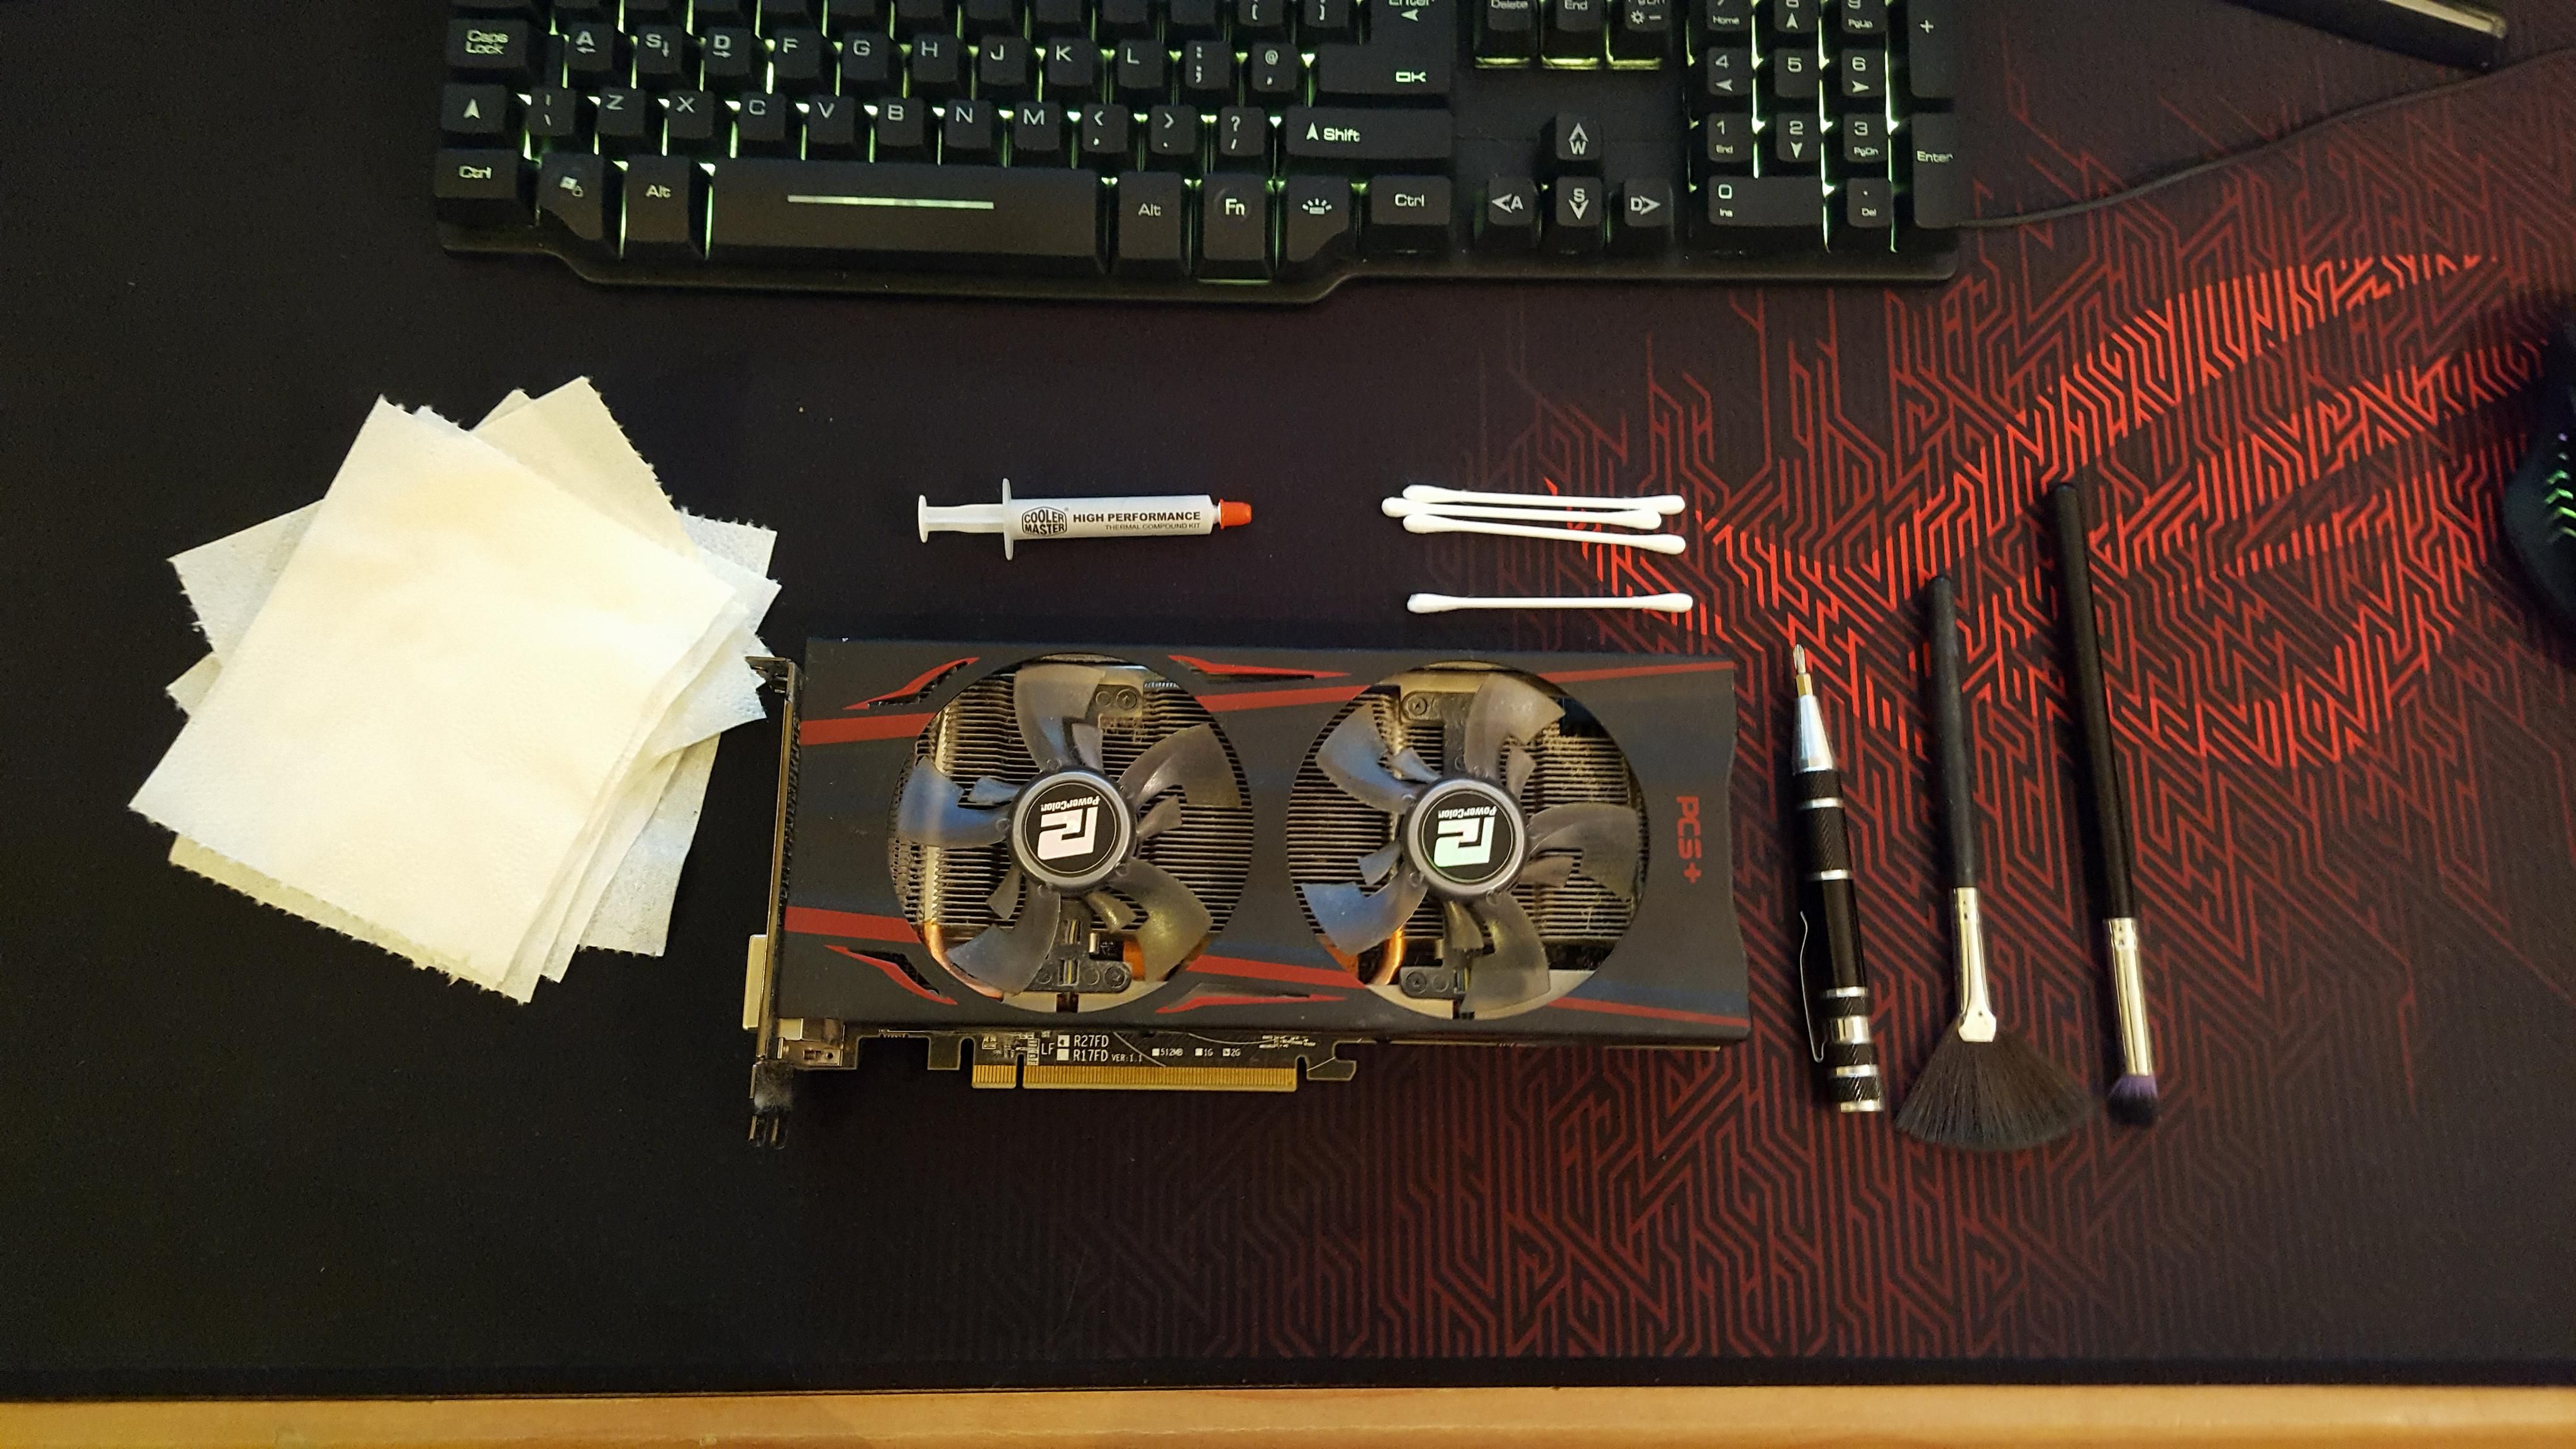
Today I am trying to see if I can revive some life back into my old trusty card buy giving it a good strip down, clean, inspection and rebuild with some fresh thermal compound that is designed specifically for GPU's.

If you have been following my Journey into Mining blog series, you will know that recently @Deeviras (the Mrs) bought me a new RX 580 8gb graphics card because of the issues I had with the second hand market and GPU's arriving dead. Aside from the mining, I needed to replace my old R9 270X 2gb card as it had locked itself a 300mhz on both the core and memory, rendering the card useless for anything other than web browsing and watching videos. Drivers removed, installed, updated, MSI after burner, under-clocking, nothing I did seemed to work, so I just gritted my teeth and put up with it until it was replaced a week or so ago.
Today it is that card I want to try and revive and bring some life back into it so it can be used for some benchmark comparisons further down the line.
Here is a quick snapshot of what the core and memory are clocked too... bit sad and depressing I know.
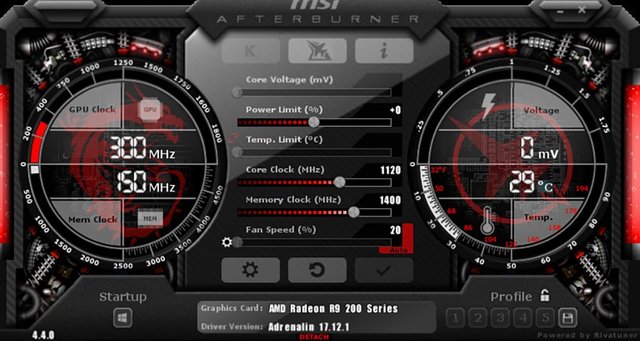
As you can see, it is on the latest drivers, the program is up to date, and the GPU is under load but the core and memory remain as they are. So I think its time for a little surgery...
I will be stripping down the GPU to access both the core itself and the PCB so I can inspect everything. First I started by setting the work area up.

For this particular card, to remove the heat sink and fans in one go you should first flip the card over.
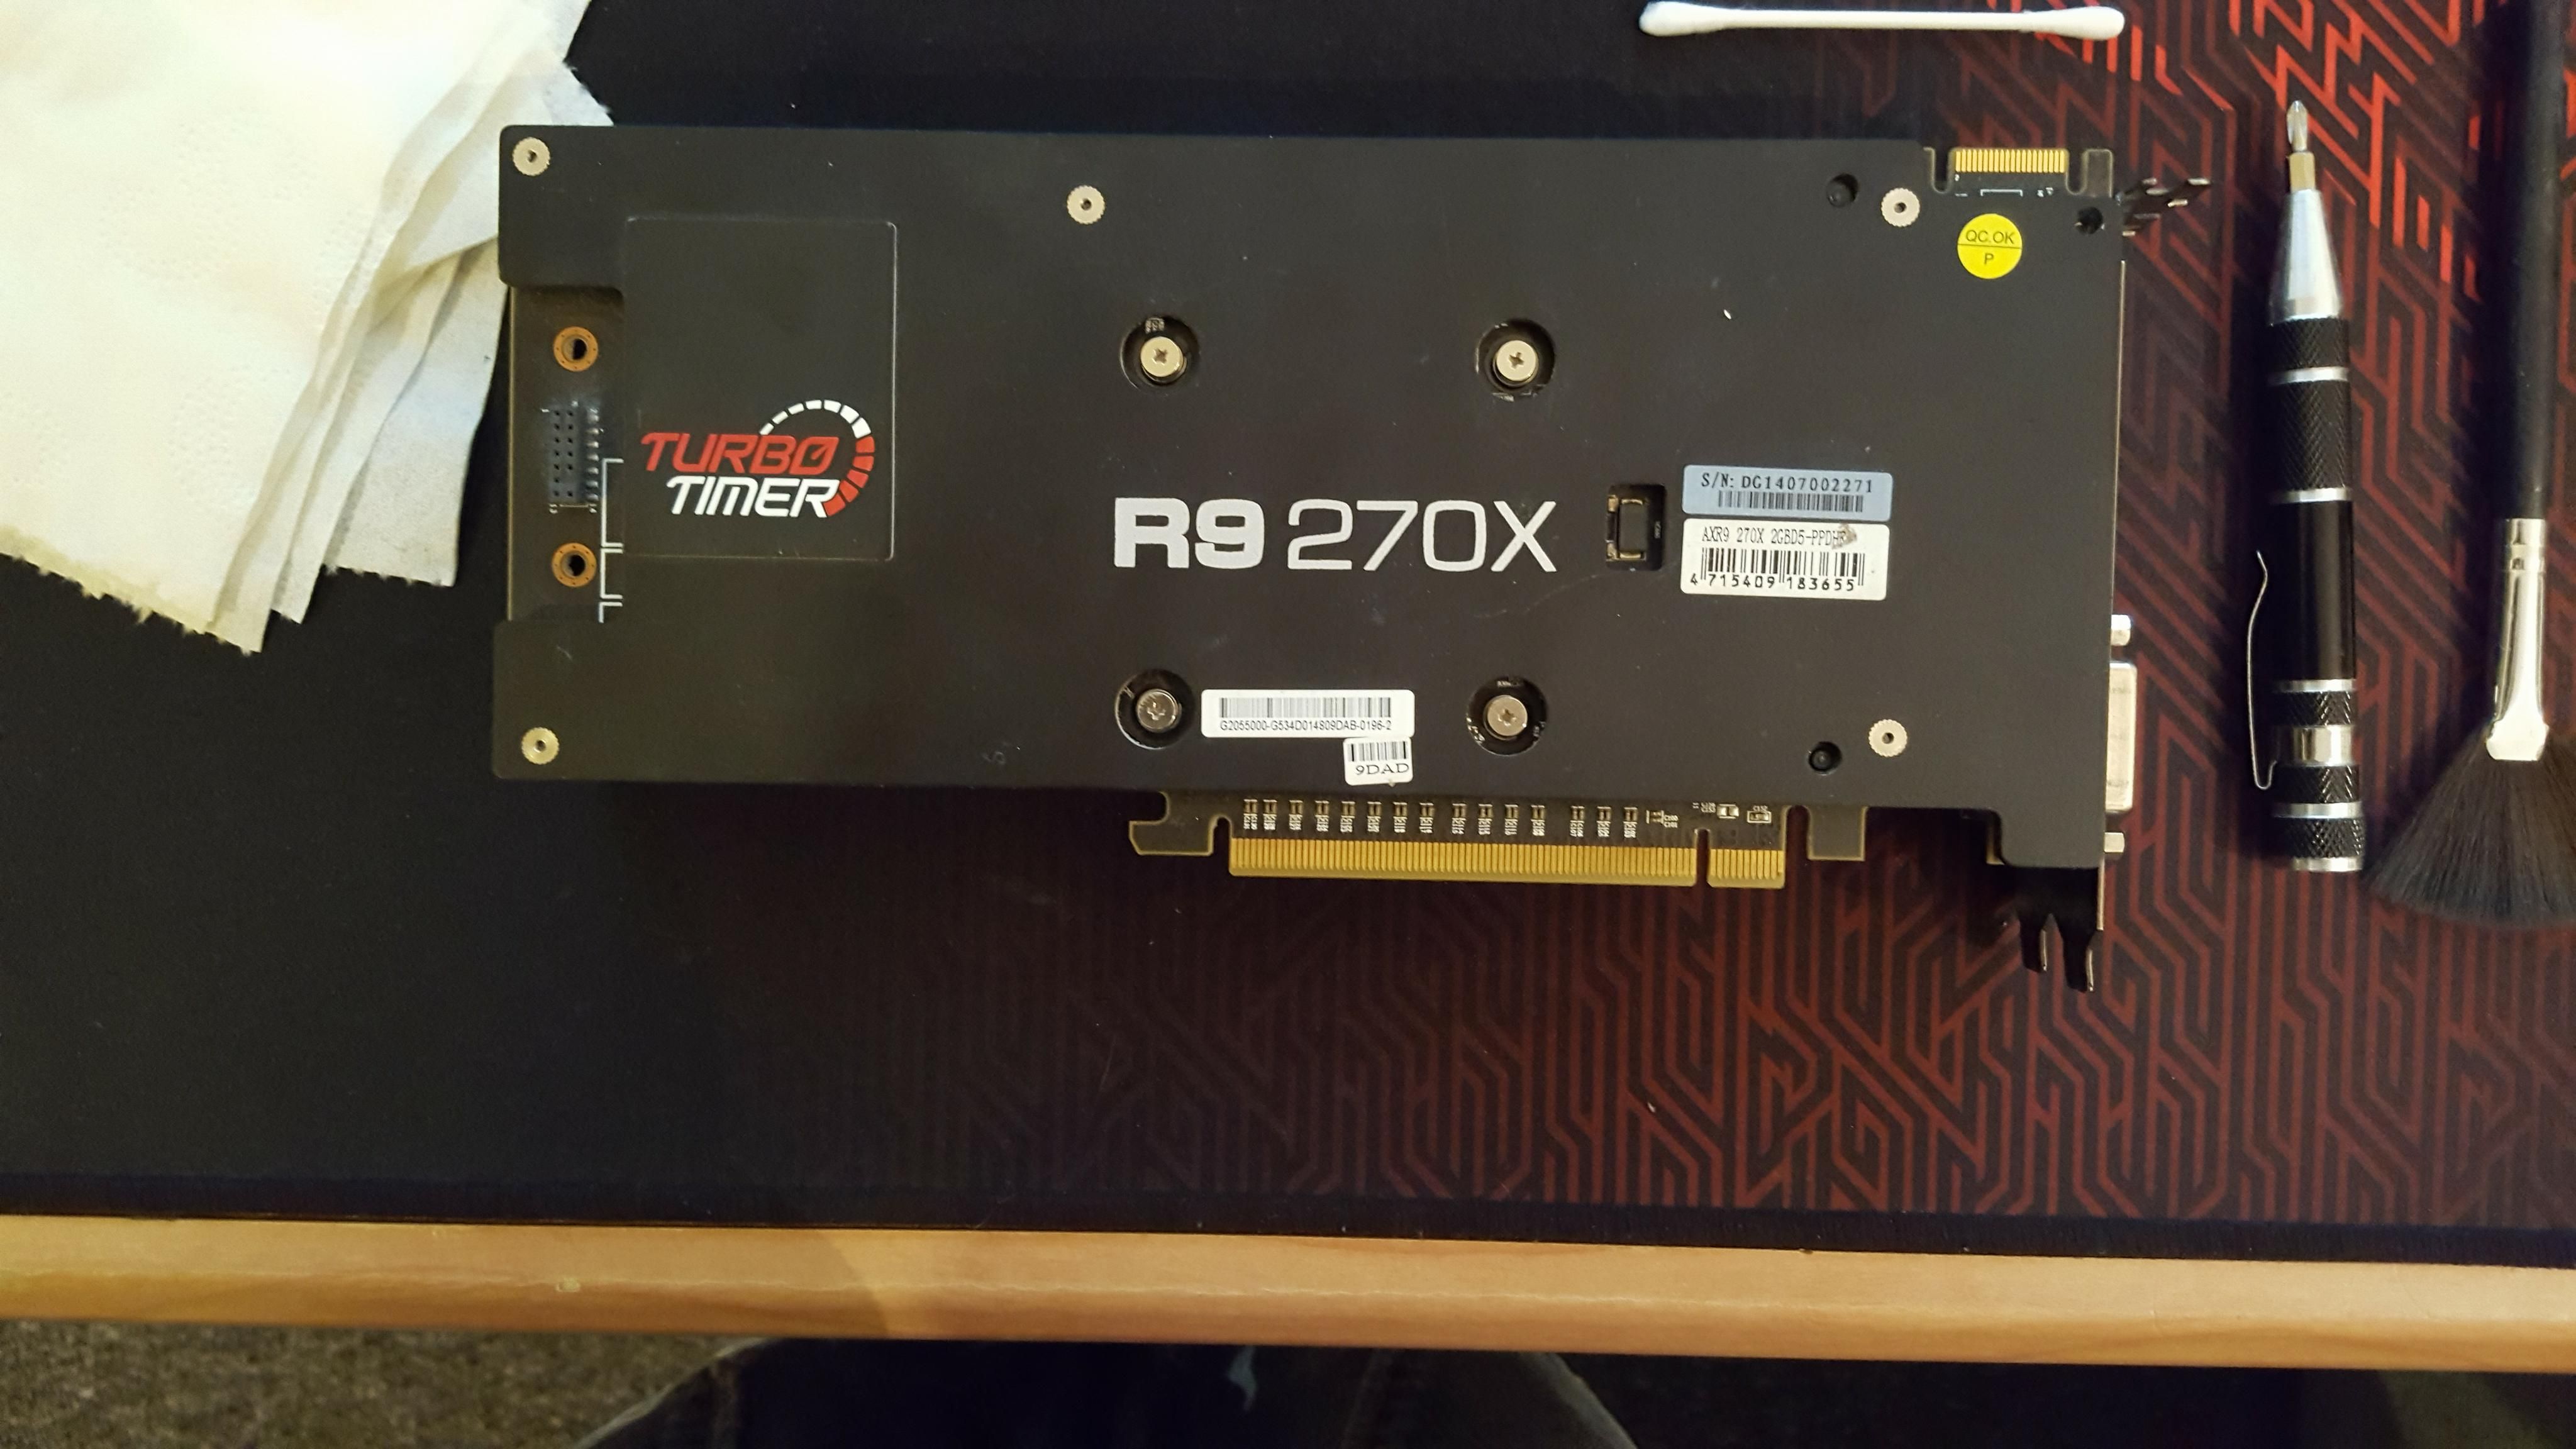
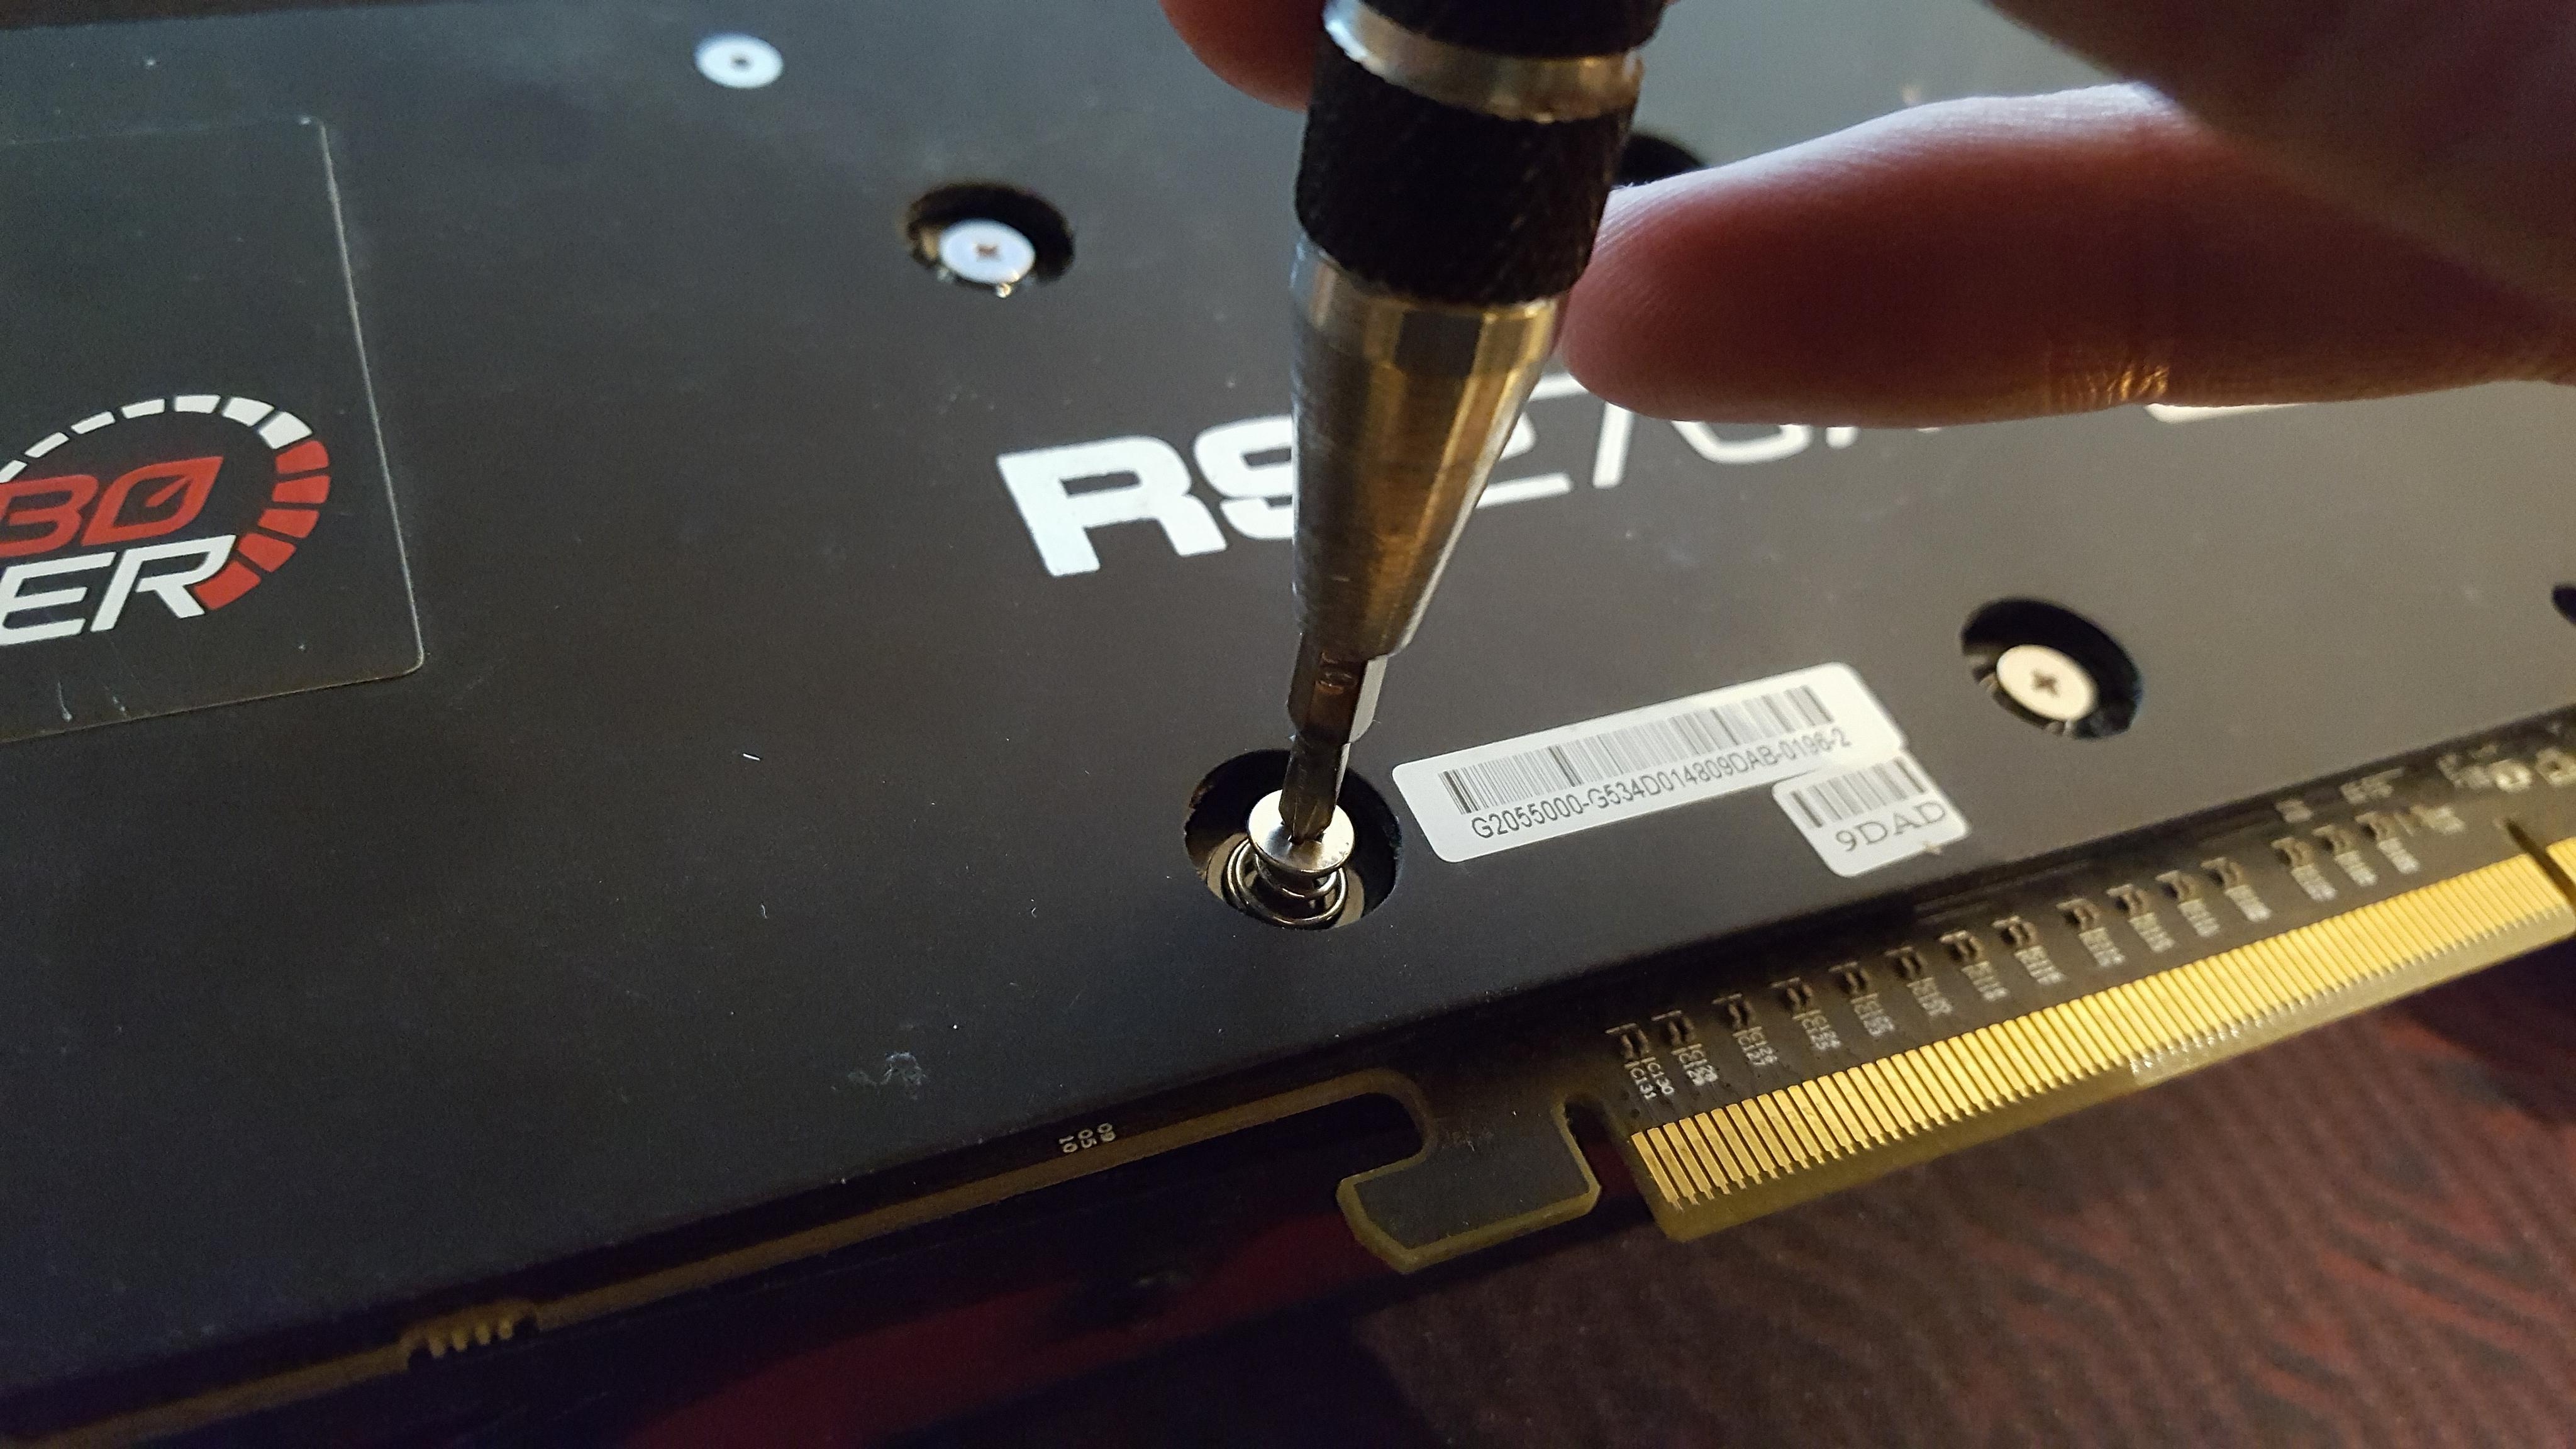
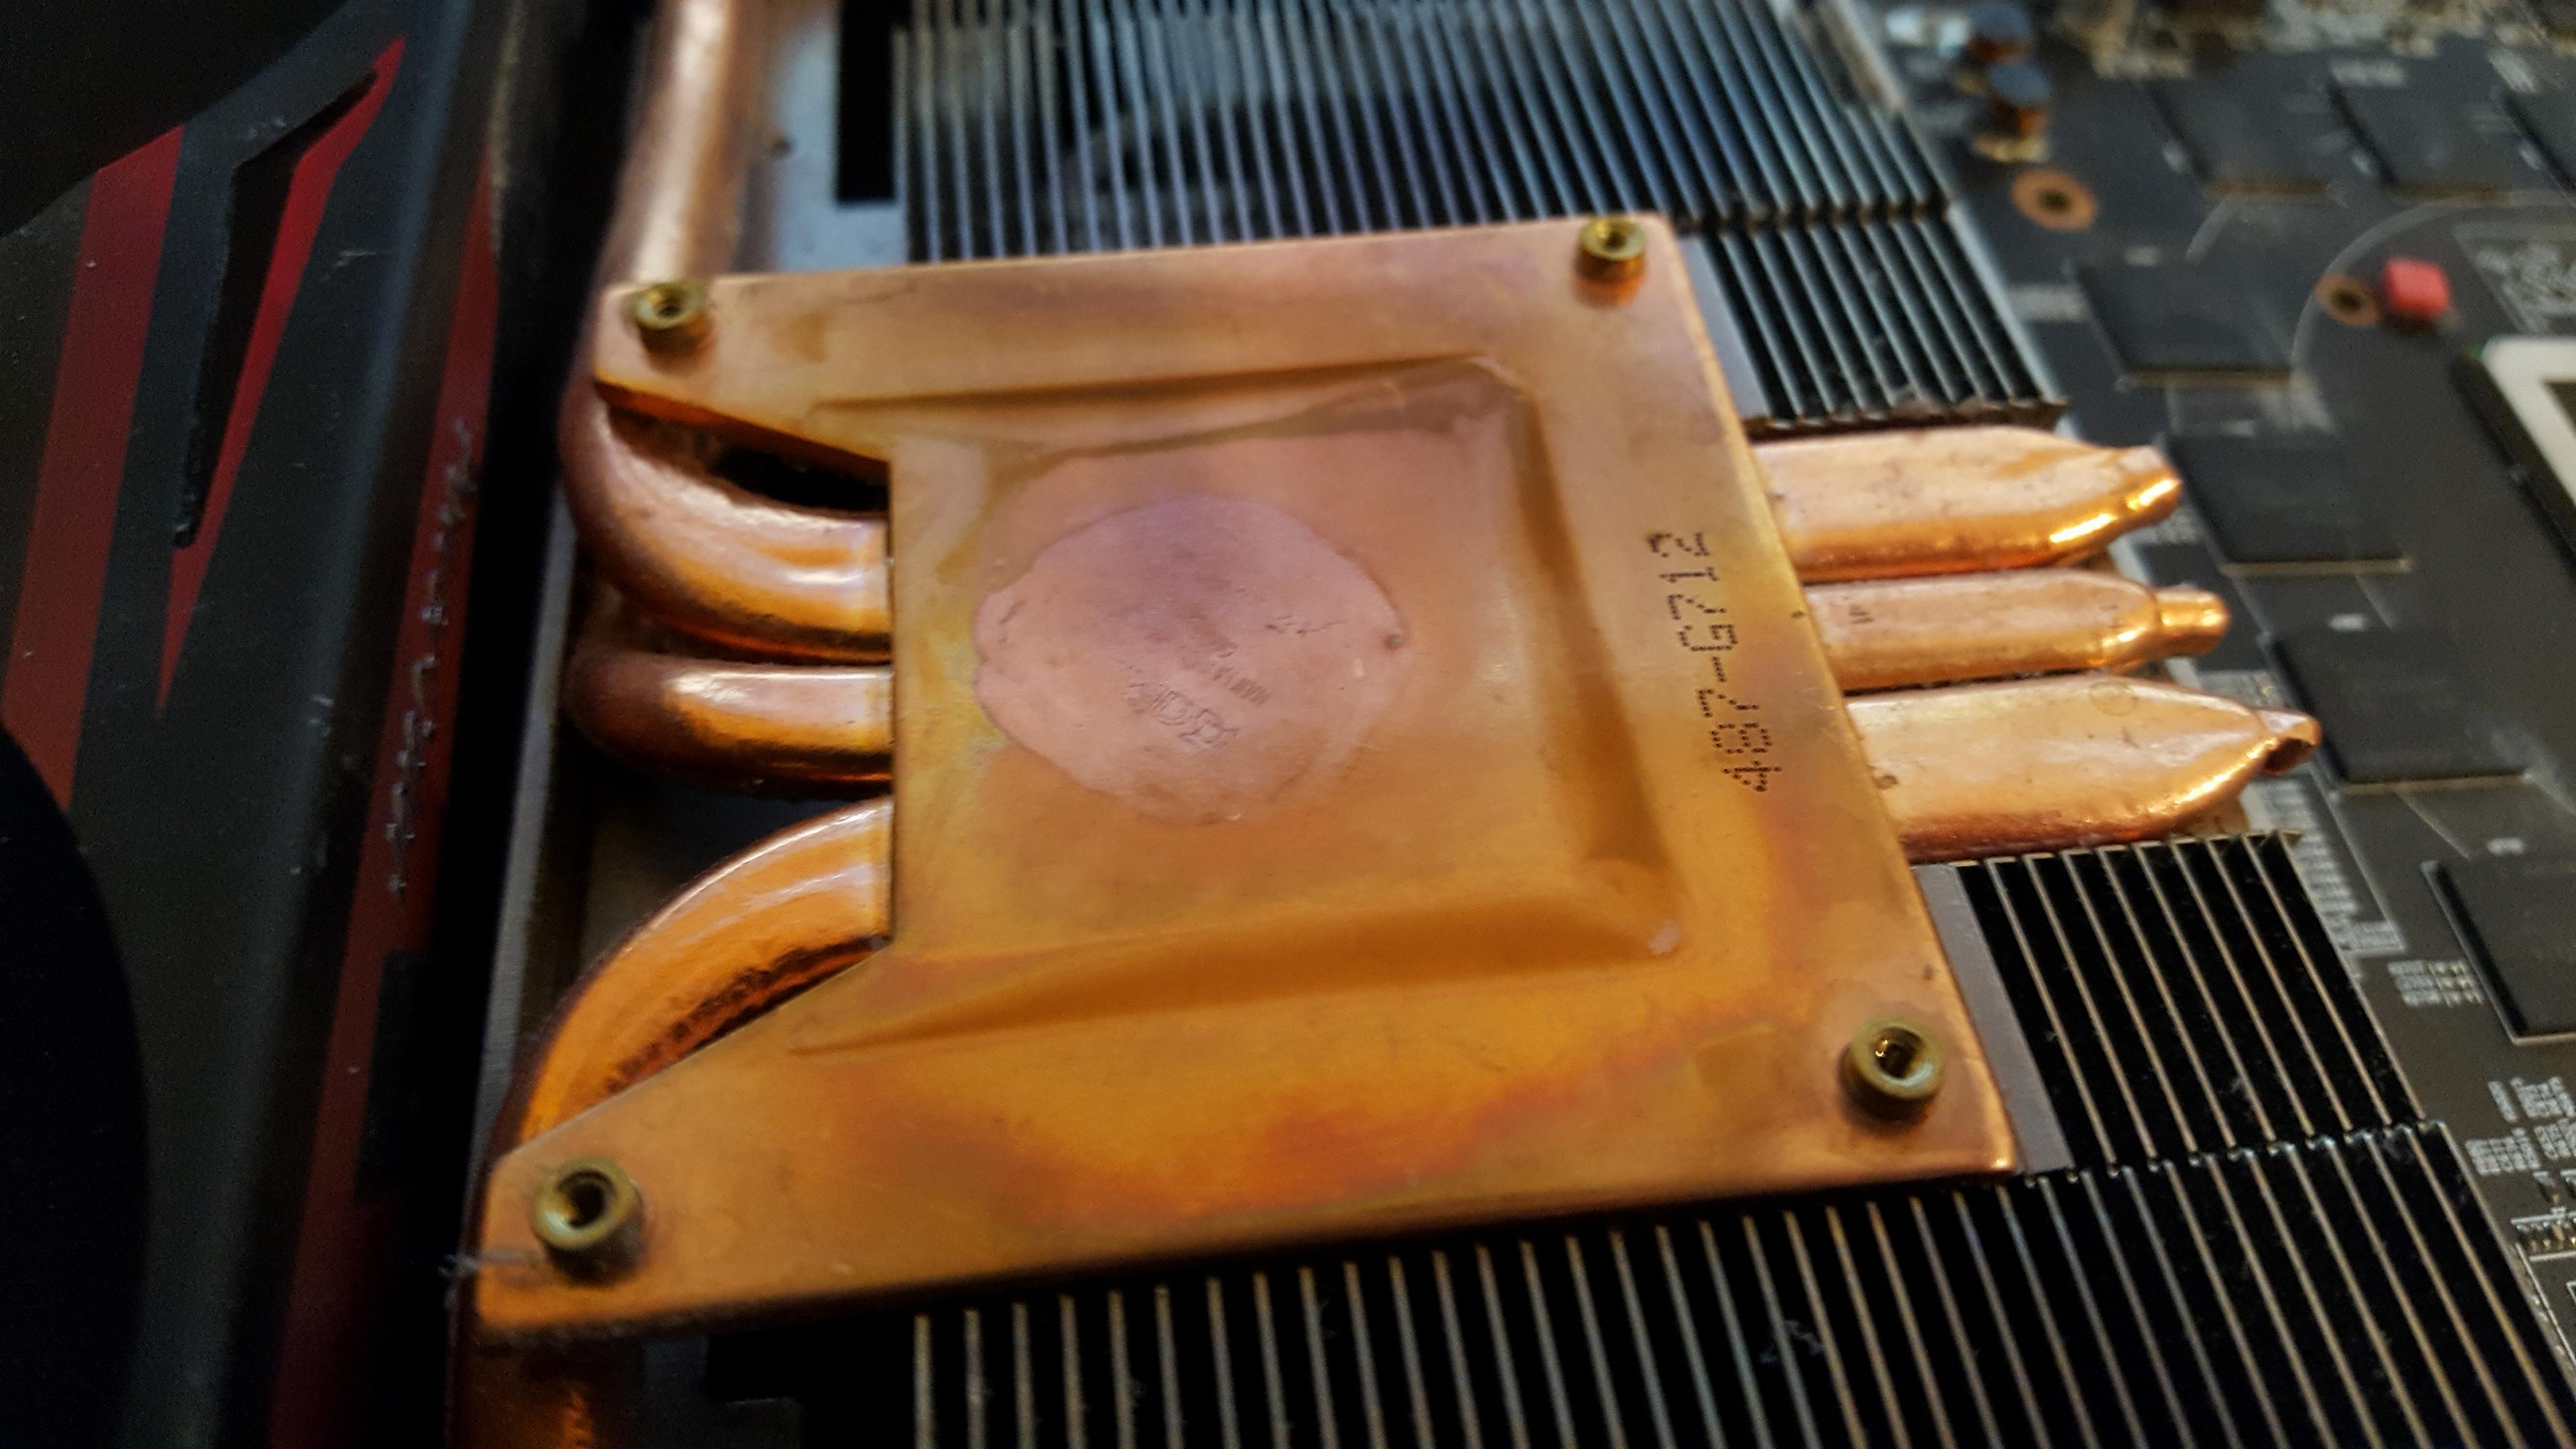
Now you will need to unscrew the 4 retaining screws that are accessible on the back of the Chip itself. Make sure to unscrew opposing corners to eliminate any undue stress on the GPU Dye.
Depending on how old the card is, the thermal compound used could have hardened. When opening the 2 halves, gently pull and twist back and forth until it comes apart.
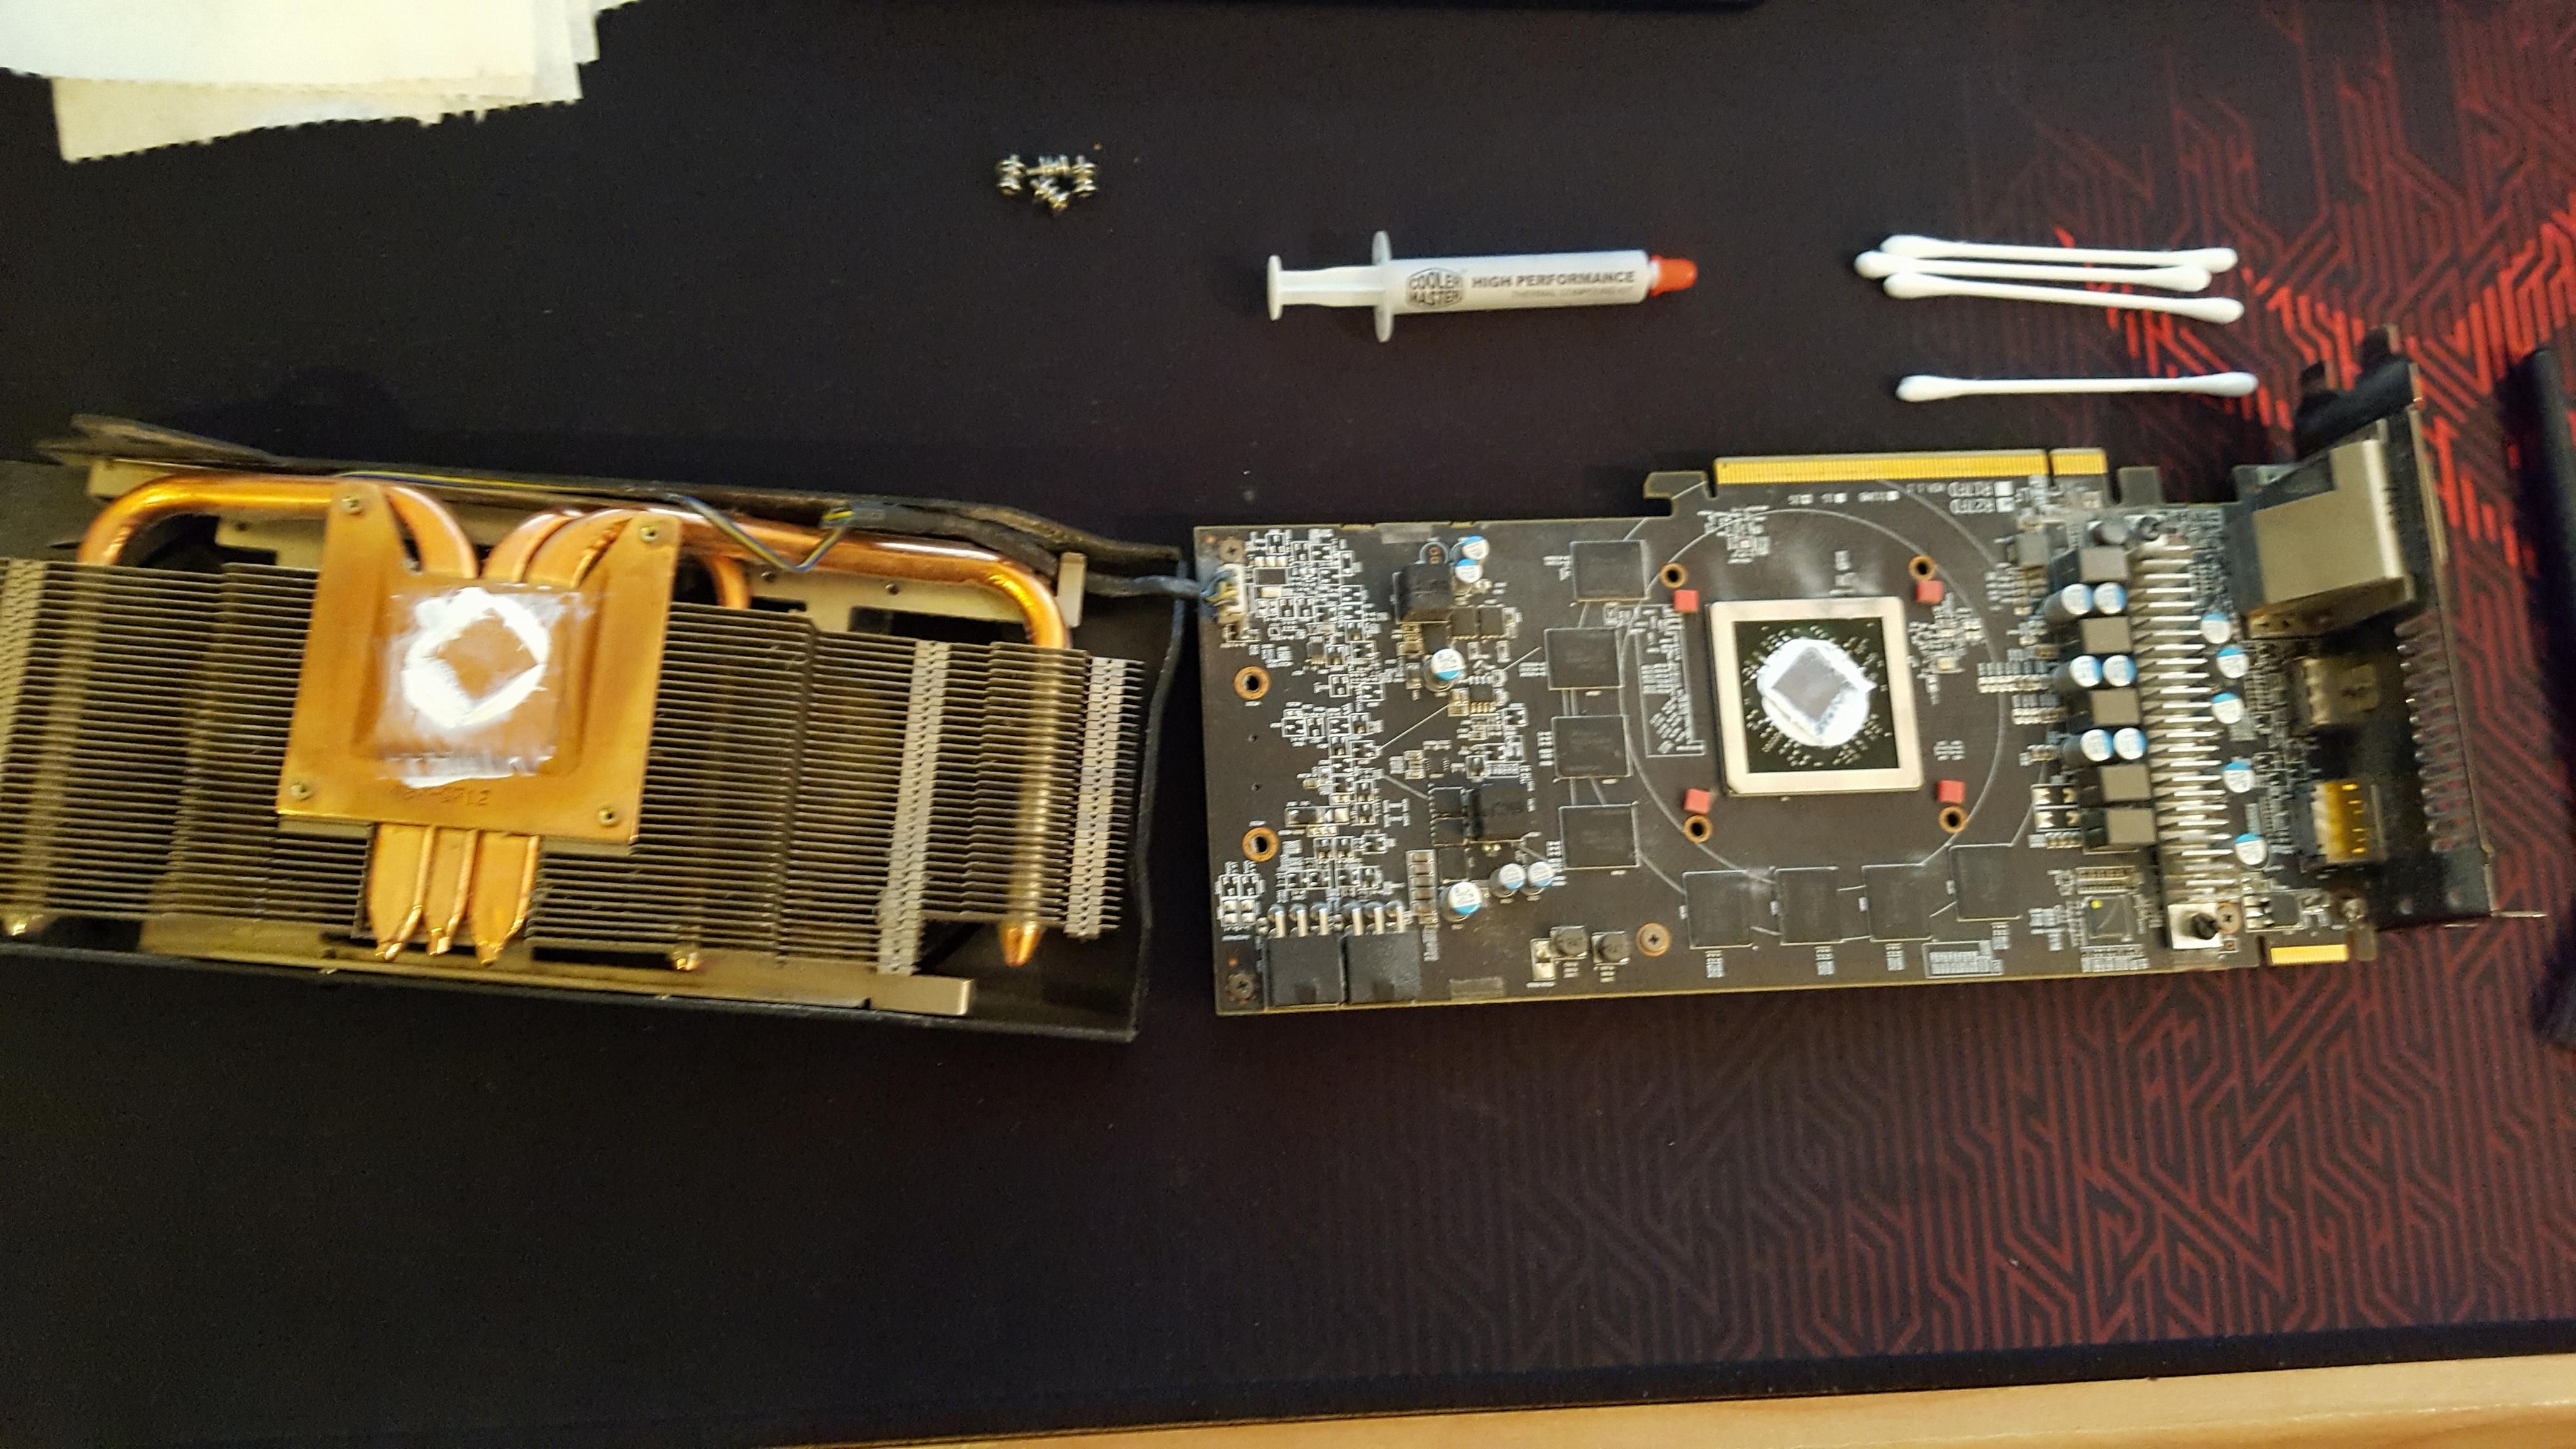
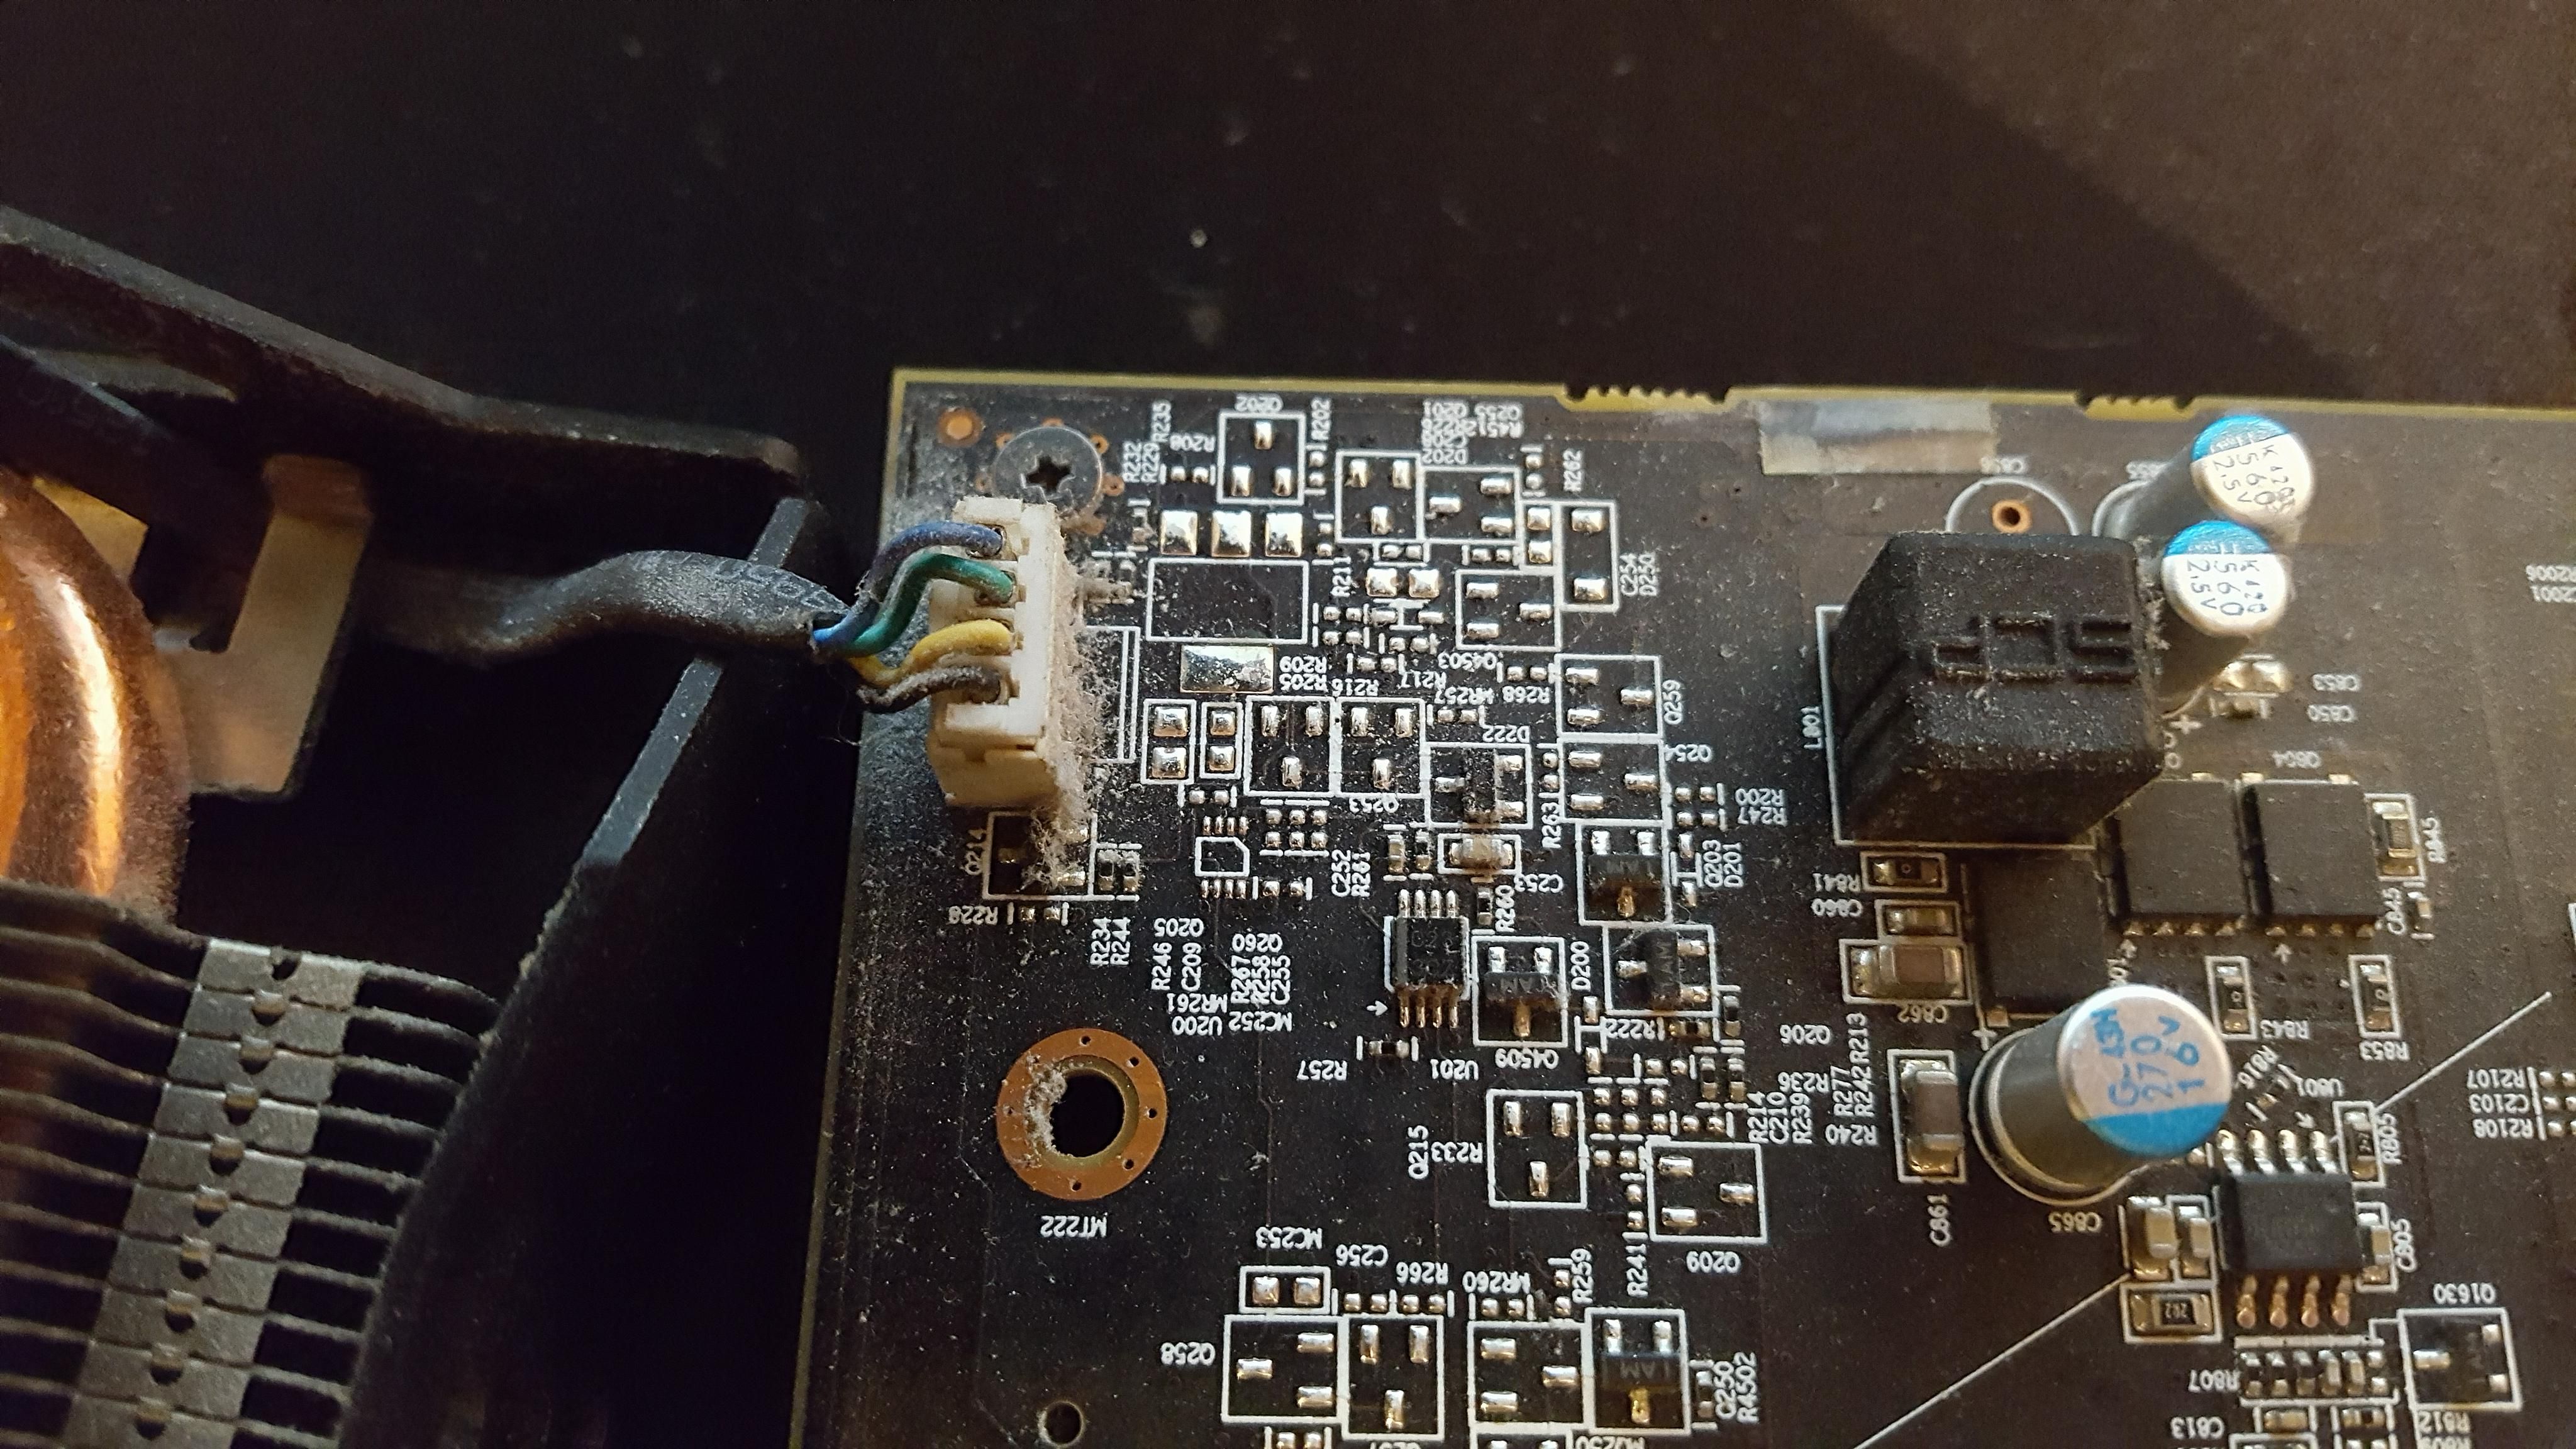
Once open, you will notice 1 or more plugs connecting the fans on one side to the main PCB. Gently remove the plugs being careful not to damage the socket.
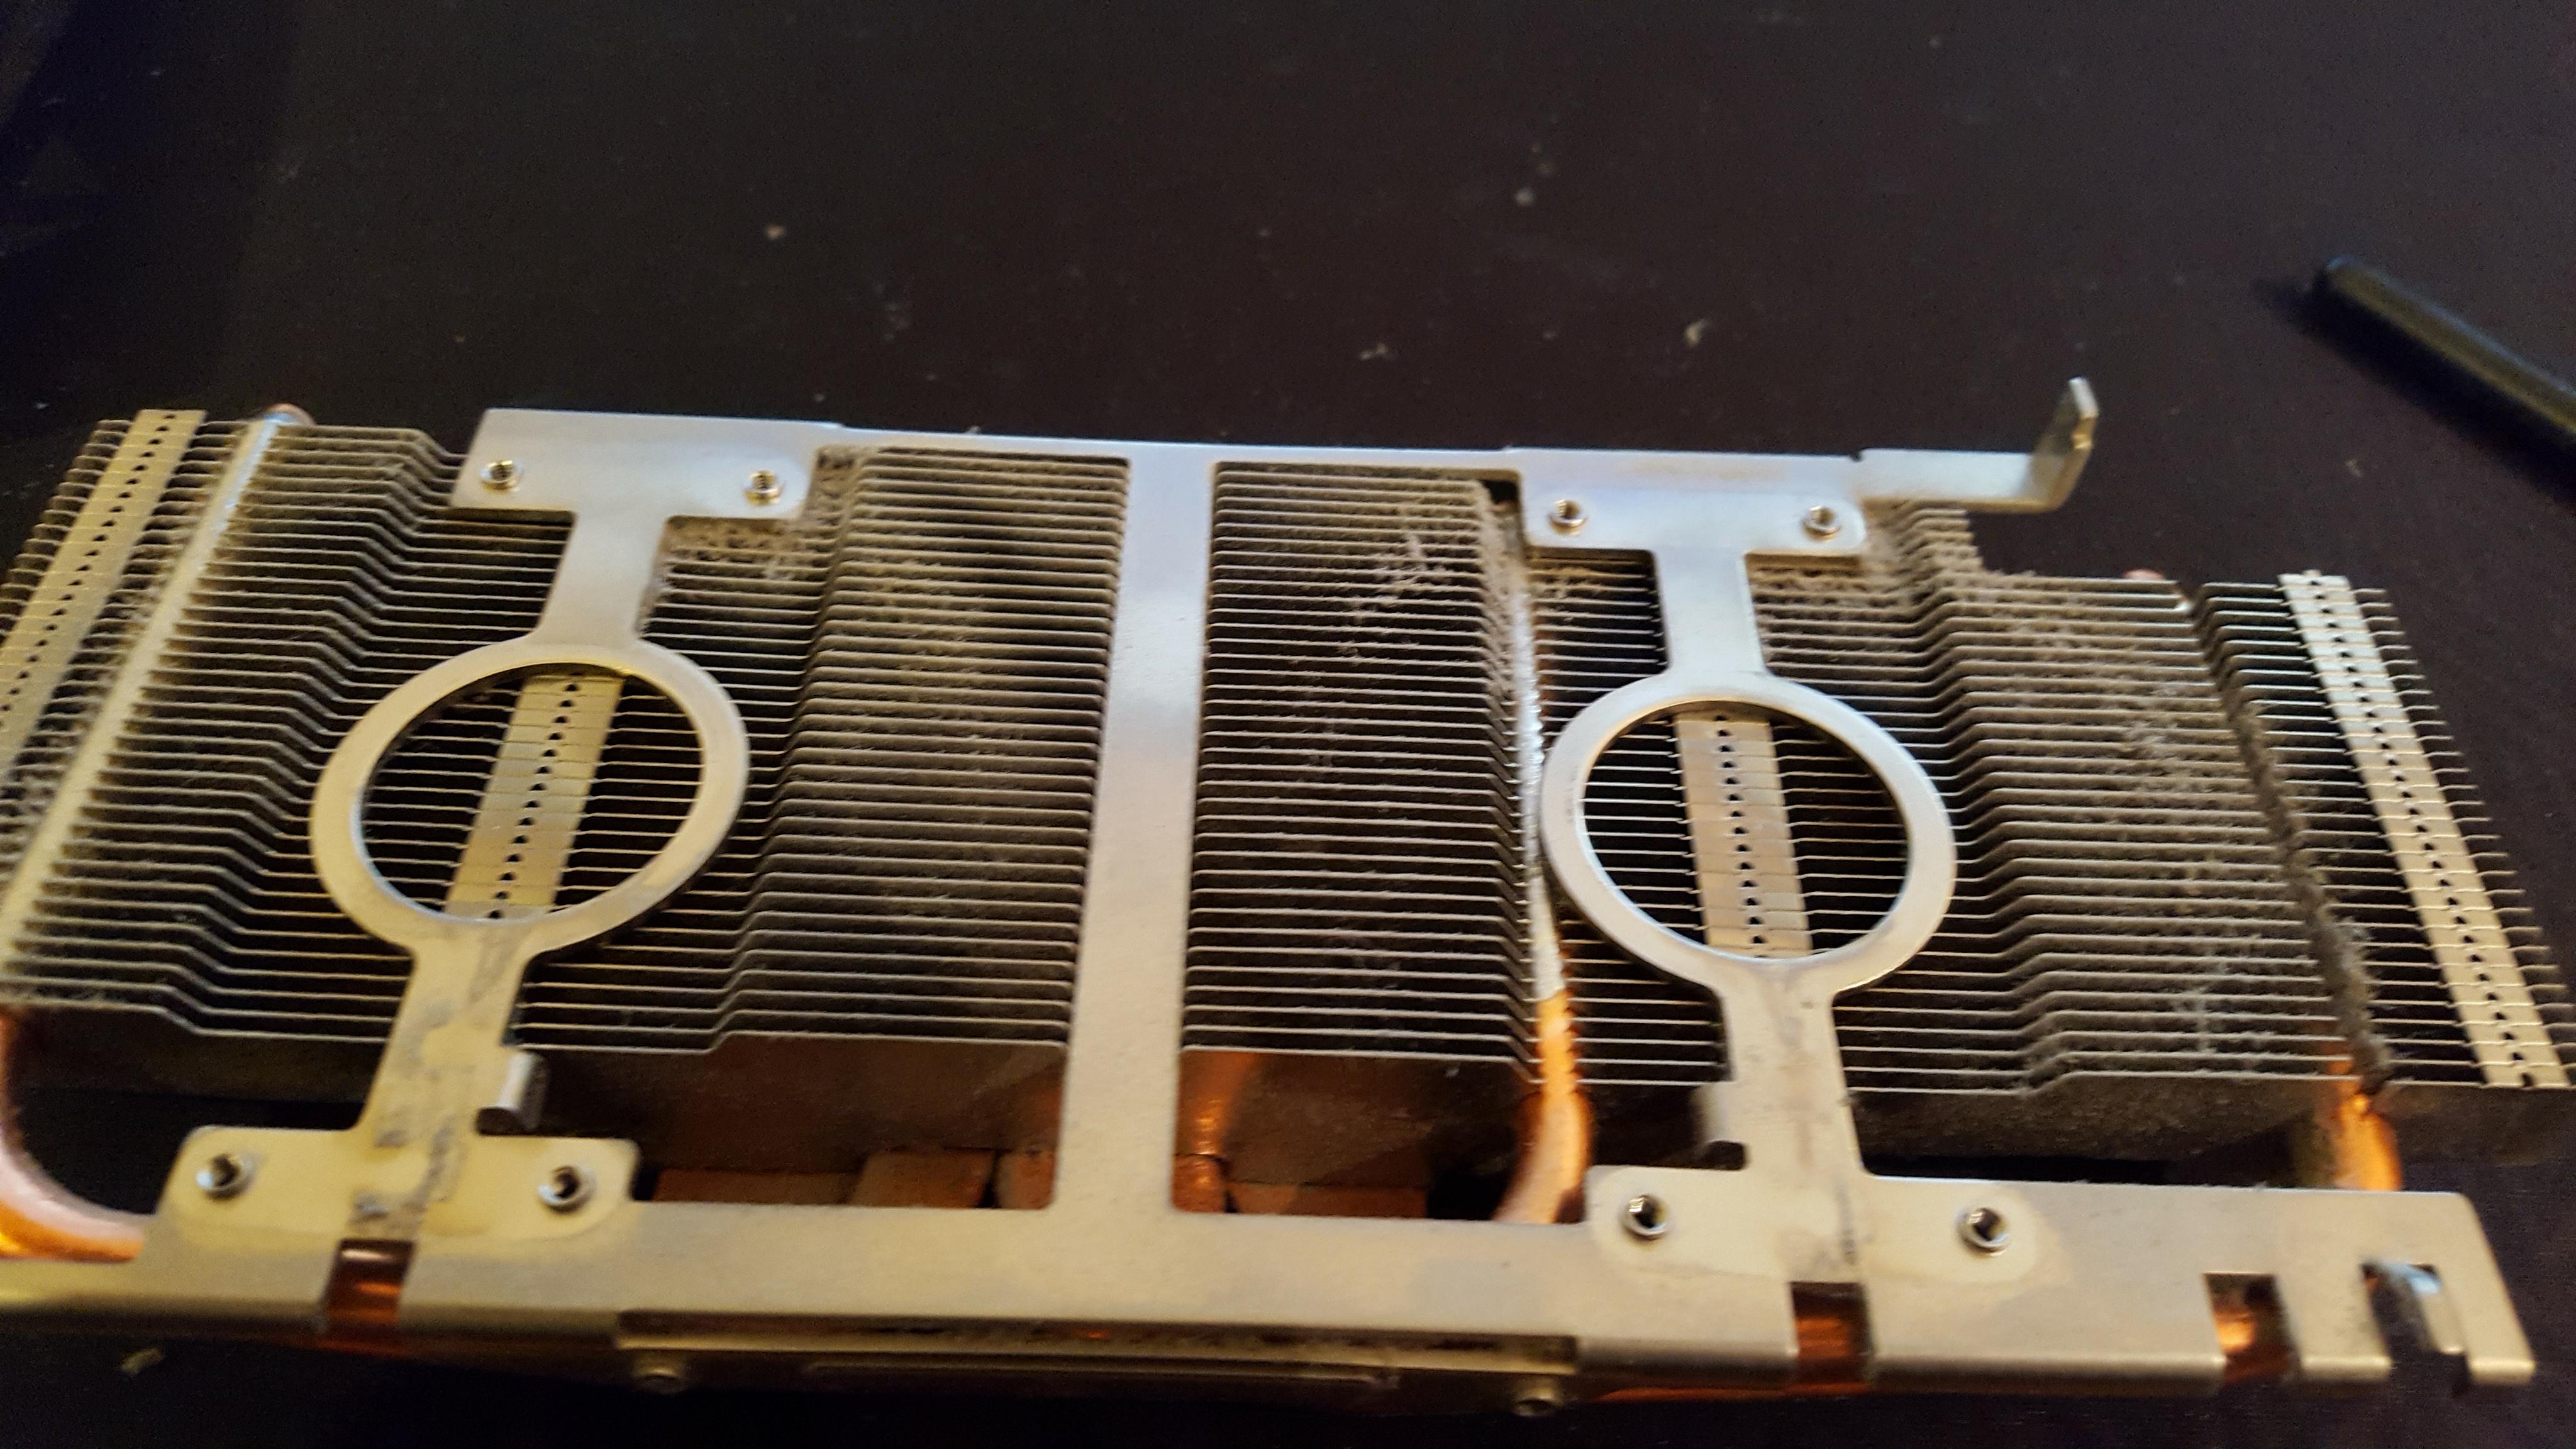
This is the face of the heat sink and where all the heat is drawn away from the GPU Dye. Using some tissue, wipe away all the thermal compound.
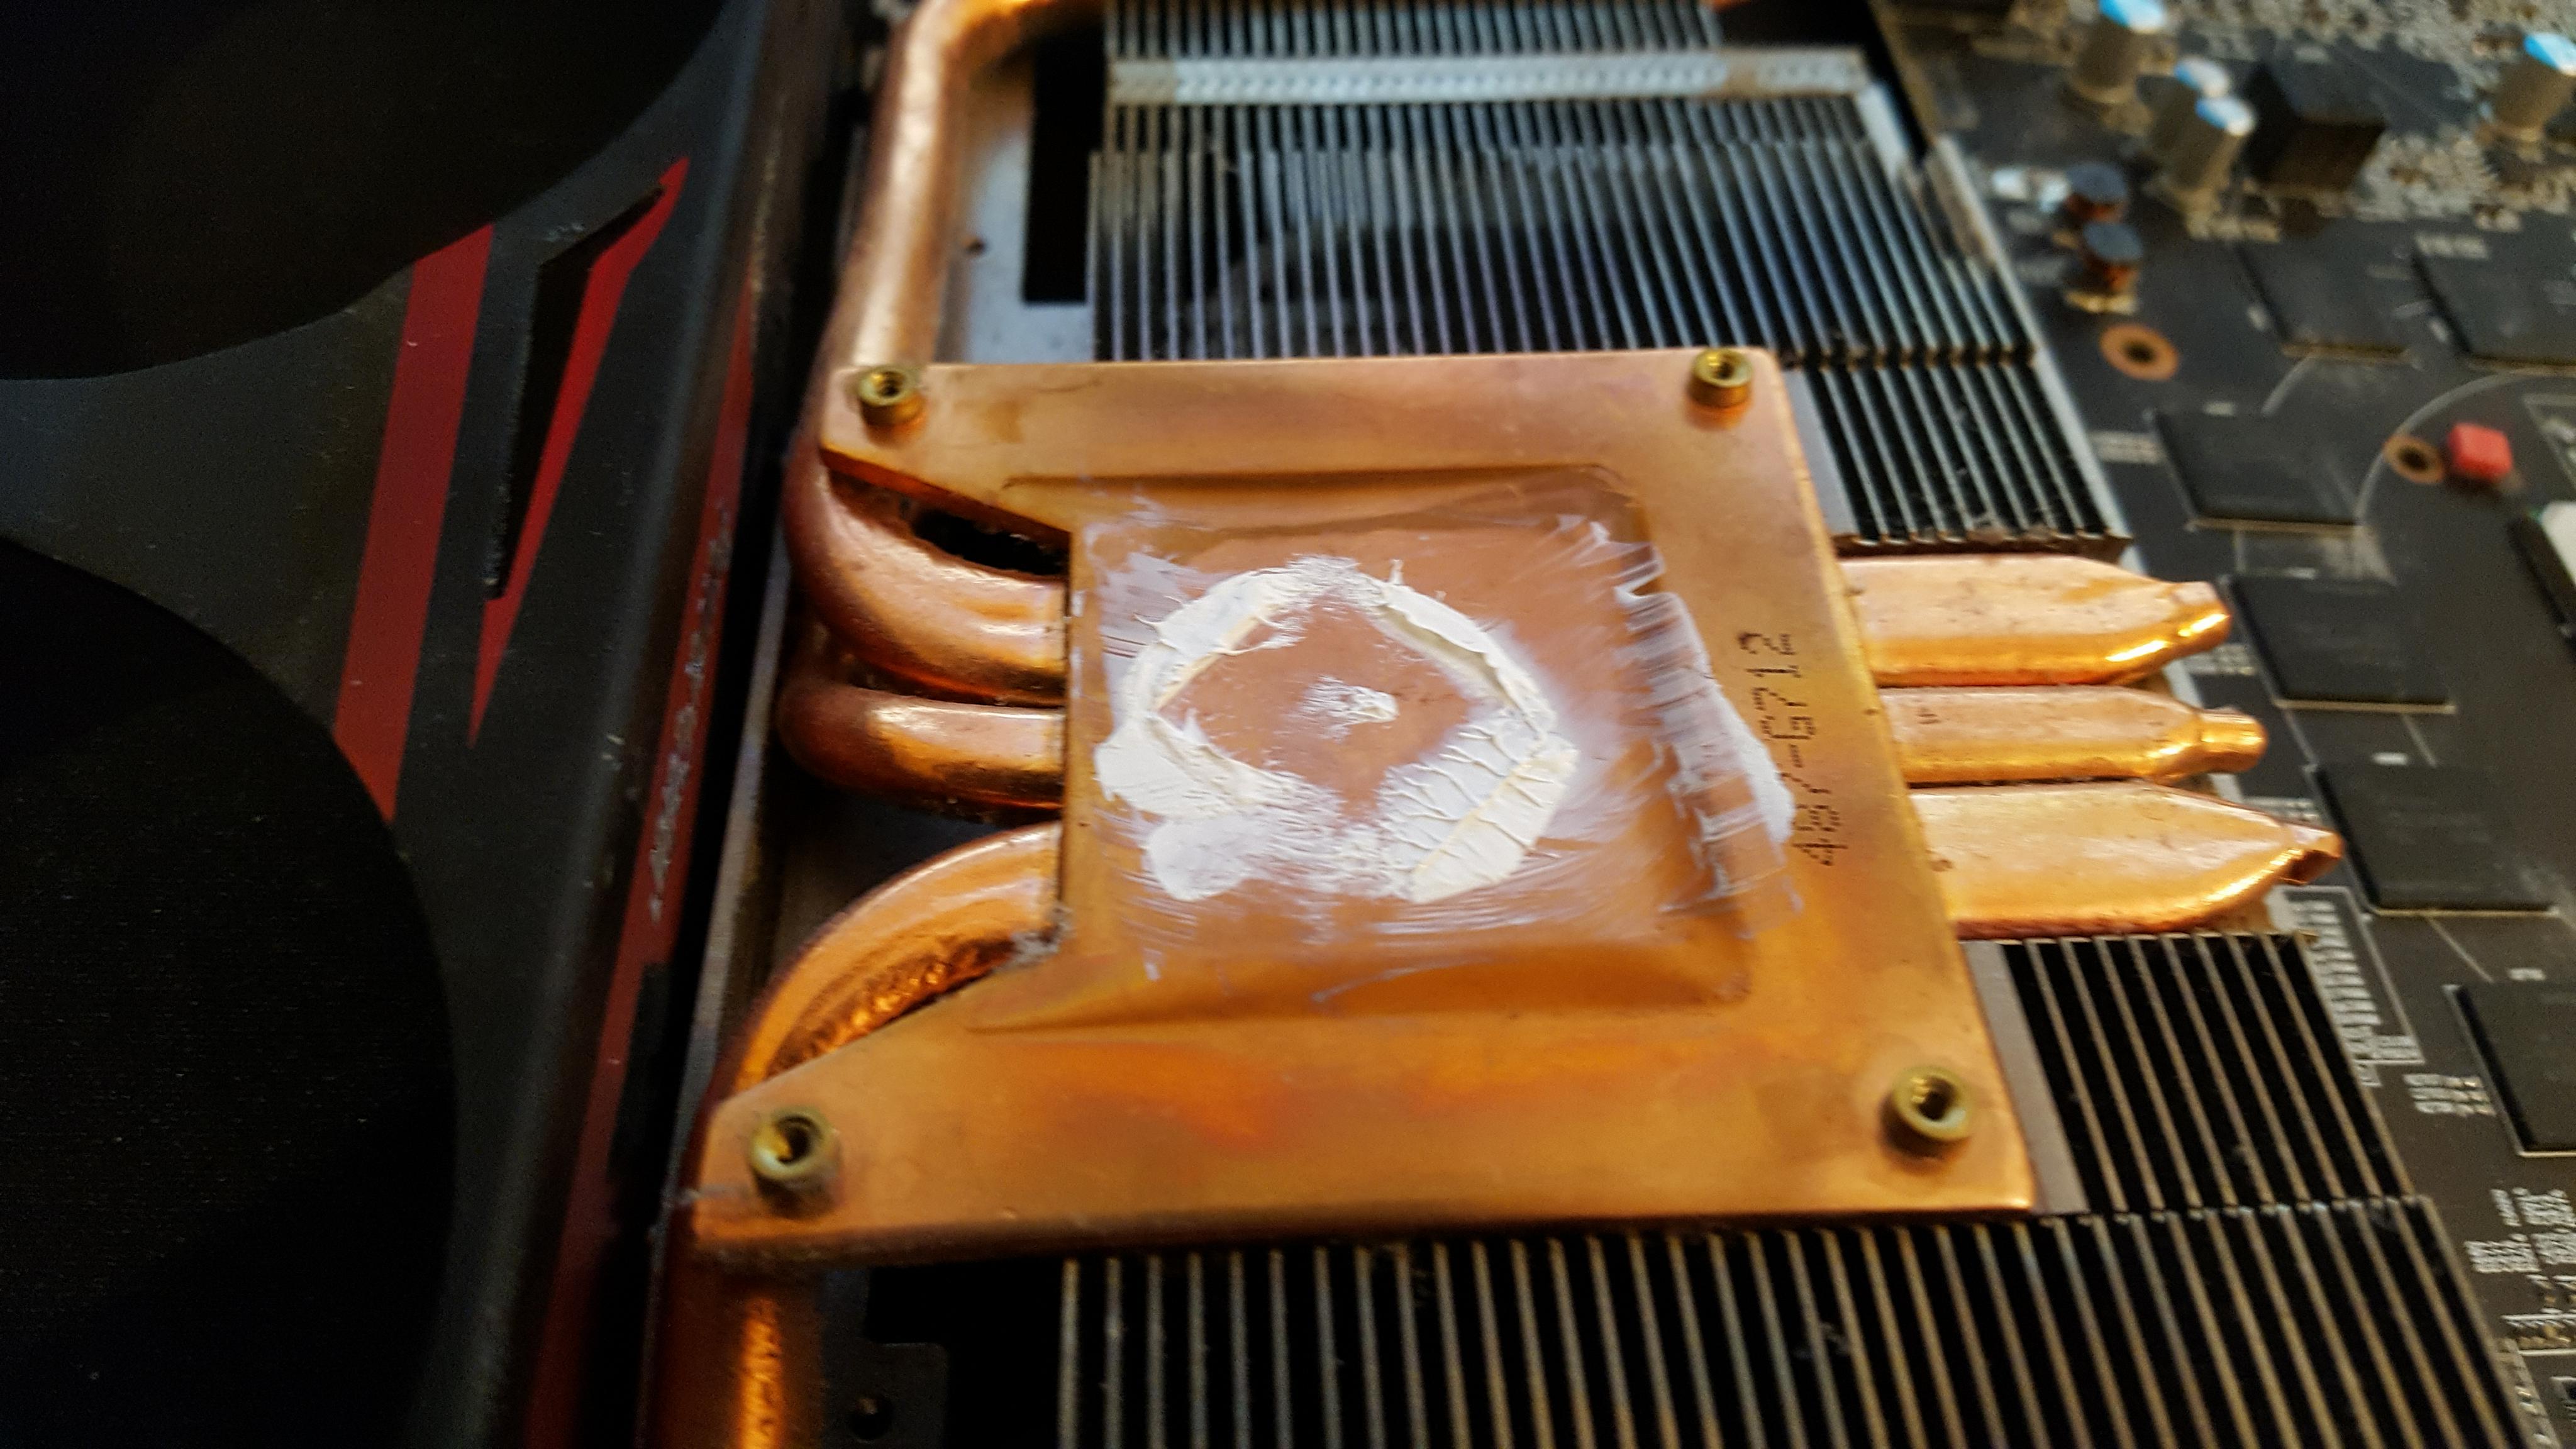
Looking closer you can see the damage done to this side of the heat sink. 4 years of overclocked performance and a warm room resulted in the copper becoming discoloured and even imprinting the GPU Dye etching onto it. A clear sign of over heating and more heat than the heat sink can handle.
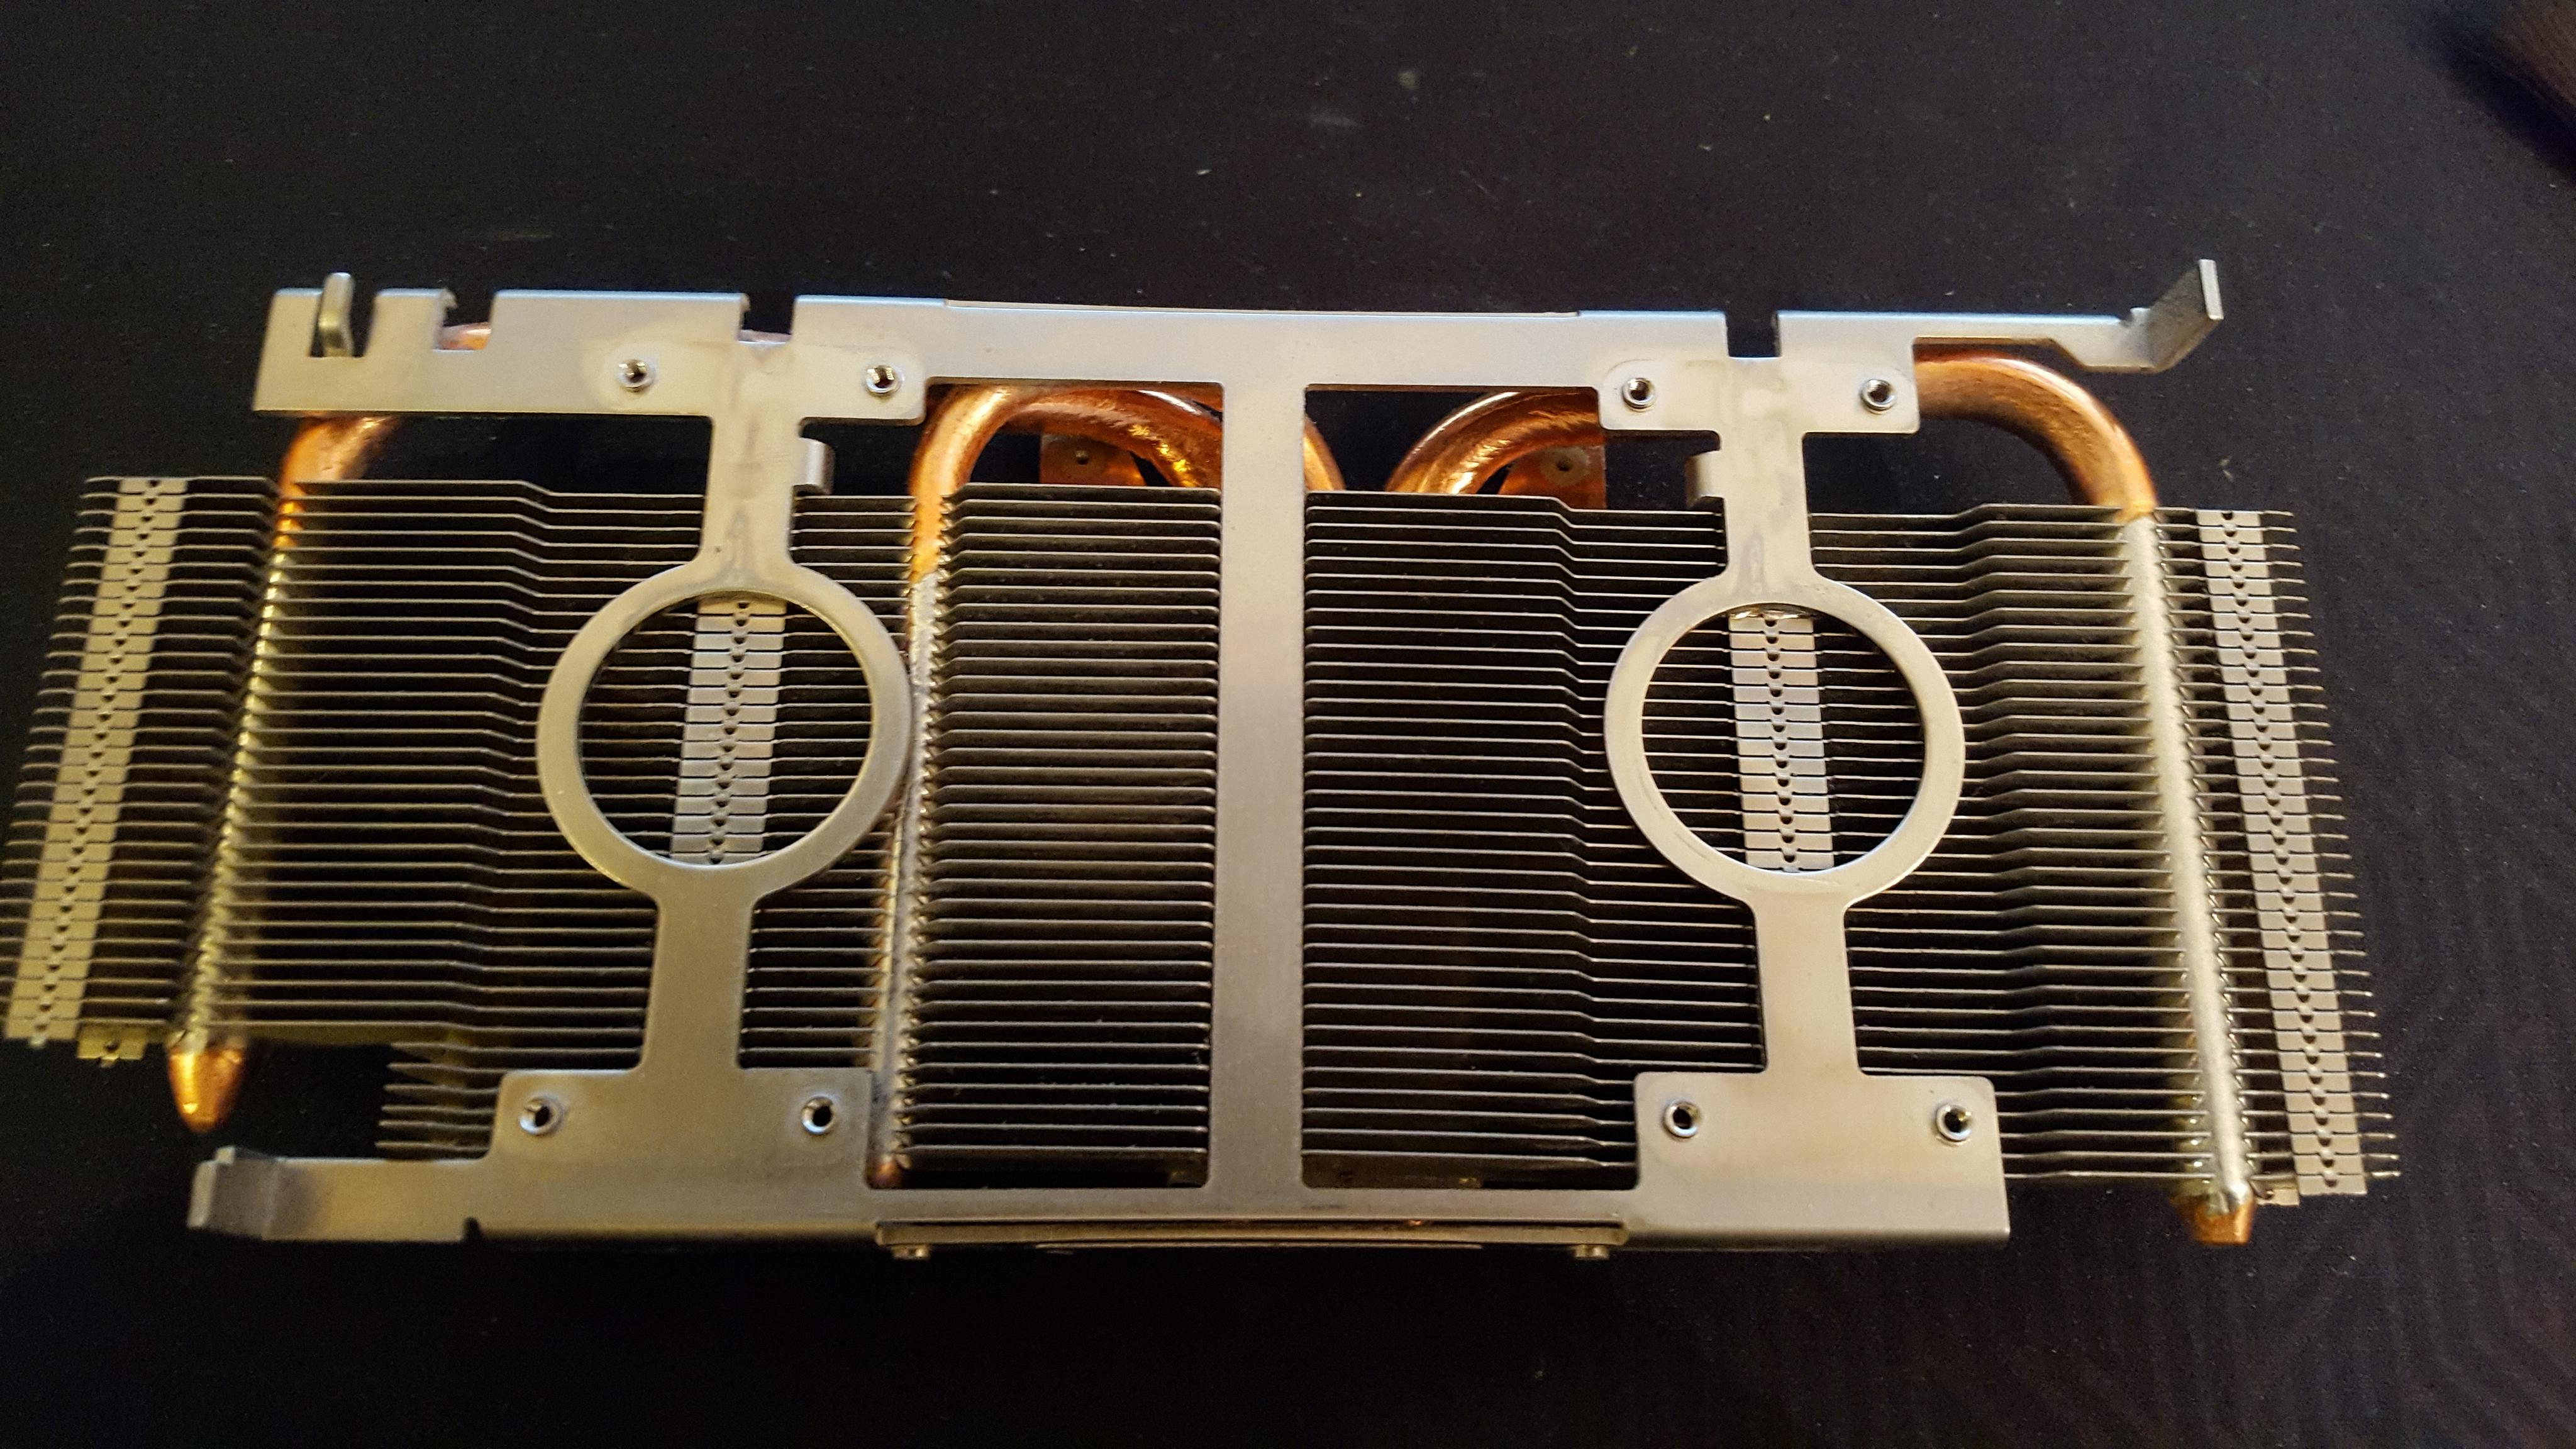
Before moving onto the main PCB, I wanted to clean out the heat sink of all the dust. Using either a small brush or compressed air can, remove all the dust you can see.
Voilà, heat sink all clean.
This is the most delicate part of the resurrection. Preferably you should use some compressed air to remove the dust of the PCB, but I don't have any so I will settle for an anti static brush to remove as much as I can.
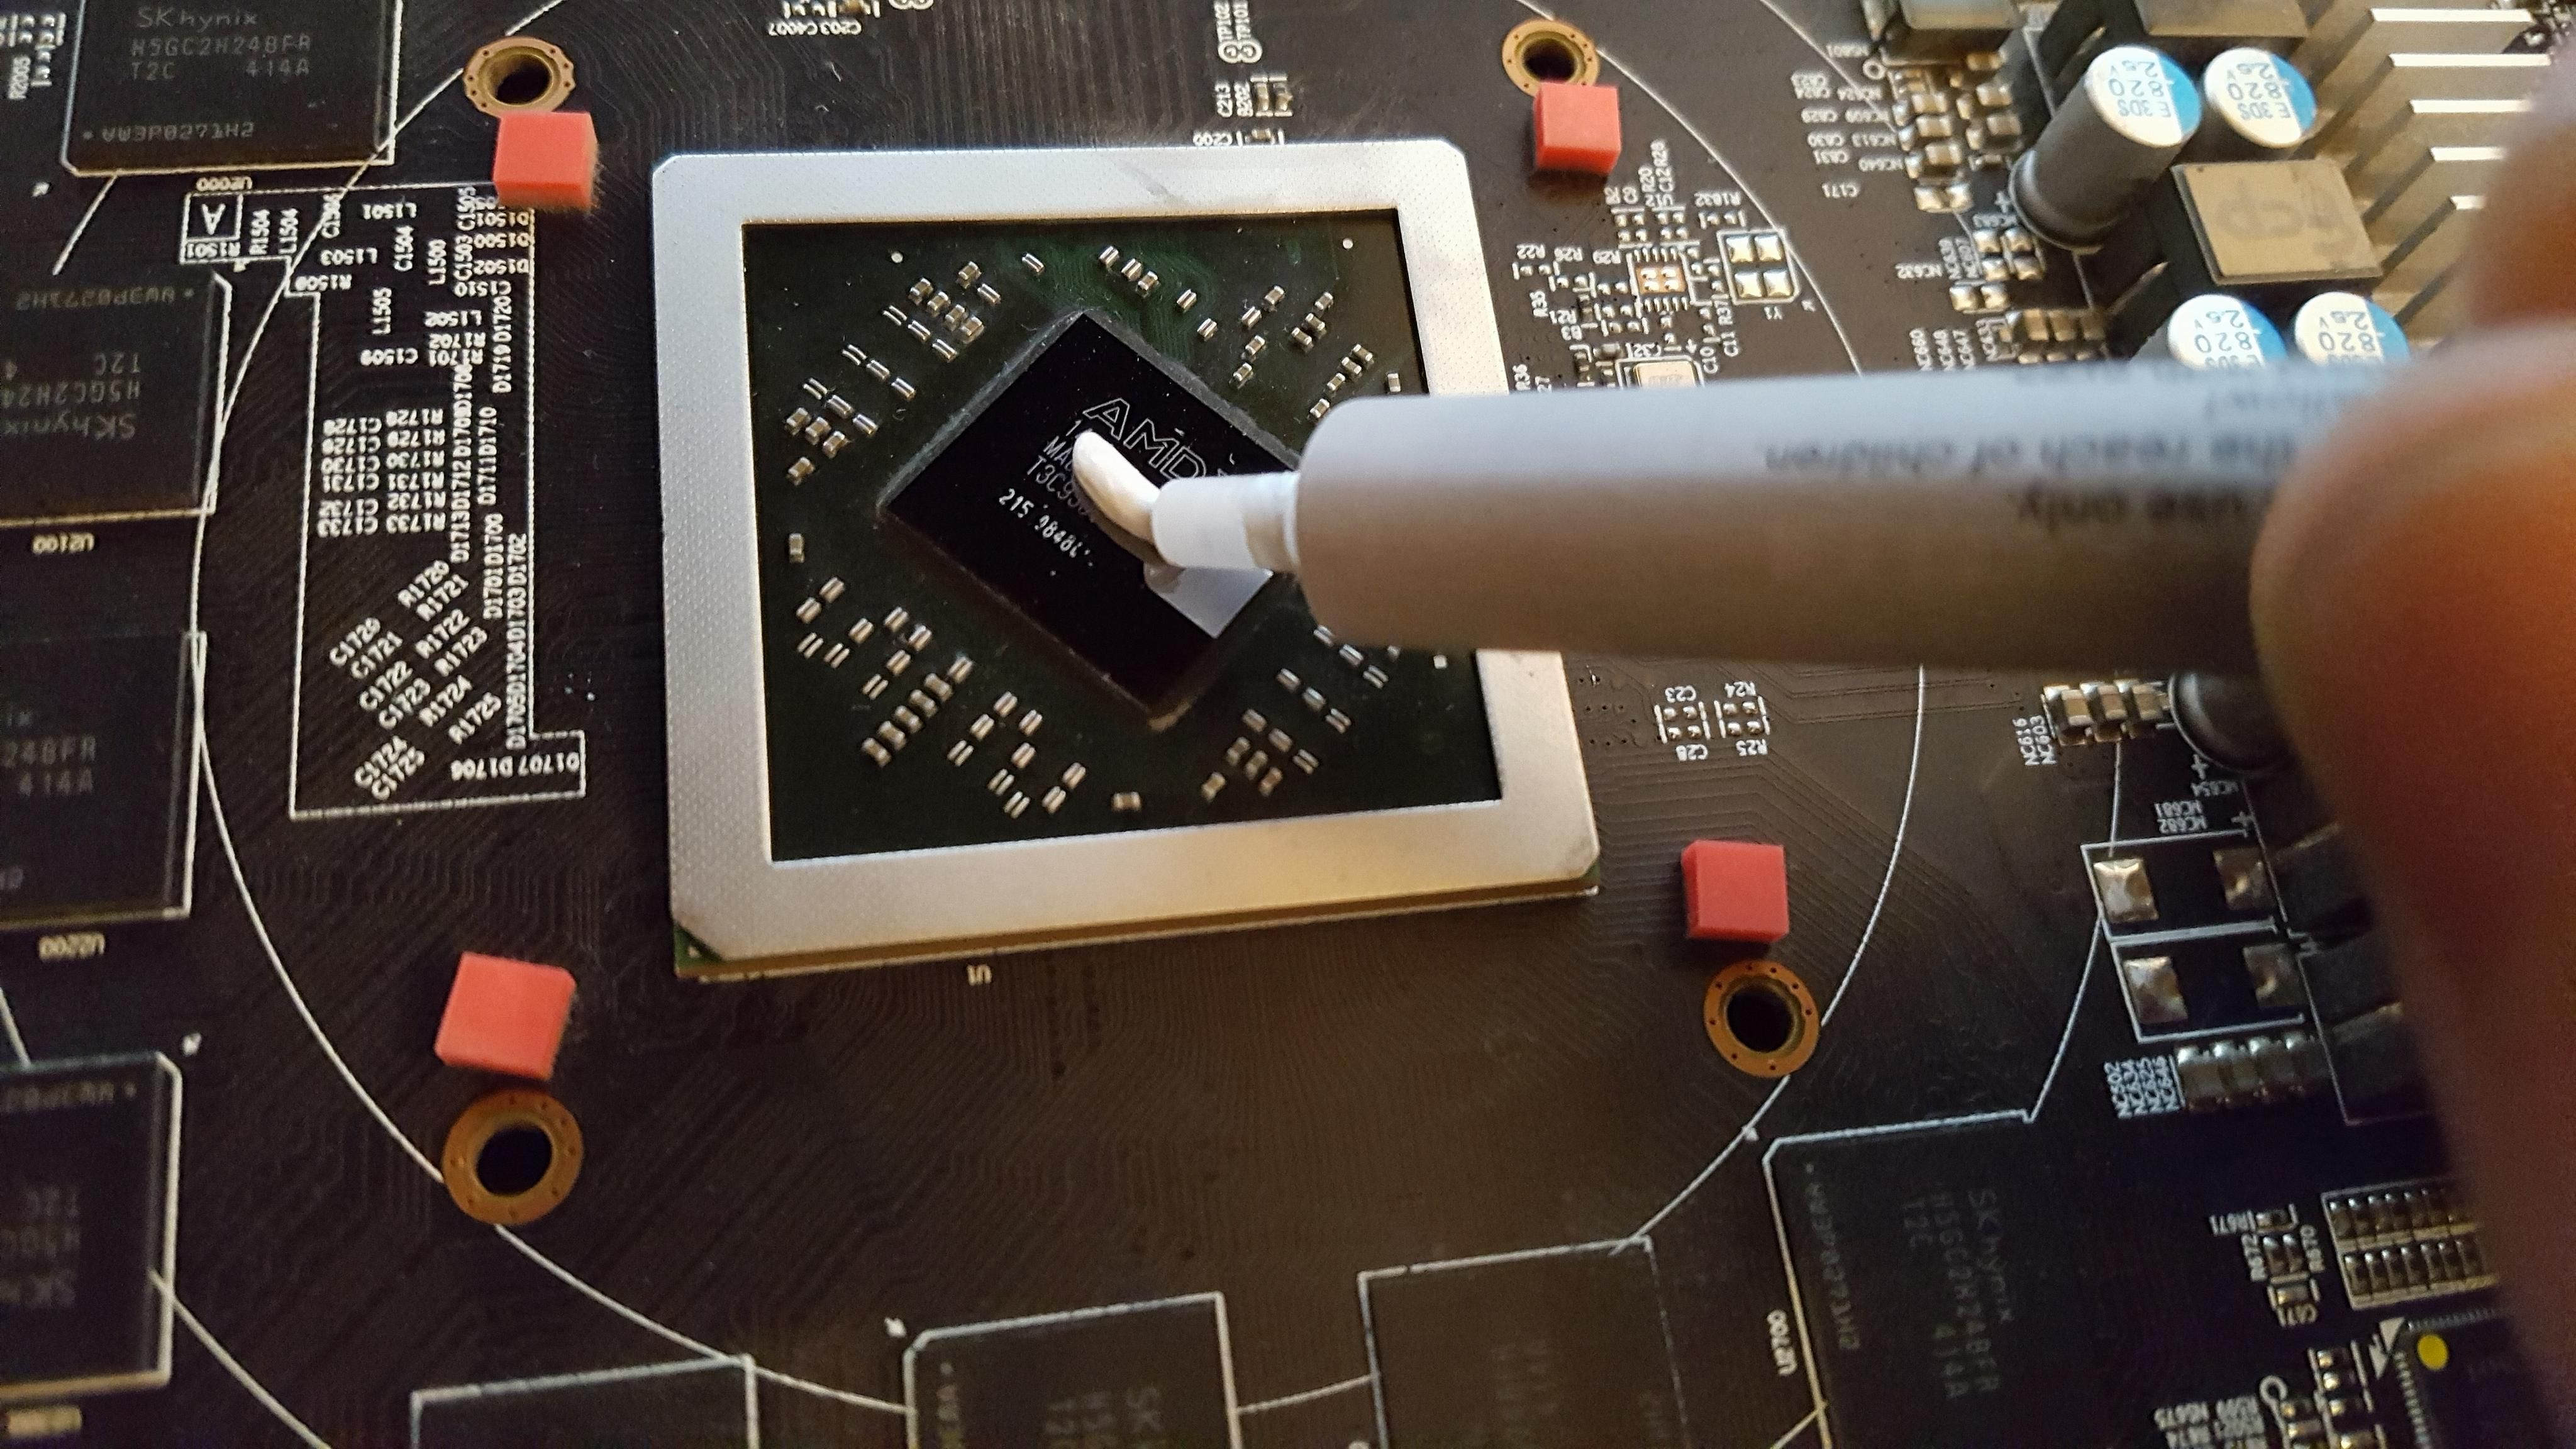
Be cautious when cleaning the GPU Dye, using plenty of cotton buds, remove a small portion with each one, being as light as possible. Make sure you do not get any thermal compound on the PCB. Discard each one after use.
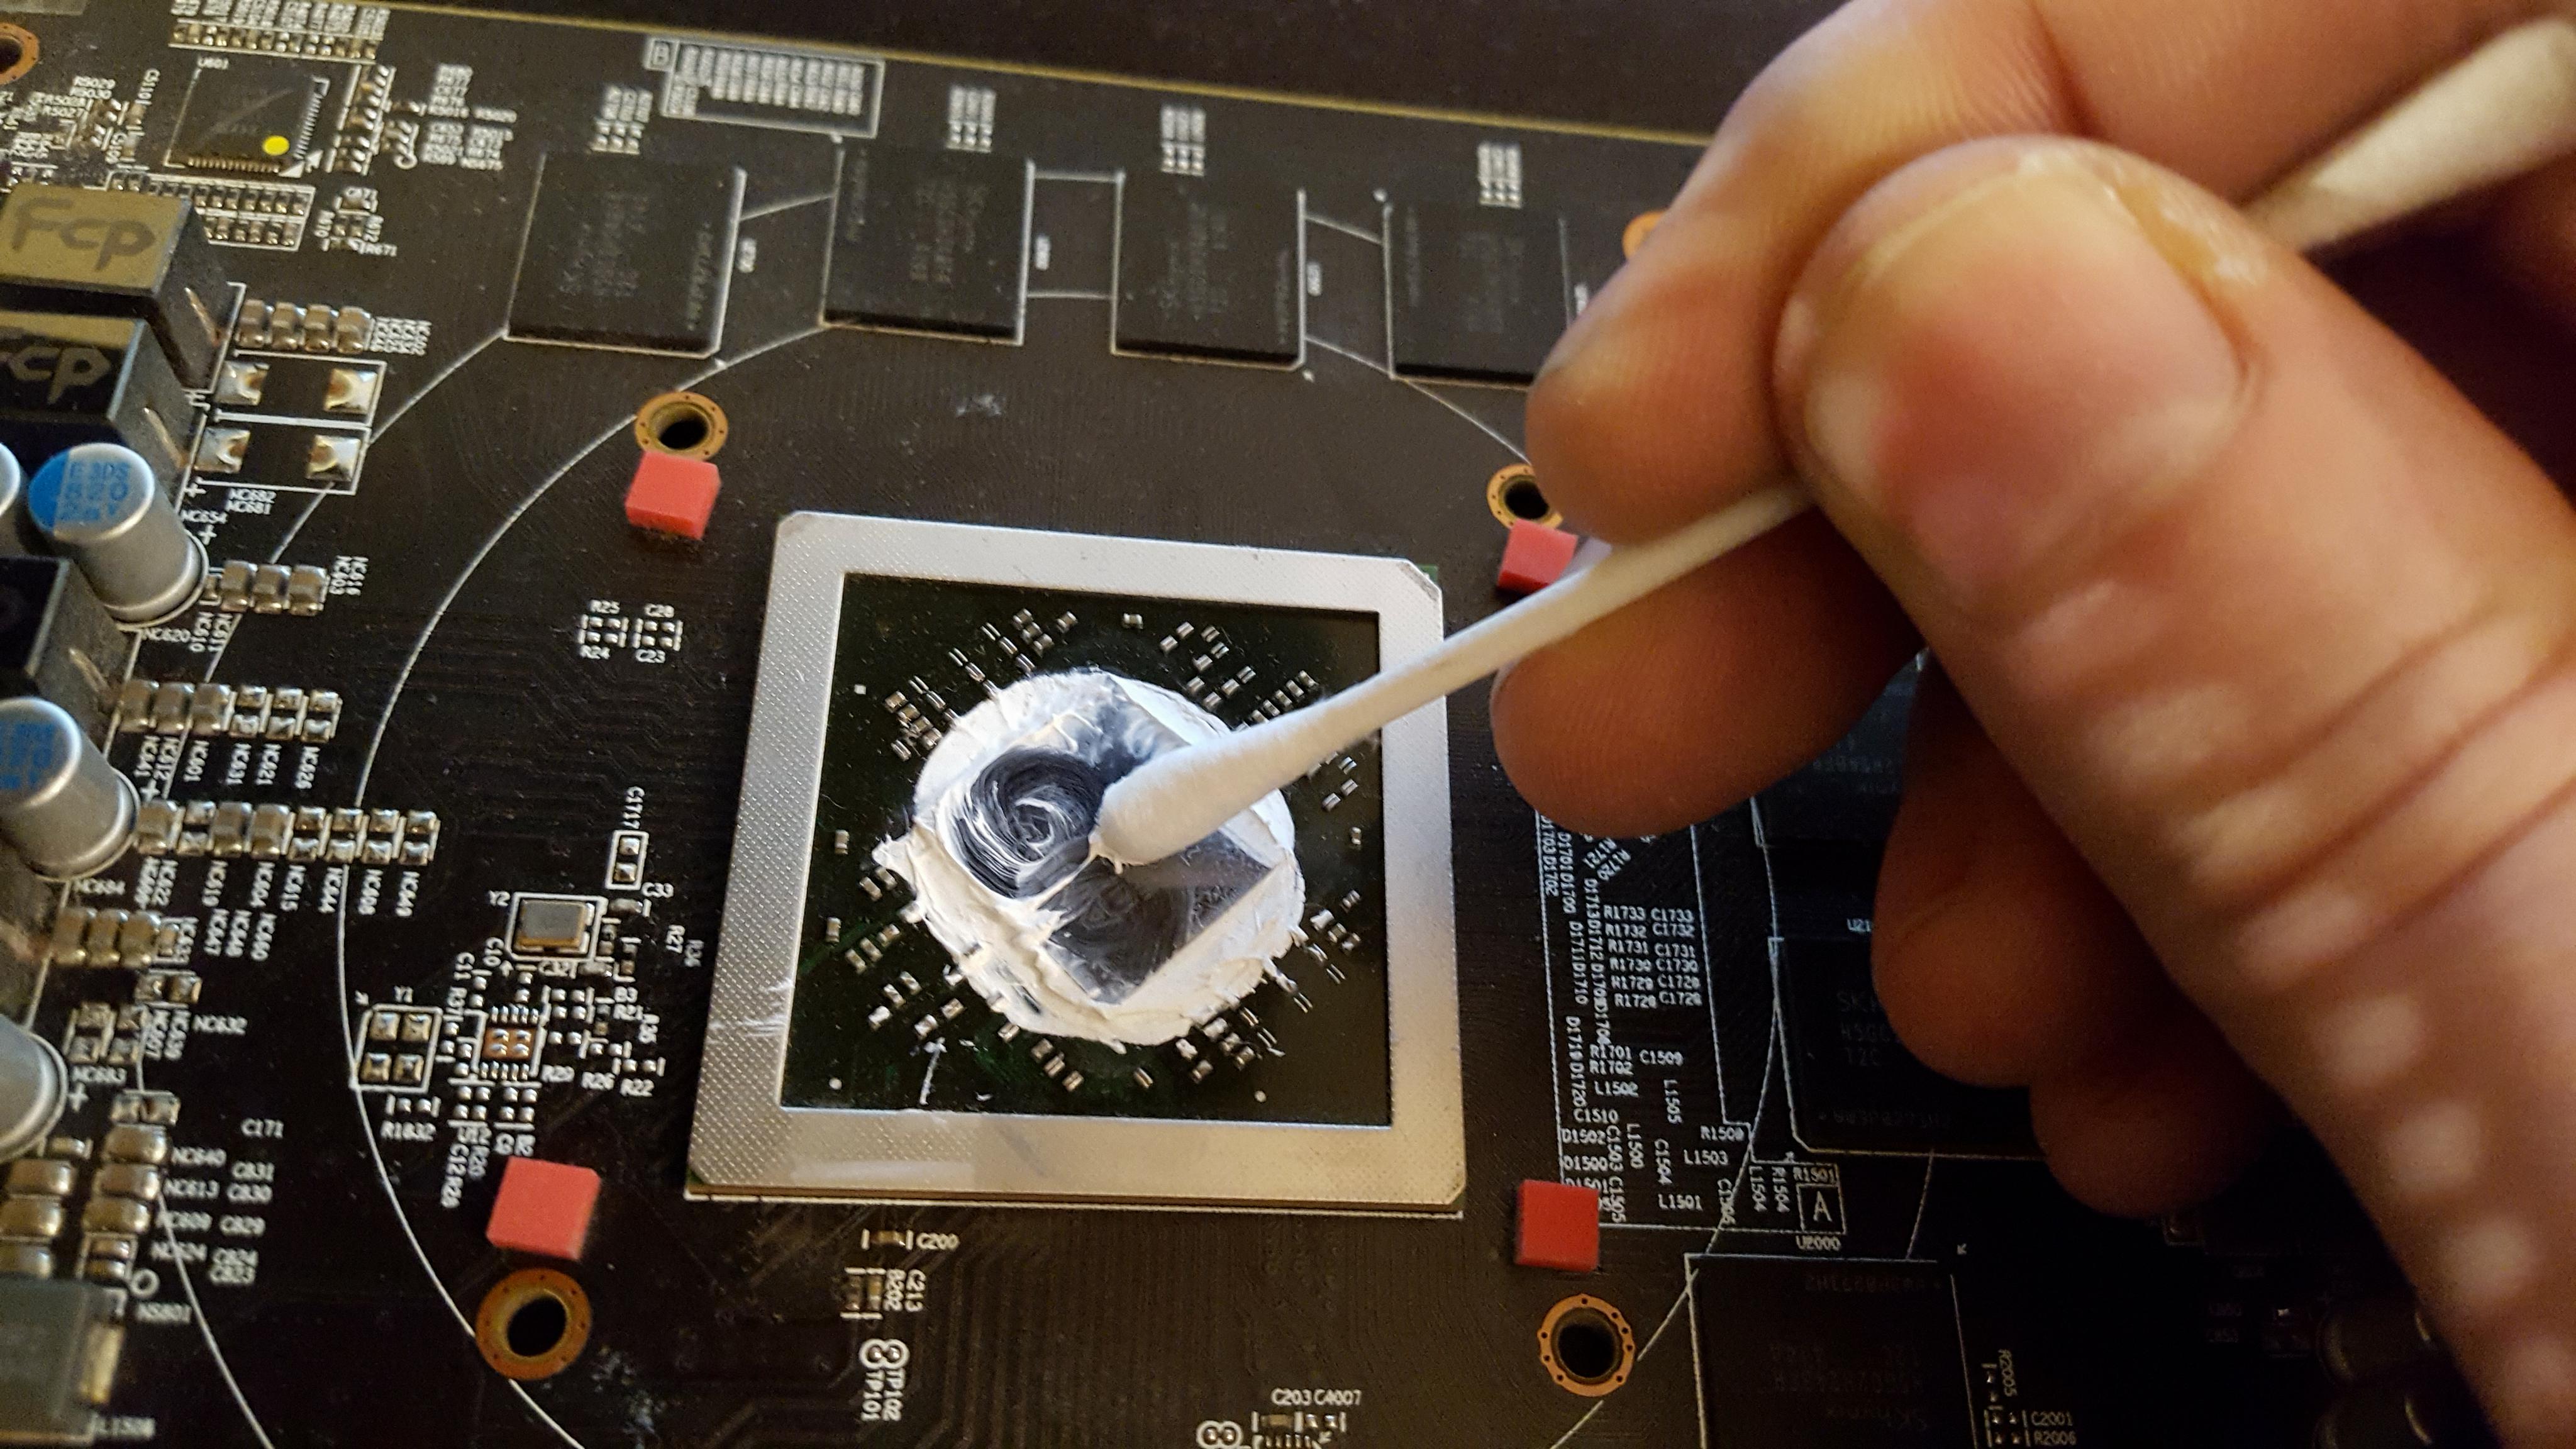
Here you can see the cleaned GPU Dye. At this point I inspected the rest of the PCB, front and back to see if there is any sign as to why the card may be locked in at such a low number. Although the PCB looks relatively clean with zero signs of damage, there was a distinct smell of electrical burning from the memory modules surrounding the GPU. So after a thorough clean I continued to reassembling.

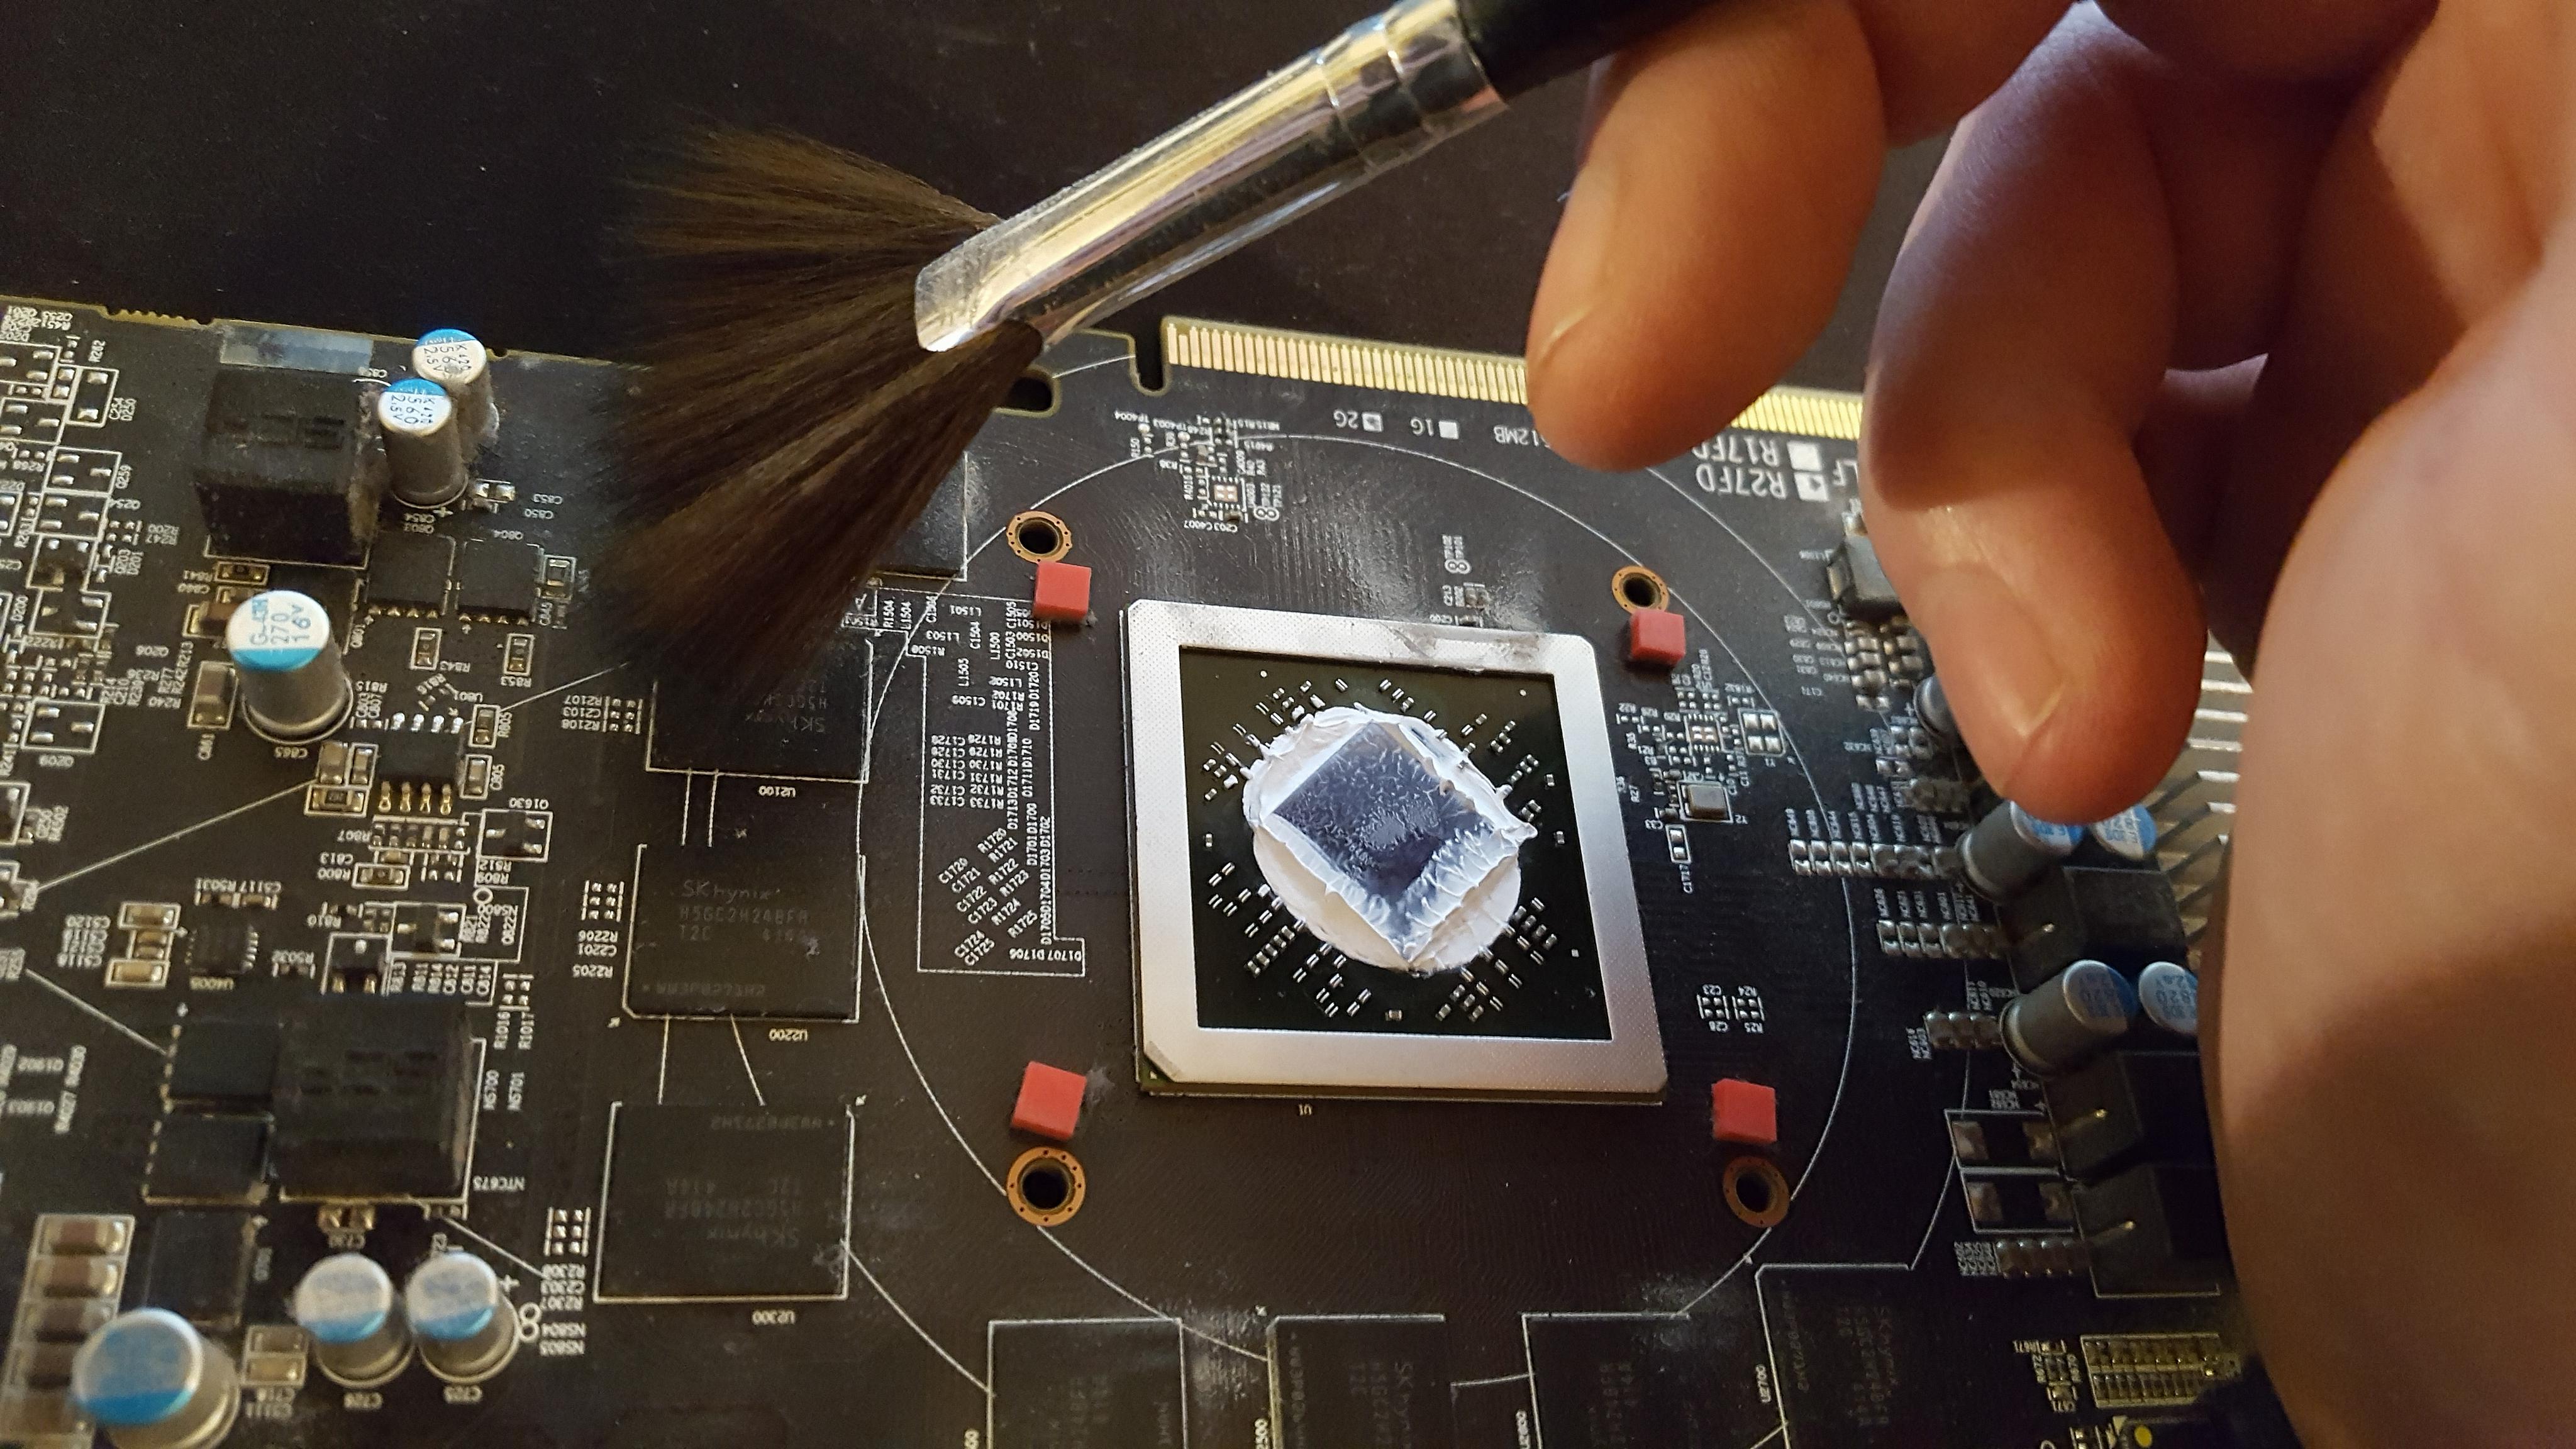
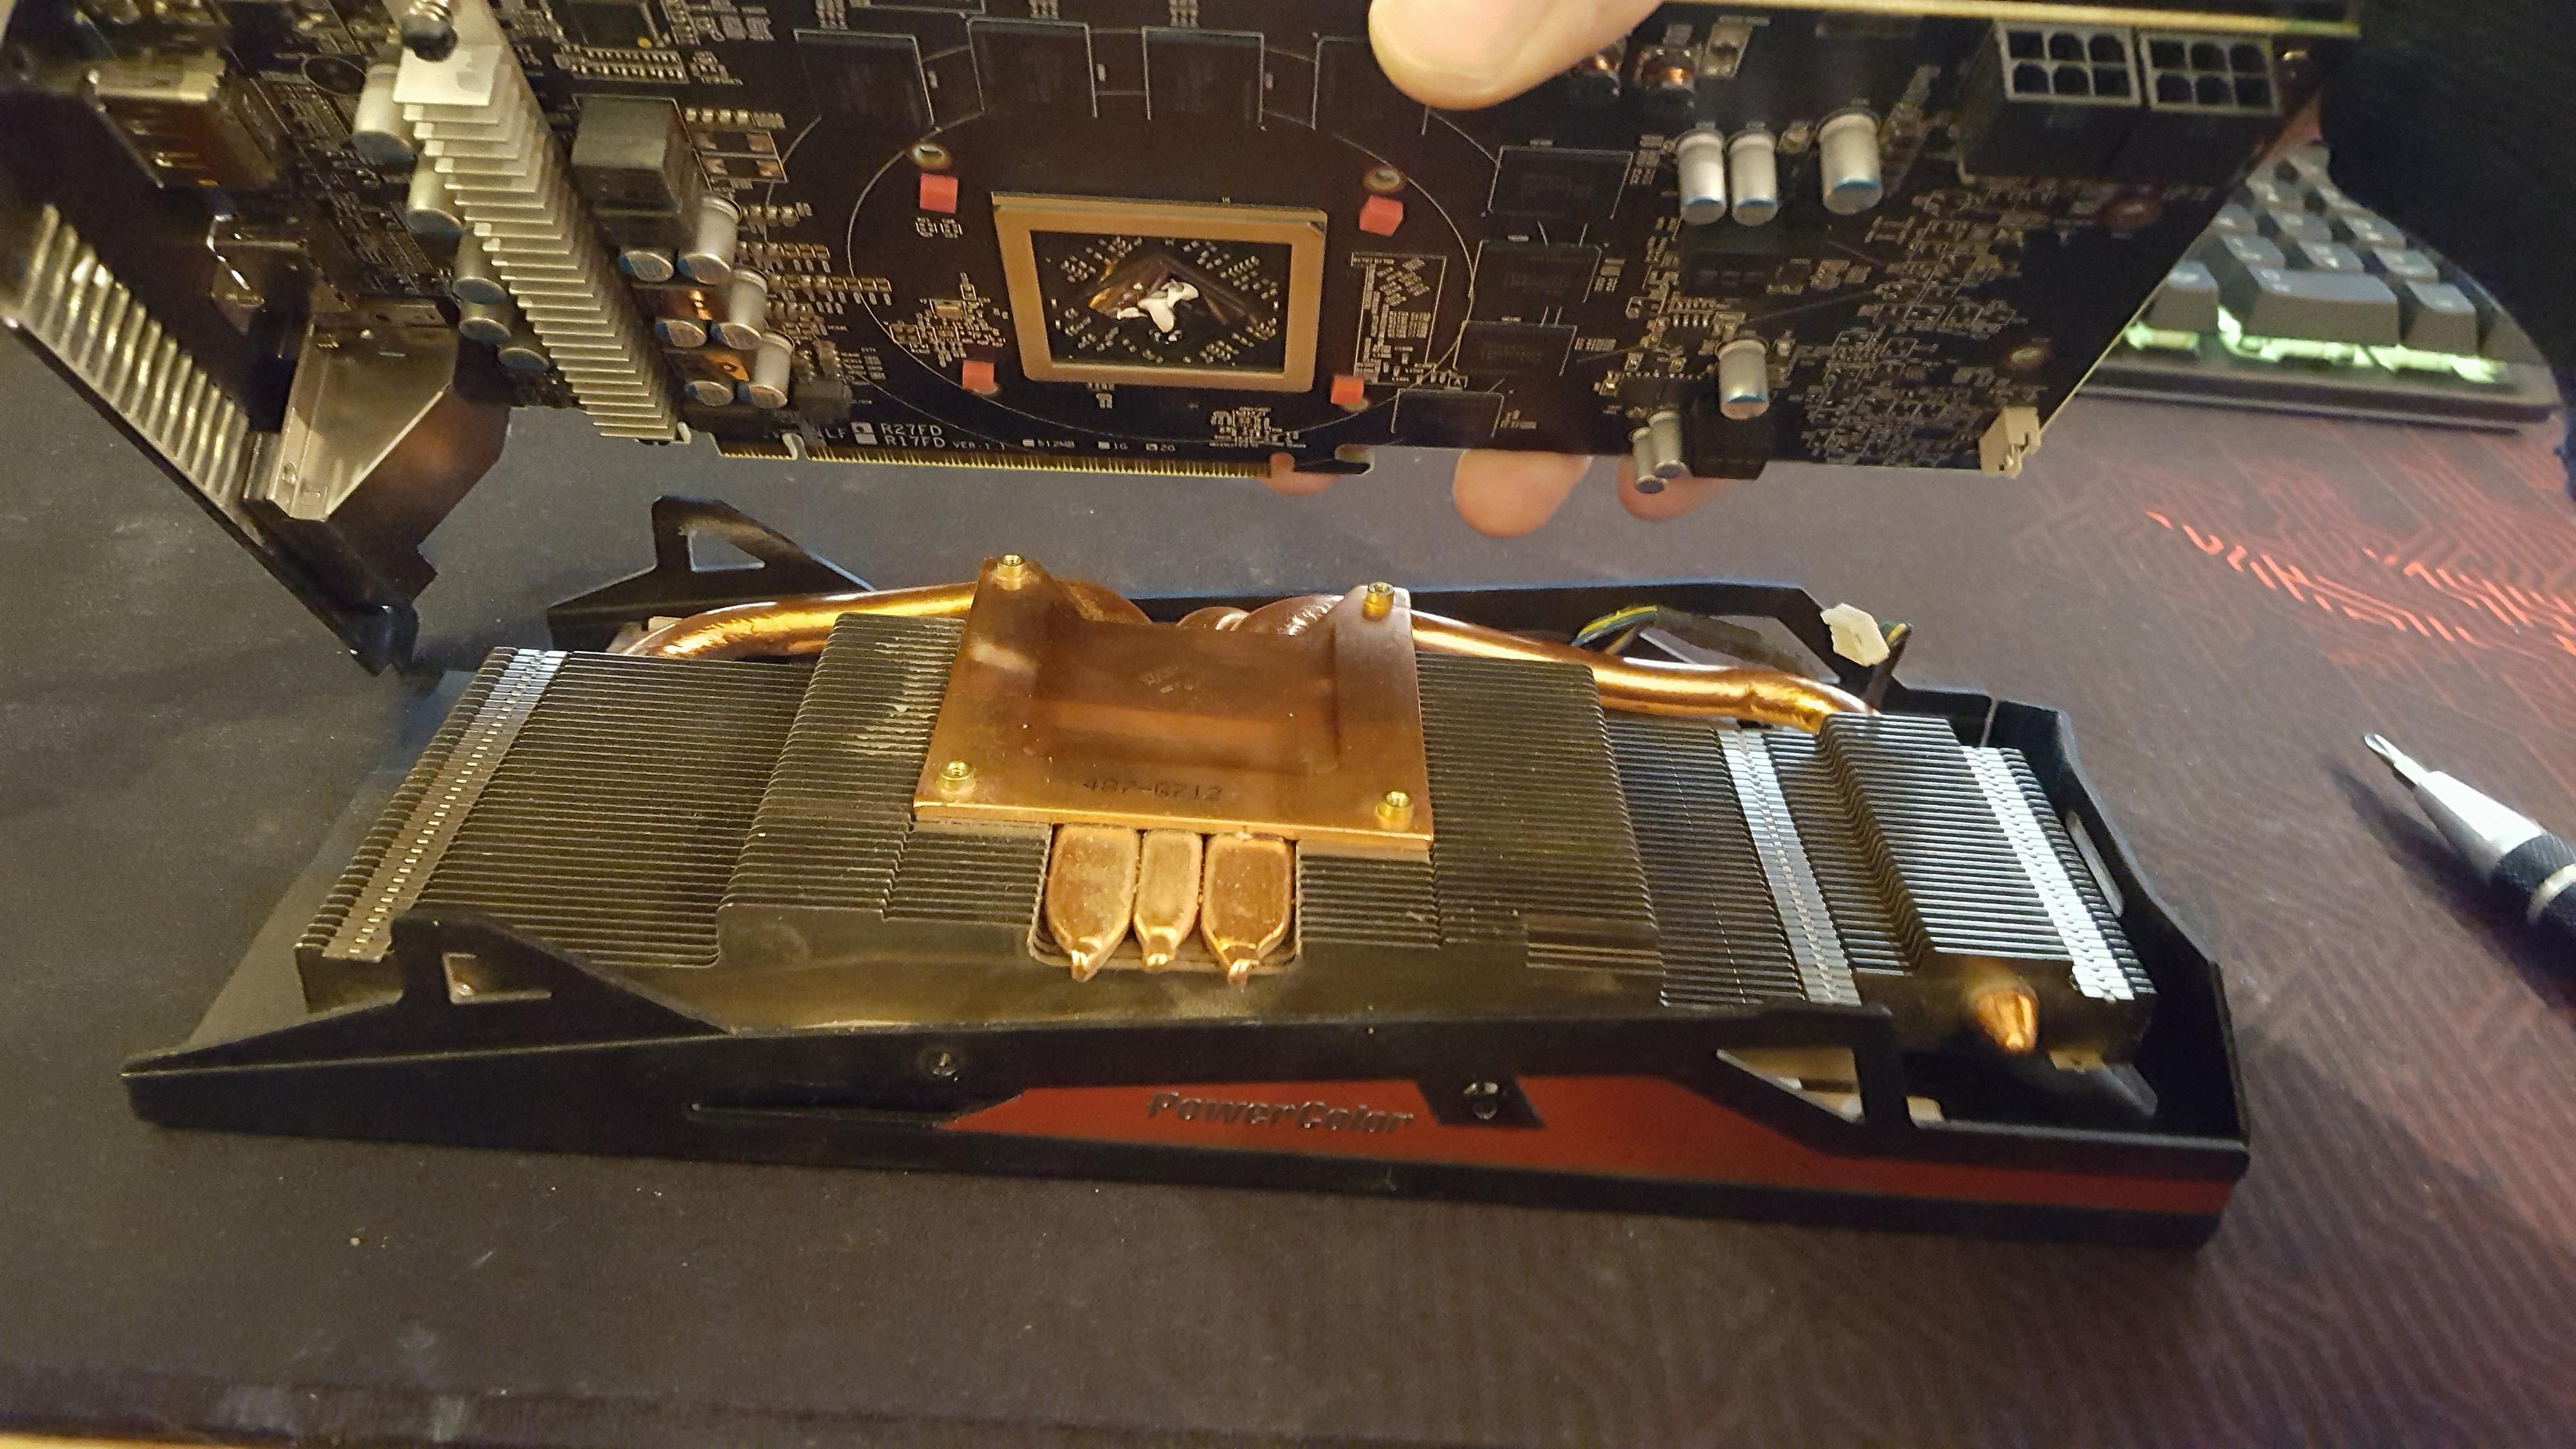
When it comes to thermal compound on a GPU, there are several methods, I personally use just a grain of rice sized blob in the centre and let the heat sink spread it out.
(Note – only use GPU approved thermal compounds, some CPU compounds are conductive and can kill a GPU if it spreads out too far.)
Make sure you plug the fans back in otherwise you will have to pull the heat sink back off. I find it much easier to reassemble when the heat sink is laid flat and placing the PCB on top, this will allow you to locate the screw points by lining them up with the holes on the board.
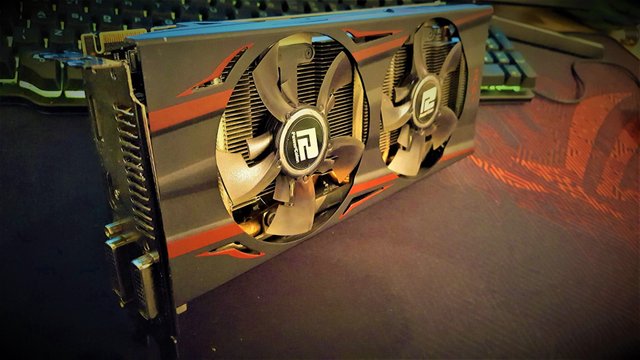
after you have screwed the heat sink back on, the graphics card is good to go.
After plugging the card back into the system and reinstalling the correct drivers I went and opened up a minor to put some load on the GPU and opened MSI after burner to see the results.
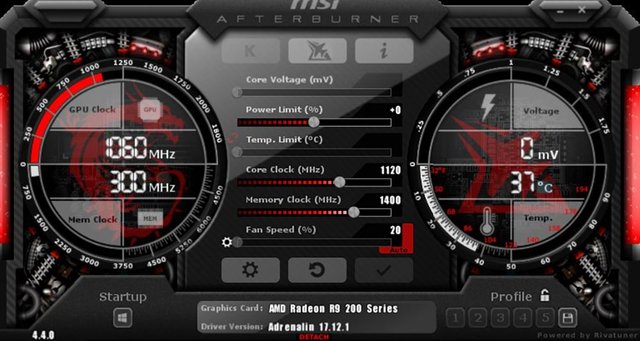
Looking at the snapshot, we can clearly see that my efforts weren't totally in vein, the GPU core is no longer stuck at a low number, and its back to stock, however the memory is still low and judging from the smell I got when inspecting the memory modules on the board, it is safe to say that the memory has well and truly had it.
Even though I did not succeed in bringing the card back to life, it is still a good guide for all of you on how to properly clean and replace the thermal compound on your GPU's, though I will recommend you use an old one to practice on first. So don't blame me when you take apart your GTX 1080 Ti and destroy it because you didn't know what you were doing. Spend $10 on an old GPU and get an idea of what to do before hand. And please note, every GPU brand and model is different so use common sense if you do clean that nice shiny/expensive graphics card.
Thanks for reading.
Don't Forget to Upvote, ReSteem and Follow for more content like this!

Stu @TechMojo
Join the chat TechMojo Discord Channel Follow us TechMojo OnG Social Page Like us TechMojo Facebook Page Follow us TechMojo Twitter
@TechMojo Recommended Blogs you should follow.
@Deeviras @Gaming-Stuff @retro-room @gingerninja @Rerez @gamesociety @XYZposter @deadspace @TechBlogger @Coff33a @XR-HammerGaming @grownfolksgaming @Free999Enigma @GeekClub @tygergamer
Cool, pretty amazing what a thorough cleaning can do right :D Think I should do the same with my GTX970 cause it's getting pretty load and hot during gaming lately :/
compressed air can, can do wanders for heat sinks. will worth investing in a few.
Hey, nice cleanup, too bad it's still not up for the task. Could it still be used as something HTPC related? or does it crash the moment it has to do something?
BTW, thanks for the recommended blog mention. this weekend I'll be transisioning to a new pc case and I'll post my findings about it. I reckon it's gonna be great.
I haven't been active lately due to exams, but after friday I am FREE!
the card will still work for video tasks so should still work in a home theater system no problem.
i look forward to seeing your posts about the transition into the new case...
and good luck for your exams dude.
I have seen videos and post after post saying that mining doesn't hurt GPUs. I think you are the first that even hints that mining can be harmful to a GPU. I have been using nicehash at night while I sleep with my gaming computer. I have been starting nicehash then going to bed. After just a few days of doing that when not mining my GTX 1060 3gb is running hotter in passive mode. I have to completely restart my computer before I try to play doom or I will get about 30 sec into the game and get kicked out.
mining does kill GPU's. most vendors will not give any warranty if they suspect its been used for mining. the amount of heat that they pump out is intense and can anneal the copper heatsink to the point where it can warp and discoulour. just like my old one. a good idea is get a can of compressed air and clean out the heatsink on your 1060, it should make it more efficient. if you still have trouble. head on over to our Discord and someone should be able to help you out.
Great tutorial! I hope I'll never have to go to such lengths to try and save my RX 280 (which is still great), but this will be quite some help in case something goes sideways.
always happy to help
Great tutorial, I'm always interested on do this stuff by myself with my PC, still learning about what is what inside the case.
thankyou. if you ever need my help or any member of my team, you can always find us in our Discord channel.
Wow some really great tutorial content here, as a fellowe gamer in the steemit community that's an upvote from me .
Would also mean a lot if you could check my post https://steemit.com/gaming/@jackvoo/hitman-absolution-welcome-back-47-review-no-11 ^o^
do you know how much of a fan i am of the Hitman Franchise? i am a professional costumer (hitman absolution suit) and have a real barcode tattoo on the back of my head. will get the other half to take a pick.
upvoted, commented and followed good sir.
good !!
Wow some really great gaming content, as a fellow gamer myself I'm going to definitely upvote you and can't wait for more content, also if you don't mind checking me out also it would be a very great help, maybe even do me as follow and as few upvotes
following you good sir. will keep an eye out for your content.
I render 4K video without a GPU, and that works as long as I use in Camera settings correctly. If I attempt any image correction in Kdenlive the whole system comes to a grinding halt, so a used GPU may hold me over until I build a new system from scratch.