Grow Your Own Series #1: Oyster Mushrooms (the easy way)
When I started researching how to grow your own oyster mushrooms, I was overwhelmed with information. There are lots of complicated instructions to be found online, which didn't really spark my enthusiasm. There are mushroom kits you can buy, cute, but these are pretty expensive. Plus, you're not really learning how to do this yourself.
After an entire afternoon of researching, I found the most simple and easy way to get started (without spending a lot of money) is to just buy a pack of oyster mushrooms in your local supermarket and brew yourself some coffee. Because you are going to need the used coffee grounds!
What you need:
- a clean (food-grade) container
- a clean, sharp knife
- used coffee grounds
- oyster mushrooms from the store
- a little patience (which is hard, I know!)
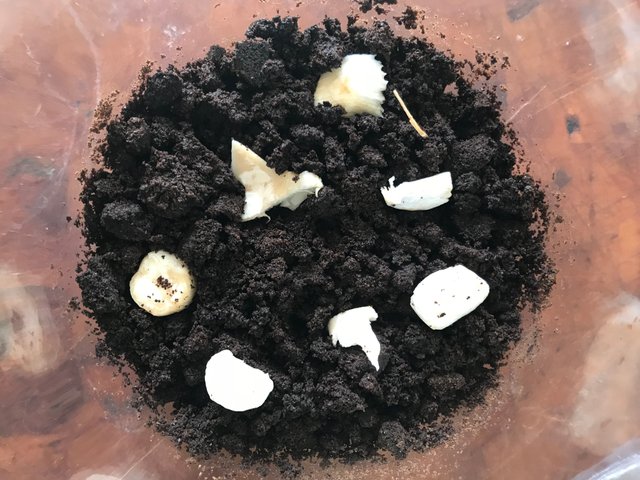
Note: Since we'll be trying to grow 'good' mold here in a moist environment, there's the risk of contaminating your project with 'bad' mold. You can easily distinct the two: our 'good' mold is bright white and fuzzy and the 'bad' mold is not. We're using used coffee grounds for this, because by brewing the coffee the grounds automatically gets sterilised.
Step 1: clean your container with very hot water, dry and put some fresh used coffee grounds in it. Make sure it is not too wet. It needs to be moist, but no excess water should drip out of it.
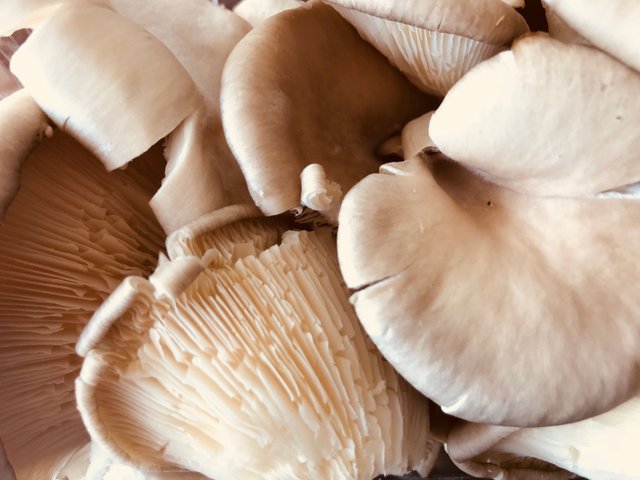
Step 2: Inspect the mushrooms you've bought (better do this in the store, before buying) At the bottom of the stems, you'll see some bright white, fuzzy mold. This is called the mycelium. It's where the mushrooms grow from.
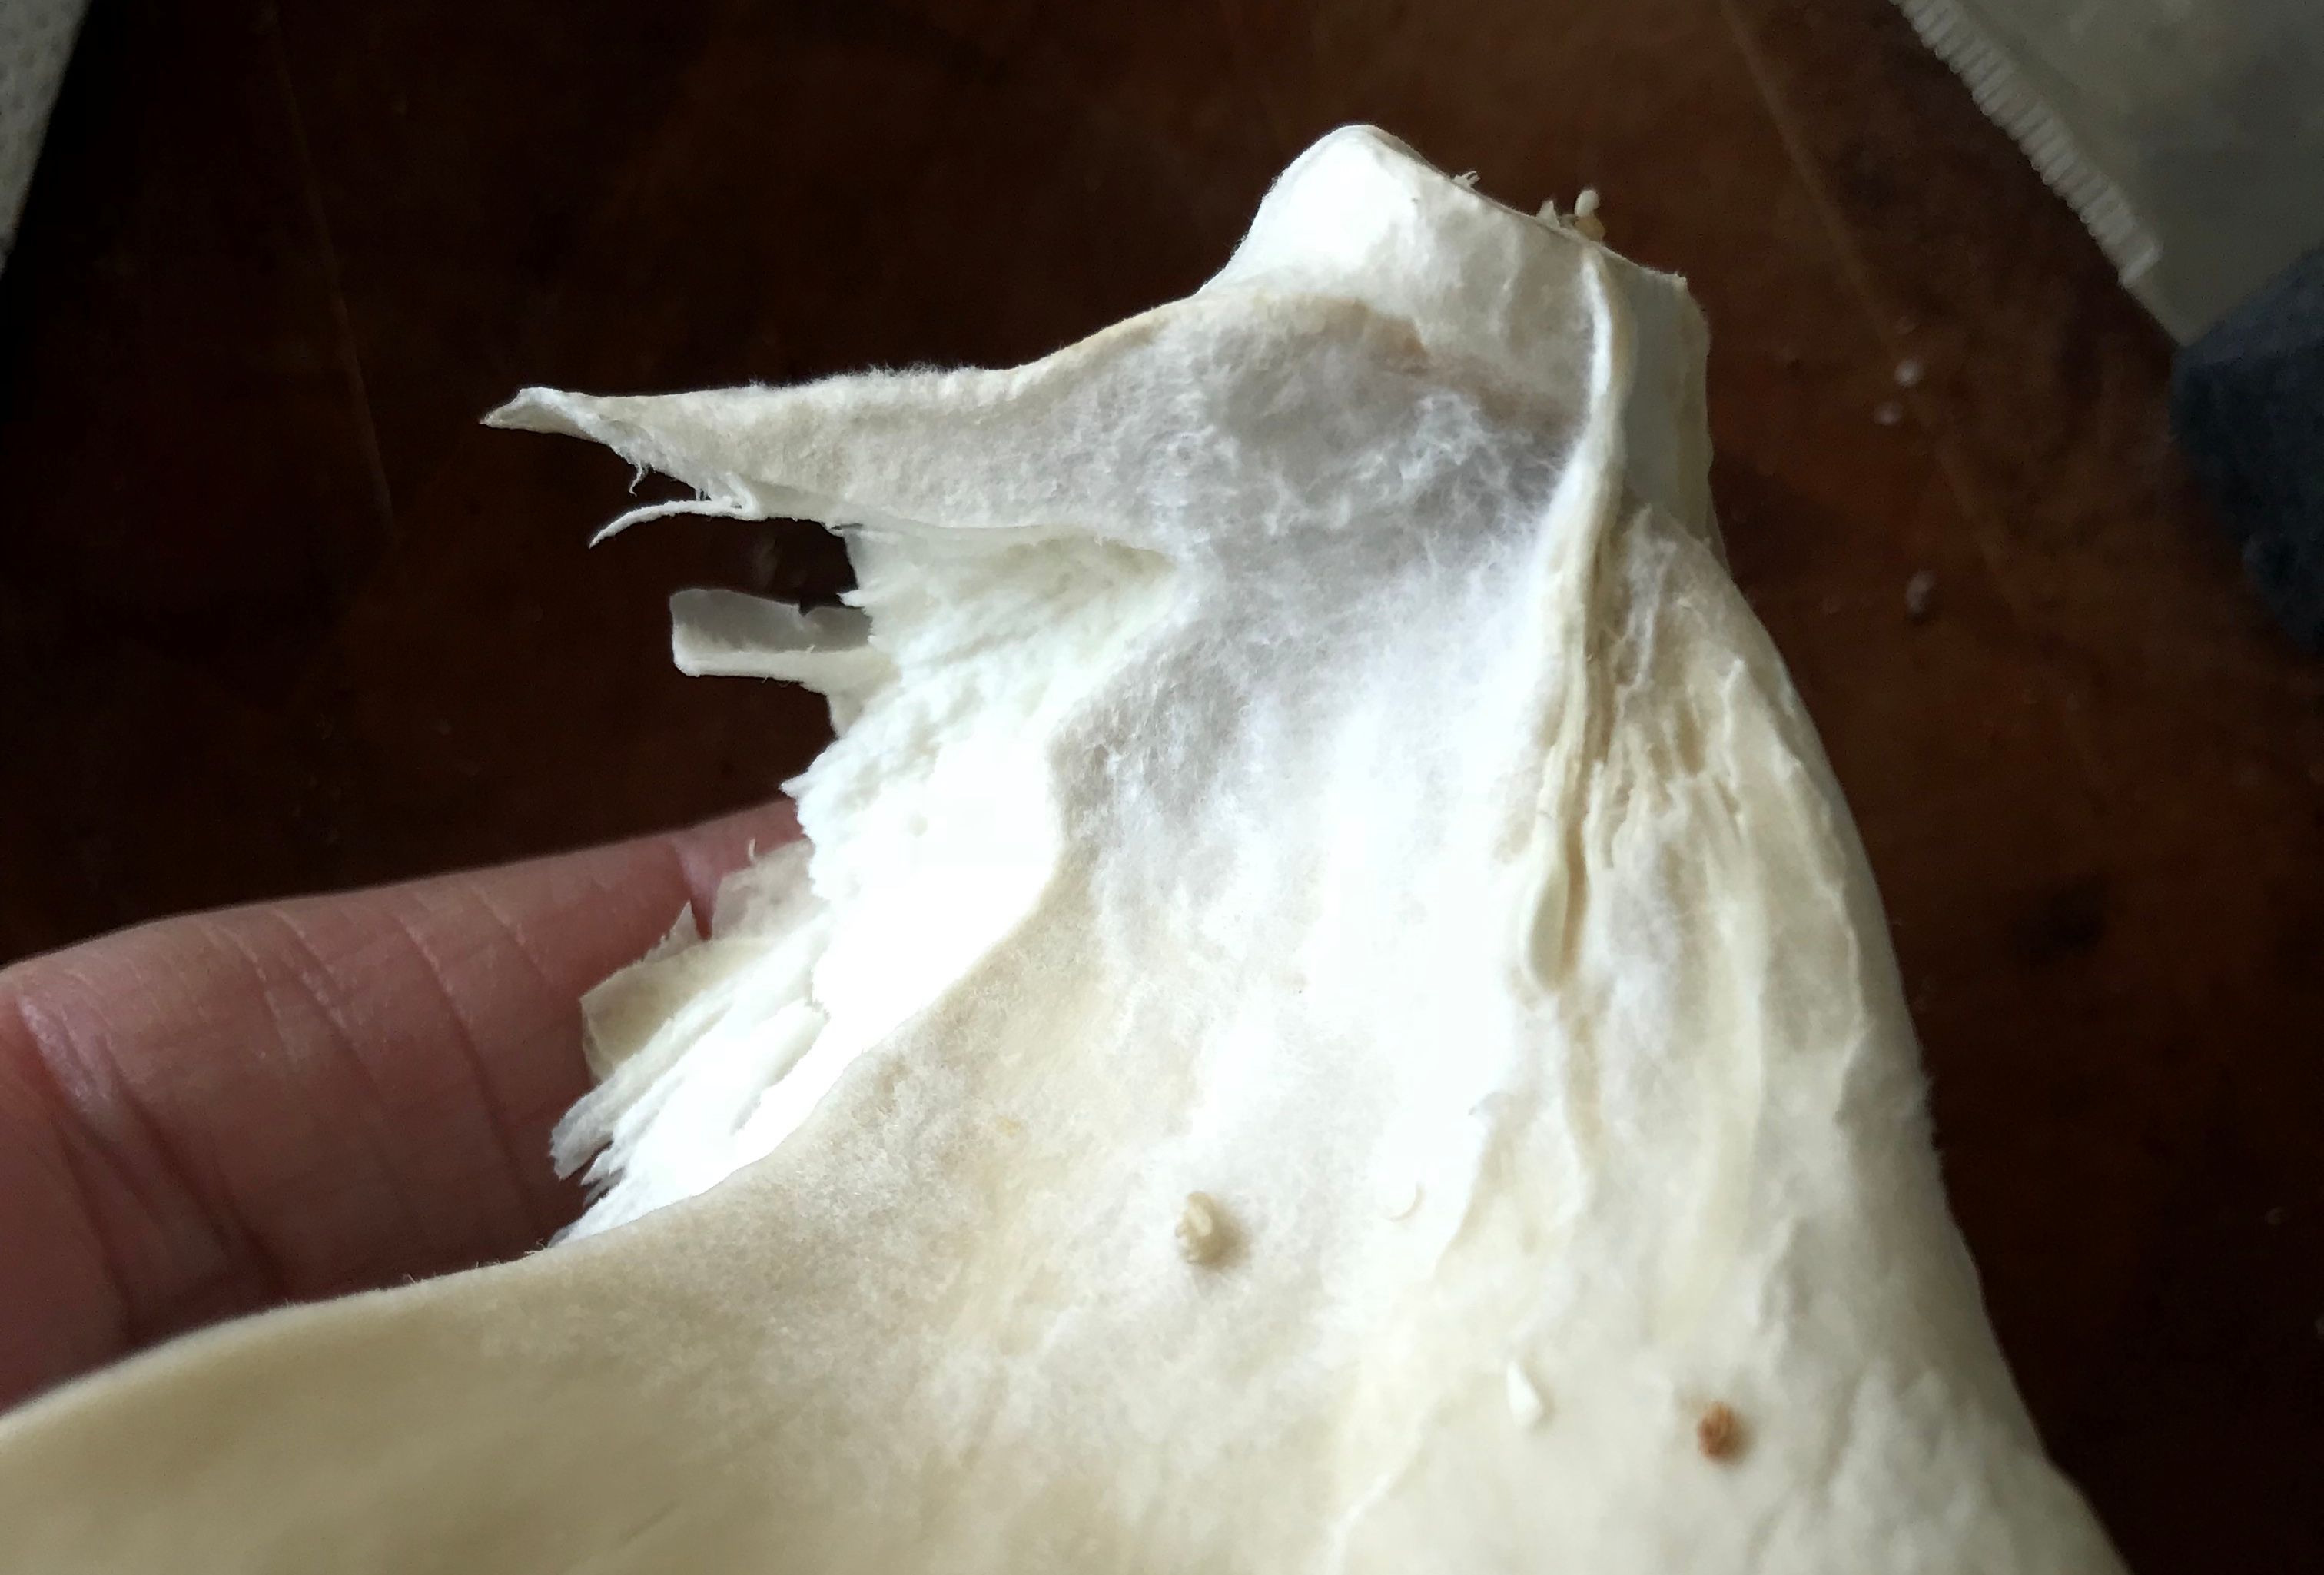
Maybe not on all stems, but you will probably find 1 or 2 that still have some mycelium attached. I have included a picture of it, I hope it's clear enough for you to recognise the mycelium on your own!
Step 3: Cut off small pieces of mushroom that have mycelium growing on it and transfer it to your container with used coffee grounds. Put the pieces on top of the coffee grounds.
Step 4: Close your container. It does not have to be airtight. In my case it is, but since I will be opening the jar every day, it will have enough fresh air to let the mycelium grow.
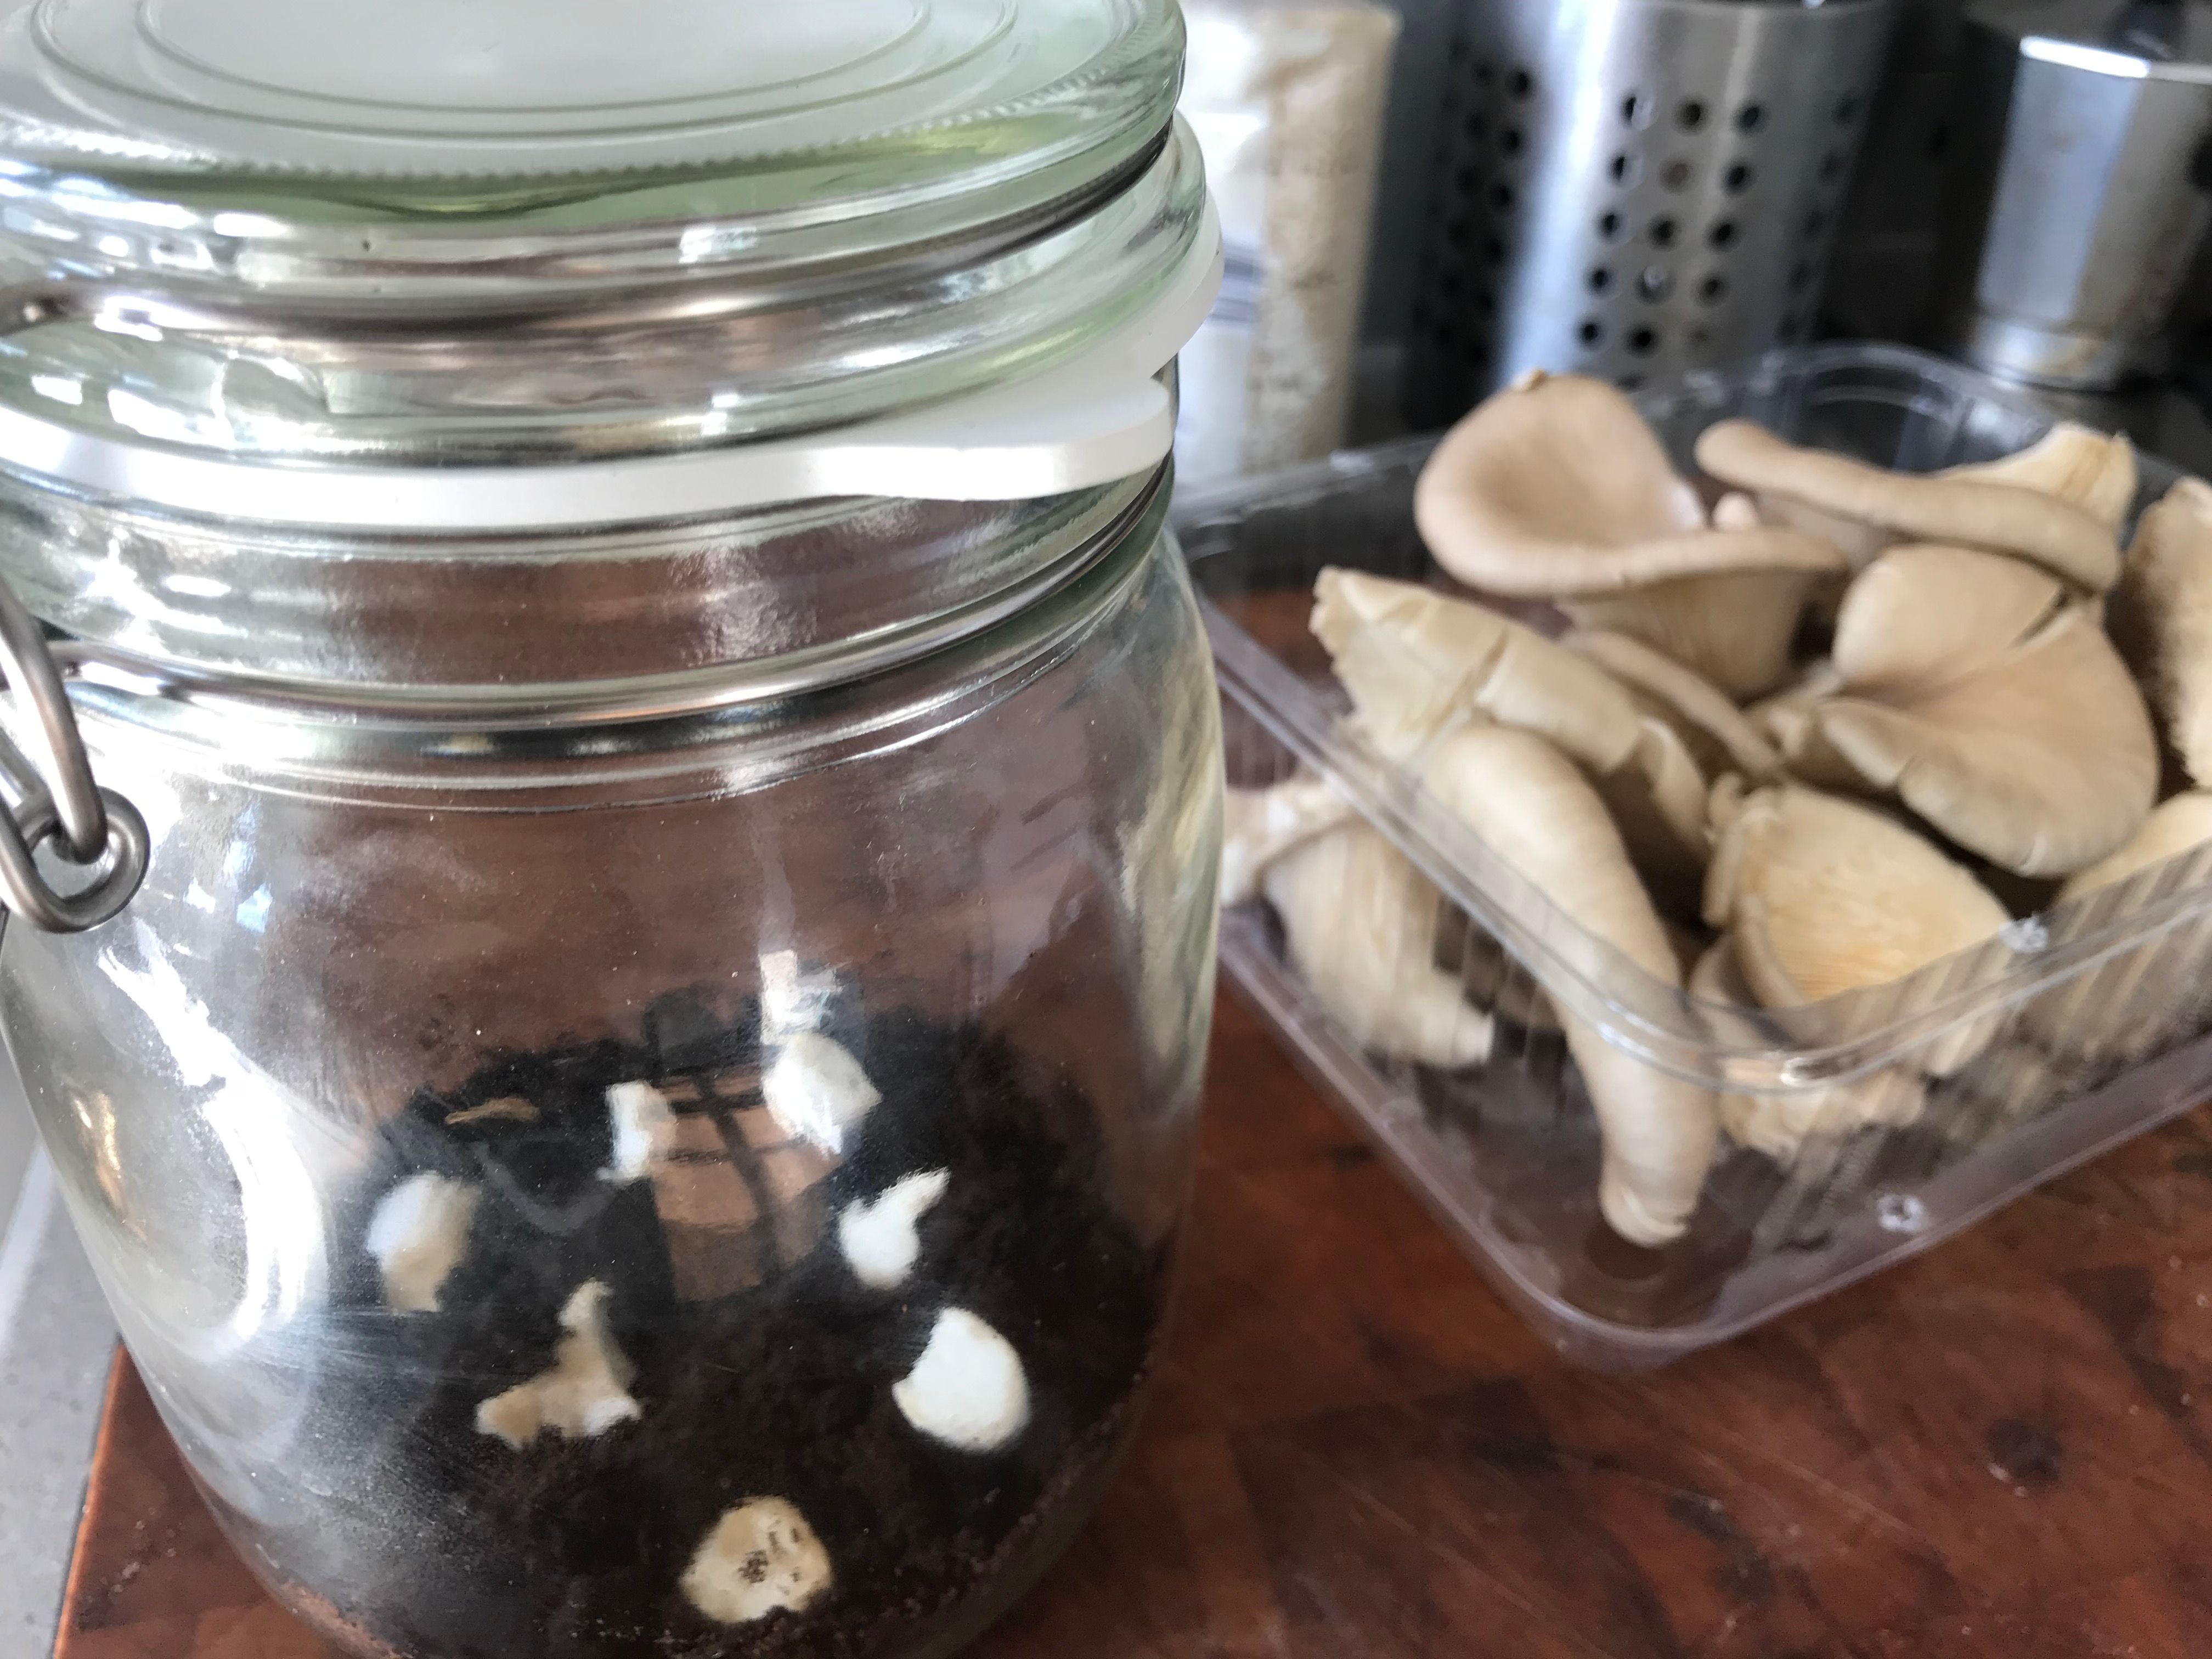
Step 5: Watch your container closely. Once the mycelium starts spreading throughout the coffee grounds, you need to add more fresh, used coffee grounds. And by doing this regularly; adding more used coffee grounds every time the mycelium has spread through (this is called inoculation btw) the previous batch, you'll end up with a container full of it. What you have now is called spawn and this is what basically gets sold as grow-your-own mushroom kits.
You can now leave it exposed to air and wait for the oyster mushrooms to start growing. You will probably be able to get 2 or 3 little mushroom harvests (flushes) out of it.
That is basically it. If you have any questions or comments, leave a message below!
I will keep updating this post with my results, so you can see how this adventure will end :)
Update 2018, March 2:
Three days later, the mycelium is growing. Look at that!
Bright white, fluffy mold. I've opened the container daily to let in some fresh air and will be adding some new used coffee grounds today, while it is still lukewarm.

Welcome to steemit! This post is so well done...love the photos and the easy to follow directions. It truly is something anyone can start even on a small scale. Thank you for sharing this.
I am a curator for a group called helpie...our goal is to find great content and lift it in any way we can. I would love to feature you in our next curation report. You would be paid for your content from the post payout and also help you get more of an audience ❤
Hi @llfarms, thank you so much! It would be great to be featured in your curation report! Could you tell me when it would be scheduled, because I would love to have another post ready just before that, ideally :) And where can I
find your helpie group?...never mind, found it :DYes, it comes out tomorrow actually so this and your growing mushrooms post will still be active. I normally like to feature one post but also link 2 others. I know its not a lot of time but if you do get another post up feel free to DM me it so I can link it as well. Helpie has a steemit blog, @helpie where you can see past curation reports and check out what we are about. Thank you so much and let me know if you have any other questions.
O yeah, I keep forgetting about posts being 'active' or not, have to get used to that :) I can't write the post I was planning for the coming week before tomorrow, because I still have some photography to do for it. But go ahead and include the mushrooms post and maybe a link to this one: https://steemit.com/hydroponics/@nerdi/my-very-first-diy-hydroponics-system. I am happy with the exposure alone, you can consider the share of the post payout you would pay me as a donation for helpie :)
Upvoted on behalf of @thehumanbot and it's allies for writing this great original content. Do not use bid bots for at least 1-2 days, as your post may get picked up by top curators.
Great Original Works are rewarded by top Curators.If you like this initiative, you can follow me in SteemAuto and upvote the posts, that I upvote.
And remember to do some charity when you are rich by contributing to me.If you have any concerns or feedback with my way of operation, raise it with @sanmi , my operator who is freaking in Steemit chat or discord most of the time.
Very nice
Thank you!