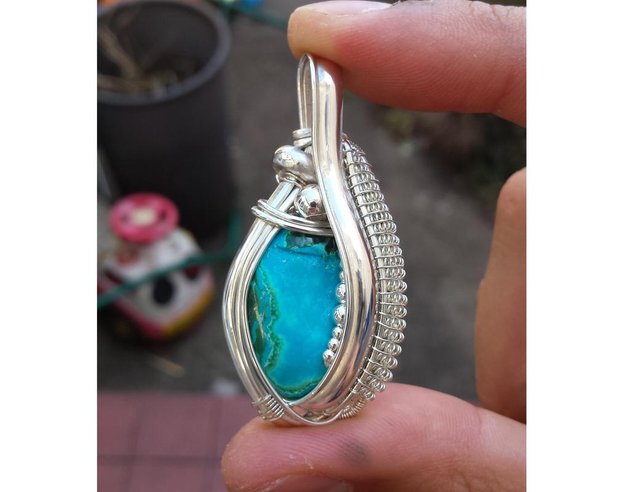
Chrysocolla Pendant : How to wire wrap a cabochon - How to: Weekly Contest by @robali123
Hiya!
It's a bank holiday this weekend in the UK which means no work Monday, and as I had the day off Friday I've been treated to a four day weekend, bit of a result! Not much has been done so far, lots of lounging around and a little bit of jewellery.
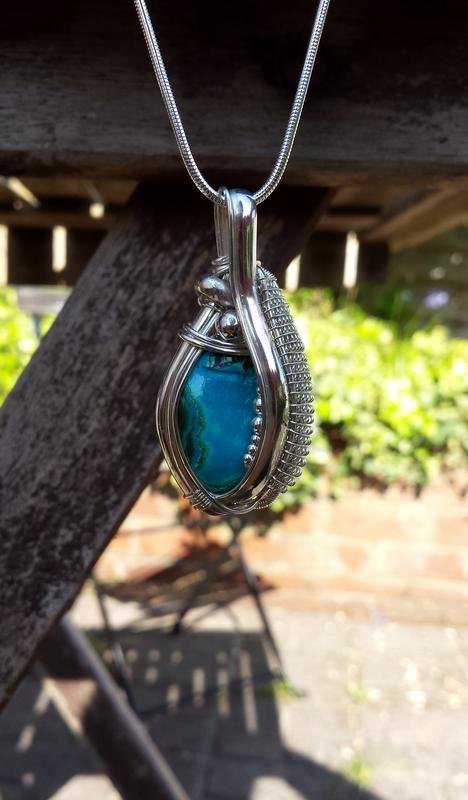
I've been working on this commision for a birthday gift. They requested a Chrysocolla and Sterling Silver pendant but gave me pretty free reign on the actual design. Overall its taken a few evenings from design to finish but that's included lots of breaks and getting sidetracked! Actual working time is probably around 5/6 Hours.
The Process
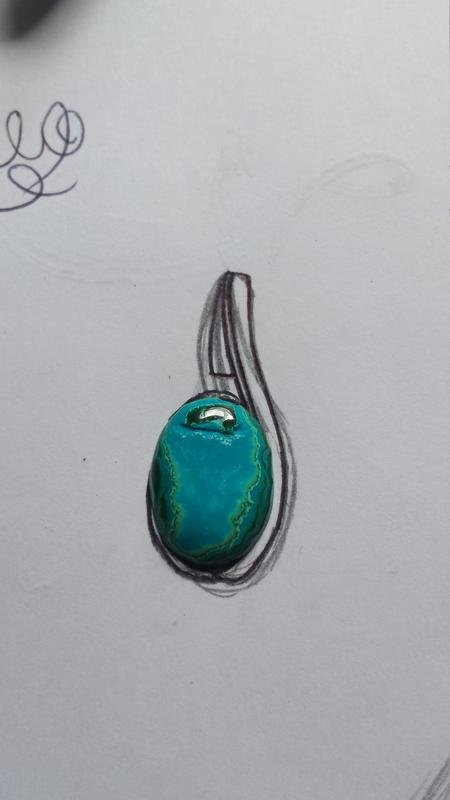
First up, when working with Silver, i tend to draw up some design ideas first. With copper, this isn't so important as the wire is dirt cheap and having to scrap a design halfway through doesn't financially cripple me! Here's the rough design I was happy with.
Next, I begin with some heavy gauge wire to build a solid base for the rest of the design to come off, I always get a little nervous working with this thicker stuff, must not waste materials
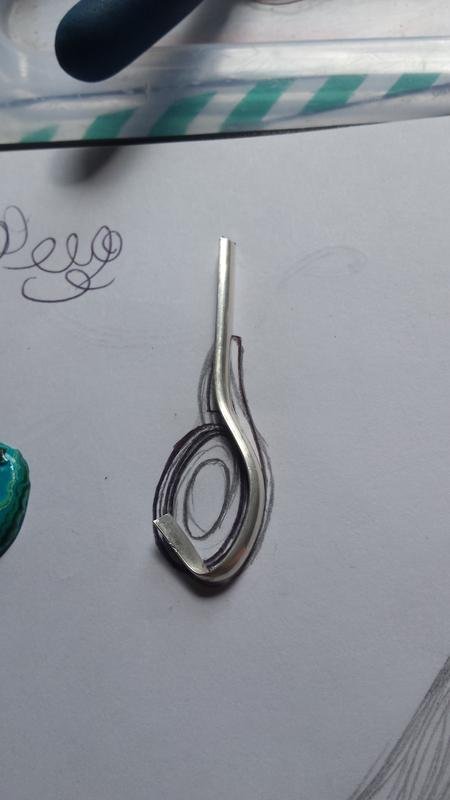
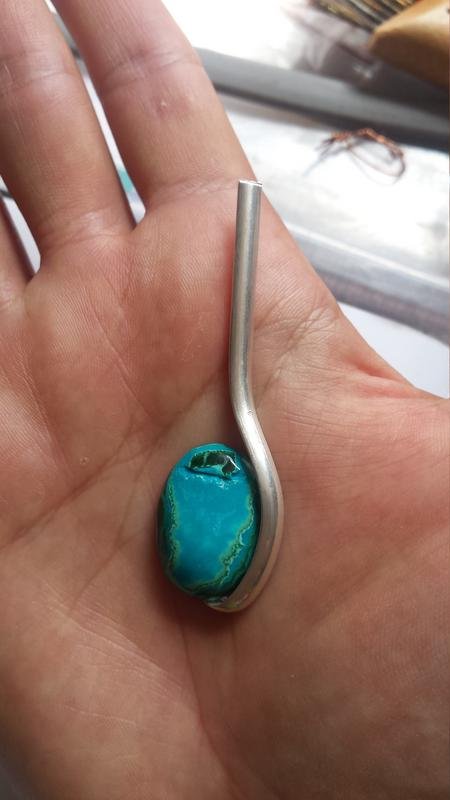
Using the drawn image as a template can be useful as a guide. I'll tweak the shape and keep checking to see how the stone will sit. It's important to get this bit right otherwise the rest of the wrap is trying to sort out or cover up the first mistake.
Using copper wire to experiment I begin adding different gauges of wire to secure the stone and add to the design. The thin copper wrapping wire is really good for holding things where I need them till they are permanently anchored.

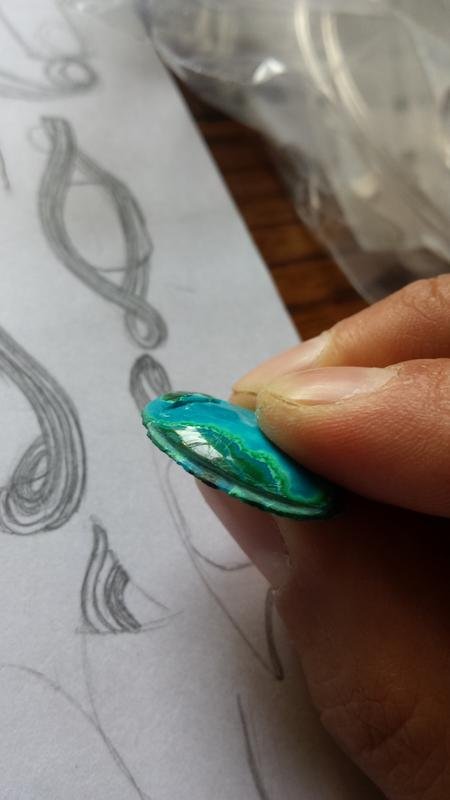
Something I've only recently felt brave enough to do is to file the stones I'm wrapping myself. A lot of the gems I buy come as rough stones or cabochons but rarely do they have grooves or holes drilled to assist with wrapping. As Chrysocolla isn't very hard I was able to file a groove with some diamond tipped needle files.
Here you can see the back of the piece where I hide all the messy ends.
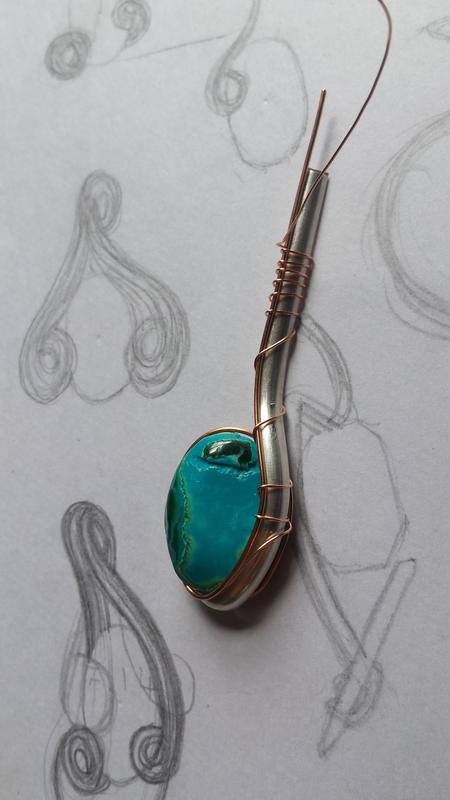
The wire to the left of the stone here is now relatively secure as it sits nicely in that groove i previously cut.

Adding some coiled wire to the right adds pressure to the other side of the stone to keep it secure, and it looks nice!
Using fine silver wire I begin adding a wrap to the twisted section.
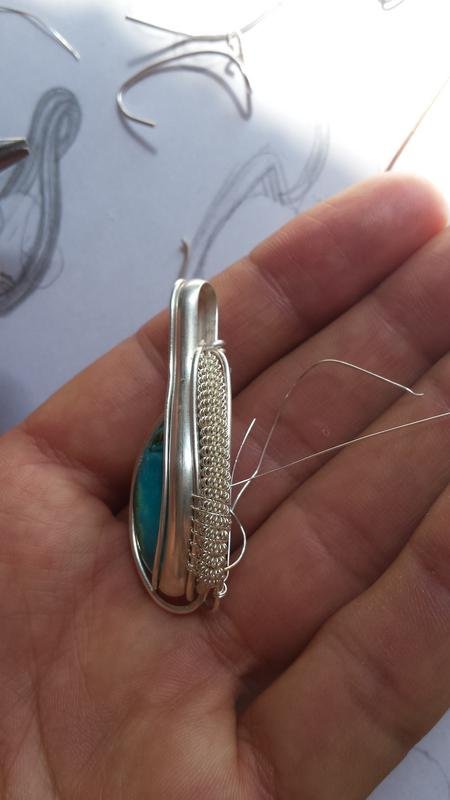
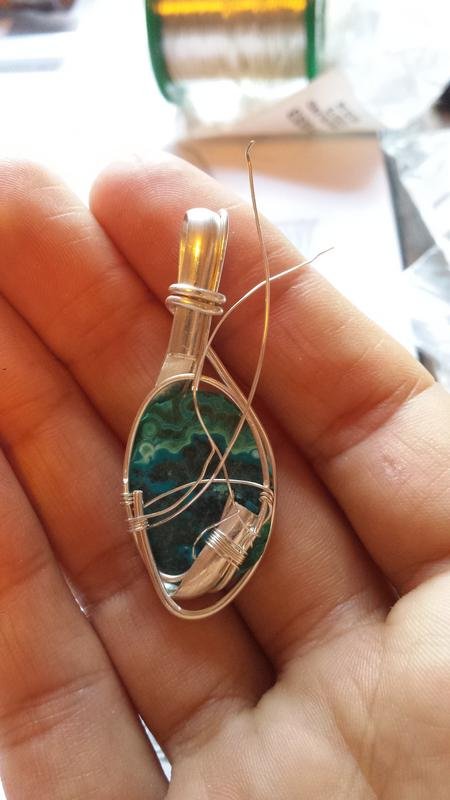
As this is a piece of jewellery and not a flat painting it's important to make sure it looks good from all or at least most angles, this side needs some work. You may also notice, as I did, that the wire on the right has shifted forward leaving a pretty big gap between it and the stone. I need to sort this out too.
My solution for the gap was some partially hidden silver beads. I love adding plain round beads to my designs, they're good for filling gaps and break up the solid wire lines a bit.
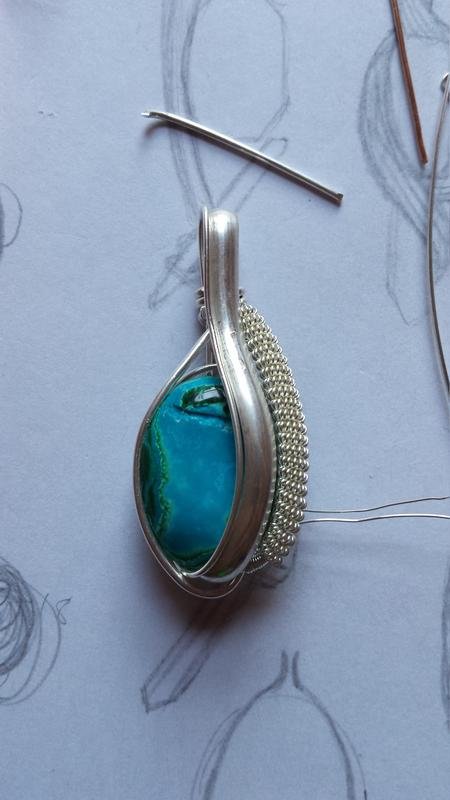
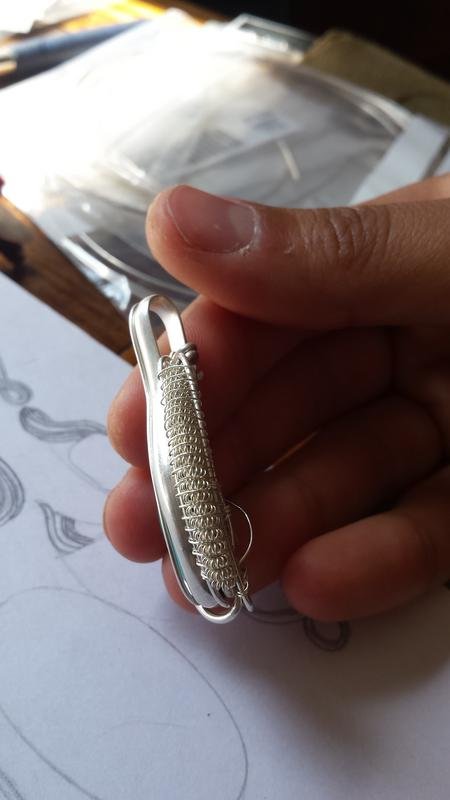
To the left is the cover piece for the other side. At this stage of the process it's risky to anchor heavy gauge wire to the piece and try and bend it to shape whilst its attached as its quite stiff it can pull the design out of shape. I know this from several ruined pendants in the past! So as you can see i've shaped it to fit perfect before attaching it with fine silver wire.
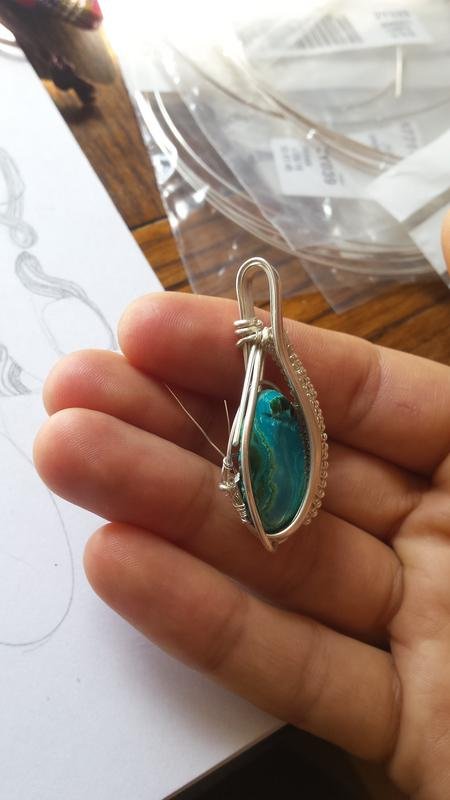
I didn't get any more photos of the final stages as I forgot but after the little touch ups and tucking of stray wires all thats needed is a polish and it's done!
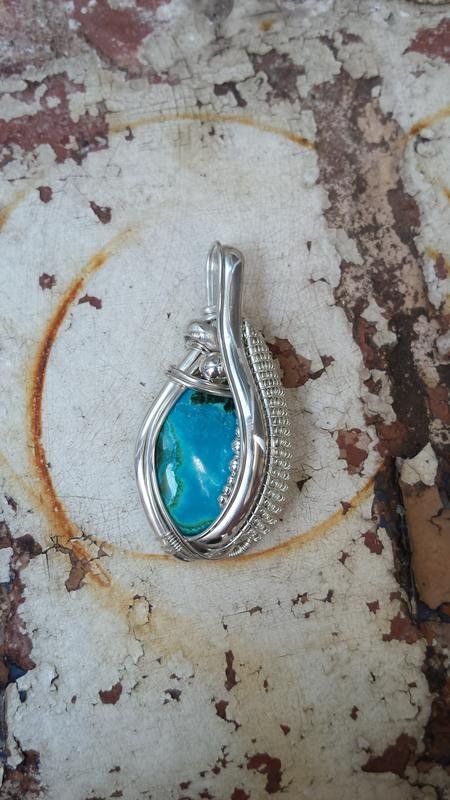

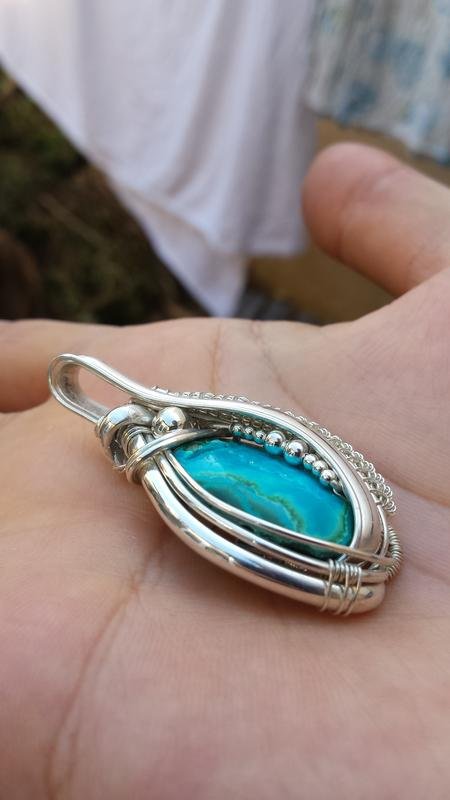
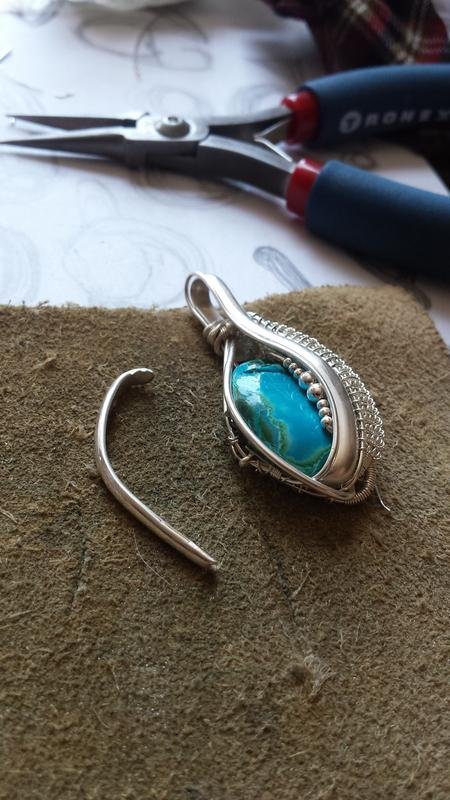
A fine snake chain completes this commission, ready for the customer :)
Previous Post - Malachite Pendant - https://steemit.com/steemmakers/@robali123/malachite-and-copper-commissioned-necklace

Hi @robali123, I just stopped back to let you know your post was one of my favourite reads and I included it in my Fiber Ramble. You can read what I wrote about your post here.
Join us on Mondays for Coffee Hour at 1pm EDT in the Steemit Fiberartists on Discord or view it live on the Steem Star Network.
That is a beautiful pendant! Fabulous job with the silver work! I am so glad this post was shared by @fiberartists because I love stones and crystals. In fact, I posted about my own chrysocolla stone just a few days ago! Lovely work! 💙
Congratulations! this post got an upvote by @steemrepo and was manually picked by the curator @bitius to be added on STEEM REPOSITORY, simply comment "YES" and we upload it on STEEM REPO Website.
Wants to know more about the Steem Repo project? Contact us on Discord
YES
I don't know what to tell you - I am amazed by your work with every post you push out.
And I've finally figured out why I can't, even with a fairly detailed walk-through, get my mind to accept how it's done. It is basically the opposite of what I do - I find the shape in the material and remove the stock until it's out. You find the shape in your mind and add until it's done.
That's why every time I see one of your work, I have a picture of a little grinder in my mind and I'm trying to visualise how I would grind/carve what I'm seeing ;)
Thats a really interesting thought. Ive recently been watching lots of smithing videos and my underlying thought is always how frustrating it looks. Pounding a lump of steel slowly slowly into the right shape. It boggles my mind a bit. Wood carving i can manage. But with the metal youre squashing it as well as then taking away material. I think youre right we literally are oposite ends of the metalworking spectrum!
I just last night watched a guy making mokame gane? Using zinc and copper. Im assuming its quite a difficult one to do and wont be a very useful blade but it looked stunning
Mokame gane does look awesome, in knifemaking they usually use them for guards or even scales, but you are right, it's a pain i the ass to make it and you can not make a (good) blade from it.
Resteemed your post for free!
Join our Discord Channel to connect with us and nominate your own or somebody else's posts in our review channel.
Help us to reward you for making it ! Join our voting trail or delegate steem power to the community account.
Your post is also presented on the community website www.steemmakers.com where you can find other selected content.
If you like our work, please consider upvoting this comment to support the growth of our community. Thank you.
Your Post Has Been Featured on @Resteemable!
Feature any Steemit post using resteemit.com!
How It Works:
1. Take Any Steemit URL
2. Erase
https://3. Type
reGet Featured Instantly & Featured Posts are voted every 2.4hrs
Join the Curation Team Here | Vote Resteemable for Witness
Beep bop, this is @pushbot.
I just received a signal from the Mother Ship that you may require a push.
You just got a 7.69% upvote courtesy of @howtoweekly!
Message from the Mother Ship:
You can earn daily profit by delegating SP to make @pushbot stronger. Delegators receive a share in 95% of the earnings.
10 SP • 20 SP • 50 SP
100 SP • 200 SP • 500 SP
1000 SP • 2000 SP • 5000 SP
Any Other Amount
Resteemed your article. This article was resteemed because you are part of the New Steemians project. You can learn more about it here: https://steemit.com/introduceyourself/@gaman/new-steemians-project-launch