Changing a gut violin string
Changing a violin string is a part of essential maintenance of our instruments. Often, when you are a beginner, you just change them when you snap, or if you are teacher, you field panicked calls from parents thinking that the instrument is irreparably broken...
However, as a professional, you change them much more often... maybe even as often as several times a year, as the strings start to ring false and respond slower than when they were fresh. The advent of metal strings sometime near the beginning of the last century removed the need to change them more frequently than that.
However, as my specialisation is in Early Music, I use mostly strings of naked gut (made generally from cow or sheep). These grow brittle and wear much more easily than the metal strings of our lazy modern cousins (ahem, @silentscreamer), but we use them as they produce a different timbre (quality of sound) that is more appropriate for the compositions that they were composed for (everything before the turn of the 20th century, and arguably up until the 1940's!). The quality of sound (timbre) is warmer and more transparent, and the attack (beginning of the note) is much quicker than those of a metal string.
Like most of our modern conveniences, a modern metal violin string is pretty much a plug and play affair, although there are some similarities in stringing technique. For a metal string, I can usually have it strung within a minute. A gut string is a slightly slower affair, and with this particular violin that I'm demonstrating with, a complete bastard of an affair....

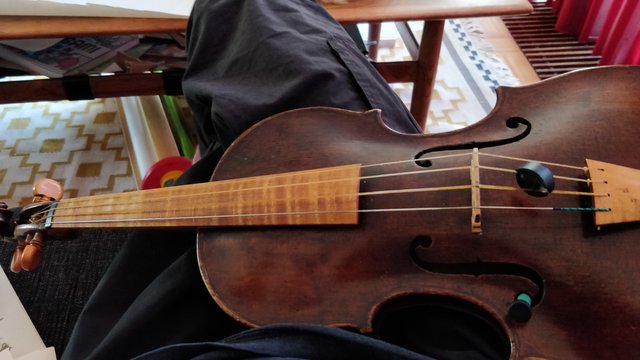
The Patient
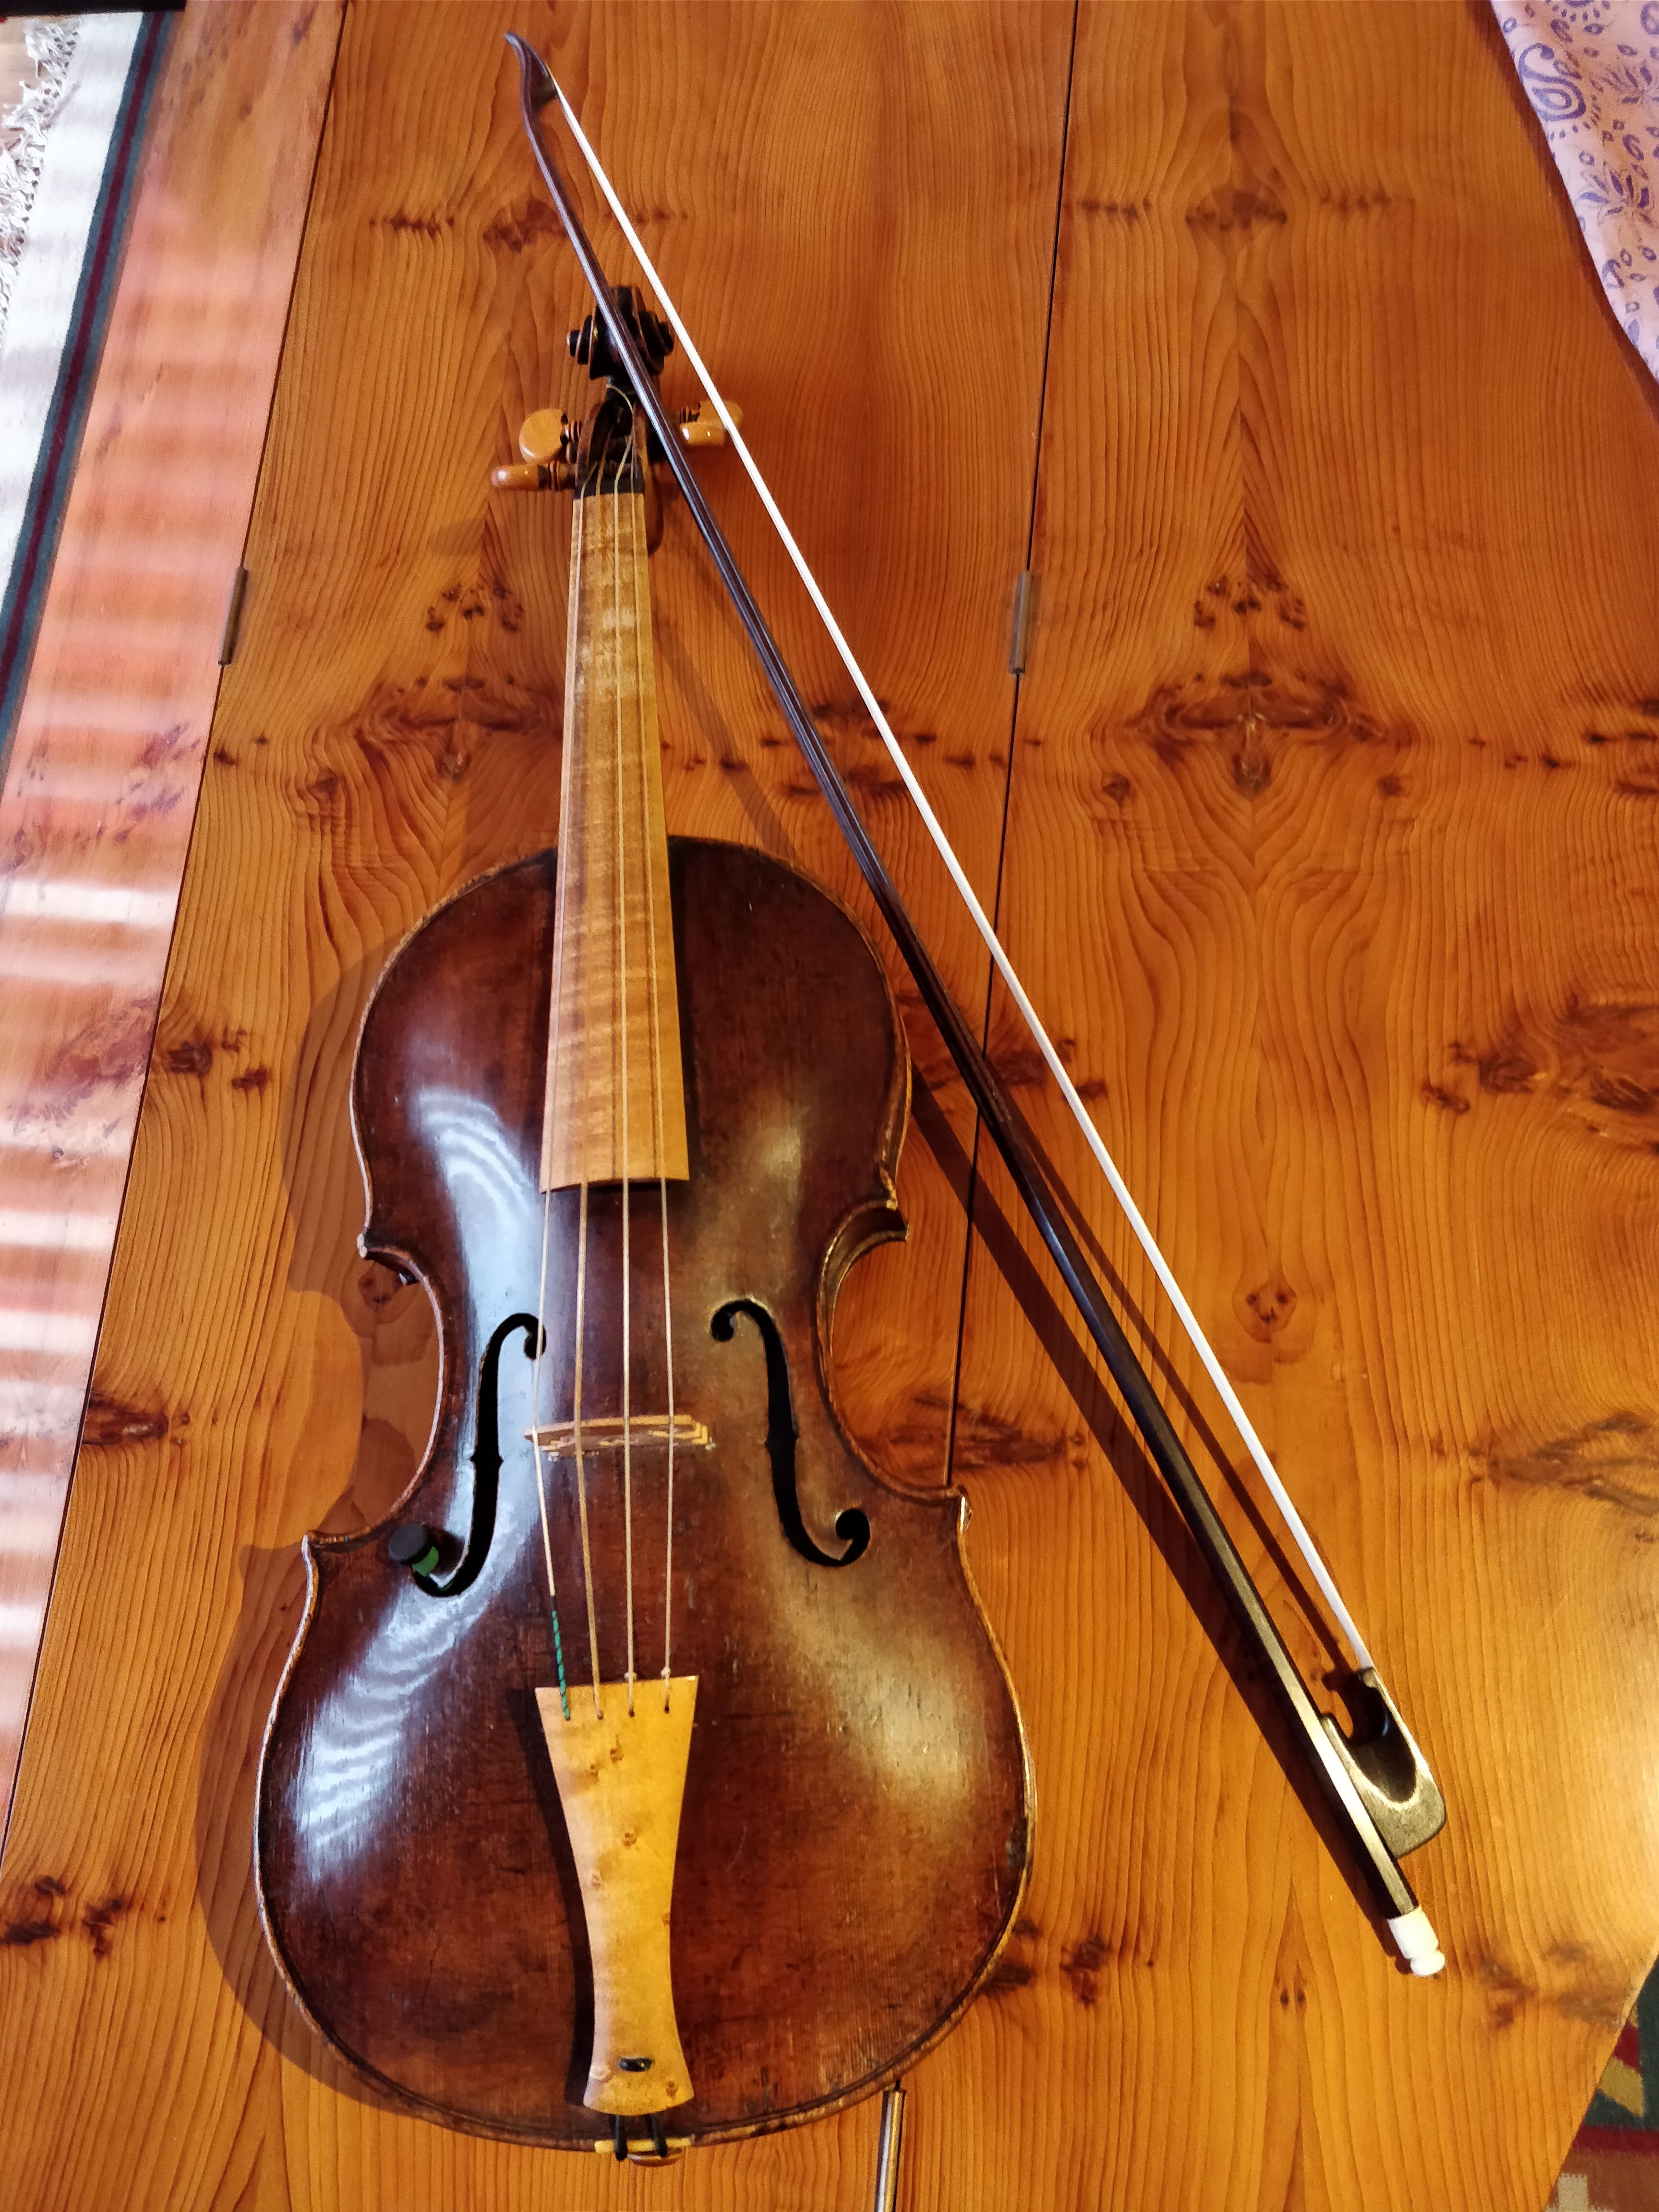
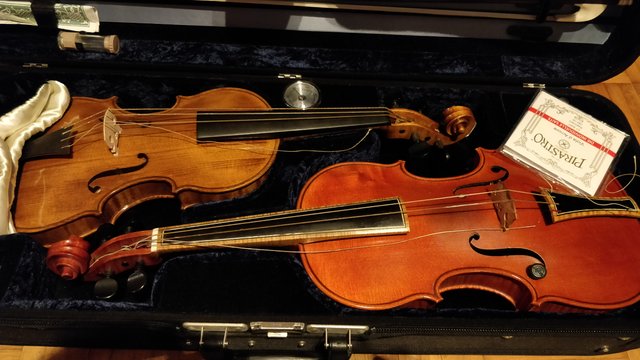
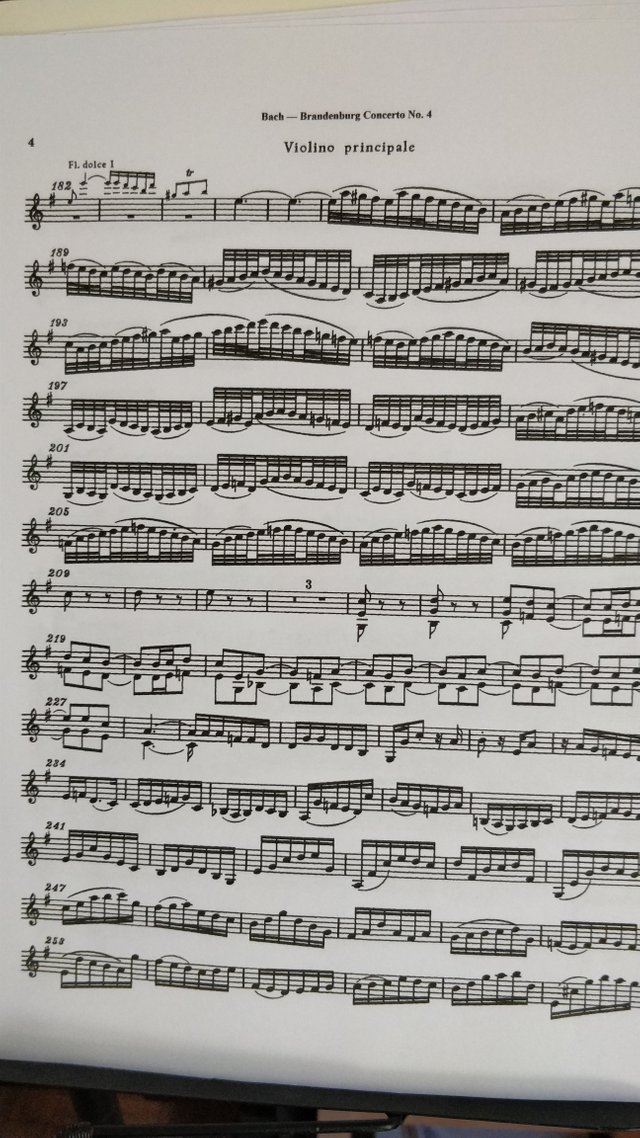
This is the violin that is in need of a quick string change. It is my main Baroque violin that is an anonymous maker from the 18th century, it is really a joy to play but a pain in the arse to string. As I had posted in this post, I have some slightly tricky pieces to get under the fingers, and having your violin in top condition always helps! It's just like tuning a car for performance or tweaking the settings of CPU voltages to get maximum performance from your tools! Gut strings tend to grow brittle and slow to respond with age, as they are more heavily affected by weather condition and general wear and tear than their metal counterparts.
The peg-box on this violin is unusually narrow and cramped, which makes it hard to get the string threaded into the holes of the peg itself. In addition, the holes that you thread the string into are quite worn, and so the string slips out incredibly easily as you turn the peg. I really should have the pegs replaced completely with new ones, but that normally takes a day to have them fitted (they need to be well fitted to turn easily, yet hold their spot with only friction), but procrastination and needing the violin conspire to put that particular chore on hold...
The New strings
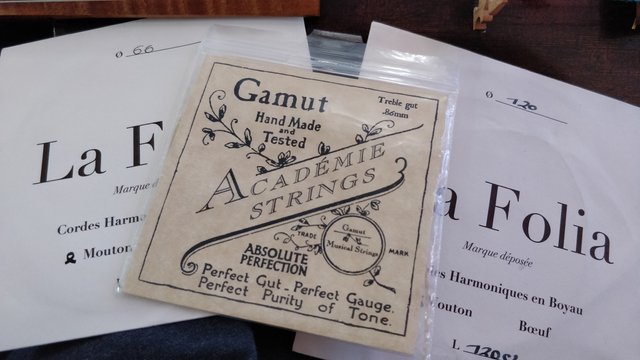
These are the new tyres, or strings... In the Early Music gut world, our strings come in different widths (gauges, these are the numbers on the packets), brands (different winding techniques), styles of winding and materials (cow, mutton, sheep or silk to name a few). With every instrument and player it is a different combination of all of the above to have an optimal output of sound quality, reaction time, and ease of playing. So, it is often a huge investment in time and money to find the right combination that works. For this particular change, I didn't have the exact gauges that I usually prefer for this violin (I was running low on string stock), but it was close enough and better than having old brittle strings. Each of my violins/violas/viola d'amore uses a different combination of string types/qualities.
Normally, it is a good idea to have as fat a gauge as you and your instrument can play well on. It makes a fuller, richer and stronger tone... however go too far and the violin will choke or you will not be able to grab the string with the bow with any ease. In addition, as you have four strings pulling at a common point (the tailpiece), it is a good idea to have the tension forces balanced so that the violin holds it's tuning. If they are mis-balanced, then the violin will pull itself out of tune constantly.
String Preparation

I know many people that soak their strings (or at least rub them down) with olive oil to help keep their freshness and suppleness, however, I'm just too lazy to do that and I just pull them out of the packet and use them directly. If I'm expecting some seriously humid conditions, then I will order varnished strings, which are more weather resistant at the cost of quality of sound (and a weird smooth feeling under the fingers).
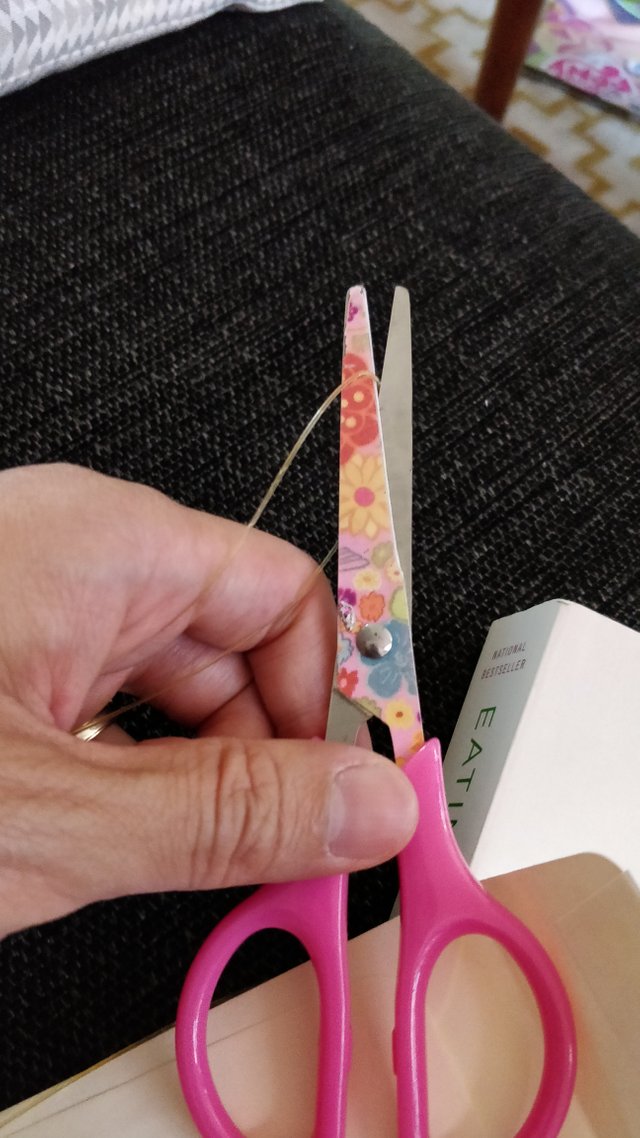
First up, every string packet comes in double lengths, which means there is twice as much string as you will need to replace the string. So, the first thing to do is to cut them in half and stash the other half away for next time (or for when you botch a job). Normally I would cut them with something super-manly like a machete or a broadsword, but this was all I had at hand today! If I'm in an orchestra, one of the wind reed players will be carrying a incredibly sharp knife (they always need them for shaping, scraping and trimming their reeds) as they are crazy psychos!
Tying the knot
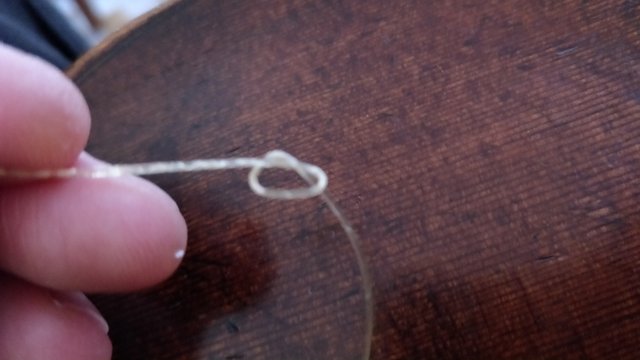
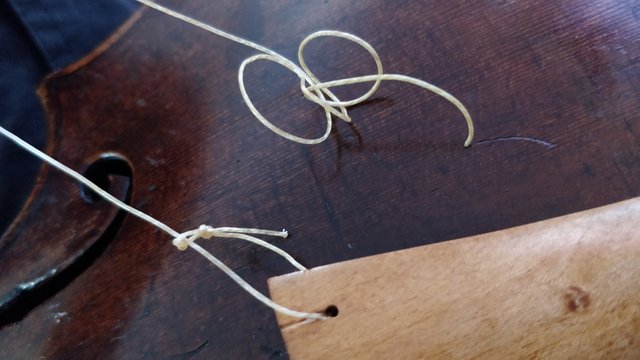
After threading the string through the hole at the tailpiece, you will need to tie a knot to hold the string as you pull the tension up from the peg end. There are many versions of doing this (including using a flame to melt the gut into a ball) but this is my tried and true method. First, you tie a beginning knot, just like you would on the first step of tying the bow on a shoe.
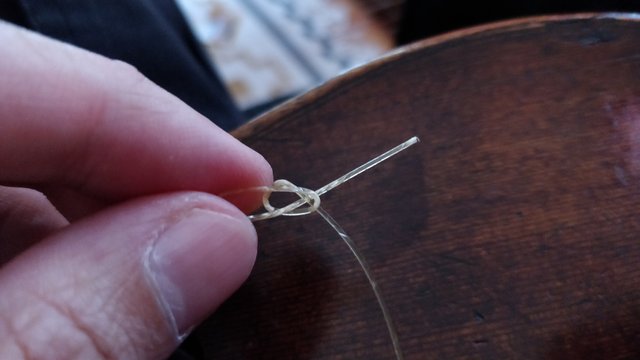
... and then you thread the loose end back into the loop of the knot, so that when tension is applied, the loop of the knot will close and hold tight on the loose end. This makes a knot that is too big to pass through hole at the tailpiece.
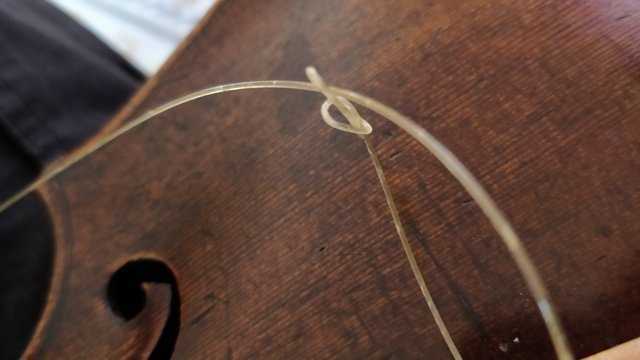
I also thread the rest of the string back through the eye of the loop, so that when tension is applied, the string is pulling on itself rather than applying all the pressure of the string at the hole of tailpiece, which would reduce the life of the string and possible widen the hole of the tailpiece over time. As you pull the string through the eye of the previous knot, you need to be really careful to not kink the string as this creates a permanent defect in the string which means the sound quality will suffer immensely.
You do what?
For some reason, I know a lot of my colleagues skip this part, or don't even know why I do this. The bridge is the piece of wood that holds the strings up off the body of the instrument. It supports the whole of the downward tension forces of the strings (which can be on the order of 10kg, or 100N), and it is held in place only by friction. So, when you tighten the strings, you are bending the bridge forwards or backwards due to the sideways shearing force applying a torque to the bridge. This means, if you are not careful, the bridge will snap or fall over... leaving you with some potentially serious damage. Or at the very least, if the bridge has moved, then the string length is different which means that your fingers will be hitting the wrong place to play in tune (given that on the violin we are looking accuracy of finger placement on the order of millimetres).
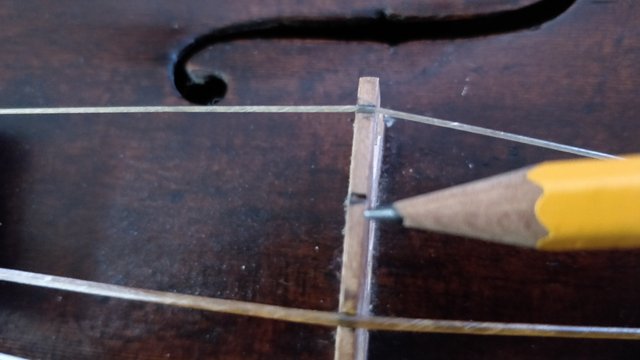
Thus, I find it best to use a lubricant to help the string glide over the bridge as you tighten the string, instead of pulling the bridge to the side. Oil is a bad idea as it would damage the varnish of the violin and also would cause the bow to slip on the string (making no sound when you play!) if it got onto the playing area of the string. Thus, I use a really soft pencil, to just paint the contact point between the string and bridge with a bit of graphite, which is a great lubricant.
The threading through the peg
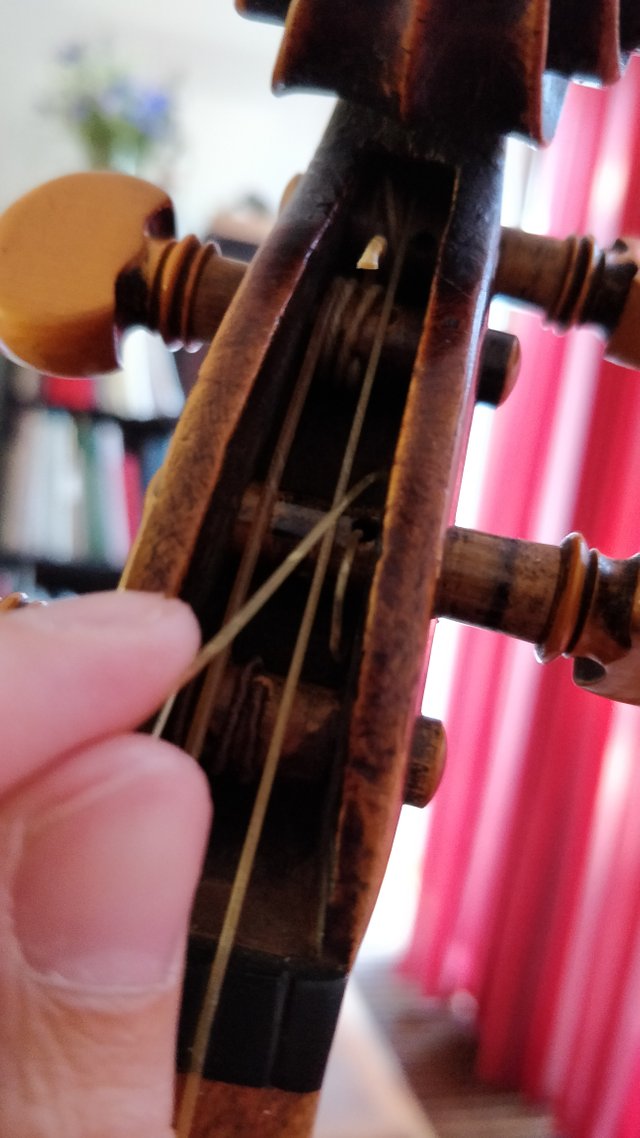
Unfortunately, this part I have less photos of, as it was a job that needed two hands and on this particular violin with the worn pegs and the narrow box, it was just a difficult procedure. I hope the above photo is clear enough to see what is going on.
So, with the tailpiece end of the string knotted and ready to be secured when the tension is applied, it is time to get the peg end secured. If you look closely, you can see that each peg has a hole that goes through the wood of the peg. This is where you thread the loose end of the string. For most violins, you would thread it in to have a few centimetres of string poking out the other end and then you would wind up the tension and the string would hold itself in with friction. This violin is not a co-operative one, luckily it is a great sounding one, or I would have thrown it out the windows in frustration...
This violin, the hole through the peg is so smooth and worn that as you increase the tension, the string slips free... So, after threading the string in, you need as much poking out the other end as possible (preferably at least 5 cm). And with that loose end, you need to hold it under the part that tightens as you wind the tension up on the peg. Hopefully this traps the loose end under several coils of the tightened string, under enough pressure to keep it held.
This particular day, the violin was being especially painful... perhaps it knew it was going to be written about and have photos taken... The A and E strings, even after being trapped under several turns of the peg, slipped out after nearly full tension (on the order of 7-10 kgs of tension, or roughly 70-100 N), and with both of them, they kinked themselves when they came undone (they shoot our pretty fast). So, essentially made them unusable for me. Luckily they were double lengths....
Realigning the bridge
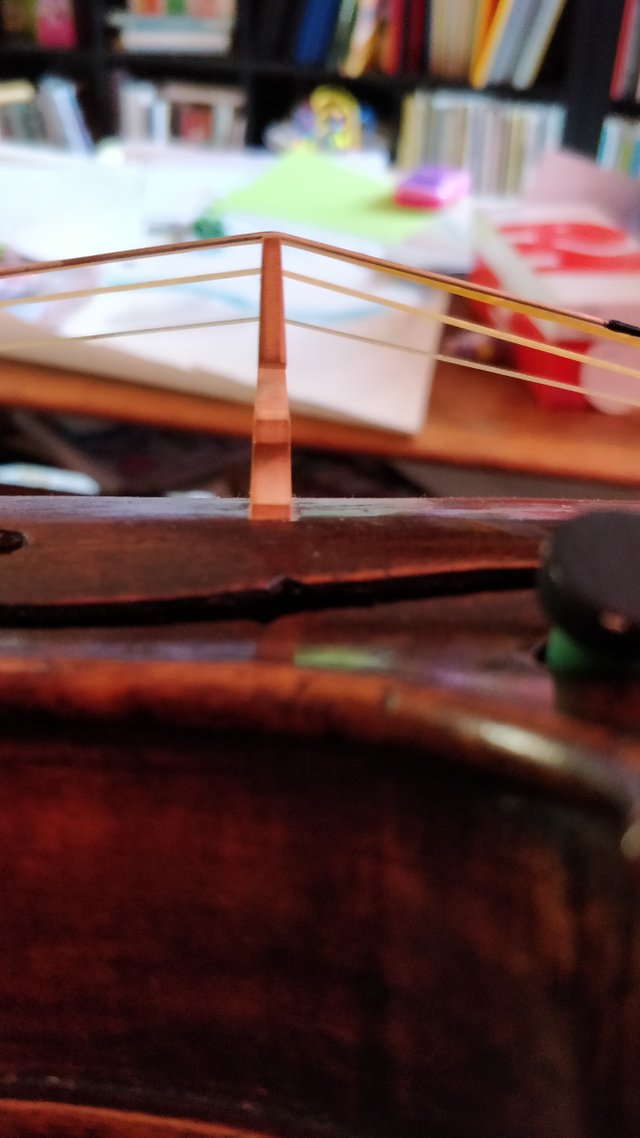
Again, this is a step that many of my colleagues skip, as they don't like messing around with the bridge. Even with a bit of carbon lubricant, the bridge was pulled a little bit. In the photo above (which I realise now doesn't have a background vertical to help compare), it is pulled a bit forward, which is normal as that is where the increasing of tension should pull it. The back (the right hand side of the photo) should be straight up and down.
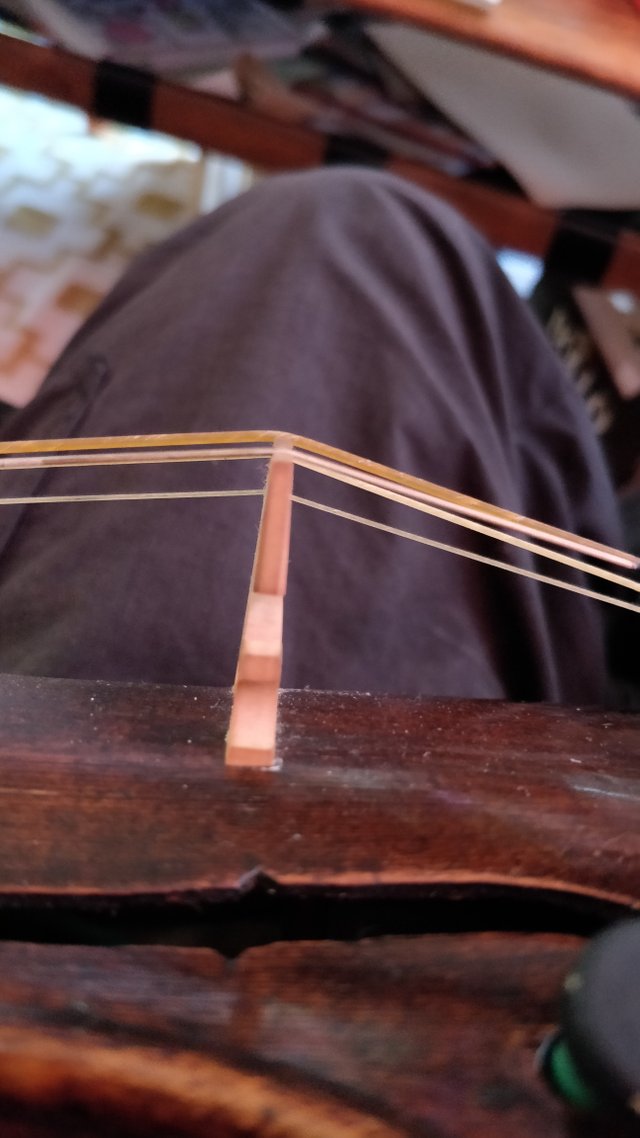
Again, it is impossible to show this technique easily as I need two hands (and knees) to straighten the bridge safely, but you can see that in the above photo, the back is now straight. Although, due to the lack of background reference, it is hard to see.
This step is really important, as you really don't want the bridge to fail or fall when you are playing... or at anytime at all! The main strength of the bridge is in it's vertical direction, it is quite weak in the horizontal direction. So it really needs to be vertical to minimise any horizontal forces acting upon it.
KLAAR!
All done and ready for action! Now, I can no longer blame the violin for holding me back as I try and scream around these notes!


The classical music community at #classical-music and Discord. Follow our community accounts @classical-music and @classical-radio. Community Logo by ivan.atman
![]()

Join us @steemitbloggers
Animation By @zord189

Upgoats by ryivhnn
Account banner by jimramones

Posted from my blog with SteemPress : http://www.gamerjokerbreadder.com/2018/07/08/changing-a-gut-violin-string/
Fascinating stuff @bengy
I thoroughly enjoyed reading about this because of the knowledge and detail that you have put into it. There's nothing better than observing someone in the zone and explaining things beyond the basics with the love and care that you have for it.
Thanks for posting.
Gaz
Glad you enjoyed it, it is a bit of annoying maintenance that needs to be constantly done, but the fact that I could write and share it made me look at it differently!
Cool. It seems like it's always the way when you unpack your thoughts a write them down. I love steemit for that reason.
Such a helpful and detailed post, @bengy! Our son's violin instructor changes out his strings but I'm definitely going to have him read your post as I know he will absorb every bit of it.
Thanks so much for sharing your own experience and advise with this instruction - very, very helpful!
Thanks! I'm not sure that this would be relevant for your son's violin teacher. These are strings that are specialised for Early Music, when naked gut strings were commonly used. These days, you would have metal wound strings, which also have ball attachments for the fine tuner and threaded ends to help with gripping the peg!
I think that at this point, no he is not using the gut strings yet nor doing any major orchestral playing. But soon..... He would appreciate learning from your post though in the meantime as he prefers the Early Music as well. Still perfecting Corelli's La Folia and struggling through learning vibrato right now - big hurdle to cross.
Even if he becomes a professional, it is not likely he will use these gut strings unless he does specialisation in Early Music!
The Corelli Follia is a great piece! Hope he enjoys it!
I stand corrected, @benjy ;) He just set me straight, too about the strings LOL I am so sorry for distracting your thread here.
No distraction! It's always good to learn new things!
Very good explanation about the difference from string to string...
What do you think about Dominant strings?
Do you think they sound similar to gut strings?
Thank you !!!
These naked gut strings sound completely different to anything covered in metal that are used in the "modern" Classical instruments. Even those that are gut-core, with metal windings.
Dominant strings are considered the central reference point for Violin strings. With other modern (metal) brands compared against them in terms of colour (sound quality), brightness and response. They are usually the most common strings, as they are easy to obtain and not expensive. When I used to play on a modern violin, I would use Olive (gut-core, metal wound) or Pirastro Gold or Tonica strings. I didn't like the Dominants personally, as I found that on my instrument and my style of playing, they were overly bright, metal sounding and a touch harsh. However, there are many world-class soloists that do use them, it really is a matter of taste, and how they match to the instrument and the player.
Thank you very much for taking the time for sharing your experience and answering so specifically, I'm sure many other violinist and similar players will find your tips very helpful for finding the right setup for their instruments.
Your post has been supported and upvoted from the Classical Music community on Steemit as it appears to be of interest to our community.
If you enjoy our support of the #classical-music community, please consider a small upvote to help grow the support account!
You can find details about us below.

The classical music community at #classical-music and Discord.
Follow our community accounts @classical-music and @classical-radio.
Follow our curation trail (classical-radio) at SteemAuto or help us out with a delegation!
Did not know anything about what lengths you go to with strings. Love listening to music without a musical bone in my body able to play an instrument.
Well presented, interesting, thanks so much @bengy #classical-music is growing here in Steemit, I have another friend who plays piano 😊 Sound of Music must draw me into finding musicians.
Hehe, "lengths" and "strings"? I wonder if that was an intentional joke?!
Anyway, these naked gut strings are part and parcel of my specialisation. The modern "normal" string players have a different and much easier experience with their standardised metal strings!
Just showing you how little I know, in a humorous way LOL....
Soaking in olive oil, I may just end up getting confused and eating them!
When I used to play tennis tournaments, my sponsors put cat gut strings (a very expensive and ultra-short life cycle string for sports) in the rackets they supplied me with.
Those strings really made a difference! Compared to synthetic strings like, nylon, graphite, hybrids, etc., cat gut strings had more "feel".
This translated into the capability to have greater control over the tennis balls.
RE: Your Post
I couldn't help thinking about the "Hannibal" series' episode where a professional string maker made his products out of human intestines...
Thanks for the informative post.
Namaste, Jaichai
I had forgotten that they used gut strings on tennis rackets as well! Yes, there is something about the response that is different, that is difficult or impossible to replicate with other materials. However, the downside is the lack of durability!
Hmmmm... maybe, I'll try human gut next time... could be a new market!
Wow. This is such a brilliant and well detailed and beautifully written post!
Violins are awesome. I just love listening to violin sounds its uncanny. And those you have up there so beautiful!
Classical-music rocks!
Cheers xD.
And, glad you enjoyed it! Classical music is great! But I'm also a fan of many other genres!
This brought back memories of the first and only time I changed strings on a violin. My granddaughter has a very cheap starter violin that clearly needed new strings. No problem, I thought--I change guitar strings all the time. I quickly learned that I was really clueless when it came to changing violin strings. After watching several videos and fiddling around for over an hour, I finally got them changed and tuned. Next time I think I will let her music teacher help her.
Proud member of #steemitbloggers @steemitbloggers
Ha, I would have thought it would be very similar! That leads me to think that I would struggle with a guitar!
The patient survived and that is the most important thing. I am looking forward to seeing your super-manly-like thing for cutting things :D :D :D
Oh no! People are calling my bluff! I might have to admit those pink scissors are mine and not my girl's!
everything is very well explained, we realize that with a little dedication we can achieve it, my sister has a violin that she never quite managed to play, but I'm sure she didn't learn to do her maintenance either, I'll show her your class, thanks
Thanks! You might find het violin is string with metal strings, so it is much easier!